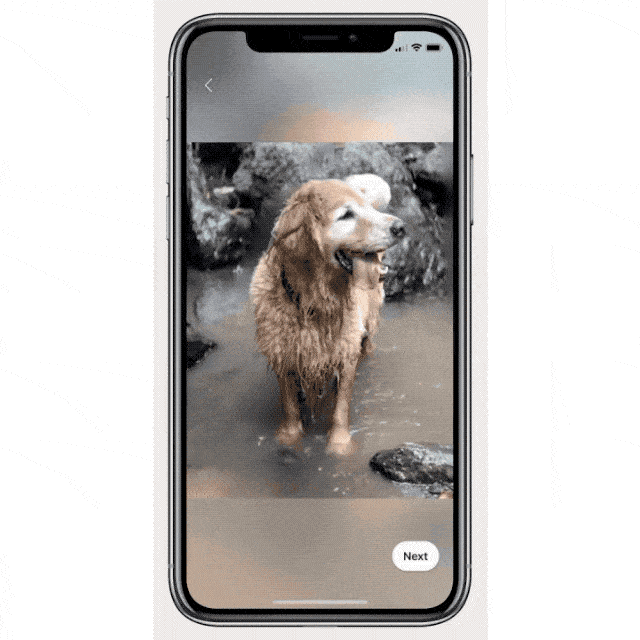
Overseas parties may have encountered this cool 3d picture effect when playing F***book:
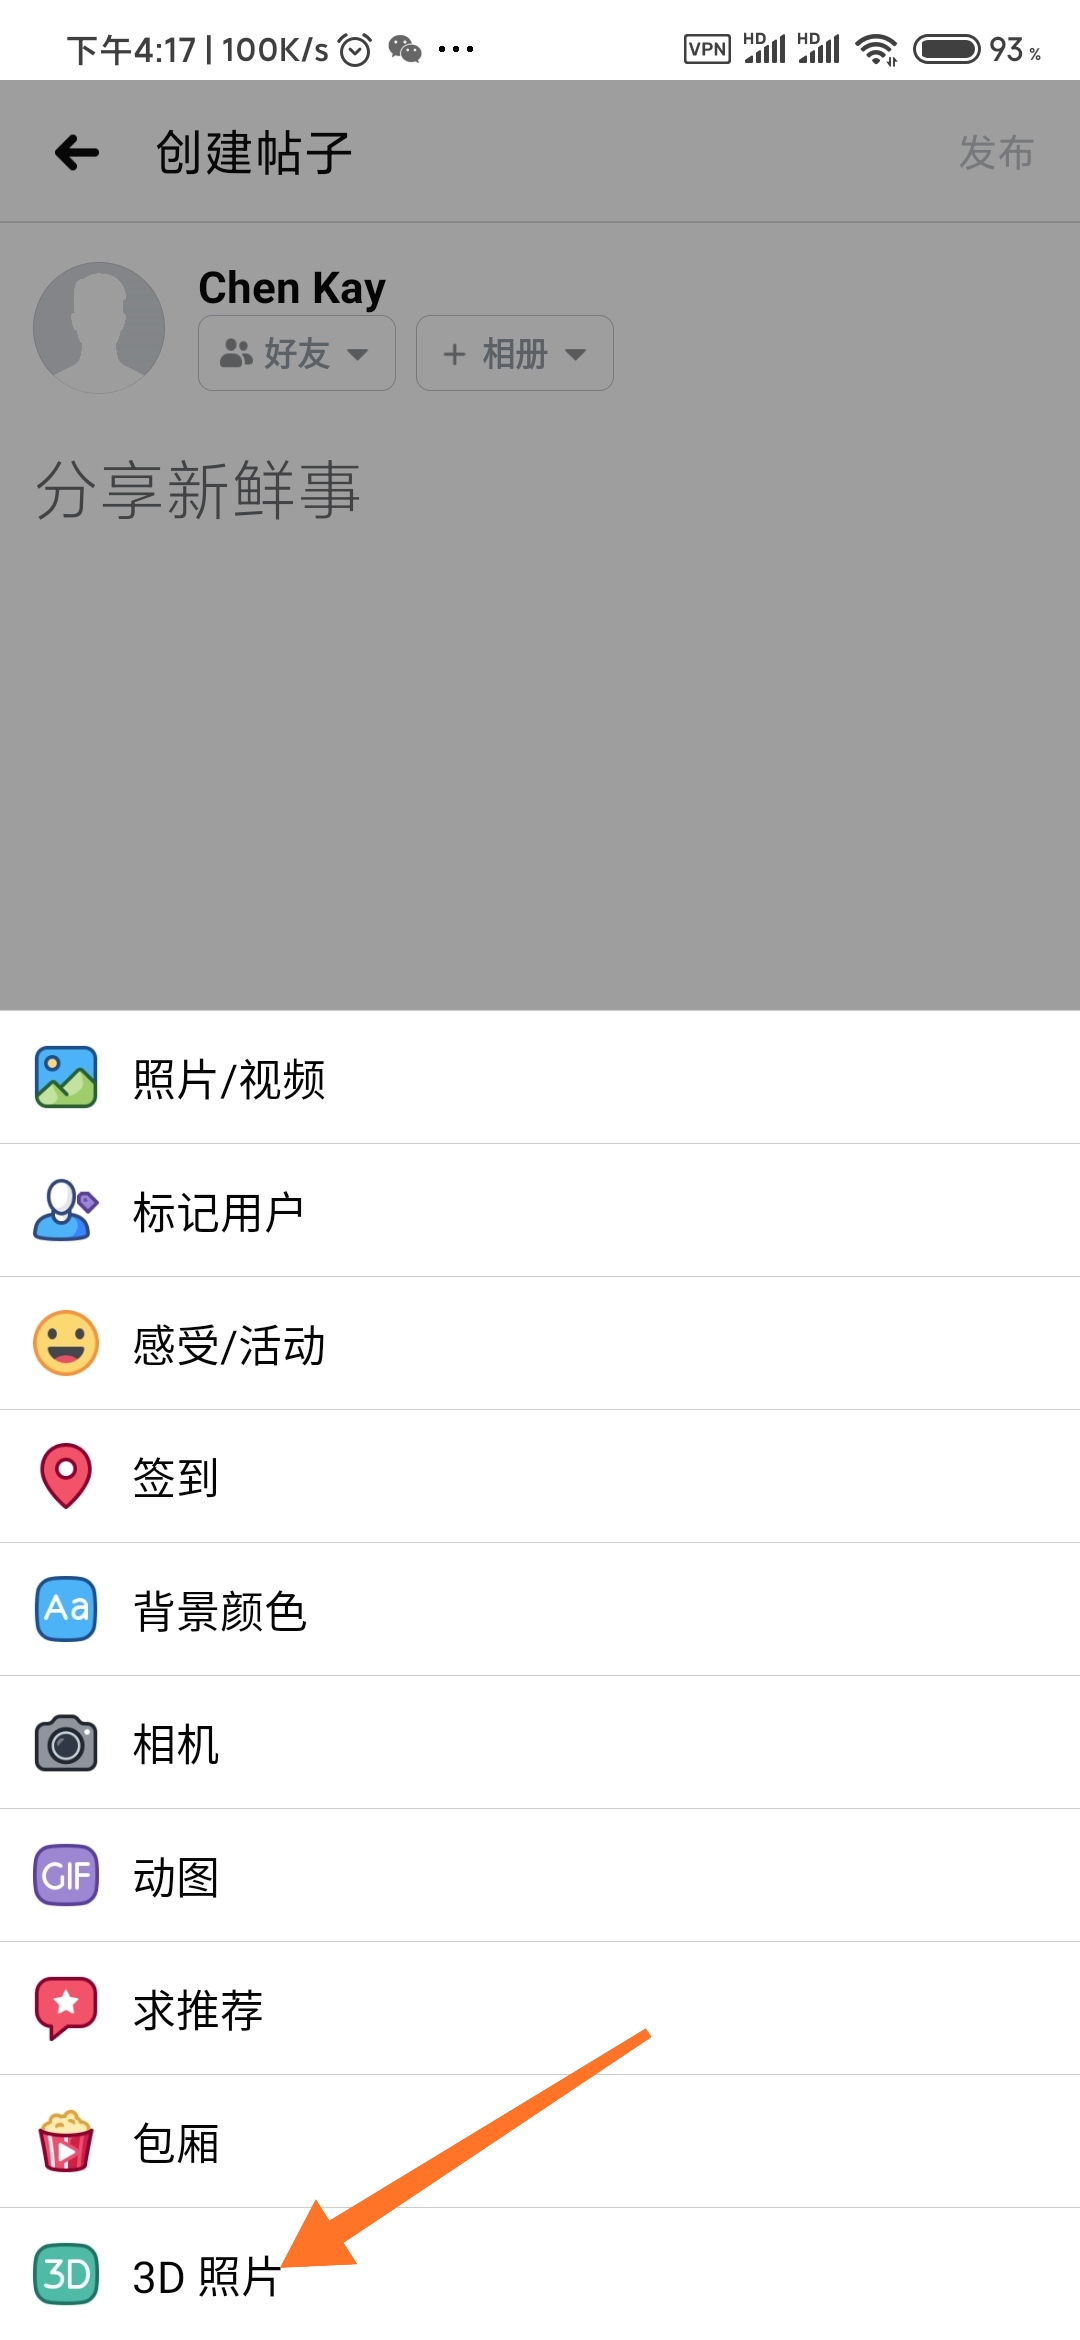
Just go through this entry on the client side-
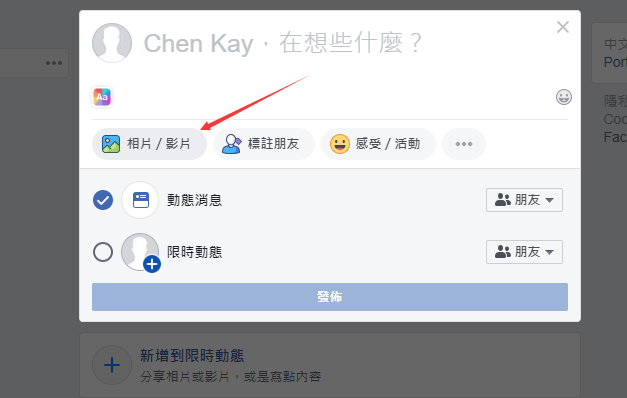
Or this entry for the web page version:
Can be generated.Don't know how to play please refer to the official Help Manual .Let's teach you how to do this today. Don't worry, all the code doesn't add up to 200 lines and no third-party libraries are used.Although canvas2D can do this, WebGL is obviously a better solution based on the performance of this pixel-level operation. Some of the previous tutorials also use WebGL. I won't cover much about the core API s, but I'll just comment in more detail on the final code, which still uses WebGL version 1.0.
The old rule is to introduce the principles first, recommend thoughtful readers to skip the tutorial and come out directly on the basis of the principles, because I still adhere to the characteristics of talk, think of what to say, mix some of my own dry goods into the tutorial, which may be too verbose for some people.Clip, Hajiki Matthew!(Site Japanese
You have two options when a must-die client uploads a picture:
One is to upload a picture with depth channel, i.e. every pixel of the picture is in RGB-D format. If you are an Apple phone, you may have portrait mode or depth mode in the camera. The photo you take is a file in heic format locally. Generally, this is with depth information (interesting pictures that can be coded by heif you go to Wikipedia can do many amazing things).Typically a phone with a TOF lens can take this picture, but don't know why F***book only seems to support Samsung and its own Android releases?
Another way is to upload two pictures, an original image of ordinary RGB pixels and a grayscale image, as long as the file name of the grayscale image is the same as the original image, with a suffix of _depth.Examples are 666.jpg and 666_depth.jpg.This is also the only way that the F***book web version supports it.There are many doors to this grayscale image, which is also the core of the code implementation behind us.A game must have known a depth map, or a shadow/light map, which stores the depth information for each pixel of the original map. The R value of each pixel of the map is the z-axis offset of the original map, because the R, G, B channels of the general depth map have the same values, so it shows a grayscale image.
How do I get a depth map?If you have a photograph in heic format with depth information, you can use PS to extract z-channel information (PS on windows does not support it). If you don't have anything, I'll try to "teach" you how to draw depth maps in PS in the next tutorial, or use an artificial intelligence program provided by Google to generate them. I'll also write the next tutorial to test the matching level personally.High~
How exactly do you create a 3D effect?In a depth map, the lighter the color (the smaller the value) means that the depth is about low. You can offset the sampling position of the original map by the depth value of the depth map, for example, when you offset the map to the left, and then sample the original map by multiplying the distance of the offset by the depth value of one of its coordinates on the map, you will get different points with different depth offsets.Small difference, the closer the offset is, the bigger the offset is. Is this a good fit for our common sense in life?In fact, discarding subjective perception, from the bottom point of view, the result is that part of the pixel points are compressed and part of the pixel points are stretched.I don't know if you've used animations made with live2D or Spine or Dragon Bones, that's what it is:
Whether the underlying changes you just mentioned are very similar to this kind of grid animation, they are actually distorted to achieve 3D effect. As far as the changes of individual pictures are concerned, the only difference between them is that the skin animation is a manual key frame (or a skeleton binding - this is the chance to talk about later), while the 3D pictures are automatically generated by deep mapping.
Finally, the crap is over. Now start coding. First set the basic style:
* {
  margin: 0;
  padding: 0;
}
body {
  width: 100vw;
  height: 100vh;
  position: relative;
  background-color: #000;
}
canvas {
  position: absolute;
  left: 50%;
  top: 50%;
  transform: translate3d(-50%, -50%, 0);
}
Then the glMatrix library is introduced to manipulate the matrix (although, as previously said, it's not dependent on third-party libraries, but coordinate conversion is really tedious ~so the program is too long and there are a lot of notes to write ~In fact, conversion is not difficult, and it's not too difficult to see the previous tutorial on your own ~~Forgive me for the headline).
<script src="./gl-matrix-min.js"></script>
I've already downloaded it and want to get a message about where to go with this library glMatrix website , this library is very small, more than 100K before it is uncompressed.
Code for the vertex shader (shader_vertex.vert):
attribute vec2 a_pos;
attribute vec2 a_uv;
uniform mat4 u_proj;
varying vec2 v_uv;
void main() {
  v_uv = a_uv; // Transfer texture coordinates to the chip shader
  gl_Position = u_proj * vec4(a_pos, 0.0, 1.0);
}
Code for the chip shader:
precision highp float;
uniform sampler2D u_sampler;
varying vec2 v_uv;
void main() {
  gl_FragColor = texture2D(u_sampler, v_uv);
}
Paste the code that draws the static picture directly:
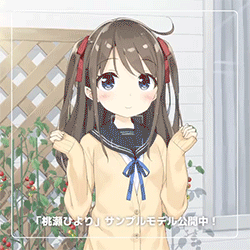
init()

async function init () {

  const { mat4 } = glMatrix

  const PAGE_WIDTH = document.body.clientWidth
  const PAGE_HEIGHT = document.body.clientHeight
  // Set Canvas Width and Height
  const CANVAS_WIDTH = 900
  const CANVAS_HEIGHT = 900
  const canvas = document.createElement('canvas')
  canvas.width = CANVAS_WIDTH
  canvas.height = CANVAS_HEIGHT
  document.body.appendChild(canvas)

  const gl = canvas.getContext('webgl')

  gl.viewport(0, 0, CANVAS_WIDTH, CANVAS_HEIGHT)

  // Load pictures (original and depth maps are the same size)
  const image = new Image()
  image.src = './sennpai.jpg'
  await new Promise(resolve => image.complete ? resolve() : (image.onload = e => resolve()))

  // If the width or height of the picture exceeds the limit, center the picture in a way similar to background-size:contain ment
  let ratio = 1
  if (image.height > CANVAS_HEIGHT) {
    ratio = CANVAS_HEIGHT / image.height
  }
  if (image.width * ratio > CANVAS_WIDTH) {
    ratio = CANVAS_WIDTH / image.width
  }

  const imgWidth = image.width * ratio
  const imgHeight = image.height * ratio

  // Get vertex shader source
  let res = await fetch('./shader_vertex.vert', { method: 'get', })
  let shaderSrc = await res.text()
  // Create vertex shader
  const vs = gl.createShader(gl.VERTEX_SHADER)
  gl.shaderSource(vs, shaderSrc)
  gl.compileShader(vs)
  // Get shader information
  if (!gl.getShaderParameter(vs, gl.COMPILE_STATUS)) {
    // Print compilation failure log
    console.error(`Error compile shader:\n${shaderSrc}\n=====error log======\n${gl.getShaderInfoLog(vs)}`)
    gl.deleteShader(vs)
    return null
  }

  // Get the chip shader source
  res = await fetch('./shader_fragment.frag', { method: 'get', })
  shaderSrc = await res.text()
  // Create Pixel Shader
  const fs = gl.createShader(gl.FRAGMENT_SHADER)
  gl.shaderSource(fs, shaderSrc)
  gl.compileShader(fs)
  if (!gl.getShaderParameter(fs, gl.COMPILE_STATUS)) {
    console.error(`Error compile shader:\n${shaderSrc}\n=====error log======\n${gl.getShaderInfoLog(fs)}`)
    gl.deleteShader(fs)
    return null
  }

  // Create program
  const prg = gl.createProgram()
  gl.attachShader(prg, vs)
  gl.attachShader(prg, fs)
  gl.linkProgram(prg)
  gl.useProgram(prg)

  // Set Projection Matrix
  const projMat4 = mat4.create()
  /**
   * ortho(out, left, right, bottom, top, near, far)
   */
  mat4.ortho(projMat4, -CANVAS_WIDTH / 2, CANVAS_WIDTH / 2, -CANVAS_HEIGHT / 2, CANVAS_HEIGHT / 2, 0, 500)
  // Get the address of the projection matrix
  const uProj = gl.getUniformLocation(prg, 'u_proj')
  // Pass in the projection matrix
  gl.uniformMatrix4fv(uProj, false, projMat4)

  // Create vbo using vertex array
  const vertexList = new Float32Array([
    //    x              y        u  v
    -imgWidth / 2, imgHeight / 2, 0, 0,
    -imgWidth / 2, -imgHeight / 2, 0, 1,
    imgWidth / 2, imgHeight / 2, 1, 0,
    imgWidth / 2, -imgHeight / 2, 1, 1,
  ])
  // Gets the size of each element of the array (used to calculate the step size)
  const PER_ELEMENT_SIZE = vertexList.BYTES_PER_ELEMENT
  const buffer = gl.createBuffer()
  /**
   * Binding Buffer
   * @param target data type
   * @param buffer Buffer object
   */
  gl.bindBuffer(gl.ARRAY_BUFFER, buffer)
  /**
   * Write data to buffer
   * @param target data type
   * @param data Data (typed array here)
   * @param usage Drawing method (used to help webgl optimize)
   */
  gl.bufferData(gl.ARRAY_BUFFER, vertexList, gl.STATIC_DRAW)
  // Gets the address of the vertex coordinate variable in the shader
  const aPos = gl.getAttribLocation(prg, 'a_pos')
  /**
   * Assign buffer objects to attribute s
   * @param location: Storage address of variable
   * @param size: The number of components per vertex, if less than the number of variables, is complemented by the rule gl.vertexAttrib[1234]f
   * @param type: Specify data type
   * @param normalized: Need normalization
   * @param stride: Number of bytes between adjacent vertices (only one data is 0)
   * @param offset: Offset of data (in bytes, only one data is 0)
   */
  gl.vertexAttribPointer(aPos, 2, gl.FLOAT, false, PER_ELEMENT_SIZE * 4, 0)
  // Allow aPos to access VBO
  gl.enableVertexAttribArray(aPos)
  // Gets the address of the texture coordinate variable in the shader
  const aUV = gl.getAttribLocation(prg, 'a_uv')
  gl.vertexAttribPointer(aUV, 2, gl.FLOAT, false, PER_ELEMENT_SIZE * 4, PER_ELEMENT_SIZE * 2)
  // Allow aUV access to VBO
  gl.enableVertexAttribArray(aUV)

  // Unbind VBO after use
  gl.bindBuffer(gl.ARRAY_BUFFER, null)

  // Creating Texture Objects
  const texture = gl.createTexture()
  // Activate Texture Unit 0
  gl.activeTexture(gl.TEXTURE0)
  // Bind and open texture unit 0
  gl.bindTexture(gl.TEXTURE_2D, texture)
  // Specify a reduction algorithm
  gl.texParameteri(gl.TEXTURE_2D, gl.TEXTURE_MIN_FILTER, gl.LINEAR)
  // Specify an enlargement algorithm
  gl.texParameteri(gl.TEXTURE_2D, gl.TEXTURE_MAG_FILTER, gl.LINEAR)
  // Specify horizontal fill algorithm
  gl.texParameteri(gl.TEXTURE_2D, gl.TEXTURE_WRAP_S, gl.CLAMP_TO_EDGE)
  // Specify vertical filling algorithm
  gl.texParameteri(gl.TEXTURE_2D, gl.TEXTURE_WRAP_T, gl.CLAMP_TO_EDGE)
  /**
   * Assign pictures to texture objects using texture unit 0
   * target Specify as 2D Texture
   * level Pyramid Texture
   * internalFormat Picture internal format
   * format Texture format (must be the same as internalFormat)
   * type Texture data type
   * image picture
   */
  gl.texImage2D(gl.TEXTURE_2D, 0, gl.RGBA, gl.RGBA, gl.UNSIGNED_BYTE, image)
  // Gets the address of the texture object in the shader (using uniform because each vertex operates on the same texture)
  const uSampler = gl.getUniformLocation(prg, 'u_sampler')
  // Specifies to get texture from texture unit 0
  gl.uniform1i(uSampler, 0)

  // Render Loop
  function loop () {
    gl.clearColor(0.0, 0.0, 0.0, 1.0)
    gl.clear(gl.COLOR_BUFFER_BIT) // Empty color buffer
    gl.drawArrays(gl.TRIANGLE_STRIP, 0, 4)
    requestAnimationFrame(loop)
  }

  loop()

}
These are common operations, and the role of the api is not explained in the comments.
Next, pass our depth map into the shader, mainly in these steps:
1. Get the picture object after loading:
const depthImage = new Image()
depthImage.src = './sennpai_depth.jpg'
await new Promise(resolve => depthImage.complete ? resolve() : (depthImage.onload = e => resolve()))
Because the onload event does not necessarily trigger if the browser has cached pictures.So let's first use the complete property to determine if the picture is loaded.
(2) Modify the element shader code to sample the original map by depth mapping:
precision highp float;
uniform sampler2D u_sampler;
uniform sampler2D u_sampler_depth;// Depth Mapping Sampler
uniform vec2 u_offset;// Offset of depth map
varying vec2 v_uv;
void main() {
  float depth = texture2D(u_sampler_depth, v_uv).r;// Getting depth information
  gl_FragColor = texture2D(u_sampler, v_uv + depth * u_offset);
}
Get the value of the R channel of the map as the depth value
(3) Pass the map into the cell shader through another texture unit, such as Texture Unit 1:
// Similarly, create textures for depth maps
const depthTexture = gl.createTexture()
// Bind and open texture unit 1
gl.activeTexture(gl.TEXTURE1)
gl.bindTexture(gl.TEXTURE_2D, depthTexture)
gl.texParameteri(gl.TEXTURE_2D, gl.TEXTURE_MIN_FILTER, gl.LINEAR)
gl.texParameteri(gl.TEXTURE_2D, gl.TEXTURE_MAG_FILTER, gl.LINEAR)
gl.texParameteri(gl.TEXTURE_2D, gl.TEXTURE_WRAP_S, gl.CLAMP_TO_EDGE)
gl.texParameteri(gl.TEXTURE_2D, gl.TEXTURE_WRAP_T, gl.CLAMP_TO_EDGE)
gl.texImage2D(gl.TEXTURE_2D, 0, gl.RGBA, gl.RGBA, gl.UNSIGNED_BYTE, depthImage)
const uSamplerDepth = gl.getUniformLocation(prg, 'u_sampler_depth')
// Specifies that the texture is obtained from texture unit 1
gl.uniform1i(uSamplerDepth, 1)
At this point, we see no change in the final result because we haven't offset the map yet, and the u_offset default value is vec(0.0,0.0).
Next, you can bind the mousemove event to the page, where I limit u and v to a maximum offset of 0.05, placing the rendering loop function in the event callback:
const uOffset = gl.getUniformLocation(prg, 'u_offset')
const scale = 0.1
document.body.onmousemove = e => {
  gl.uniform2f(uOffset, scale * (e.pageX / PAGE_WIDTH - 0.5), scale * (e.pageY / PAGE_HEIGHT - 0.5))
  loop()
}
// Draw Loop
function loop () {
  gl.clearColor(0.0, 0.0, 0.0, 1.0)
  gl.clear(gl.COLOR_BUFFER_BIT) // Empty color buffer
  gl.drawArrays(gl.TRIANGLE_STRIP, 0, 4)
  // requestAnimationFrame(loop)
}
ok, you're done. Preview the result picture.