preface
This paper introduces the use of IISExpress as Host in Winform desktop application to start the Web project of. Net platform.
The open source component of CEF is used for browsing Web pages.
get ready
First create the Winform project WinFormIISExpressHost.
Then put the IISExpress folder under Bin\Debug of the project.
Looking for IISExpress
It's easy to find IISExpress. If VS is installed locally, you can find it directly under C:\Program Files\IIS Express.
Of course, you can also download and install it on the official website, and then go to the installation directory to find IISExpress. The official download address is: https://www.microsoft.com/zh-CN/download/details.aspx?id=34679
Note: the default folder name of IISExpress is IIS Express. There is a space in the middle. We need to remove it because we need to start IISExpress with the command line later. The space will cause us a lot of trouble.
Start IISExpress
IISExpress folder has iisexpress.exe File, we just start it and IIS will run.
But IISExpress has a problem. It does not read the [appserver] configuration file in the current directory by default\ applicationhost.config ]; so when we start IISExpress, we must specify its startup file.
The command line for specifying IISExpress is as follows, which can be run under CMD.
start C:\Users\Administrator\Desktop\IISExpress\iisexpress /config:C:\Users\Administrator\Desktop\IISExpress\AppServer\applicationhost.config
Now we convert the command line to code startup, as follows:
public string DirMain = Environment.CurrentDirectory + @"\";
private void Form1_Load(object sender, EventArgs e)
{
var plist = System.Diagnostics.Process.GetProcessesByName("iisexpress");
if (plist.Count() <= 0)
{
string para = $@"/config:{DirMain}IISExpress\AppServer\applicationhost.config";
Start($@"{DirMain}IISExpress\iisexpress", para);
}
}
public static bool Start(string programPath, string para)
{
try
{
Process myProcess = new Process();
myProcess.StartInfo.WindowStyle = System.Diagnostics.ProcessWindowStyle.Hidden;
myProcess.StartInfo.UseShellExecute = false;
myProcess.StartInfo.FileName = programPath;
myProcess.StartInfo.CreateNoWindow = true;
myProcess.StartInfo.Arguments = para;
myProcess.EnableRaisingEvents = false;
bool boo = myProcess.Start();
return boo;
}
catch (Exception ex)
{
return false;
}
}
Modify IISExpress profile
IISExpress's profile is AppServer\applicationhost.config , now let's modify it to let IISExpress specify the Bin\WebSite folder under the current project path as the root directory of the site application.
Open with Notepad applicationhost.config , and then locate sites.
Modify the value of the physicalPath property in the site information.
ps: we can also modify the website operation port, and copy one Site node and add another Site.
<sites>
            <site name="Development Web Site" id="1" serverAutoStart="true">
                <application path="/">
                    <virtualDirectory path="/" physicalPath="D:\WinFormIISExpressHost\bin\Debug\WebSite" />
                </application>
                <bindings>
                    <binding protocol="http" bindingInformation=":5180:localhost" />
                </bindings>
            </site>
            <siteDefaults>
                <!-- To enable logging, please change the below attribute "enabled" to "true" -->
                <logFile logFormat="W3C" directory="%AppData%\Microsoft\IISExpressLogs" enabled="false" />
                <traceFailedRequestsLogging directory="%AppData%\Microsoft" enabled="false" maxLogFileSizeKB="1024" />
            </siteDefaults>
            <applicationDefaults applicationPool="IISExpressAppPool" />
            <virtualDirectoryDefaults allowSubDirConfig="true" />
        </sites>
test
Now let's create a new MVC website project of WebTEST and publish it; put the published files in the Bin/Website folder of the Winform project just now (you can also publish them directly to this folder).
Then run the project.
After the project runs, the icon of IISExpress will appear in the lower right corner of the computer.
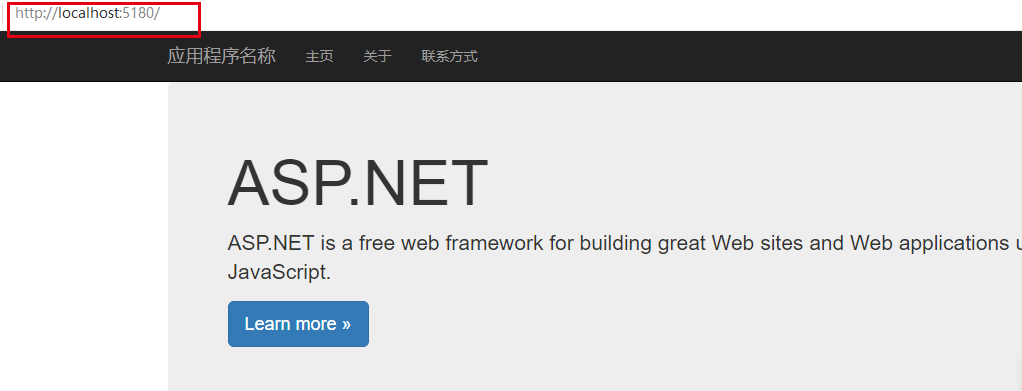
Then we visit http://localhost:5180/ . The access was successful, as shown in the following figure:

CEF application
IISExpress has run successfully. Now we use CEF to browse the web. (CEF is a Browser using the Chrome kernel)
First, reference the CEF (sometimes, after referencing the CEF, the project will not refresh. Close and restart to see the referenced DLL in the reference), as shown in the following figure:

After referencing CEF, we will find that the project compilation will report errors; this is because CEF does not support AnyCPU, so we need to change the platform target to X64. (both project properties and solution configuration need to be modified)

However, many times, our solution must use AnyCPU, so we need to modify the next project file. (item property must be X64)
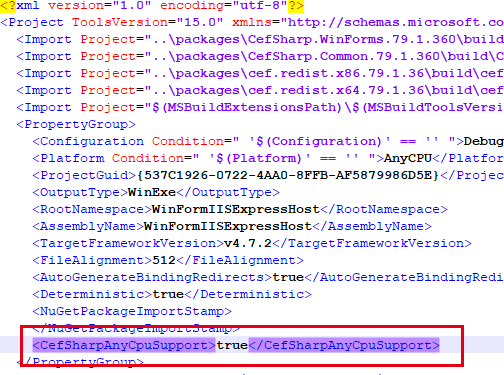
Open with Notepad WinFormIISExpressHost.csproj ; add a node under the first PropertyGroup < cefsharpanycpusupport > true < / cefsharpanycpusupport >; as shown below:

After modifying the project file VS, you will be prompted to reload the project; click OK to reload, and then the project can be compiled.
Now we apply CEF to the project, the code is as follows:
var chromeBrowser = new ChromiumWebBrowser("http://localhost:5180/");
            panelParent.Controls.Add(chromeBrowser);
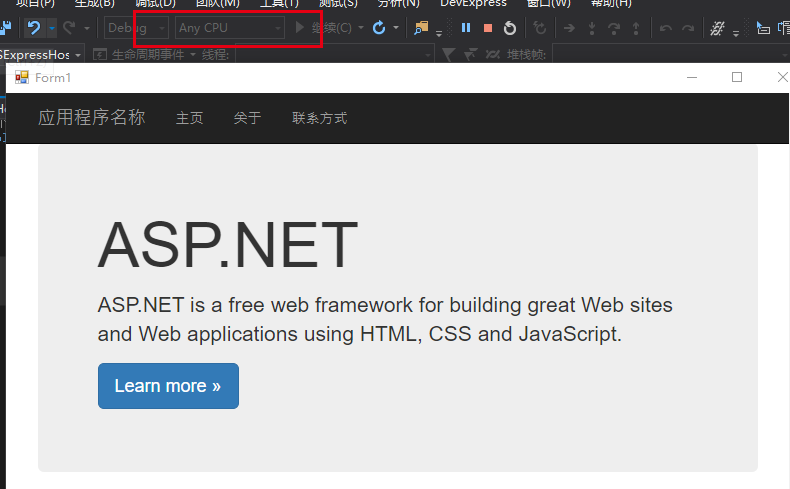
Then run the project. As shown in the figure below, the project runs successfully under Anycpu.

----------------------------------------------------------------------------------------------------
The code has been transmitted to Github, welcome to download.
Github address: https://github.com/kiba518/WinFormIISExpressHost
----------------------------------------------------------------------------------------------------
Note: This article is original, any form of reprint please contact the author to obtain authorization and indicate the source!
If you think this article is not bad, please click [recommend] below, thank you very much!
https://www.cnblogs.com/kiba/p/12719481.html
