Earlier, we explained how to install the database in wsl netcore runtime and how to publish one netcore applications, in order to form a complete series, in this section, we will learn how to netcore application containerization [of course, this is based on wsl]
Environmental preparation
1.Docker installation
Previously, there was a small series of docker, please refer to
(2) Docker Desktop and Kubernetes installation
(3) Docker, k8s initial experience and Dashboard pit avoidance guide!!!
(4) Build your first docker image and learn more about docker image and container management
Through the above four steps, you can learn some basic knowledge of docker, including what it is, why and how to use it, including how to build images, start and stop containers and some problems that need attention.
For more information, please refer to the relevant series Docker&k8s_ Leonardo da Vinci CSDN blog is not the only one drawing eggs
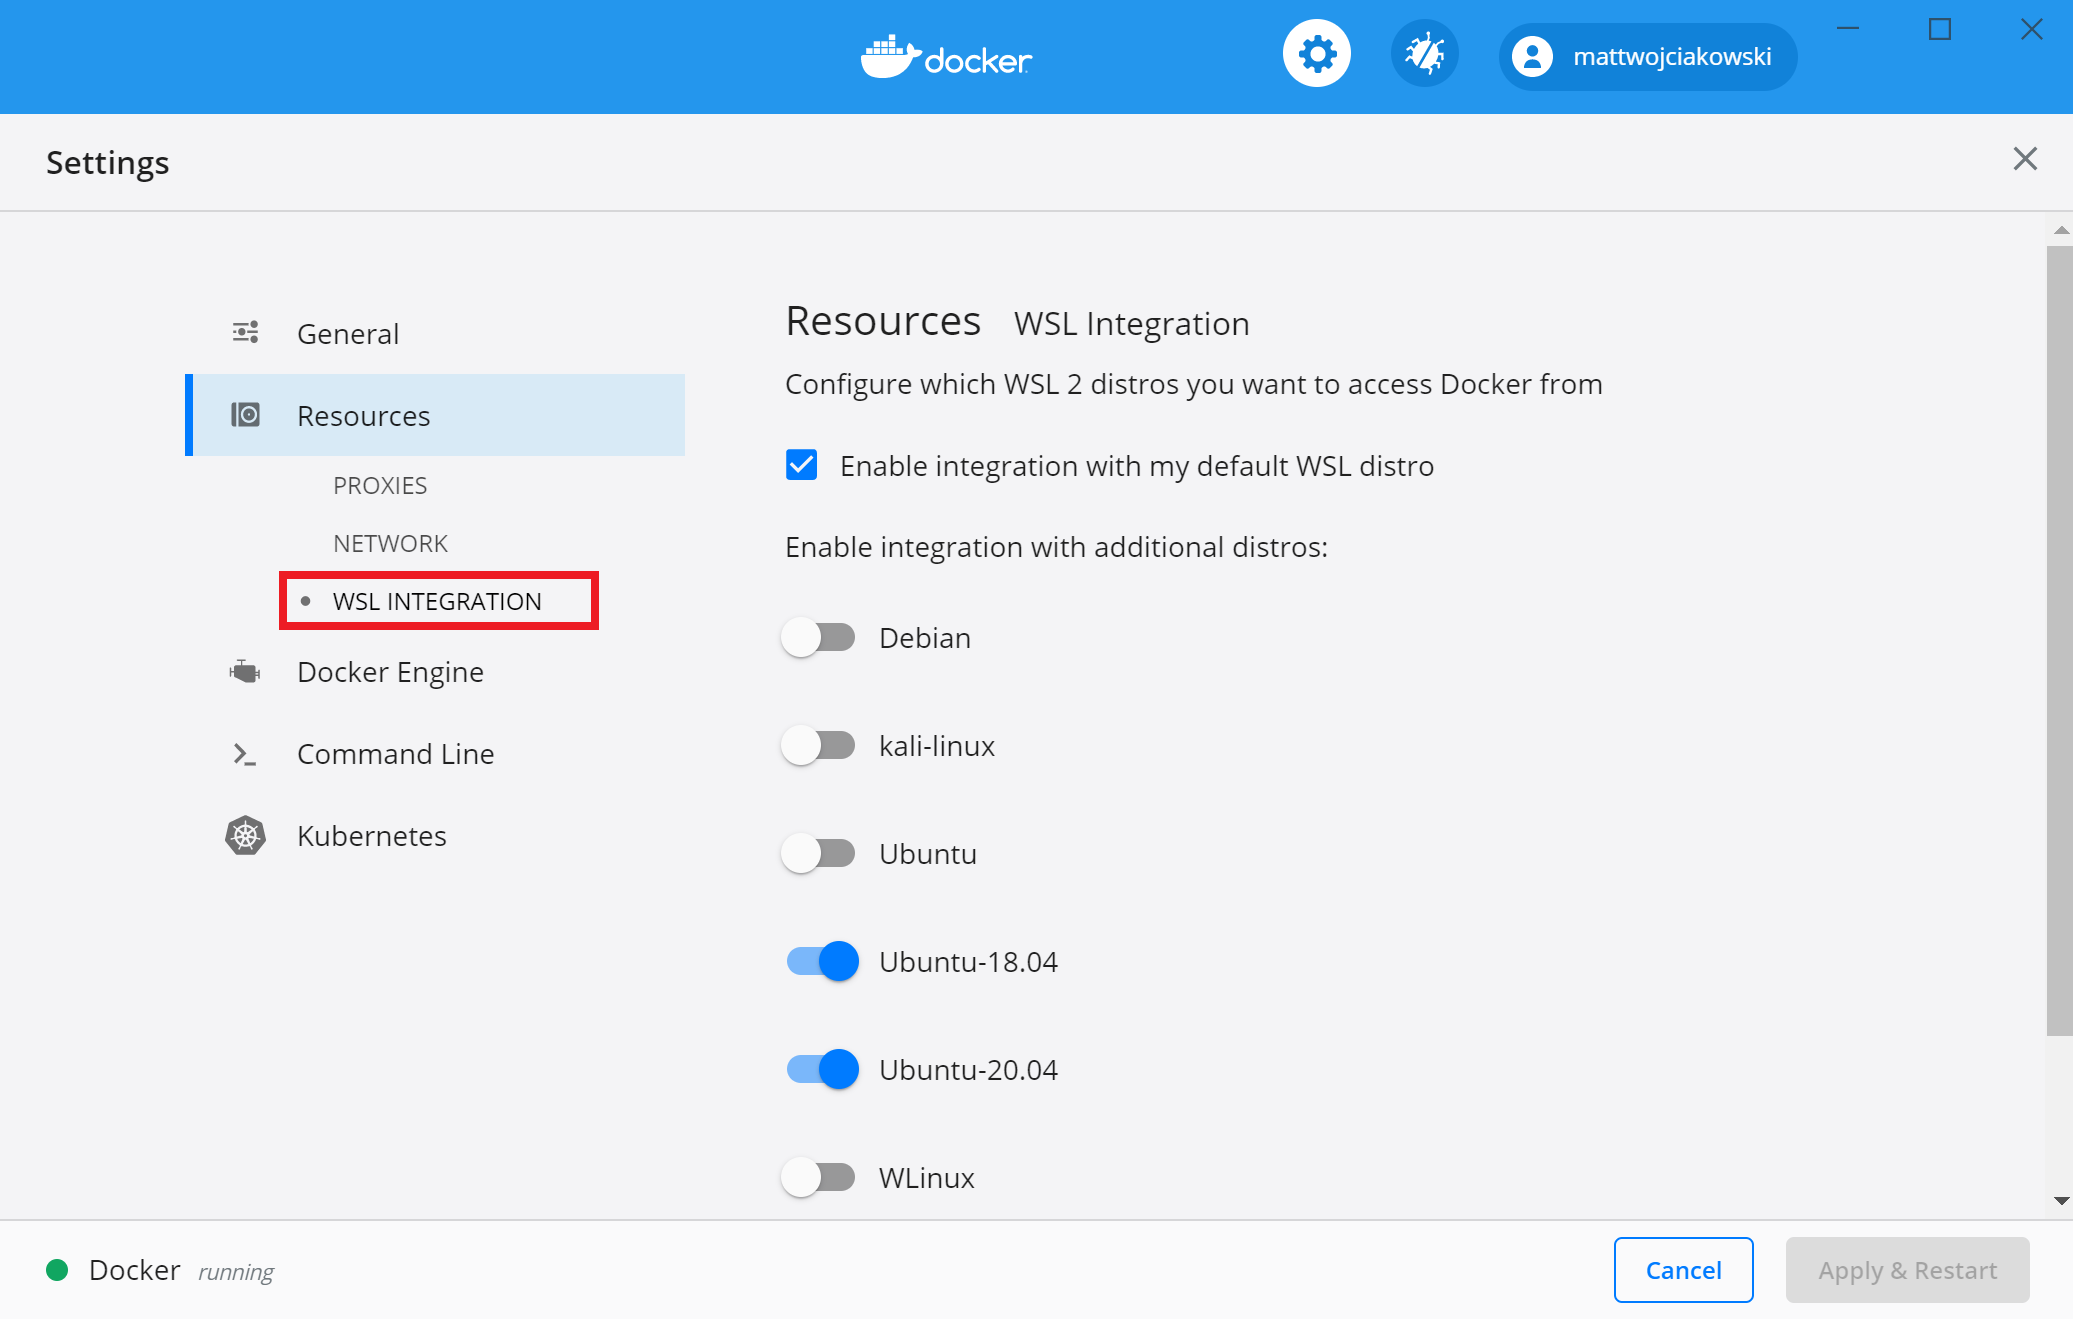
2. Enable corresponding functions
Because this section is based on WSL and the latest version of docker for windows also supports wsl2, it is recommended to install wsl2 and enable WSL in docker. Enable the following functions
- Enable WSL 2 as engine
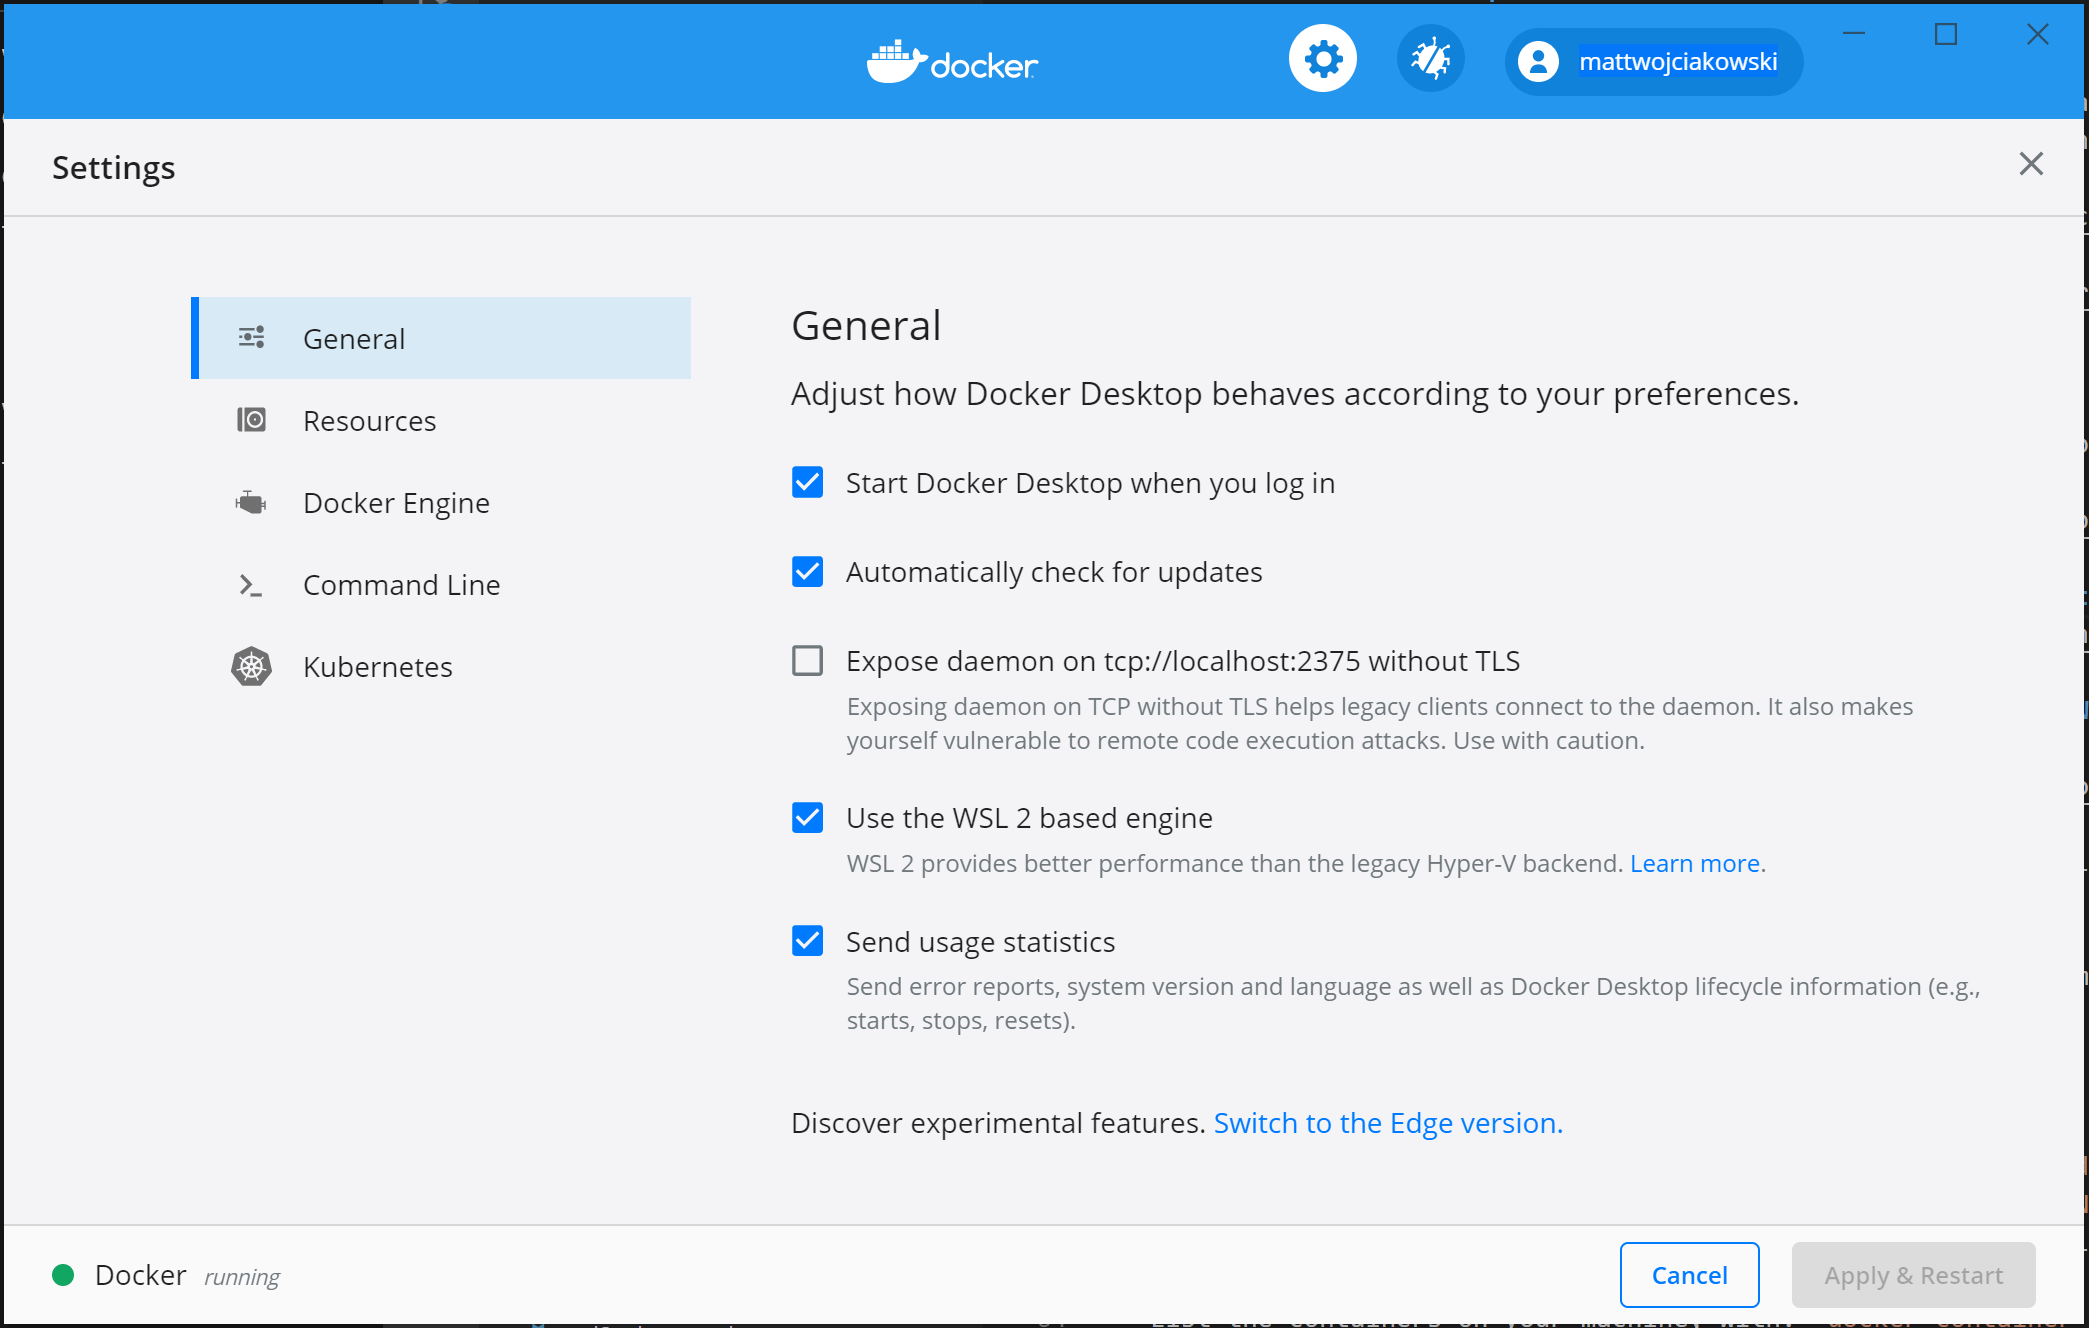
- Under integration, select the corresponding system
If you have not installed WSL environment or non wsl2 environment, please refer to
wsl installation and version upgrade
SSL connection, WSH connection and remote connection configuration
wsl installs mysql, initializes the database and sets the service self startup
For more information, please refer to this series linux_ Leonardo da Vinci CSDN blog is not the only one drawing eggs
At this point, we can begin the formal content of this section.
Create application
. netcore application creation
This time, we create an aspnetcore application, that is, a web application, and deploy it into the container,
First, we create a web application and generate it with the following command
dotnet new web -o DockerTest
dotnet build DockerTest\DockerTest.csproj
Then, publish the project to the Release path so that it can be applied when the image is rebuilt
dotnet publish DockerTest\DockerTest.csproj -c Release
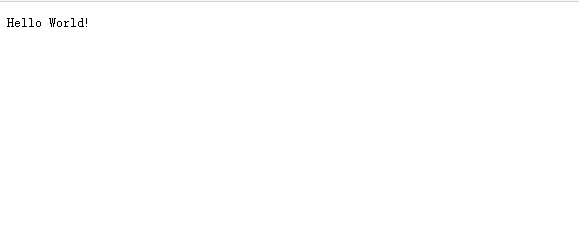
Then, try the following to see the effect
dotnet run DockerTest.csproj
 or
dotnet DockerTest.dll
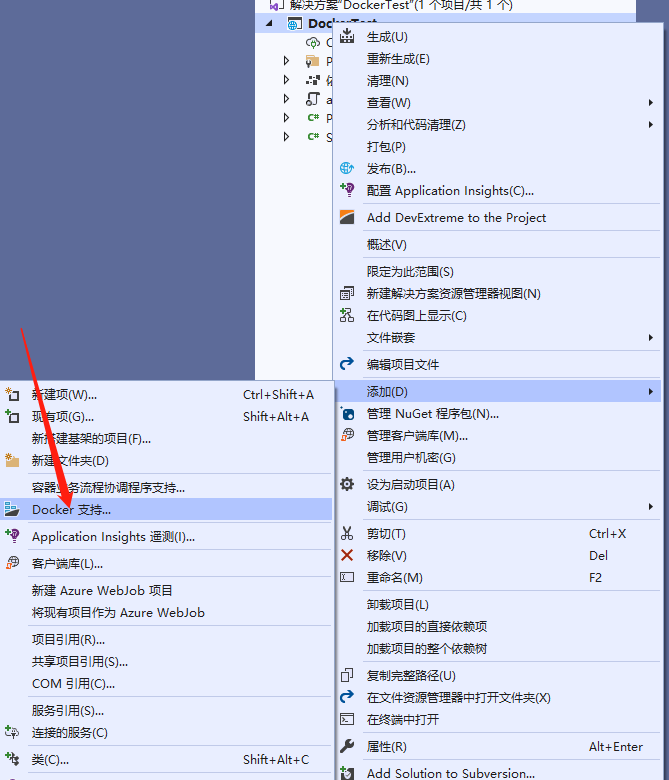
Dockerfile creation
In dockertest Add a Dockerfile file and edit its contents in the same level directory of csproj. Here, you can use vs to add the file, which will bring its own default contents. We can achieve our goal by modifying the default contents
Then select the target platform
#See https://aka.ms/containerfastmode to understand how Visual Studio uses this Dockerfile to build your images for faster debugging.

FROM mcr.microsoft.com/dotnet/aspnet:5.0 AS base
WORKDIR /app
EXPOSE 80
EXPOSE 443

FROM mcr.microsoft.com/dotnet/sdk:5.0 AS build
WORKDIR /src
COPY ["DockerTest.csproj", "."]
RUN dotnet restore "./DockerTest.csproj"
COPY . .
WORKDIR "/src/."
RUN dotnet build "DockerTest.csproj" -c Release -o /app/build

FROM build AS publish
RUN dotnet publish "DockerTest.csproj" -c Release -o /app/publish

FROM base AS final
WORKDIR /app
COPY --from=publish /app/publish .
ENTRYPOINT ["dotnet", "DockerTest.dll"]
In this file, we can see that the exposed port of the container is 80 443. The project is based on aspnet:5.0,
At this point, we can enable docker to build the image.
docker build -t dockertest -f Dockerfile .
# -t specifies the name of the image. Note that it can only be lowercase
# -f specifies the path of Dockerfile Represents the current path
At this point, we just need to wait for the execution to be completed.

After the image is built, we can view the image first, and then run a container
docker images #View all mirrors

docker run -d -p 5060:80 dockertest
#-p represents the mapped port. Map the local 5060 to port 80 of the container

docker run -d -p 4446:80 --name 3334 dockertest
#Start a container with a specific name

docker container ls
#View all containers
At this point, the container has been successfully started. We can verify it by entering the address in the browser.
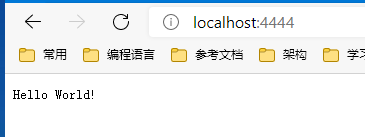
This indicates that our container has been successfully deployed.
So far, the content of this section is basically over, but here is a pit. If you don't pay attention, it's easy to fall in,
According to our thinking, if we want to EXPOSE the applications in the container through a specific port, we only need to modify the EXPOSE in the Dockerfile.
But pay attention!!!!
If you only change the port, you can't access it through the browser. Then through various debugging, you will find that you can access it only when you expose port 80 and add mapping. Why???
I recorded it here . netcore cannot be accessed by changing the exposure port when applying containerization
In fact, this is because netcore listens to port 80 by default. Therefore, when the container starts the application, it actually listens to port 80. To access through other ports, we only need to add ENV variable in Dockerfile to specify
ENV ASPNETCORE_URLS=http://+: 5000 #5000 is the port you want to use
Then, after the constructed image is deployed to the container, it can be accessed through this port.
Well, that's the end of this section. If you have any questions, please leave a message. The follow-up will be updated continuously.
Codeword is not easy, but also hope to support yo!!!