Computer vision research institute column
Author: Edison_G
I haven't officially tried OneFlow, but I feel it's easy to get started through data search and code interpretation. I have the opportunity to share detailed code interpretation with you later.
Get started quickly
Install OneFlow stable release
Install the latest stable version of OneFlow using the following command:
python3 -m pip install --find-links https://oneflow-inc.github.io/nightly oneflow_cu102 --user
System requirements:
- Python >= 3.5
- Nvidia Linux x86_64 driver version >= 440.33
If you are prompted that the corresponding version cannot be found, try upgrading pip:
python3 -m pip install --upgrade --user pip
Install OneFlow with legacy CUDA
The installation method of OneFlow supporting other earlier versions of CUDA is as follows:
python3 -m pip install --find-links https://oneflow-inc.github.io/nightly oneflow_cu101 --user
python3 -m pip install --find-links https://oneflow-inc.github.io/nightly oneflow_cu100 --user
python3 -m pip install --find-links https://oneflow-inc.github.io/nightly oneflow_cu92 --user
python3 -m pip install --find-links https://oneflow-inc.github.io/nightly oneflow_cu91 --user
python3 -m pip install --find-links https://oneflow-inc.github.io/nightly oneflow_cu90 --user
Compile and install OneFlow from source code
If you want to install OneFlow by compiling the source code, you can refer to the README of the OneFlow source code warehouse. It is strongly recommended to read Troubleshooting before compiling the OneFlow source code.
YoloV3
Quick start
Before starting, please make sure that you have correctly installed oneflow and can successfully import oneflow in the python 3 environment.
- git clone this warehouse to local
git clone --recursive https://github.com/Oneflow-Inc/oneflow_yolov3.git
2. Install python dependency Library
pip install -r requirements.txt
3. Under the project root directory, execute:
./scripts/build.sh
Execute this script to compile the custom op operator in cpp code into callable and executable so file, you will see in the project path:
- libdarknet.so
- liboneflow_yolov3.so
Pre training model
We use the pre training model provided by the original author of yolov3 - yolov3 Weight, the model in OneFlow format is generated after conversion. Download pre training model: of_model_yolov3.zip and unzipped of_ The model folder is placed in the project root directory and can be used.
Prediction / reasoning
function:
sh yolo_predict.sh
Or:
sh yolo_predict_python_data_preprocess.sh
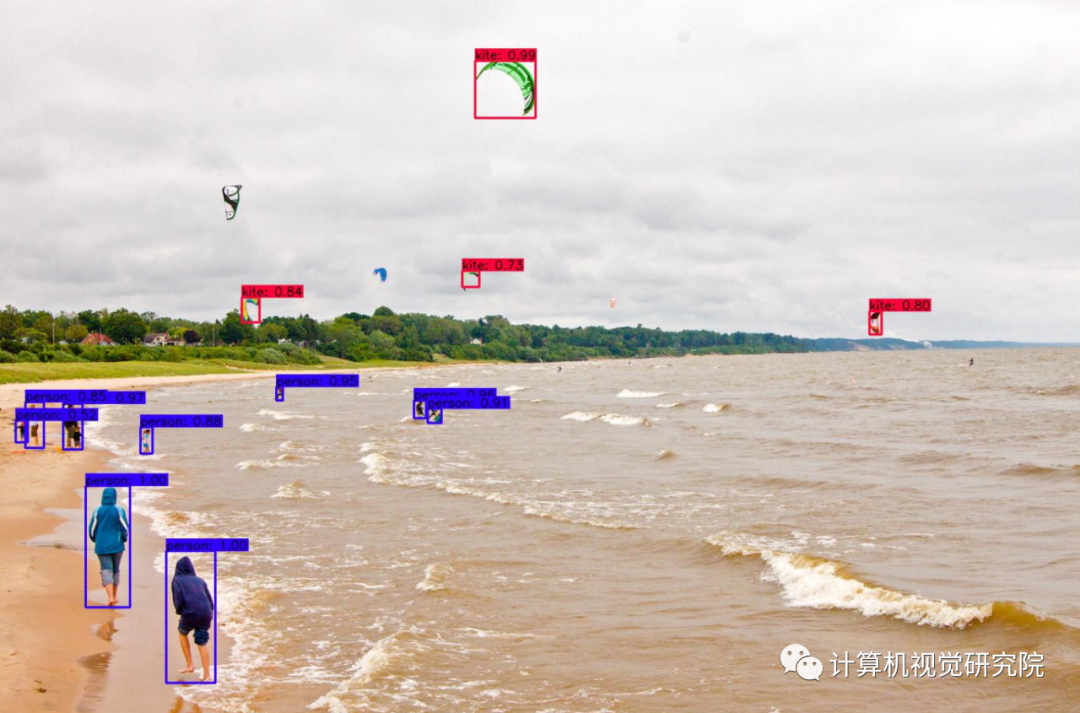
After running the script, a picture with bbox mark box after detection will be generated under data/result:
Parameter description -- pre trained_ Model pre training model path
- --label_path coco category label path (coco.name)
- --input_dir folder path of pictures to be detected
- --output_ Output path of dir detection structure
- --image_paths single / multiple image paths to be detected, such as:
--image_paths 'data/images/000002.jpg' 'data/images/000004.jpg'
The training is also very simple. After preparing the data set, you only need to execute: sh yolo_train.sh is enough. See [dataset creation] below for the process of dataset creation.
Data set production
YoloV3 supports any target detection data set. Let's take the production process of COCO2014 as an example to introduce the production of data sets required for training / verification. Other data sets, such as PASCAL VOC or user-defined data sets, can adopt the same format.
resource file
Download the pictures of COCO2014 training set and verification set, and put the unzipped train2014 and val2014 in the directory of data/COCO/images
(if the COCO2014 dataset has been downloaded locally, you can ln soft link images to the parent directories of train2014 and val2014 locally)
Prepare resource files: labels, 5K part,trainvalno5k.part
wget -c https://pjreddie.com/media/files/coco/5k.part
wget -c https://pjreddie.com/media/files/coco/trainvalno5k.part
wget -c https://pjreddie.com/media/files/coco/labels.tgz
script
Execute the script in the data/COCO Directory:
# get label file
tar xzf labels.tgz

# set up image list
paste <(awk "{print \"$PWD\"}" <5k.part) 5k.part | tr -d '\t' > 5k.txt
paste <(awk "{print \"$PWD\"}" <trainvalno5k.part) trainvalno5k.part | tr -d '\t' > trainvalno5k.txt

# copy label txt to image dir
find labels/train2014/ -name "*.txt"  | xargs -i cp {} images/train2014/
find labels/val2014/   -name "*.txt"  | xargs -i cp {} images/val2014/
Executing the script will automatically unzip labels Tgz file, and generate 5k.0 in the current directory Txt and trainvalno5k Txt, and then copy all label txt files of labels/train2014 and labels/val2014 to the corresponding training set and verification set folders (ensure that the pictures and labels are in the same directory).
At this point, the preparation process of the whole data set is completed.
train
Modify Yolo_ train. Parameters in SH script, such as: - image_path_file="data/COCO/trainvalno5k.txt" and execute:
sh yolo_train.sh
You can start the training process. More detailed parameters are as follows:
- --gpu_num_per_node number of GPUs per machine
- --batch_size batch batch size
- --base_lr initial learning rate
- --Number of target categories (COCO 80; VOC 20)
- --model_save_dir model storage folder path
- --dataset_dir training / validation set folder path
- --num_ Total number of epoch iterations
- --save_frequency specifies the epoch interval at which the model is saved
In the next issue, let's see how OneFlow performs???
© THE END
Please contact the official account for authorization.