1, Extremely simplified deployment
One click deployment with docker
| advantage | shortcoming |
|---|---|
| Simple, fast, true one click deployment | This is a miniaturized deployment and is suitable for private use. If it needs to be used by more than one person, it is recommended to adopt the normal deployment mode |
1. Install docker
centos 6 installation method:
rpm -iUvh http://dl.fedoraproject.org/pub/epel/6/x86_64/epel-release-6-8.noarch.rpm
yum update -y
yum -y install docker-io
service docker start
chkconfig docker on
centos7 installation method:
curl -sSL https://get.docker.com/ | sh
systemctl start docker
systemctl enable docker.service
2. Install nextcloud
docker run -d --name nextcloud -p 80:80 -v /root/nextcloud:/data rootlogin/nextcloud
After installation, the login address is http://ip
Port 80 can be replaced. If it is changed to 8000, the login address will become http://ip:8000
/root/nextcloud is the database of network disk, which can also be modified according to needs.
After installation, the login address is http://ip
80 The port can be replaced. If it is changed to 8000, the login address will become http://ip:8000
/root/nextcloud It is a network disk database, which can also be modified according to needs.
| parameter | value |
|---|---|
| Login address | http: / / server ip or domain name |
| port | 80 or self modified port |
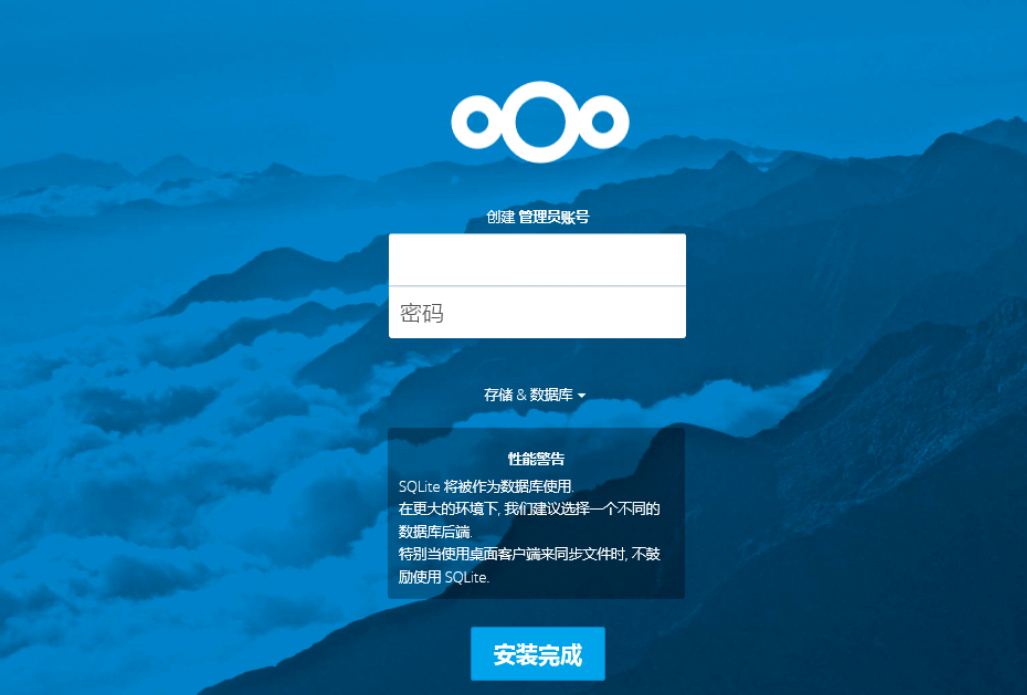
After logging in, as shown in the figure below, the database defaults to SQLite. Set an administrator user name and password, click to complete the installation, and finally wait for the installation to be completed
2, General deployment
1. Download nextcloud
Official website download address:
https://nextcloud.com/install/#instructions-server
Download the file to the local computer. The download speed is a little slow. Don't worry. Just let him do it. Let's do the following operation
2. Use "pagoda" to build environment
Note: check before installation. It must be a new system that has not installed other environments such as Apache/Nginx/php/MySQL
Installation method:
After connecting to the Linux server with SSH connection tool, execute the following commands according to the system to start the installation, which are all one click installation, and wait for the installation to be completed
If it is a virtual machine, you can use it directly
The pagoda contains a payment module, which has no impact on the installation and use of nextcloud. Most of the payment modules are installation modules, which can be purchased according to their own needs
Centos
yum install -y wget && wget -O install.sh http://download.bt.cn/install/install_6.0.sh && sh install.sh
Ubuntu/Deepin
wget -O install.sh http://download.bt.cn/install/install-ubuntu_6.0.sh && sudo bash install.sh
Debian
wget -O install.sh http://download.bt.cn/install/install-ubuntu_6.0.sh && bash install.sh
Fedora
wget -O install.sh http://download.bt.cn/install/install_6.0.sh && bash install.sh
2.1 installation and operation environment
After the pagoda is installed, directly follow the prompts and log in to the WEB interface with your own computer
When you log in for the first time, you will be prompted to install the environment. Select the LNMP environment for installation. You need to select the version above 7.3 for the PHP version. Other versions can be selected by default. Finally, wait for the environment installation to complete
2.2 building websites and databases
Click the website in the pagoda to add the site
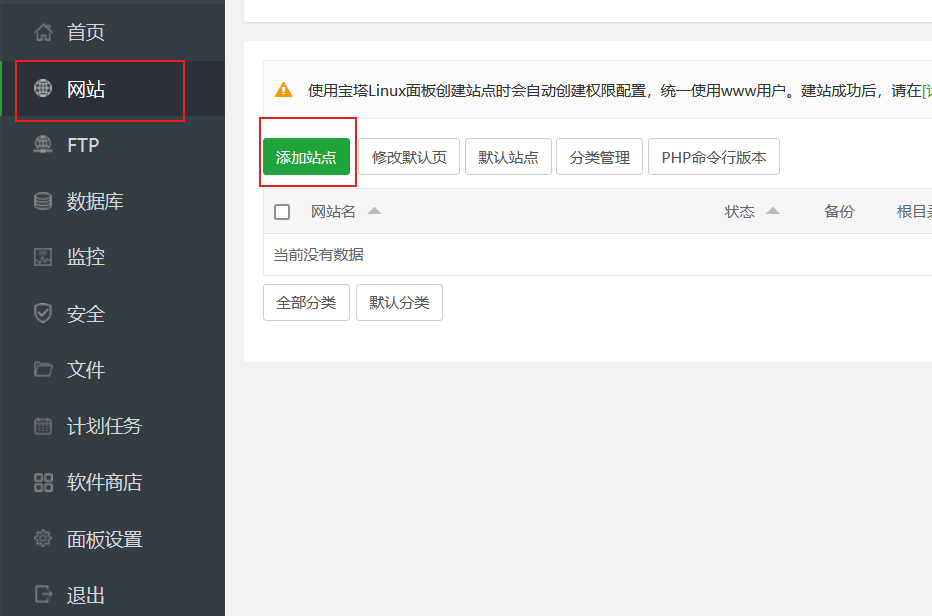 As shown in the figure:
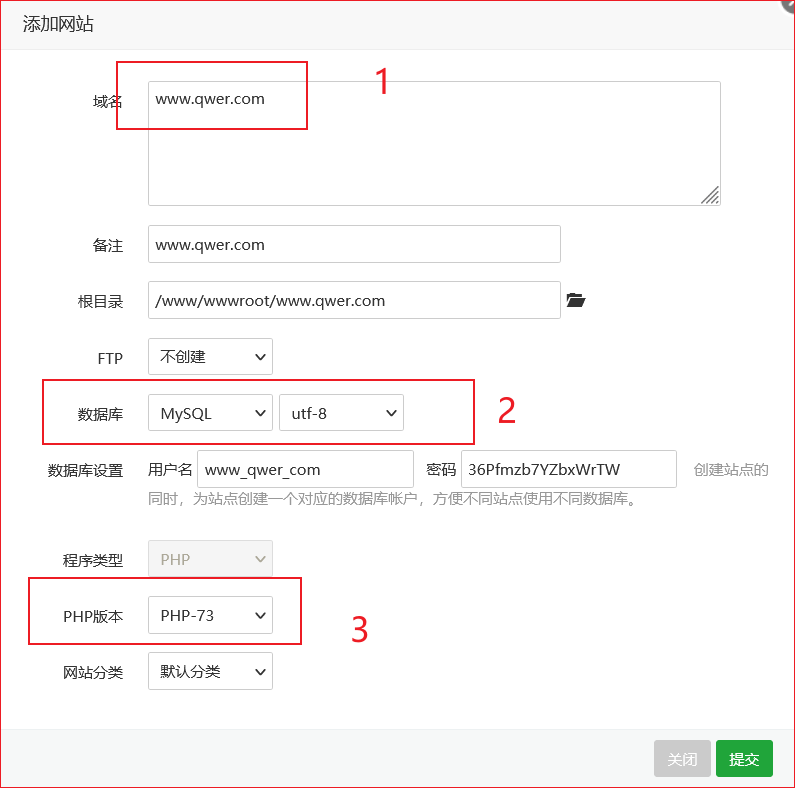
1. Just choose a website name (or your own domain name), and pay attention to resolving the domain name to your own server IP on your own DNS server
2. Select MySQL, and the latter defaults
3. Select php7 Version above 3
2.3 installing nextcloud
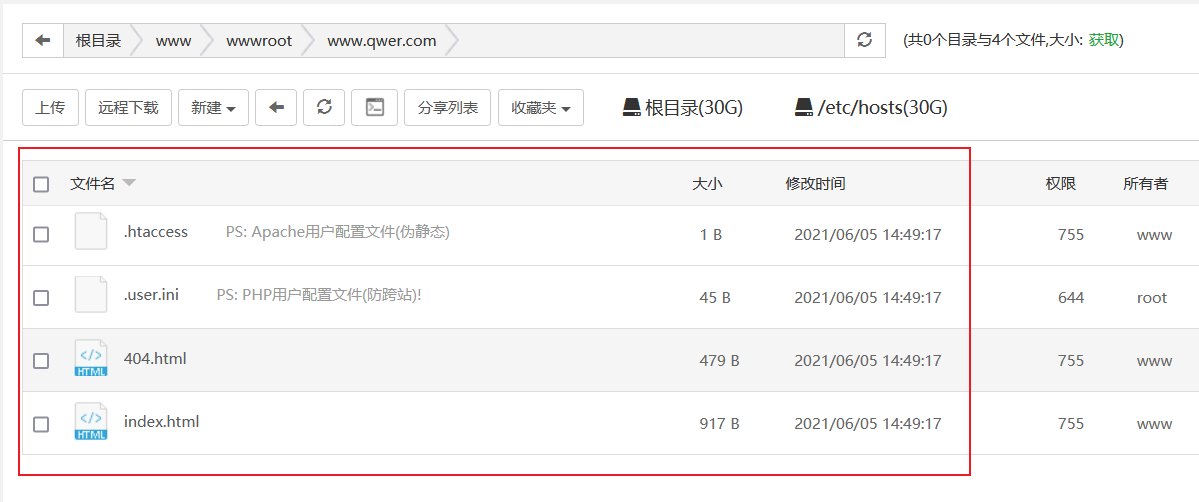
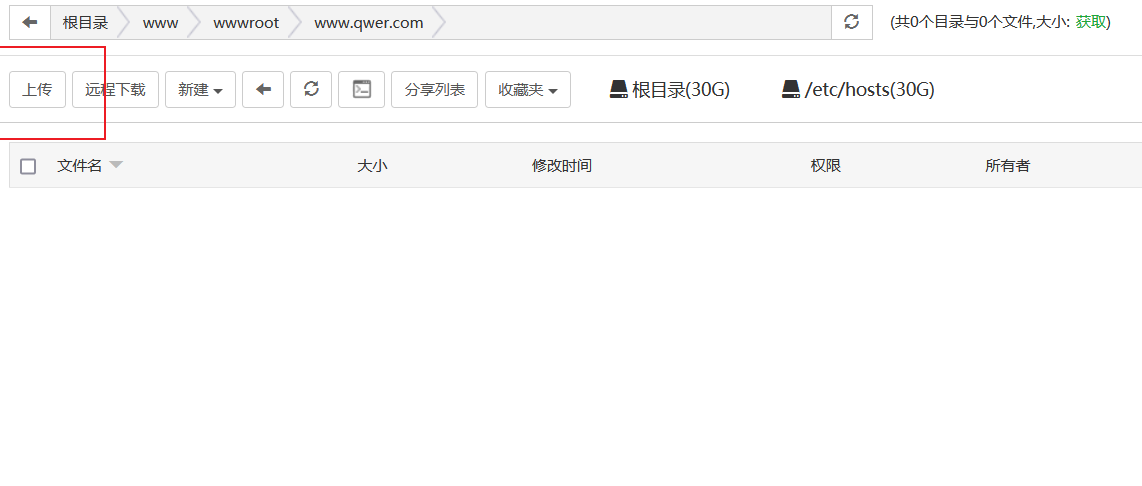
Click "file" on the pagoda panel to enter the website directory. First enter the website directory, as shown in the figure below. Delete all the four files. After deleting the four files, one file will reappear and be deleted to ensure that there is nothing under the website directory
 Click upload to upload the downloaded nextcloud to the website directory and unzip it
 Access with the browser on your computer:
http://www.qwer.com/nextcloud/index.php
Note: www.qwer.com Com to your own domain name
Then access the following interface:
Different from the minimalist deployment, we need to create the user name and password of the administrator, and select the storage and database at the same time
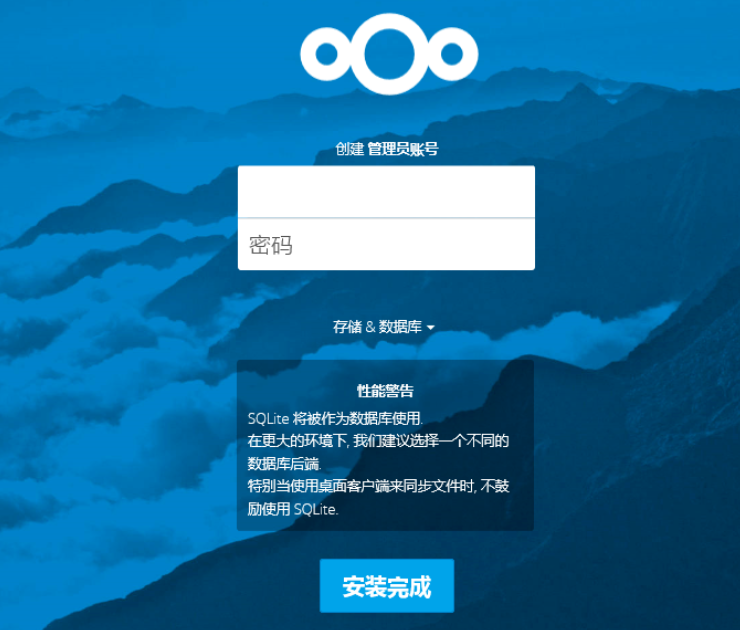
First select MySQL and enter the database name, user name and password. You can find the database you created before (created together when creating the website) from the pagoda "database", and copy the database name, user name and password into nextcloud. localhost recommends not to change it
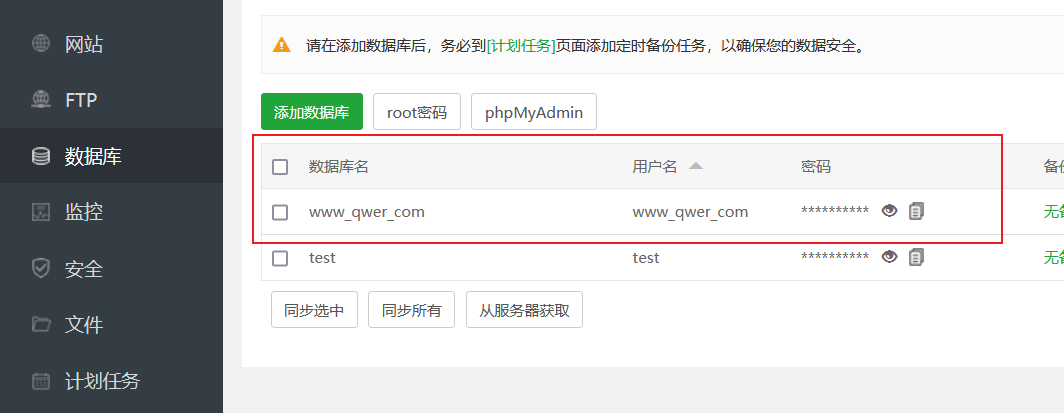 After entering the above information, click "finish installation" and wait for the installation to complete
3, Using nextcloud
After installation, you can directly access:
http://www.qwer.com/nextcloud
Enter the user name and password you created before to log in, and then you can create other users
You can also download the client to realize advanced functions such as real-time synchronous upload of resources