Dynamic and static separation
-
Before we understand the separation of motion and static, we must first understand what is motion and what is static.
In Web development, generally speaking, dynamic resources actually refer to those background resources, while static resources refer to HTML, JavaScript, CSS, img and other files.
Generally speaking, it is necessary to separate dynamic resources from static resources and deploy static resources on nginx. When a request comes, if it is a request for static resources, it will directly obtain resources under the static resource directory configured by nginx. If it is a request for dynamic resources, nginx uses the principle of reverse proxy to forward the request to the background application for processing, So as to realize dynamic and static separation.
After the separation of front and rear ends, the access speed of static resources can be greatly improved. At the same time, the front and rear ends can be developed in parallel during the opening process, which can effectively improve the development time and reduce the joint debugging time.
1,establish NFS Mount point (at nfs (on server)
  ①.Create and authorize static catalogue
   [root@nfs ~]# mkdir /static
   [root@nfs ~]# chown -R www.www /static/

  ②.Add mount point (Edit)/etc/exports (profile)
   [root@nfs ~]# vim /etc/exports
    /static      172.16.1.0/20(rw,sync,all_squash,anonuid=666,anongid=666)

  ③.restart nfs Server
   [root@nfs ~]# systemctl restart nfs-server

  ④.Check whether the server is normal
   [root@nfs ~]# showmount -e
    /static 172.16.1.0/20


2,take web01 The static resources of the server are placed in the mount point (in the web01 (on server)
  ①.Create directory
   [root@web01 ~]# mkdir /opt/static

  ②.mount
   [root@web01 ~]# mount -t nfs 172.16.1.31:/static /opt/static/

  ③.Place the static resources of the project in the mount point
   [root@web01 ~]# cp -r /opt/bbs/static/* /opt/static/


3,Mount to lb01(Operate on a proxy server)
  ①.install nfs-utils
   [root@lb01 ~]# yum install nfs-utils -y
  ②.Create mount point
   [root@lb01 ~]# mkdir /opt/static/
  ③.mount
   [root@lb01 ~]# mount -t nfs 172.16.1.31:/static /opt/static/
   [root@lb01 ~]# df -h

  ④.modify nginx configuration file
   [root@lb01 ~]# vim /etc/nginx/conf.d/test.conf
   [root@lb01 ~]# cat /etc/nginx/conf.d/test.conf
upstream bbs {
    server 172.16.1.7:80 max_fails=3 fail_timeout=3s;
    server 172.16.1.8:80 max_fails=3 fail_timeout=3s;
    server 172.16.1.9:80 max_fails=3 fail_timeout=3s;
}

server {
    listen 80;
    server_name bbs.test.com;
    location / {
        proxy_pass http://bbs;
        proxy_next_upstream error timeout invalid_header http_500 http_502 http_503 http_404;
        include /etc/nginx/proxy_params;
    }
    location /static {
        alias /opt/static;
    }

}

  ⑤.Test overload nginx
   [root@lb01 ~]# nginx -t
   [root@lb01 ~]# systemctl restart nginx


4,test
 Browser access: bbs.test.com
Rewrite
- Rewrite mainly implements url address rewriting and redirection, which is the process of redirecting incoming web requests to other URLs.
Basic overview of Rewrite
1.Address jump, user access www.linux.com this URL Yes, direct it to a new domain name www.baidu.com.
2.Protocol jump, user through http When the agreement requests a website, jump it back to https Agreement mode.
3.Pseudo static, a technology that displays dynamic pages as static pages, which is convenient for search engine input and builds dynamic pages at the same time URL The address exposes too many parameters to improve higher security.
4.Search Engines, SEO Optimization depends on url The path is easy to remember url Facilitate search engine entry.
rewrite syntax
Syntax: rewrite regex replacement [flag];
Default:    —
Context:    server, location, if

rewrite         # Module command
regex           # Requested link (regular expressions supported)
replacement     # Jump link
[flag];         # label

location /download/ {
    rewrite ^(/download/.*)/media/(.*)\..*$ $1/mp3/$2.mp3 break;
    rewrite ^(/download/.*)/audio/(.*)\..*$ $1/mp3/$2.ra  break;
    return  403;
}
Rewrite Flag
- The rewrite instruction redirects the URL or modifies the string according to the expression. It can be applied to the server, location and if environment. Each row of the rewrite instruction is followed by a flag tag. The supported flag tags are as follows:
| flag | effect |
|---|---|
| last | After this rule is matched, stop matching and no longer match the following rules |
| break | After this rule is matched, stop matching and no longer match the following rules |
| redirect | Return to 302 temporary redirection, and the address bar will display the address after the jump |
| permanent | Return to 301 permanent redirection, and the address bar will display the address after jump |
1. The difference between last and break
[root@lb01 ~]# cat /etc/nginx/conf.d/rewrite.conf

server {
    server_name _;
    listen 80;
    location ~ ^/break {
        rewrite (.*) /test break;
    }

    location ~ ^/last {
        rewrite (.*) /test last;
    }

    location /test {
        default_type text/html;
        return 200 "test";
    }
}

break As long as the rule is matched, it will go to the directory of the local configuration path to find the requested file;
and last As long as the rule is matched, the server(...)Tag reissue request.


break Request:
1.request linux.rewrite.com/break
2.matching location ~ ^/break Will jump to linux.rewrite.com/test
3.After requesting a jump, go back and find the directory of the local site /test
4.If found, return/code/test/index.html Contents of the;
5.If the directory is not found, an Error 404 is reported. If the directory is found and the corresponding file is not found, an error 403 is reported

last request:
1.request linux.rewrite.com/last
2.matching location ~ ^/last Will jump to linux.rewrite.com/test
3.If found, return/code/test/index.html Contents of the;
4.If not found, the current server When a request is made, the access address becomes linux.rewrite.com/test
5.Re request server Will match location /test/ Directly return to the location Content of
6.If not location Match, and then return 404;
2. The difference between redirect and permanent
redirect
location /redirect {
	rewrite (.*) http://www.baidu.com redirect;
}
location /permanent {
    rewrite (.*) http://www.baidu.com permanent;
}
redirect: Each request will ask the server. If the server is unavailable, it will fail to jump.
permanent: The first request will ask, and the browser will record the jump address. The second time, it will not ask the server, and jump directly through the address cached by the browser.
HTTPS
-
Why use HTTPS? Because HTTP is not safe, when we use HTTP website, it will be hijacked and tampered. If HTTPS protocol is adopted, the data is encrypted during transmission, so hackers cannot steal or tamper with data message information, and avoid information leakage during network transmission.
-
So when we implement https, we need to understand the ssl protocol, but now we use more TLS encryption protocol.
-
So how does TLS ensure that plaintext messages are encrypted? In the OSI seven layer model, the application layer is the http protocol. Under the application layer protocol, our presentation layer is the layer where ssl protocol plays a role. Through (handshake, exchange of secret keys, alarm, encryption) and other methods, it is the application layer http protocol that realizes the secure encryption of data without perception
Simulated website hijacking
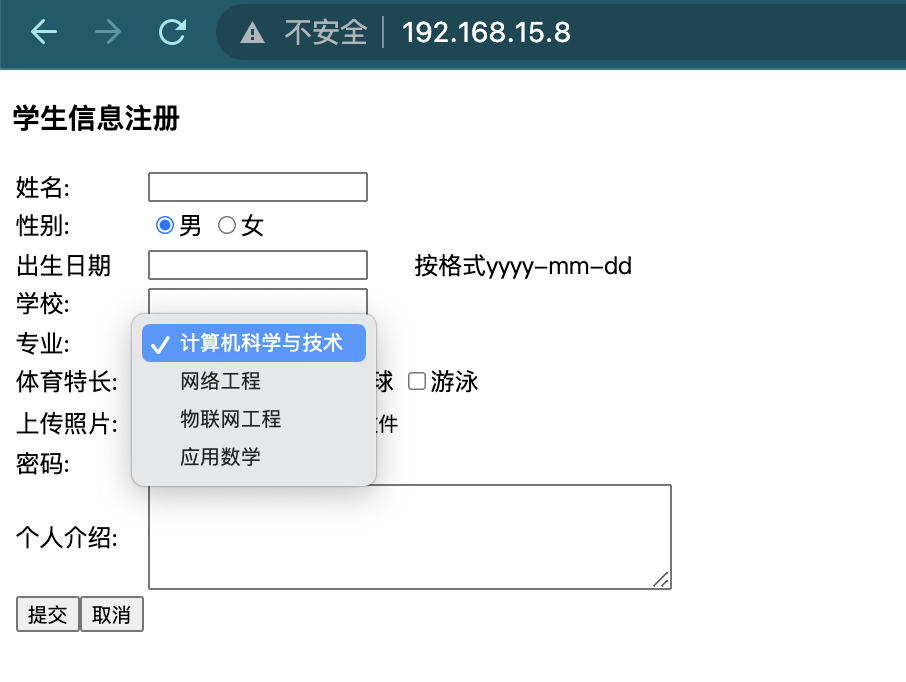
1. Normal page
# 1. Create a new html file
[root@web01 ~]# mkdir /opt/code
[root@web01 ~]# cd /opt/code
[root@web01 ~]# vim index.html
#Copy and paste the contents below
<!DOCTYPE html PUBLIC "-//W3C//DTD XHTML 1.0 Transitional//EN" "http://www.w3.org/TR/xhtml1/DTD/xhtml1-transitional.dtd">
<html xmlns="http://www.w3.org/1999/xhtml">
<head>
<meta http-equiv="Content-Type" content="text/html; charset=utf-8" />
<title>Student information registration page</title>
</head>
<body>
<h3>Student information registration</h3>
<form  name="stu"action="">
<table>
  <tr><td>full name:</td><td><input type="text"name="stuName"/></td></tr>
  <tr><td>Gender:</td>
      <td><input type="radio"name="stuSex"checked="checked">male
          <input type="radio"name="stuSex">female
          </td>
          </tr>
   <tr><td>date of birth</td>
       <td><input type="text"name="stuBirthday"></td>
       <td>By format yyyy-mm-dd</td>
       </tr>
       <tr><td>school:</td><td><input type="text"name="stuSchool"></td></tr>
       <tr><td>major:</td>
           <td><select name="stuSelect2">
               <option selected>Computer science and technology</option>
               <option>Network engineering</option>
               <option>Internet of things project</option>
               <option>applied mathematics</option>
               </select>
               </td>
               </tr>
               <tr><td>Sports Specialty:</td>
                   <td colspan="2">
                      <input type="checkbox"name="stuCheck" >Basketball
                      <input type="checkbox"name="stuCheck" >Football
                      <input type="checkbox"name="stuCheck" >Volleyball
                      <input type="checkbox"name="stuCheck" >Swimming
                   </td>
               </tr>
               <tr><td>Upload photos:</td><td colspan="2"><input type="file" ></td></tr>
               <tr><td>password:</td><td><input type="password"name="stuPwd" ></td></tr>
               <tr><td>Personal introduction:</td>
                   <td colspan="2"><textarea name="Letter"rows="4"cols="40"></textarea></td>
               </tr>
               <tr>
                 <td><input type="submit"value="Submit" ><input type="reset"value="cancel" ></td>
                 </tr>
                 </table>
                 </form>
</body>
</html>


# 2. Compress the previous web01 configuration. None can be ignored
[root@web01 ~]# gzip /etc/nginx/conf.d/game.conf

# 3. Create a new profile
[root@web01 ~]# vim /etc/nginx/conf.d/http.conf

server {
    listen 80;
    server_name _;
    location / {
        root /opt/code;
        index index.html;
    }
}

# 4. Test heavy load nginx
[root@web01 ~]# nginx -t
[root@web01 ~]# systemctl restart nginx

# 5. Browser access: http://192.168.15.8/
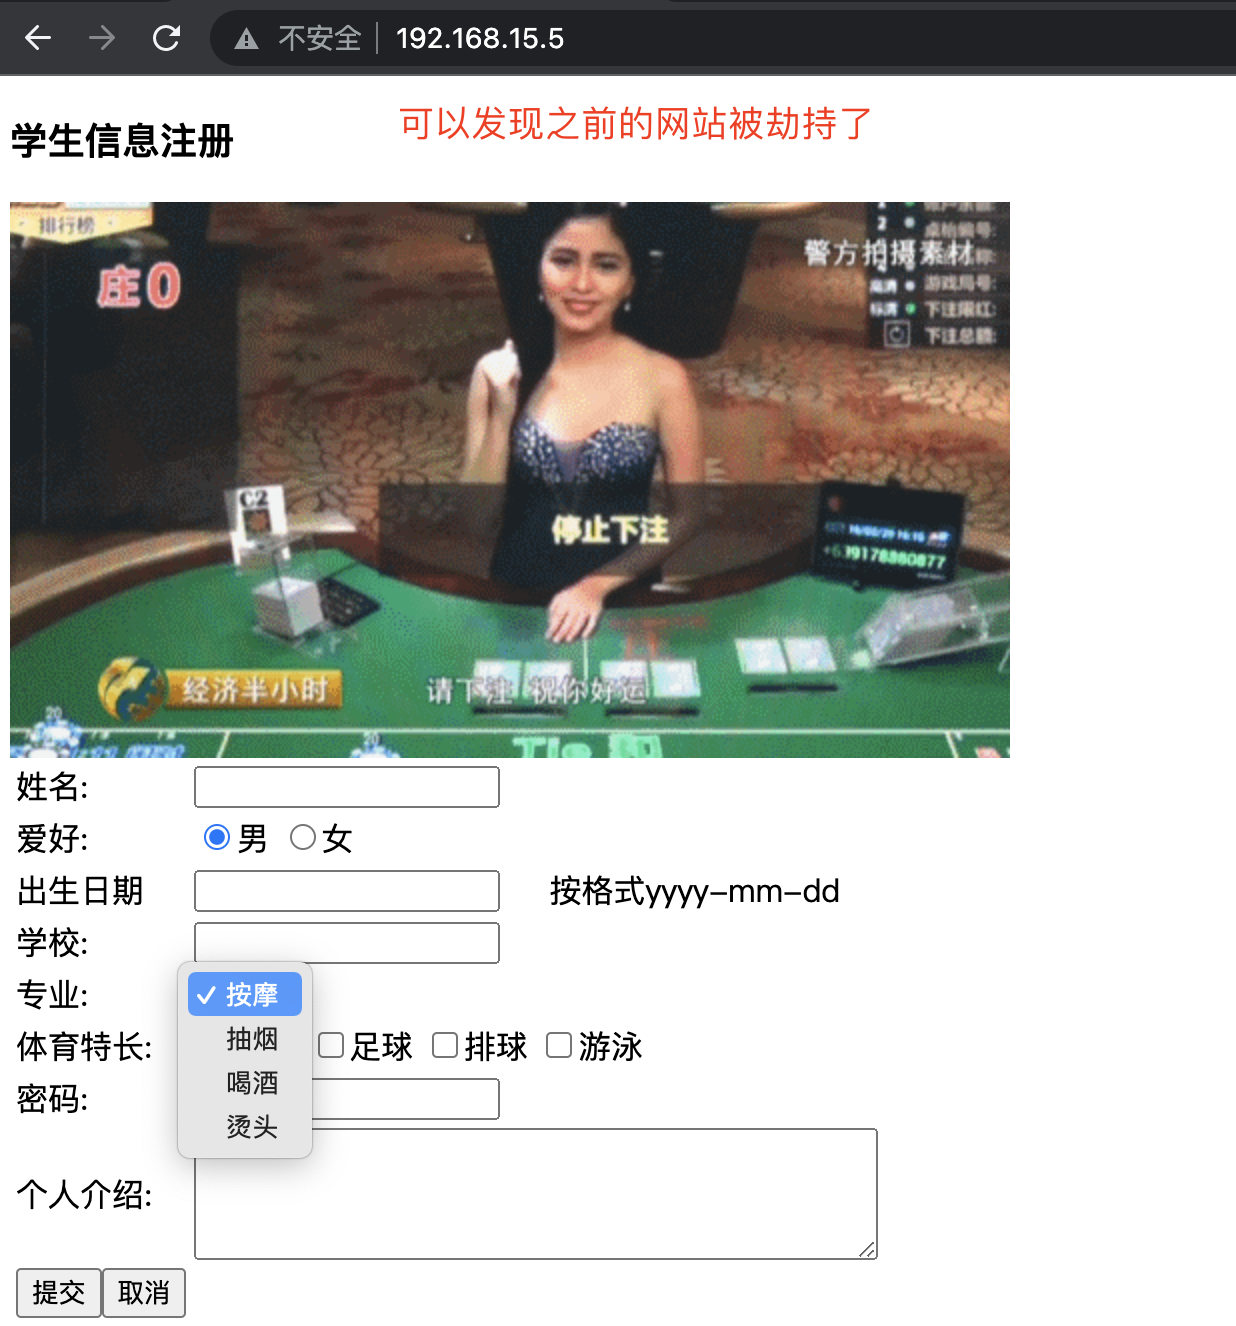
2. Website hijacking
# Compress the previous nginx agent load balancing configuration (no operation can be ignored)
[root@lb01 ~]# gzip /etc/nginx/conf.d/test.conf
# Create a new nginx configuration file
[root@lb01 ~]# vim /etc/nginx/conf.d/http.conf
server {
    listen 80;
    server_name _;

    location / {
        proxy_pass http://192.168.15.8;

        sub_filter '<title>Student information registration page</title>' '<title>Macao's first online casino</title>';
        sub_filter '<h3 align="center">Student information registration</h3>' '<h3 align="center">VIP User information registration</h3>';
        sub_filter '<tr><td>Gender:</td>' '<tr><td>hobby:</td>';
        sub_filter '<option selected>Computer science and technology</option>' '<option selected>massage</option>';
        sub_filter '<option>Network engineering</option>' '<option>smoking</option>';
        sub_filter '<option>Internet of things project</option>' '<option>drink</option>';
        sub_filter '<option>applied mathematics</option>' '<option>Hot head</option>';
        sub_filter '<tr><td>Upload photos:</td><td colspan="2"><input type="file" ></td></tr>' '<img src="https://blog.driverzeng.com/zenglaoshi/xingganheguan.gif">';
    }
}

# Restart nginx service
[root@lb01 ~]# systemctl restart nginx

# test
 Browser access: http://192.168.15.5/
Encryption process
- 1. The browser initiates a request to port 443 of the server, which carries the encryption algorithm and hash algorithm supported by the browser.
- 2. The server receives the request and selects the encryption algorithm and hash algorithm supported by the browser.
- 3. The server returns the digital certificate to the browser. The digital certificate here can be applied to a reliable institution or self-made.
- 4. The browser enters the digital certificate authentication phase, which is completed by the browser's built-in TLS:
- 4.1 first, the browser will index from the built-in certificate list to find the organization corresponding to the certificate issued by the server. If it is not found, the user will be prompted whether the certificate is issued by an authoritative organization and is untrustworthy. If the corresponding organization is found, take out the public key issued by the organization.
- 4.2 decrypt the certificate with the certificate public key of the organization to obtain the content and certificate signature of the certificate, including the website URL, website public key, certificate validity, etc. The browser will first verify the validity of the certificate signature (the verification process is similar to the communication between Bob and Susan above). After the signature is passed, the browser verifies whether the web address recorded in the certificate is consistent with the current web address. If it is inconsistent, the user will be prompted. If the web address is consistent, the validity of the certificate will be checked, and the user will be prompted if the certificate expires. When these are authenticated, the browser can safely use the website public key in the certificate.
- 4.3 the browser generates a random number R and encrypts R with the website public key.
- 5. The browser transmits the encrypted R to the server.
- 6. The server decrypts R with its own private key.
- 7. The server uses R as the key, uses the symmetric encryption algorithm to encrypt the web content and transmit it to the browser.
- 8. The browser takes R as the key and uses the previously agreed decryption algorithm to obtain the web content.
Certificate comparison
| contrast | Domain name DV | Enterprise OV | Enhanced EV |
|---|---|---|---|
| Green address bar | 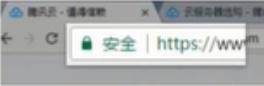 Small lock mark + https Small lock mark + https |
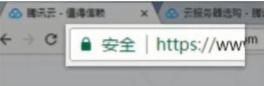 Small lock mark + https Small lock mark + https |
 Small lock mark + enterprise name + https Small lock mark + enterprise name + https |
| General purpose | Personal sites and applications; Simple https encryption requirements | E-commerce sites and applications; SME site | Large financial platform; Large enterprise and government agency sites |
| Audit content | Domain name ownership verification | Comprehensive enterprise authentication; Domain name ownership verification | The highest level of enterprise authentication; Domain name ownership verification |
| Issuance duration | 10 minutes - 24 hours | 3-5 working days | 5-7 working days |
| Single application period | 1 year | 1-2 years | 1-2 years |
| Compensation guarantee fund | - | $1.25-1.75 million | $1.5-1.75 million |
Self signed certificate
[root@web01 ~]# cd /etc/nginx/
[root@web01 nginx]# mkdir ssl_key
[root@web01 nginx]# cd ssl_key

#Use the openssl command as the CA authority to create a certificate (the production does not use this method to generate a certificate, and the black door certificate is not recognized by the Internet)
[root@web01 ssl_key]# openssl genrsa -idea -out server.key 2048
Generating RSA private key, 2048 bit long modulus
..............+++
..................................+++

e is 65537 (0x10001)
Enter pass phrase for server.key: 123456
Verifying - Enter pass phrase for server.key: 123456

[root@web01 ssl_key]# ll
total 4
-rw-r--r--. 1 root root 1739 Dec  9 11:27 server.key

#Generate a self signed certificate (public key) and remove the password of the private key
[root@web01 ssl_key]# openssl req -days 36500 -x509 -sha256 -nodes -newkey rsa:2048 -keyout server.key -out server.crt
Generating a 2048 bit RSA private key
.....................................+++
............+++
writing new private key to 'server.key'
-----
You are about to be asked to enter information that will be incorporated
into your certificate request.
What you are about to enter is what is called a Distinguished Name or a DN.
There are quite a few fields but you can leave some blank
For some fields there will be a default value,
If you enter '.', the field will be left blank.
-----
Country Name (2 letter code) [XX]:china
string is too long, it needs to be less than  2 bytes long
Country Name (2 letter code) [XX]:CN
State or Province Name (full name) []:meiguo
Locality Name (eg, city) [Default City]:riben
Organization Name (eg, company) [Default Company Ltd]:heishoudang
Organizational Unit Name (eg, section) []:oldboy
Common Name (eg, your name or your server's hostname) []:oldboy
Email Address []:123@qq.com

# Req -- > used to create a new certificate
# New -- > indicates that a new certificate is created
# X509 -- > indicates that the format of the defined certificate is standard format
# Key -- > indicates the private key file information called
# Out -- > indicates the output certificate file information
# Days -- > indicates the validity period of the certificate
# Sha256 -- > encryption method

#1. Open certificate
Syntax: ssl on | off;
Default:    ssl off;
Context:    http, server

#2. Specify the certificate file
Syntax: ssl_certificate file;
Default:    —
Context:    http, server

#3. Specify the private key file
Syntax: ssl_certificate_key file;
Default:    —
Context:    http, server

#4. Modify the nginx configuration file (if load balancing is configured, the following configuration is not required)
[root@web01 ~]# cat /etc/nginx/conf.d/https.conf
server {
    listen 443 ssl;
    server_name _;

    ssl_certificate /etc/nginx/ssl_key/server.crt;
    ssl_certificate_key /etc/nginx/ssl_key/server.key;

    location / {
        root /opt/code;
        index index.html;
    }
}

#5. Restart the nignx service
[root@lb01 ~]# systemctl restart nginx

#6. Test
 Browser access: https://192.168.15.8/
Load certificate into agent
# Synchronize the ssl configuration of web01 to agent lb01
[root@web01 conf.d]# scp https.conf 192.168.15.5:/etc/nginx/conf.d/https.conf
[root@web01 conf.d]# scp /etc/nginx/ssl_key 192.168.15.5:/etc/nginx/conf.d/https.conf

# Modify the nginx configuration file of lb01
[root@lb01 conf.d]# cat /etc/nginx/conf.d/https.conf
upstream ssl {
    server 172.16.1.7;
    server 172.16.1.8;
    server 172.16.1.9;
}

server {
    listen 443 ssl;
    server_name _;

    ssl_certificate /etc/nginx/ssl_key/server.crt;
    ssl_certificate_key /etc/nginx/ssl_key/server.key;

    location / {
        proxy_pass http://ssl;
        include /etc/nginx/proxy_params;
    }
}

server {
    listen 80;
    server_name _;
    rewrite (.*) https://192.168.15.5 permanent;
}

# Test and restart the nignx service
[root@lb01 ~]# nginx -t
[root@lb01 ~]# systemctl restart nginx

# test
 Browser access: https://192.168.15.5/