Nginx web page optimization (1)
Configure Nginx hidden version number
-
In the production environment, the version number of Nginx needs to be hidden to avoid the leakage of security vulnerabilities
-
View method
- Use fiddler tool to view Nginx version number in Windows client
- Use "curl-i web address" command to view in CentOS system
- The method of hiding version number in Nginx
- Modify profile method
- Modify source code law
Modify profile method
- The value of the server UU tokens option in Nginx's configuration file is set to off
[root@www conf]# vi nginx.conf
.....
server_ tokens off;              //Close version number
.....
[root@www conf]# nginx -t
- Restart the service, visit the website and use curl-i command to detect
[root@www conf]# service nginx restart
[root@www conf]# curl -| http://192.168.9.209/
HTTP/1.1 200 OK
Server: nginx
- If the fastcgi param server software option is configured in the php configuration file
- Then edit the PHP FPM configuration file and change the value of fastcgi ﹣ param server ﹣ software to
- fastcgi_param SERVER_ SOFTWARE nginx ;
Configuration example
[root@localhost nginx]# curl -I http://192.168.144.133/ / / use the command to view the version number
HTTP/1.1 200 OK
Server: nginx/1.12.2      //Display version number
Date: Thu, 14 Nov 2019 06:52:14 GMT
Content-Type: text/html
Content-Length: 634
Last-Modified: Thu, 14 Nov 2019 06:24:32 GMT
Connection: keep-alive
ETag: "5dccf320-27a"
Accept-Ranges: bytes
[root@localhost nginx]# vim conf/nginx.conf / / enter the edit configuration file
...//Omit parts
http {
    include       mime.types;
    default_type  application/octet-stream;
    server_tokens off;          //Add entry close version number
...//Omit parts
:wq
[root@localhost nginx]# systemctl restart nginx.service
[root@localhost nginx]# curl -I http://192.168.144.133
HTTP/1.1 200 OK
Server: nginx                 //Version number hidden
Date: Thu, 14 Nov 2019 06:56:51 GMT
Content-Type: text/html
Content-Length: 634
Last-Modified: Thu, 14 Nov 2019 06:24:32 GMT
Connection: keep-alive
ETag: "5dccf320-27a"
Accept-Ranges: bytes
Modify source code law
- Nginx source file / usr/src/nginx-1.12.0/src/core/nginx.h contains version information, which can be set at will
-
Recompile installation, hide version information
-
Example:
#Define nginx "version" 1.1.1 "the modified version number is 1.1.1
 #define NGINX VER "IIS /" change the software type to IIS
- Restart the service, visit the website and use curl-i command to detect
Configuration example
[root@localhost ~]# vim /usr/local/nginx/conf/nginx.conf / / edit the nginx configuration file
...//Omit parts
http {
    include       mime.types;
    default_type  application/octet-stream;
    server_tokens on;                           //Open the hidden version number entry set above
...//Omit parts
:wq
[root@localhost ~]# cd /opt/nginx-1.12.2/src/core / / change the version number information in the extracted source package
[root@localhost core]# vim nginx.h
#define nginx_version      1012002
#Define nginx? Version "1.1.1" / / change the version number
#define NGINX_VER          "nginx/" NGINX_VERSION
:wq
[root@localhost core]# cd /optnginx-1.12.2/
[root@localhost nginx-1.12.2]# . / configure -- prefix = / usr / local / nginx -- user = nginx -- group = nginx -- with HTTP? Stub? Status? Module / / reconfigure nginx
checking for OS
 + Linux 3.10.0-693.el7.x86_64 x86_64
checking for C compiler ... found
 + using GNU C compiler
 + gcc version: 4.8.5 20150623 (Red Hat 4.8.5-39) (GCC)
...//Omit parts
  nginx http fastcgi temporary files: "fastcgi_temp"
  nginx http uwsgi temporary files: "uwsgi_temp"
  nginx http scgi temporary files: "scgi_temp"
[root@localhost nginx-1.12.2]# Make & & make install / / re create and install nginx
[root@localhost nginx-1.12.2]# systemctl restart nginx.service / / restart the nginx service
[root@localhost nginx-1.12.2]# curl -I http://192.168.144.133 / / view version number
HTTP/1.1 200 OK
Server: nginx/1.1.1             //Version number change
Date: Thu, 14 Nov 2019 07:11:08 GMT
Content-Type: text/html
Content-Length: 634
Last-Modified: Thu, 14 Nov 2019 06:24:32 GMT
Connection: keep-alive
ETag: "5dccf320-27a"
Accept-Ranges: bytes
Modify Nginx users and groups
- The Nginx runtime process needs the support of users and groups to achieve access control when reading website files
- Nginx uses no body user account and group account by default, and generally needs to be modified
- Method of modification
- Specify users and groups when compiling installation
- Modify profile to specify users and groups
Specified when compiling and installing
-
Create user account and group account, such as nginx
- When compiling and installing -- user and -- group specify the running user and group account of Nginx service
Modify profile method specification
- Create a new user account, such as nginx
- Modify the user option of the main configuration file to specify the user account
- Restart nginx service for configuration to take effect
- Use the ps aux command to view the process information of nginx and verify the effect of running user account change
[root@www conf]# vi nginx.conf
user nginx nginx;
[root@www conf]# service nginx restart
[root@www conf]# ps aux | grep nginx
root     130034 0.0 0.0 20220 620 ?        Ss 19:41 0:00 nginx: master process
/usr/local/sbin/nginx
nginx       130035 0.0 0.0 20664 1512 ?     S 19:41 0:00 nginx: worker process
Configure Nginx web page cache time
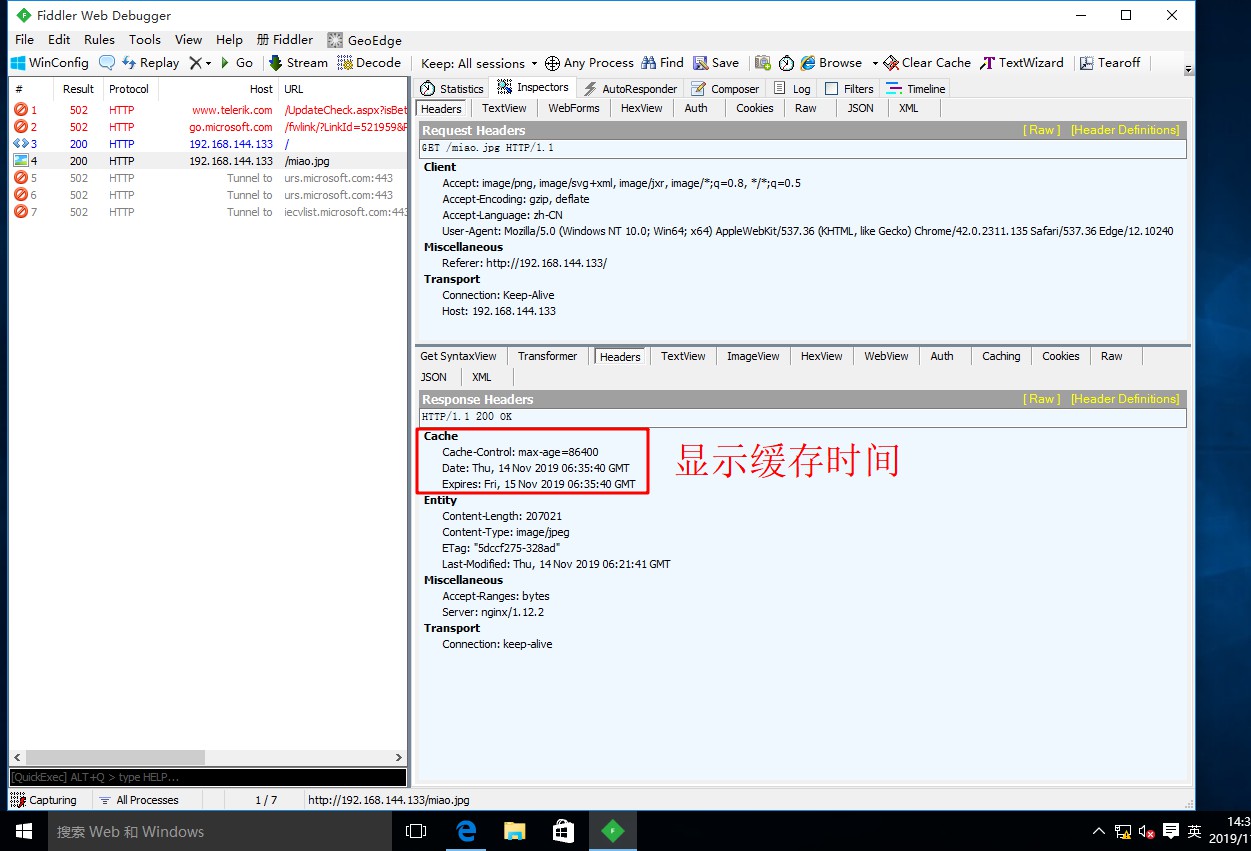
- When Nginx returns the web page data to the client, it can set the cache time to facilitate the direct return of the same content request in the future, avoid repeated requests, and speed up the access speed
- Generally, it is set for static web pages, but not for dynamic web pages
- You can use fiddler in Windows client to view the cache time of web pages
Setup method
- The configuration file can be modified to add expiration parameters for specific content in http segment, server segment, or location segment
Example
- Modify the configuration file of Nginx, and add the expires parameter in the location section
location ~\.(gif|ipg|jepg|png|bmp|ico)$ {
       root  html;
       expires 1d;
}
Configuration example
[root@localhost ~]# systemctl stop firewalld.service / / turn off the firewall
[root@localhost ~]# setenforce 0 / / turn off enhanced security
[root@localhost ~]# systemctl start nginx.service / / start nginx service
[root@localhost ~]# netstat -ntap | grep 80 / / check whether the service port is enabled
tcp        0      0 0.0.0.0:80              0.0.0.0:*           LISTEN      1684/nginx: master
[root@localhost ~]# mkdir abc
[root@localhost ~]# mount.cifs //192.168.100.10/lamp-c7 abc / / mount the host image folder to the abc directory
Password for root@//192.168.100.10/lamp-c7:
[root@localhost ~]# cd abc / / / enter the abc directory
[root@localhost abc]# ls
apr-1.6.2.tar.gz                  Discuz_X2.5_SC_UTF8.zip  miao.jpg
apr-util-1.6.0.tar.gz             error.png                mysql-5.6.26.tar.gz
awstats-7.6.tar.gz                httpd-2.4.29.tar.bz2     nginx-1.12.0.tar.gz
cronolog-1.6.2-14.el7.x86_64.rpm  LAMP-php5.6.txt          php-5.6.11.tar.bz2
[root@localhost abc]# cp miao.jpg /usr/local/nginx/html / / / copy the picture to the nginx service site
[root@localhost abc]# cd /usr/local/nginx/html / / / enter the site directory
[root@localhost html]# ls
50x.html  index.html  miao.jpg
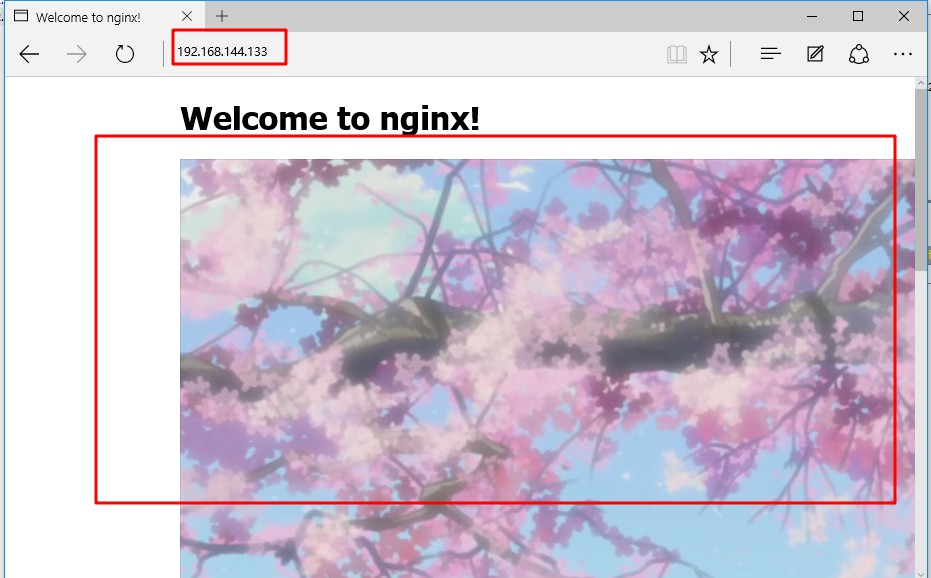
[root@localhost html]# vim index.html / / edit web content
<!DOCTYPE html>
<html>
<head>
<title>Welcome to nginx!</title>
<style>
    body {
        width: 35em;
        margin: 0 auto;
        font-family: Tahoma, Verdana, Arial, sans-serif;
    }
</style>
</head>
<body>
<h1>Welcome to nginx!</h1>
<img src="miao.jpg"/>                      //Add pictures
<p>If you see this page, the nginx web server is successfully installed and
working. Further configuration is required.</p>

<p>For online documentation and support please refer to
<a href="http://nginx.org/">nginx.org</a>.<br/>
Commercial support is available at
<a href="http://nginx.com/">nginx.com</a>.</p>

<p><em>Thank you for using nginx.</em></p>
</body>
</html>
:wq
[root@localhost nginx]# vim conf/nginx.conf / / edit configuration
..//Omit parts
events {
    worker_connections  1024;
}

http {
    include       mime.types;
    default_type  application/octet-stream;
..//Omit parts
 # deny access to .htaccess files, if Apache's document root
        # concurs with nginx's one
        #
        location ~\.(gif|jepg|jpg|ico|bmp|png)$ {       //Edit cache entry
            root html;
            expires 1d;
        }
    }
..//Omit parts
:wq
[root@localhost nginx]# systemctl restart nginx.service / / restart nginx service- Visit the web page in the client and use the packet capturing tool to check whether the cache time is on


Configure Nginx to realize connection timeout
- In the enterprise website, in order to avoid the same customer taking up the connection for a long time and causing waste of resources, the corresponding connection timeout parameters can be set to control the connection access time
- Use the Fiddler tool to view the connection parameter
Explanation of timeout parameters
-
Keepalive_ timeout
- Set the connection retention timeout. Generally, you can only set this parameter, which is 75 seconds by default. You can set it according to the situation of the website, or close it. You can set it in http segment, server segment, or location segment
-
Client header_ timeout
- Specifies the timeout to wait for the client to send the request header
- Client body _timeout
- Set request body read timeout
Configuration example
[root@localhost nginx-1.12.2]# cd /usr/local/nginx/conf / / / enter the nginx configuration file directory
[root@localhost conf]# vim nginx.conf / / edit the configuration file
...//Omit parts
http {
    include       mime.types;
    default_type  application/octet-stream;
    server_tokens on;

    #log_format  main  '$remote_addr - $remote_user [$time_local] "$request" '
    #                  '$status $body_bytes_sent "$http_referer" '
    #                  '"$http_user_agent" "$http_x_forwarded_for"';

    #access_log  logs/access.log  main;

    sendfile        on;
    #tcp_nopush     on;

    #keepalive_timeout  0;
    keepalive_timeout  65 180;     //Add client timeout 180 seconds
    client_header_timeout 80;      //Set client header timeout
    client_body_timeout 80;        //Set client theme content timeout

    #gzip  on;

    server {
        listen       80;
        server_name  localhost;
...//Omit parts
:wq
[root@localhost conf]# systemctl restart nginx.service / / restart the service