1. Installation environment
1.1 installation of MSYS2+MinGW64
1. Download msys2, official address: http://www.msys2.org/ , select the 64 bit installer here
2. After the installation is completed, do not start msys2 first and install it in the root directory / etc / Pacman D / find mirrorlist mingw32,mirrorlist.mingw64 and mirrorlist Msys and modify it.
mirrorlist. Add a line to the mingw32 file, server= http://mirrors.ustc.edu.cn/msys2/mingw/i686/
mirrorlist. Add a line to the mingw64 file, server= http://mirrors.ustc.edu.cn/msys2/mingw/x86_64/
mirrorlist. Add a line to the msys file, server= http://mirrors.ustc.edu.cn/msys2/msys/ $arch/
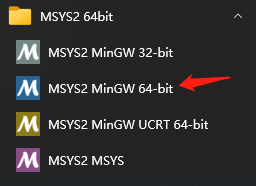
3. Find MSYS 64bit in win10 menu and start msys2 MinGW 64 bit
4. Recognize and give orders
Pacman - SYU = > synchronize the software library and update the system to the latest state
pacman -S package_ name1 package_ Name2 = > install or upgrade a single package or a list of packages (including dependent packages)
pacman -R package_ Name = > delete a single package
pacman -Rs package_ Name = > delete the specified software package and all its dependencies that are not used by other installed software packages
5. Enter pacman -Syu to update the software library, and then directly click the close button to close the window
6. Repeat step 2 (at this time, three files in step 2 are overwritten due to updating the software library)
7. Use the command to install necessary software such as mingw64 (one by one)
pacman -S gcc

pacman -S mingw-w64-x86_64-toolchain

pacman -S mingw-w64-i686-toolchain

pacman -S mingw-w64-x86_64-SDL2

pacman -S mingw-w64-i686-SDL2

pacman -S base-devel

pacman -S yasm

pacman -S nasm

pacman -S make
=1.2 installation VS=
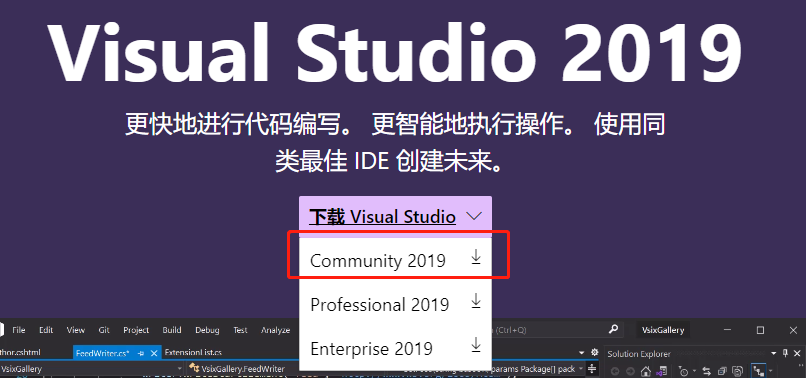
1. Download address: https://visualstudio.microsoft.com/zh-hans/vs/ Select Community Edition
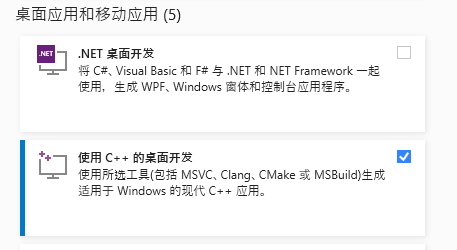
2. Install Visual Studio, "workload" interface, and select different components according to your needs. Because you need to make, you only select "desktop development using C + +" and "installation details" on the right. If there are no special needs, you can use the default configuration. The default of "language pack" is simplified Chinese, and the "installation location" is modified according to the directory.
3. Wait until the selected components are downloaded. The process may be slow. Just wait patiently.
1.3 installation of pcre
Download address: https://strawberryperl.com/download/5.32.1.1/strawberry-perl-5.32.1.1-64bit.msi
Pay attention to the installation path
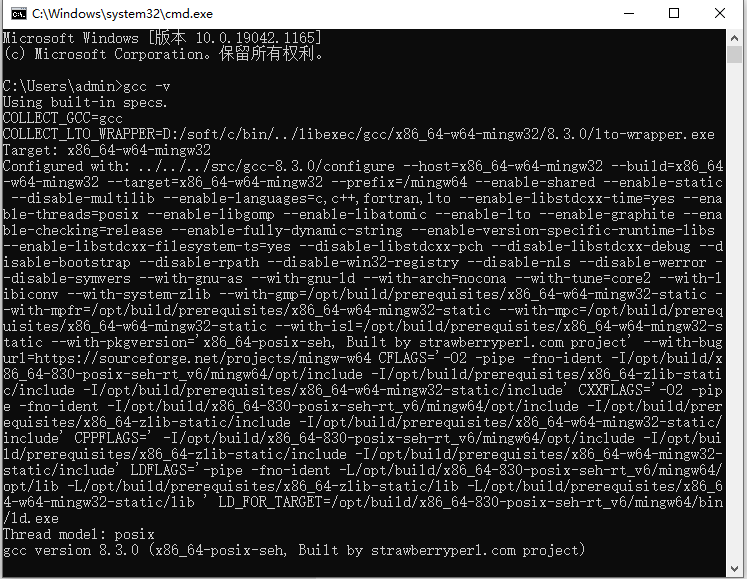
1.4 inspection environment
1.4 download nginx source code and related packages
Download address: https://codeload.github.com/nginx/nginx/zip/refs/tags/release-1.20.1
http://nginx.org/download/nginx-1.20.1.tar.gz
Download zlib:http://www.zlib.net/zlib-1.2.11.tar.gz
Download PCRE:https://ftp.pcre.org/pub/pcre/pcre-8.45.tar.gz
Download opensll:http://distfiles.macports.org/openssl/openssl-1.1.1j.tar.gz
Filter module: git clone https://github.com/yaoweibin/ngx_http_substitutions_filter_module
be careful:
1.PCRE please download pcre-8 series instead of pcre2 series, otherwise it will not be compiled at all.
2. Please download three pcres, zlib and OpenSSL tar.gz end of the source package, do not download zip package.
2. Compile and install
2.1 create relevant directories and unzip them to the corresponding path
It is recommended to use 7-zip for decompression if one is not installed
Create D:\snt\soft\nginx
Unzip the nginx source code to this path
To create nginx install under the nginx path, you can use commands or operate in the graphical interface
admin@DESKTOP-I77Q7HO MINGW64 ~
$ cd D:/snt/soft/nginx/

admin@DESKTOP-I77Q7HO MSYS /d/snt/soft/nginx/
$ ls
nginx-1.20.1

admin@DESKTOP-I77Q7HO MSYS /d/snt/soft/nginx/nginx-1.20.1
$ mkdir nginx-install

admin@DESKTOP-I77Q7HO MSYS /d/snt/soft/nginx/nginx-1.20.1
$ ls
nginx-1.20.1  nginx-install
admin@DESKTOP-I77Q7HO MSYS /d/snt/soft/nginx/nginx-1.20.1
$ cd nginx-1.20.1

admin@DESKTOP-I77Q7HO MSYS /d/snt/soft/nginx/nginx-1.20.1
$ ls
auto  conf  contrib  docs  misc  src

admin@DESKTOP-I77Q7HO MSYS /d/snt/soft/nginx/nginx-1.20.1
$ ls auto/
cc          feature       include  make     options  summary
configure   have          init     module   os       threads
define      have_headers  install  modules  sources  types
endianness  headers       lib      nohave   stubs    unix
Unzip the module and the required package to the D:\snt\soft\nginx\nginx-1.20.1\objs\lib path. If you don't have this folder, please create it yourself

2.2 compilation
2.2.1 generate Makefile
Note that msys software needs to be used here. Note that 64 bits should be selected
admin@DESKTOP-I77Q7HO MINGW64 /d/snt/soft/nginx/nginx-1.20.1
$ auto/configure \
 --prefix="D:/snt/soft/nginx/nginx-install" \
 --with-cc=cl --with-debug --prefix= --conf-path=conf/nginx.conf \
 --pid-path=logs/nginx.pid --http-log-path=logs/access.log \
 --error-log-path=logs/error.log --sbin-path=nginx.exe \
 --http-client-body-temp-path=temp/client_body_temp \
 --http-proxy-temp-path=temp/proxy_temp \
 --http-fastcgi-temp-path=temp/fastcgi_temp \
 --http-scgi-temp-path=temp/scgi_temp \
 --http-uwsgi-temp-path=temp/uwsgi_temp \
 --with-cc-opt=-DFD_SETSIZE=1024 --with-pcre=objs/lib/pcre-8.45 \
 --with-zlib=objs/lib/zlib-1.2.11 --with-openssl=objs/lib/openssl-1.1.1j \
 --with-openssl-opt=no-asm --with-http_ssl_module \
 --with-http_sub_module --add-module=objs/lib/ngx_http_substitutions_filter_module
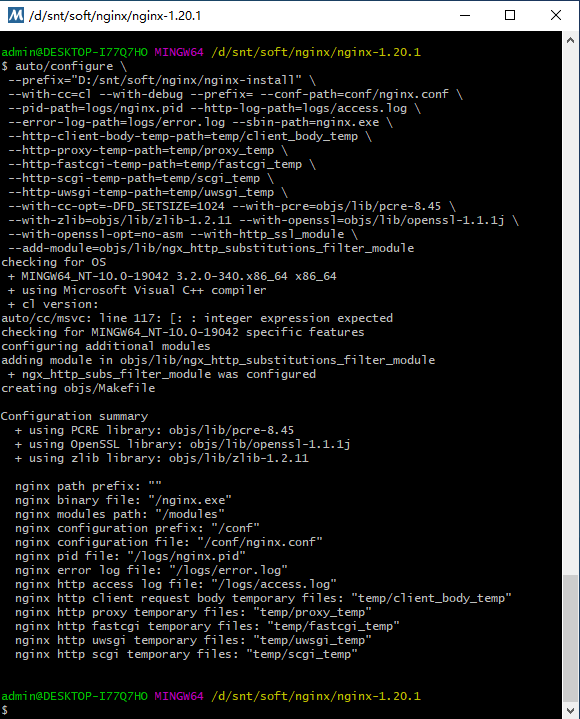
The following display is normal
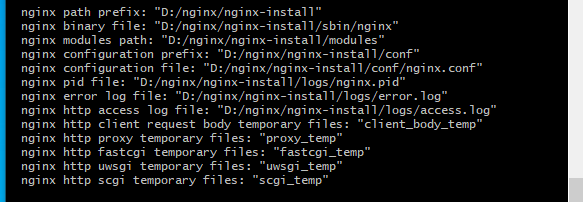
2.2.2 compilation
Next, continue to execute the command:
Note that you need to use vs here, because you need some libraries of the system during the compilation process.
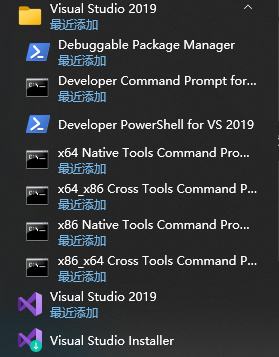
cd D:\snt\soft\nginx\nginx-1.20.1\

nmake -f objs/Makefile
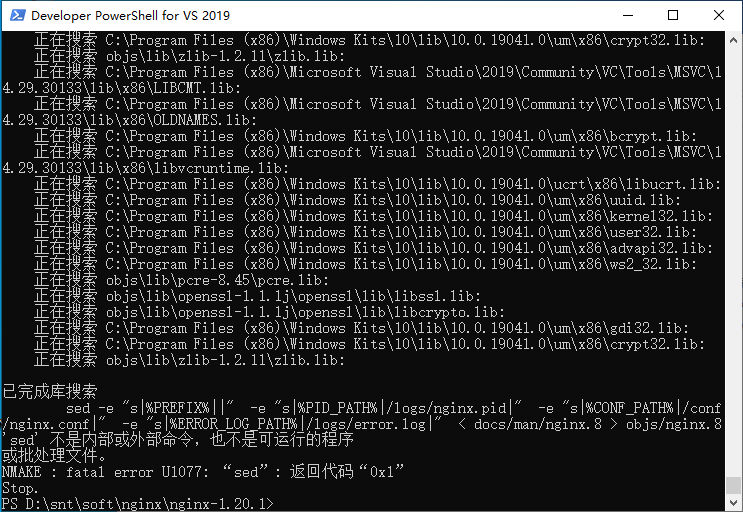
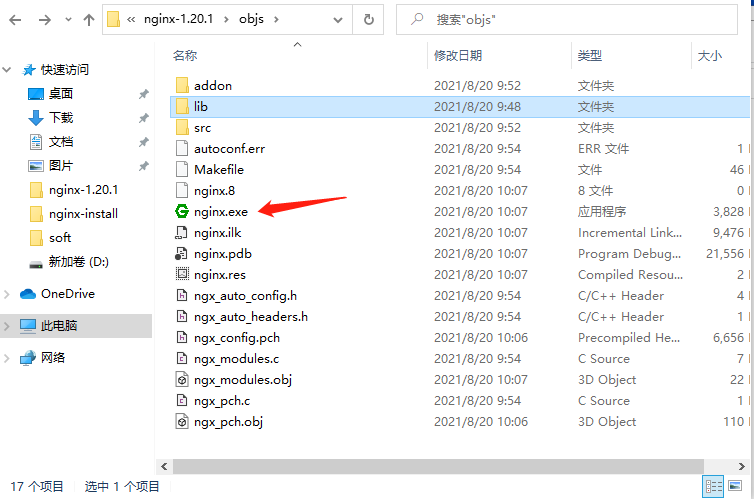
The execution time is relatively long, which is normal. If there is no error, after a few minutes, you will be prompted that the reference sed cannot be found. It doesn't matter if the SED command is not executed. exe will be generated in nginx-1.20.1\objs \ directory.
2.2.3 create nginx installation directory and start
Execute after completion:
1. Create a new nginx install folder (if it has been created, please ignore it)
2. Copy the conf and contrib directories in the source code to nginx install
3. Copy the html directory in the official compiled version to nginx install
Download address: http://nginx.org/download/nginx-1.20.1.zip
4. Copy nginx generated in objs directory exe
5. Create new logs, temp and ssl folders
6. Create crt and key to ssl directory
Create an ssl folder under D:\nginx to store the certificate and create the private key (it is recommended to use the system window instead of gitBash. gitBash cannot be selected if it involves selection)
openssl genrsa -des3 -out shidian.key 1024 //shidian took his own name

In these two steps, you need to enter the password. After entering the password, enter the confirmation password again. Remember this password, which will be used later.
Enter pass phrase for shidian.key:
Verifying - Enter pass phrase for shidian.key:

View the key in ssl Directory:

Create csr certificate
openssl req -new -key shidian.key -out shidian.csr (key The file is just generated, shidian.csr (for custom file name)
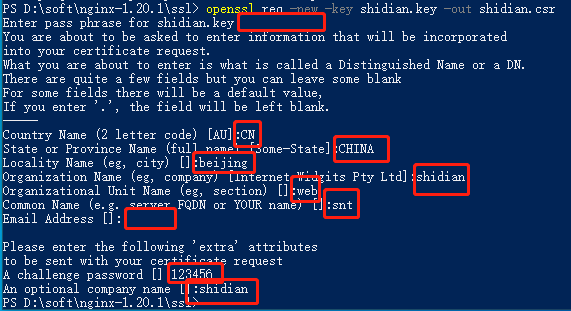
As shown in the figure above, you need to enter information after executing the above command. The most important information entered is Common Name. The domain name entered here is the domain name we want to access using https.
View csr file:
After the above steps are completed, two files appear in the ssl folder

Remove password
Remove the required password when loading nginx supported by SSL and using the above private key, otherwise you need to enter the password when starting nginx.
Copy Shidian Key and rename it Shidian key. org
You can use this command line or use the mouse to operate copy Shidian key shidian. key. org
Remove the password and execute this command on the command line: OpenSSL RSA - in Shidian key. org -out shidian. Key (Shidian is the custom file name)
As shown in the figure below, this command needs to enter the password just set

Generate CRT certificate OpenSSL x509 - req - Days 365 - in Shidian csr -signkey shidian. key -out shidian. crt

The final generated certificate is as follows:

test
Modify nginx configuration
Remember to back up before modifying the configuration file
upstream nodejs__upstream2 {
	server 127.0.0.1:8080; # I use the port name that needs to be monitored
	keepalive 64;
}

server {
	listen 443 ssl;
	server_name localhost; # Configured https domain name

	ssl_certificate      D:/soft/soft/nginx-1.20.1/ssl/shidian.crt;  # This is the directory where the crt file of the certificate is located
	ssl_certificate_key  D:/soft/soft/nginx-1.20.1/ssl/shidian.key;  # The key directory is where the certificate is located

	ssl_session_cache    shared:SSL:1m;
	ssl_session_timeout  5m;

	ssl_ciphers  HIGH:!aNULL:!MD5;
	ssl_prefer_server_ciphers  on;

 location / {
     root   html;
     index  index.html index.htm;
           }
 }
}
Restart ngingx
.\nginx.exe -s reload

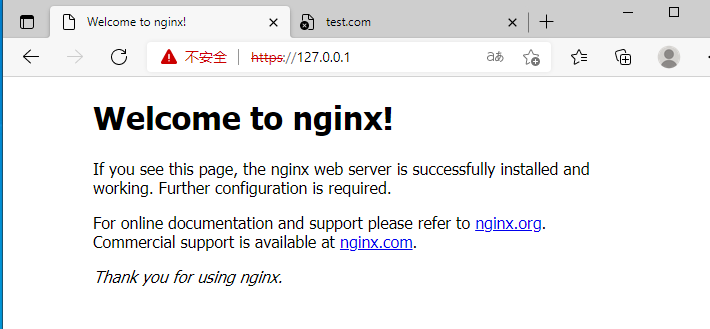
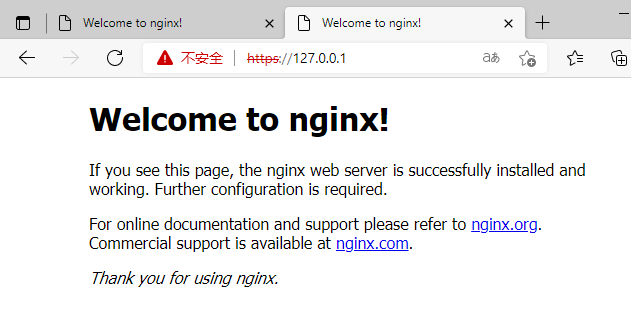
visit https://127.0.0.1/ Test
Or directly copy the crt and key of the created number to the ssl directory
7. View directory
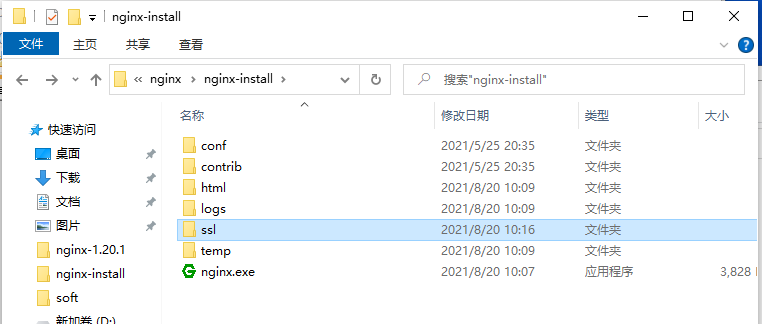
This can start nginx Exe to check whether there is an error. Visit localhost or 127.0.0.1.
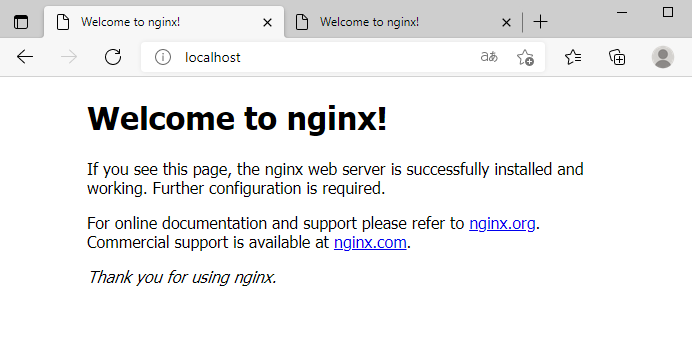
Check whether https is successful:
Cancel the comment of 443 in the configuration file and add crt and key
server {
    listen       443 ssl;
    server_name  localhost;

    ssl_certificate      D:/snt/soft/nginx/nginx-install/ssl/server.crt;
    ssl_certificate_key  D:/snt/soft/nginx/nginx-install/ssl/server.key;

    ssl_session_cache    shared:SSL:1m;
    ssl_session_timeout  5m;

    ssl_ciphers  HIGH:!aNULL:!MD5;
    ssl_prefer_server_ciphers  on;

    location / {
        root   html;
        index  index.html index.htm;
    }
}
Restart nginx exe
admin@DESKTOP-I77Q7HO MINGW64 /d/snt/soft/nginx/nginx-install
$ ./nginx.exe -s reload

View version and module
admin@DESKTOP-I77Q7HO MINGW64 /d/snt/soft/nginx/nginx-install
$ ./nginx.exe -V
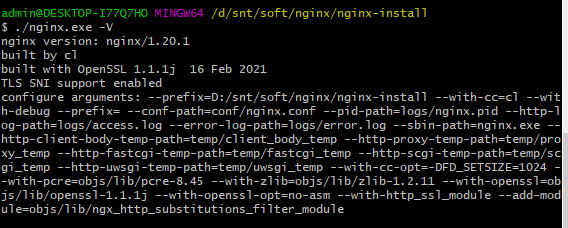
At this point, Nginx is installed in the D: / SNT / soft / Nginx / Nginx install directory.
Reference documents
https://blog.csdn.net/qq_24054301/article/details/112131057
https://www.zeelis.com/t/289.html
https://blog.csdn.net/weixin_34387468/article/details/90104406
https://blog.csdn.net/skymouse2002/article/details/88971071?share_token=2bb5274e-9aa4-46c5-aca1-f12ea625623c&tt_from=copy_link&utm_source=copy_link&utm_medium=toutiao_android&utm_campaign=client_share
Reference documents
https://www.cnblogs.com/jiangwangxiang/p/8481661.html
https://blog.csdn.net/renanrenan/article/details/83304557
https://www.cnblogs.com/luxiaoyao/p/10034009.html