Nightingale is a new generation of domestic intelligent monitoring system. It has good support for cloud native scenes and traditional physical machine virtual machine scenes. It is built in 10 minutes and familiar with the use in 1 hour. It has withstood the verification of massive data in didi production environment. It hopes to build a benchmark for domestic monitoring. At present, it is V5 0. From this version, it has done collaborative integration with Prometheus, VictoriaMetrics, Grafana, Telegraf and other ecosystems, and strive to build the best open source operation and maintenance monitoring system in China.
text
If it is only for quick testing, Docker deployment is the fastest, but many friends may not have Docker environment. In addition, in order to reduce the introduction of more technology stacks and enhance the stability of the production environment, some friends may not want to use Docker. This article will explain how to quickly deploy the stand-alone version. The supporting timing library of the stand-alone version uses Prometheus. If there are thousands of machines and hundreds of services to be monitored, and the capacity of the single version cannot be met, you can use the cluster version. It is recommended to use VictoriaMetrics or M3DB for the timing library of the cluster version. However, the architecture of M3DB is more complex and many friends can't handle it. Choosing simple VictoriaMetrics is enough for most companies. Let's take a look at the server architecture first:
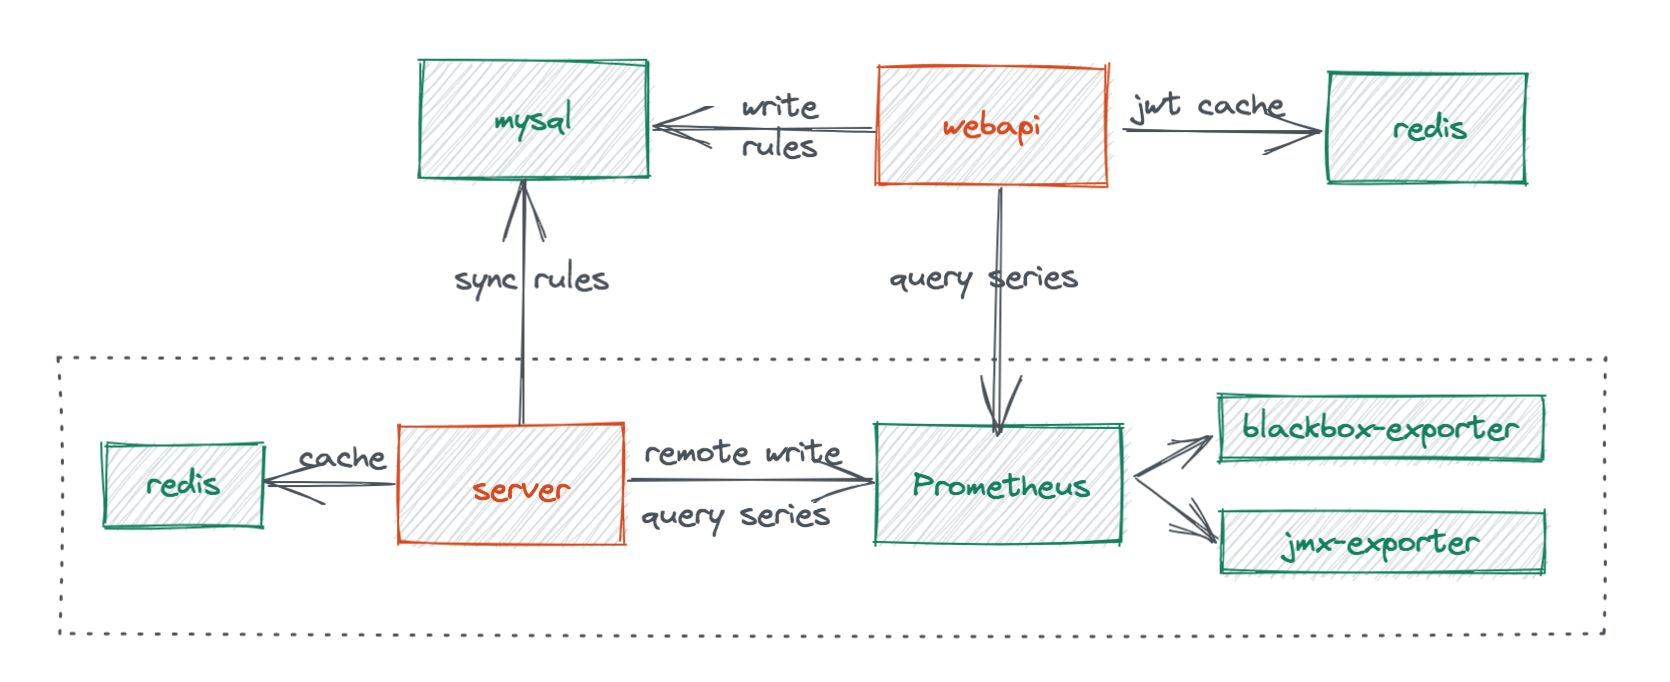
- Core module server: server is used for alarm. It will synchronize alarm rules from the database, and then read Prometheus data for alarm judgment. The server can also receive the monitoring data report, and then write to multiple timing libraries through the remote write protocol. The server also relies on redis, which stores the heartbeat information of the server itself and the monitoring object.
- Core module webapi: provide restful api for interacting with front-end JavaScript, write some user configuration class information into mysql, use jwt for authentication, and use redis to store jwt's token. In the mode of stand-alone deployment, redis of server and redis of webapi can be reused.
Article environment
- CentOS 8
- Redis
- Prometheus
- VictoriaMetrics
- Mariadb
Machine details in this document
- Hua Weiyun
- n9e(server/webapi/prometheus/mariadb/redis): 192.168.0.99
- VictoriaMetrics: 192.168.0.153
Install front-end software (if any, please ignore)
dnf -y install vim git wget
Install Prometheus
mkdir /opt/prometheus
wget https://s3.jcloud.sjtu.edu.cn/899a892efef34b1b944a19981040f55b-oss01/github-release/prometheus/prometheus/releases/download/v2.33.0/prometheus-2.33.0.linux-amd64.tar.gz
tar xf prometheus-2.33.0.linux-amd64.tar.gz
cp -far prometheus-2.33.0.linux-amd64/* /opt/prometheus/
Create Prometheus service file
cat <<EOF >/etc/systemd/system/prometheus.service
[Unit]
Description="prometheus"
Documentation=https://prometheus.io/
After=network.target

[Service]
Type=simple

ExecStart=/opt/prometheus/prometheus  --config.file=/opt/prometheus/prometheus.yml --storage.tsdb.path=/opt/prometheus/data --web.enable-lifecycle --enable-feature=remote-write-receiver --query.lookback-delta=2m

Restart=on-failure
SuccessExitStatus=0
LimitNOFILE=65536
StandardOutput=syslog
StandardError=syslog
SyslogIdentifier=prometheus


[Install]
WantedBy=multi-user.target
EOF
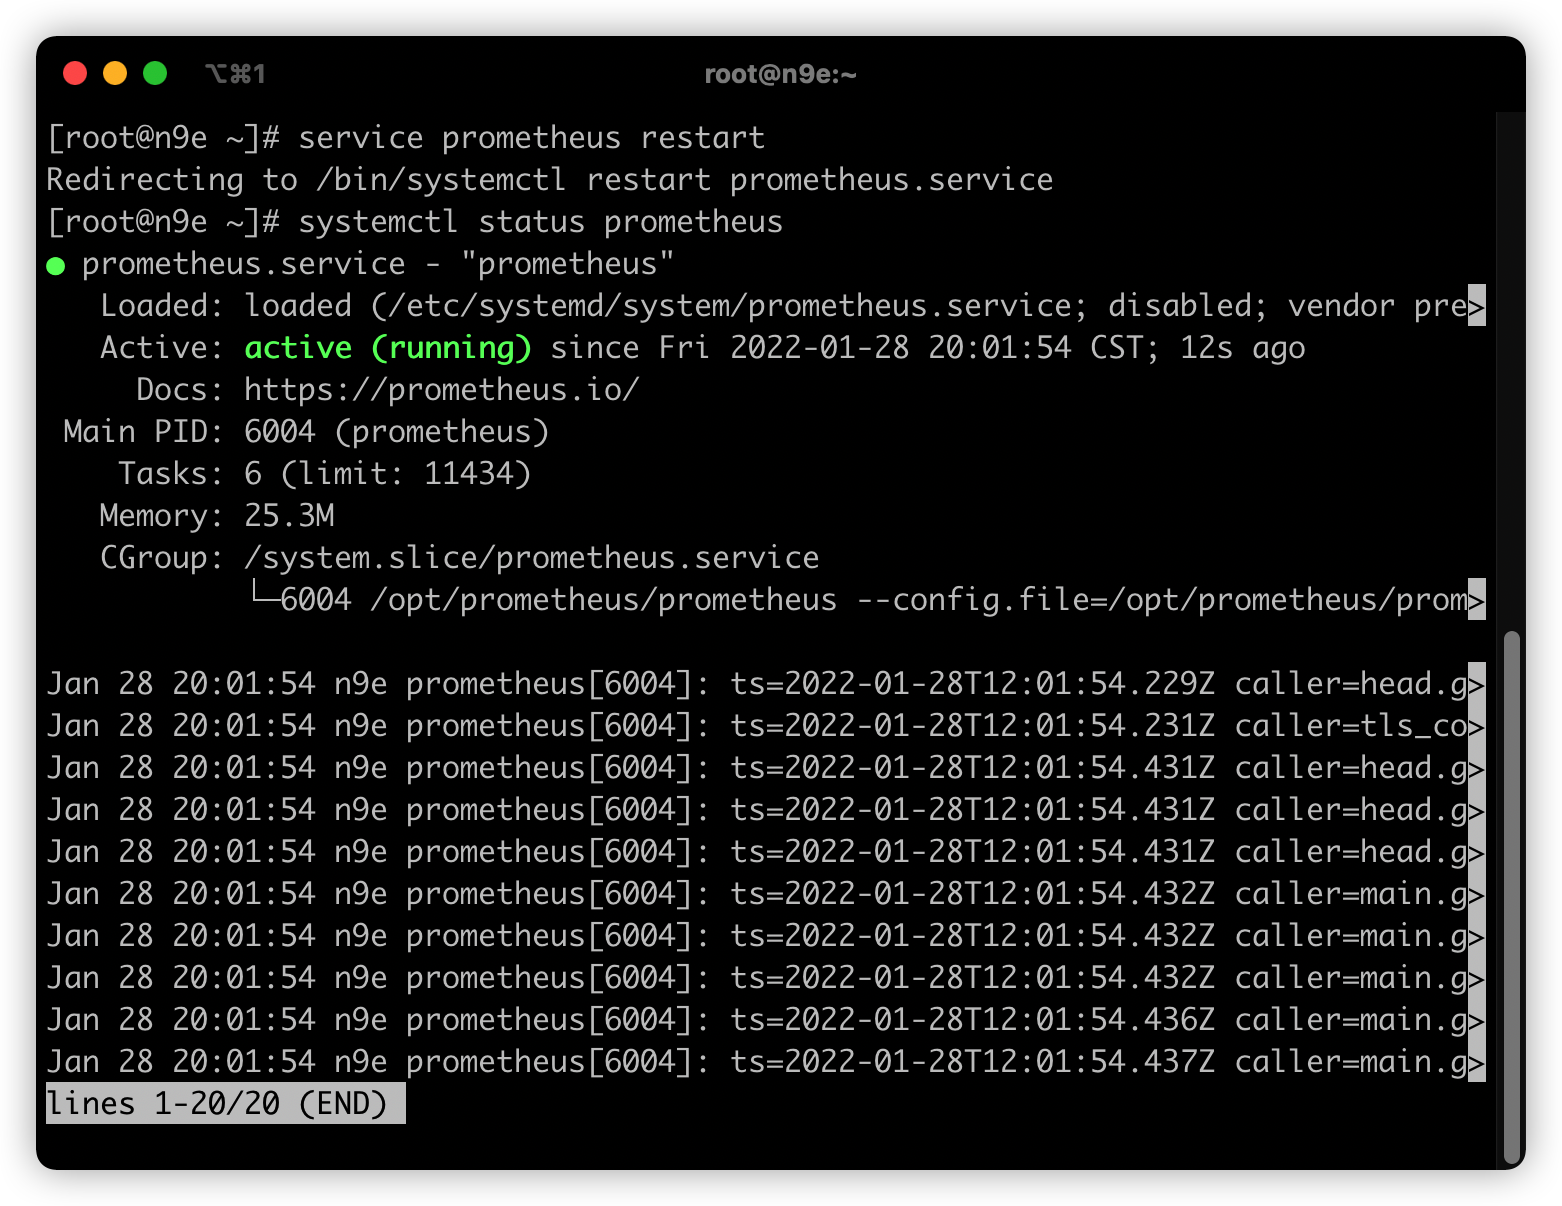
Start Prometheus
systemctl enable prometheus
systemctl restart prometheus
mount this database
dnf -y install mariadb-server
Start the database and set the password
You can set the password yourself. This article is xiaoyu123
systemctl start mariadb
systemctl enable mariadb
mysql -e "SET PASSWORD FOR 'root'@'localhost' = PASSWORD('xiaoyu123');" 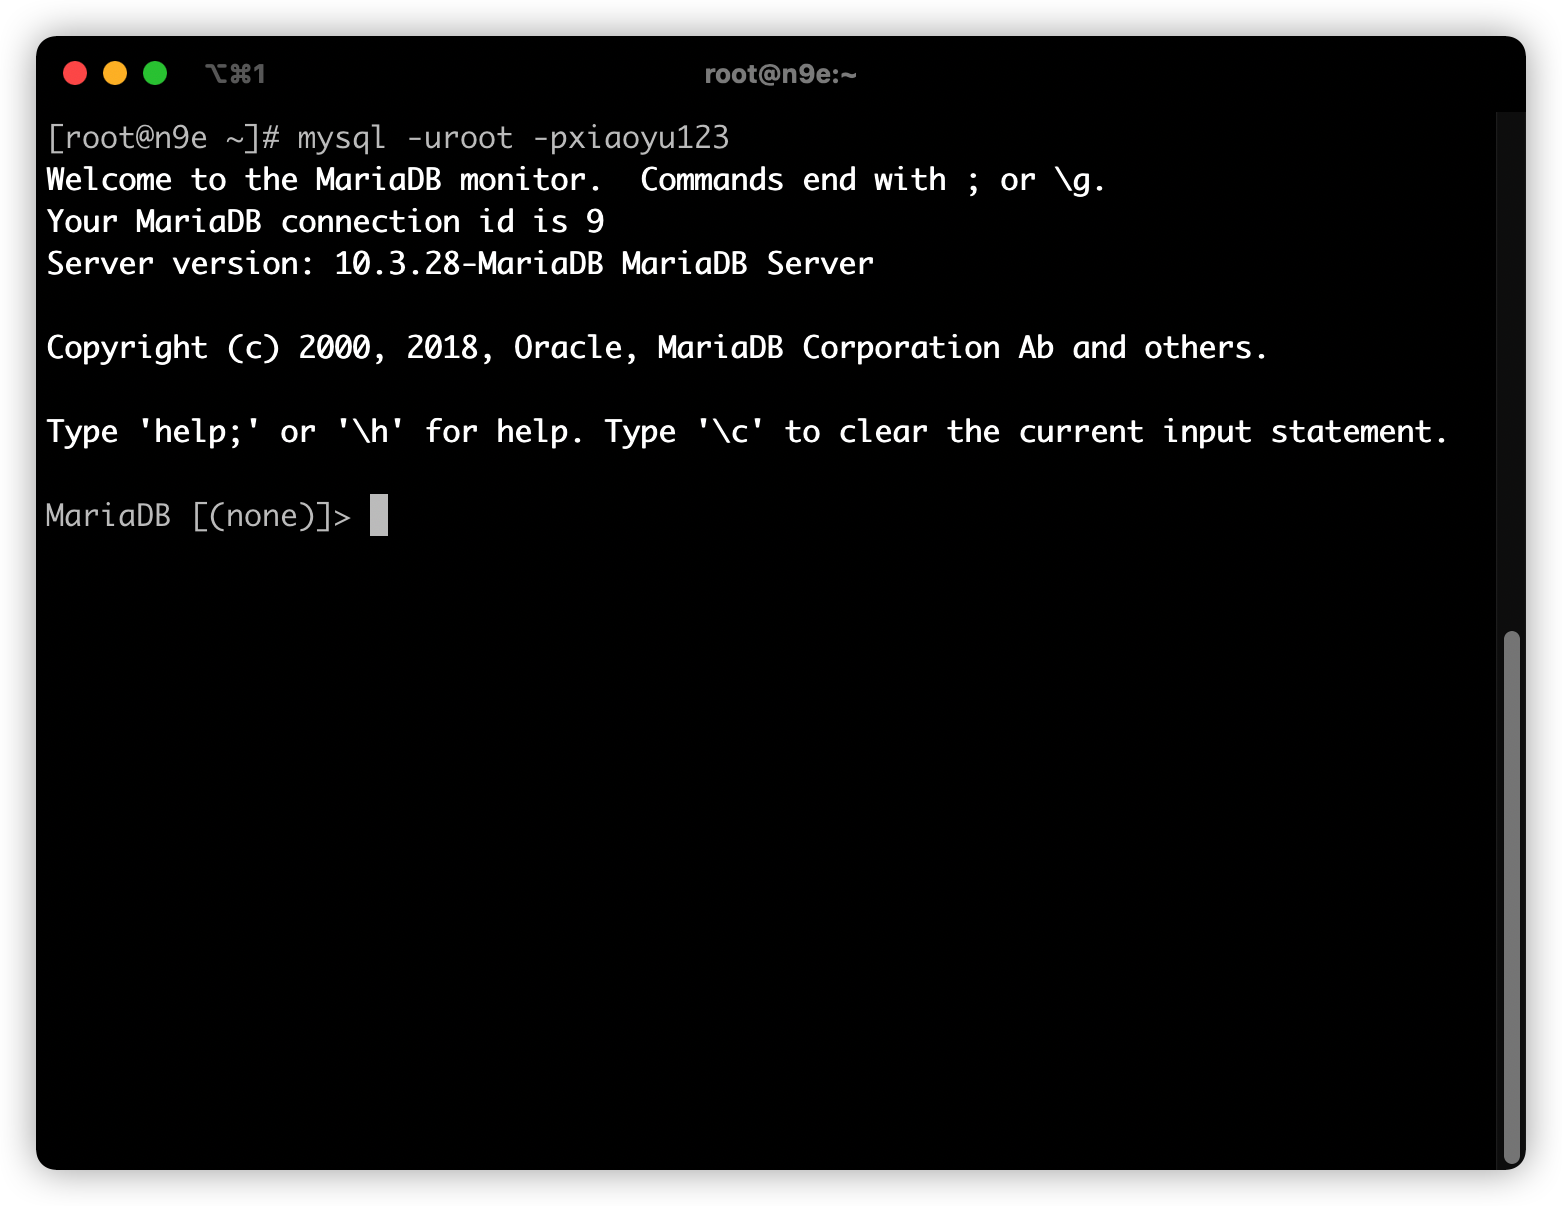
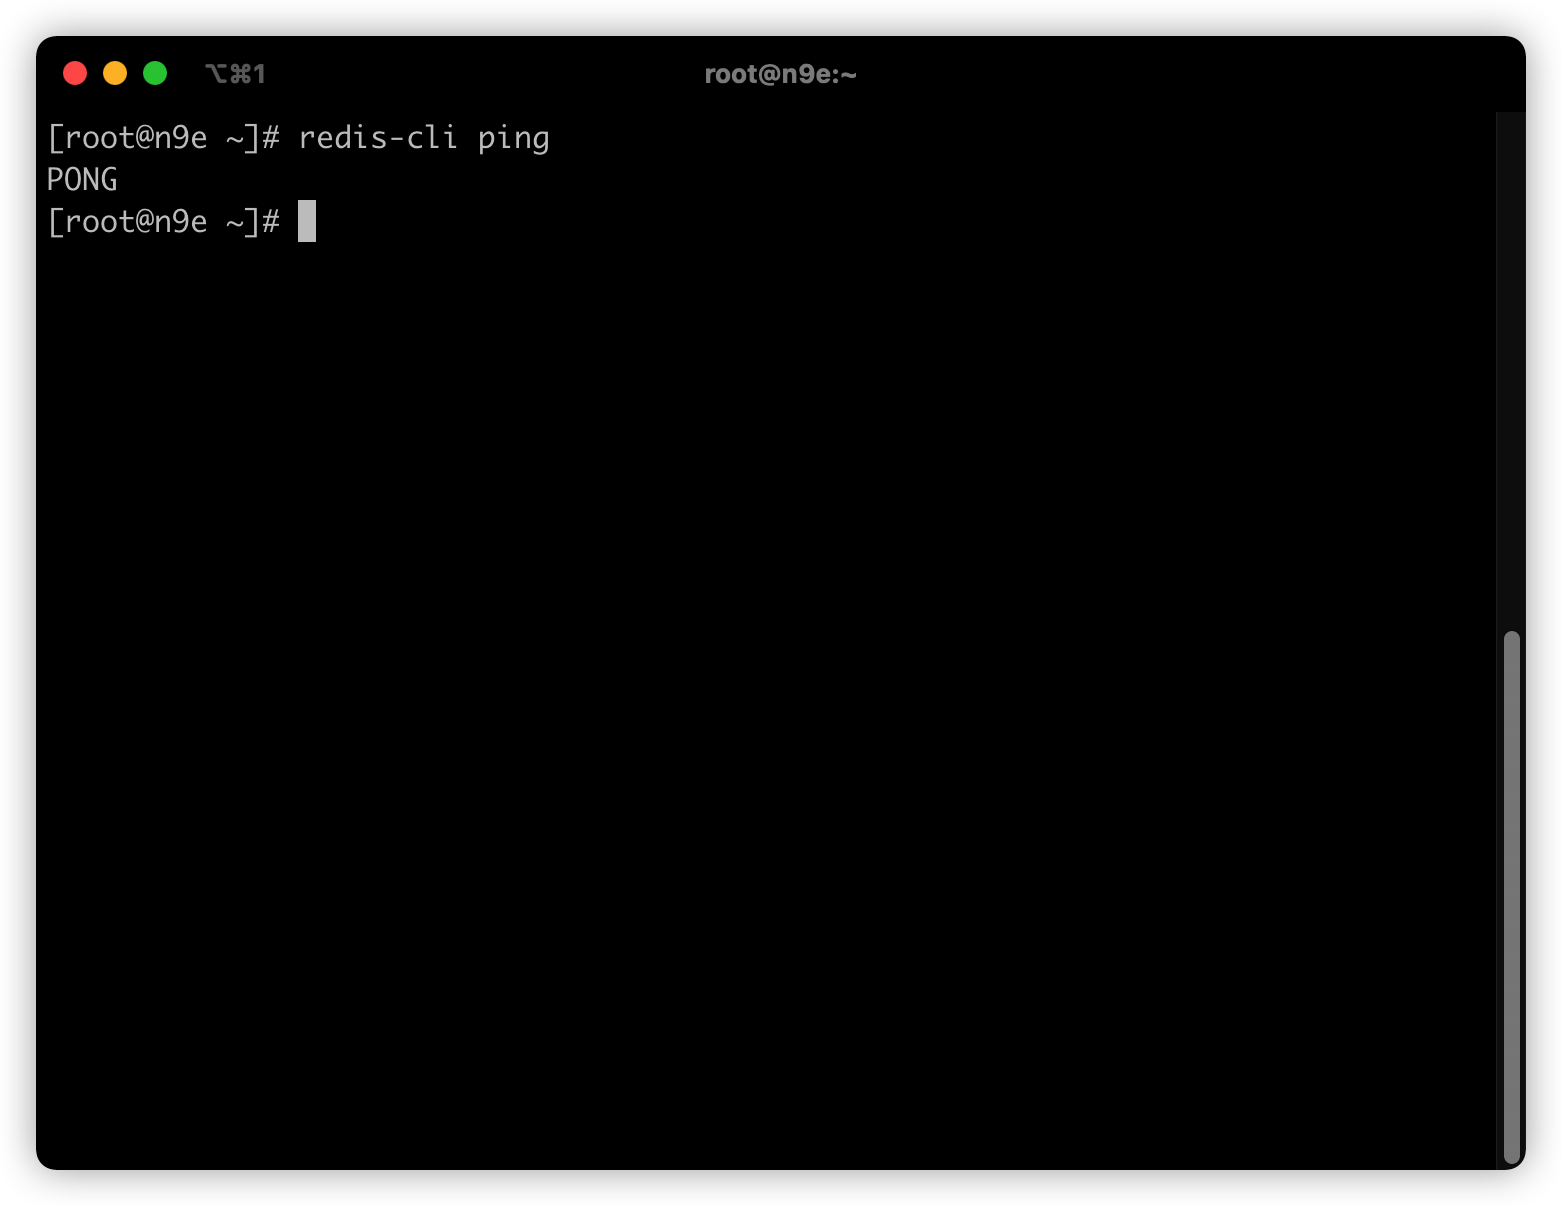
Install redis and start
dnf -y install redis
systemctl start redis
systemctl enable redis
Install Nightingale assembly
mkdir -p /opt/n9e && cd /opt/n9e
wget https://github.com/didi/nightingale/releases/download/v5.3.1/n9e-5.3.1.tar.gz
tar zxvf n9e-5.3.1.tar.gz
Import database file
mysql -uroot -pxiaoyu123 < docker/initsql/a-n9e.sql
Modify Nightingale related configuration
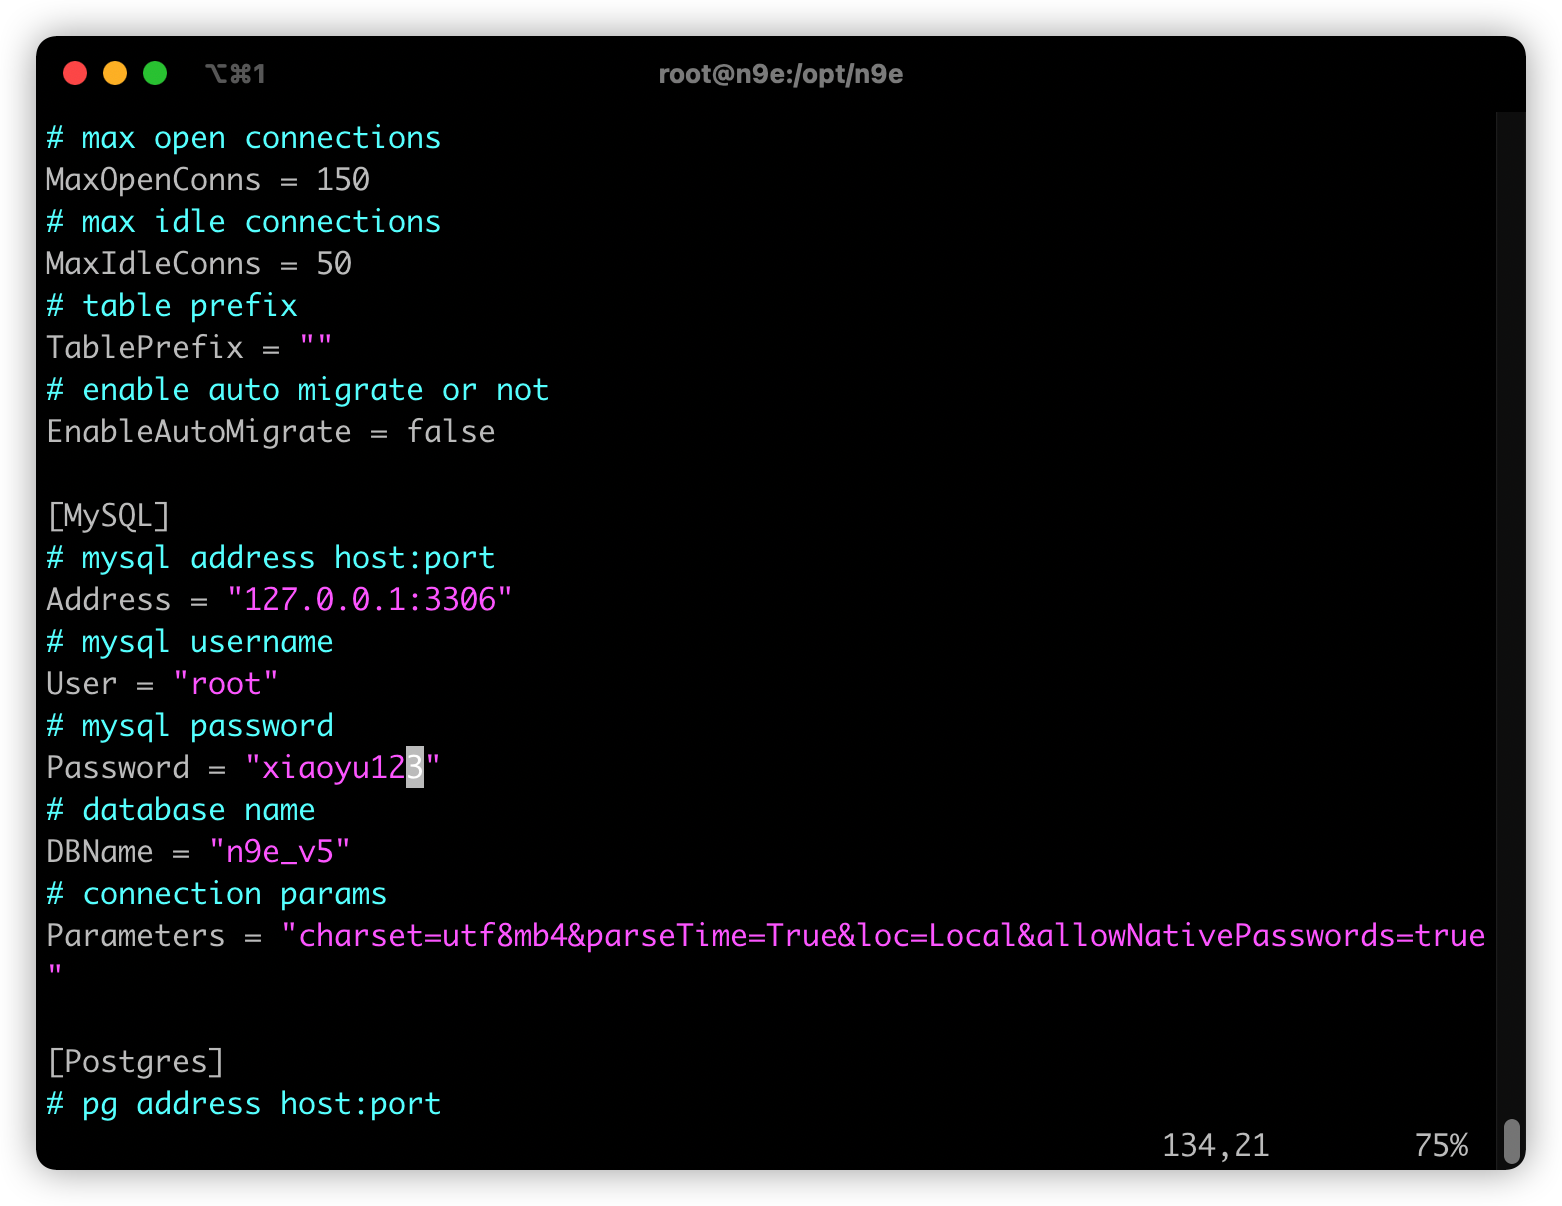
Since the database password of the default configuration file is 1234, it needs to be adjusted.
vim etc/server.conf
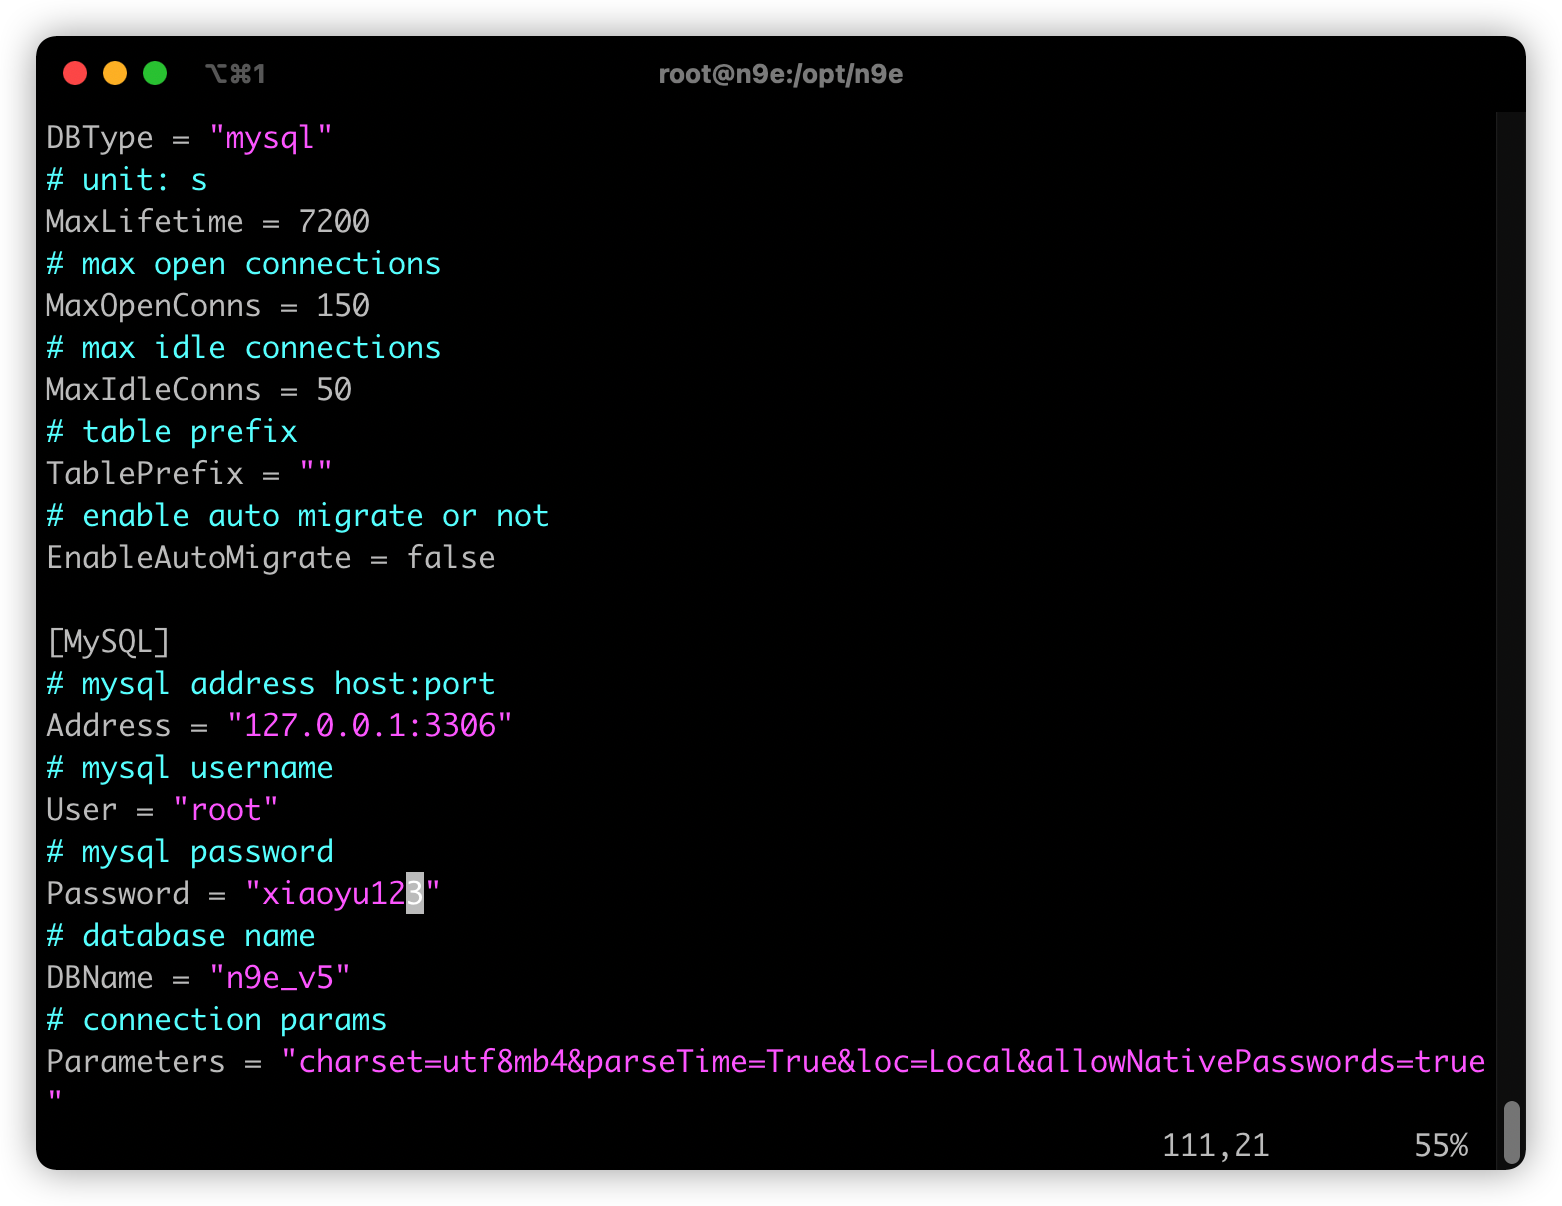
vim etc/webapi.conf
Create service file
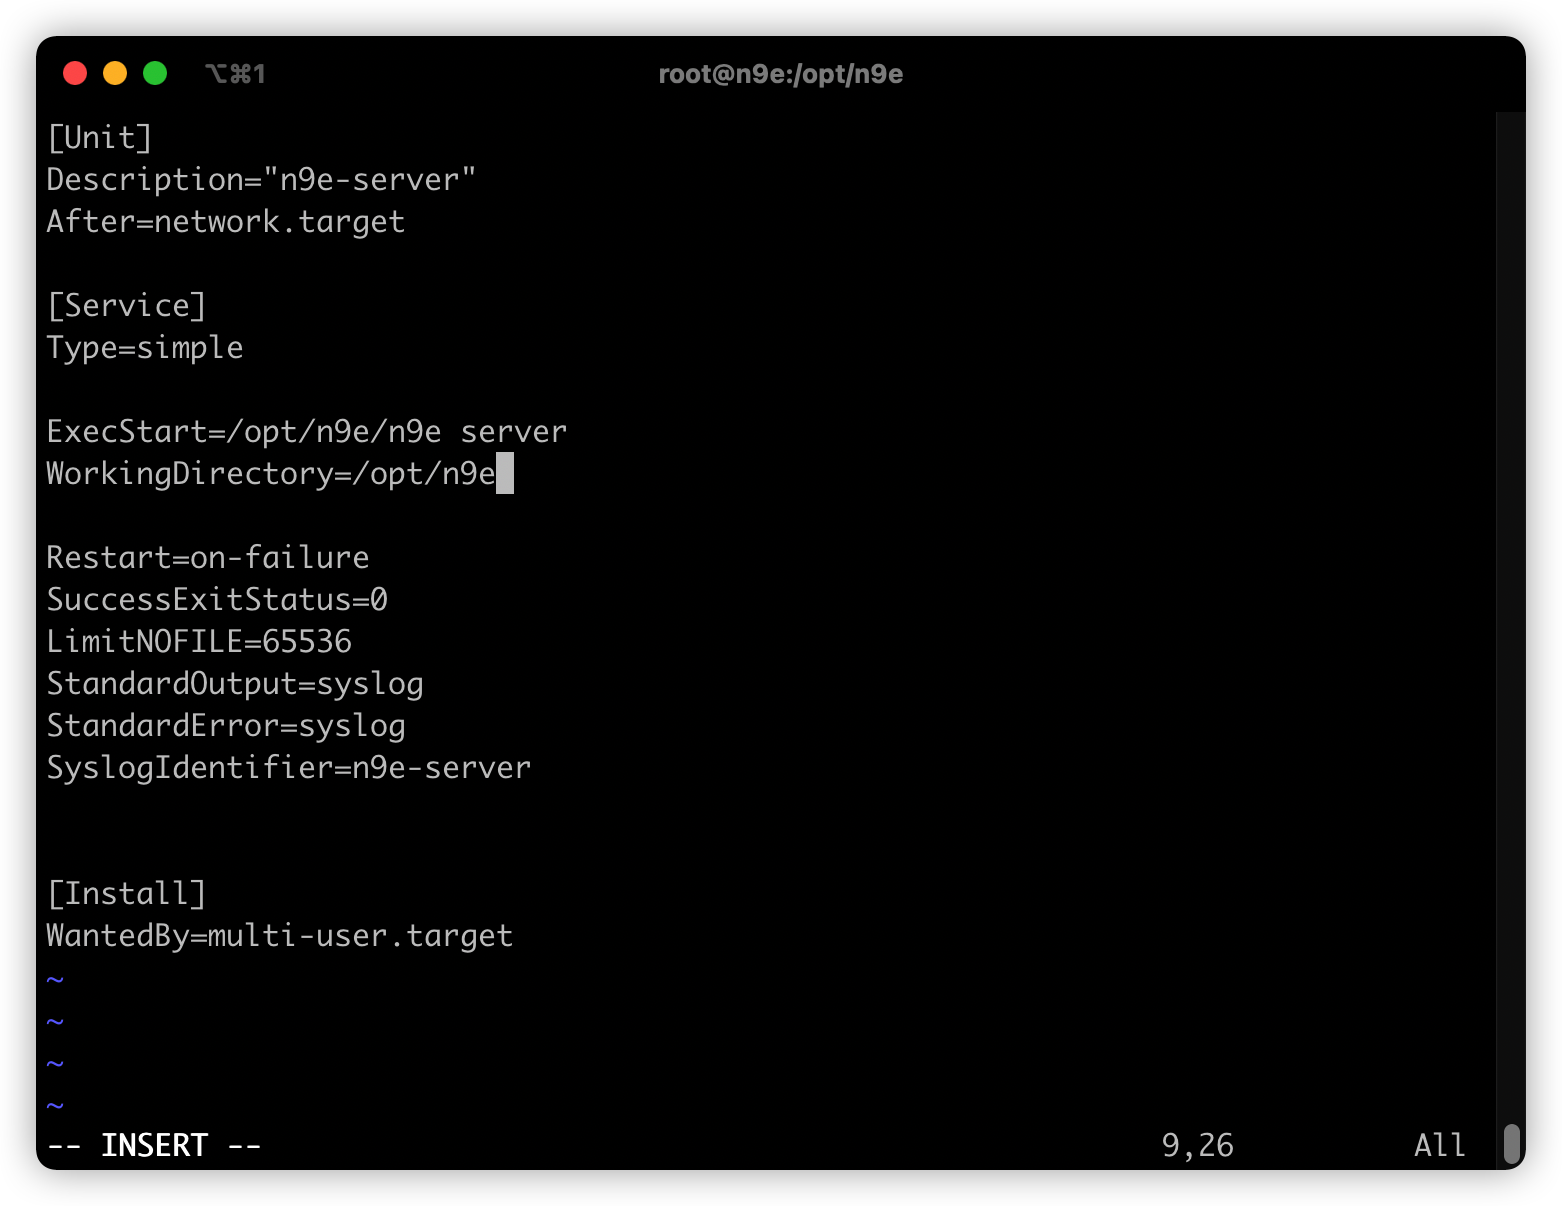
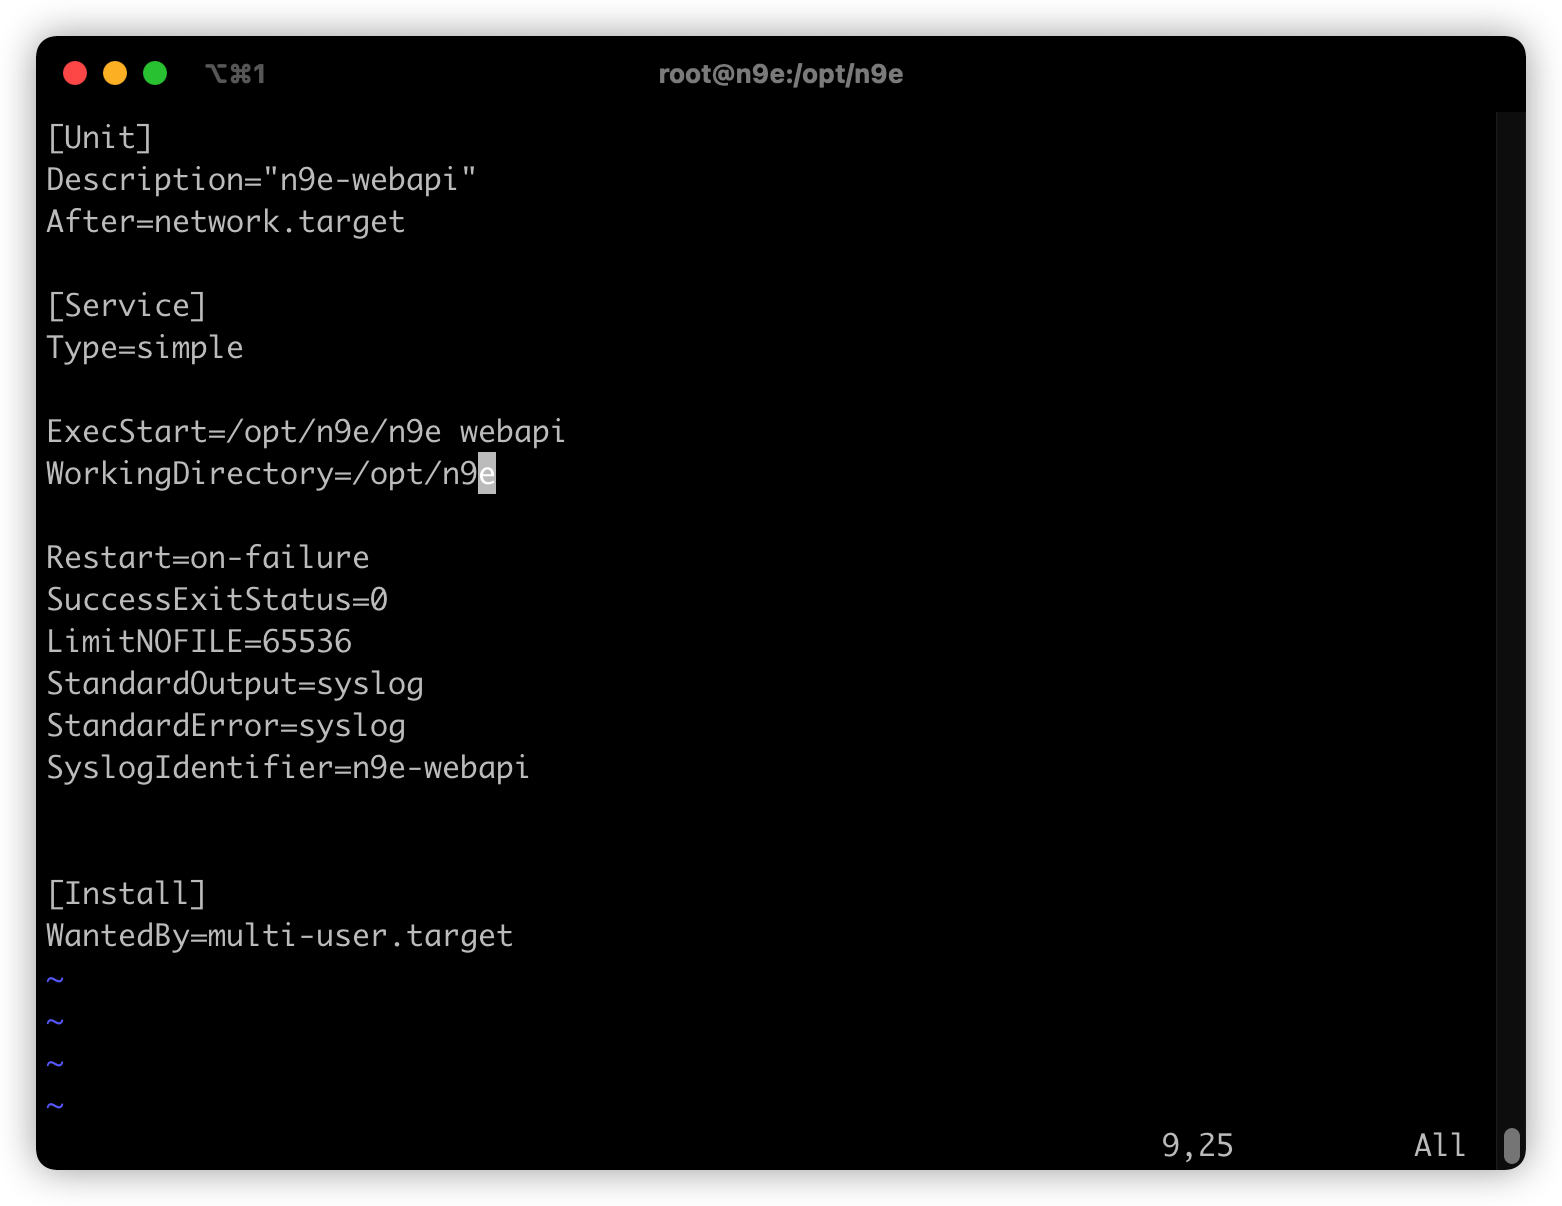
It comes with by default. You only need to adjust the parameters, mainly the startup file path and working directory.
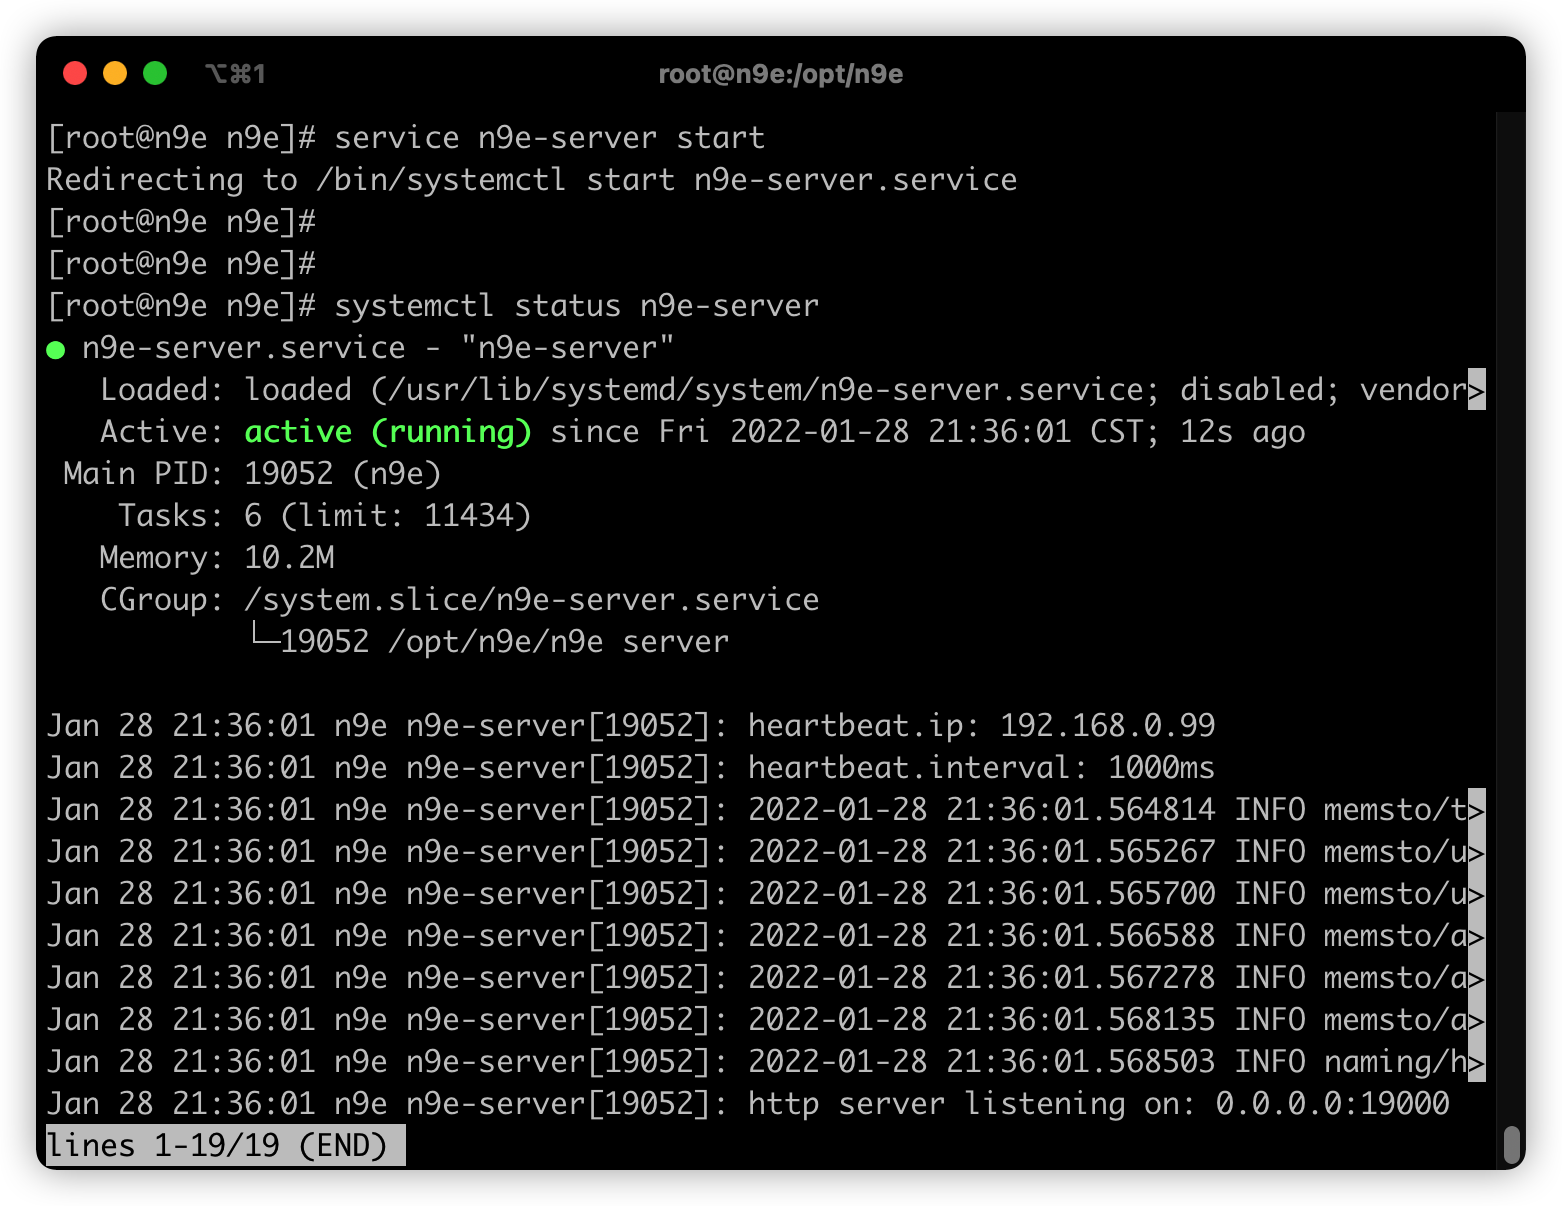
vim etc/service/n9e-server.service
cp etc/service/n9e-server.service /usr/lib/systemd/system/
systemctl start n9e-server
systemctl enable n9e-server
vim etc/service/n9e-webapi.service
cp etc/service/n9e-webapi.service /usr/lib/systemd/system
systemctl start n9e-webapi
systemctl enable n9e-webapi
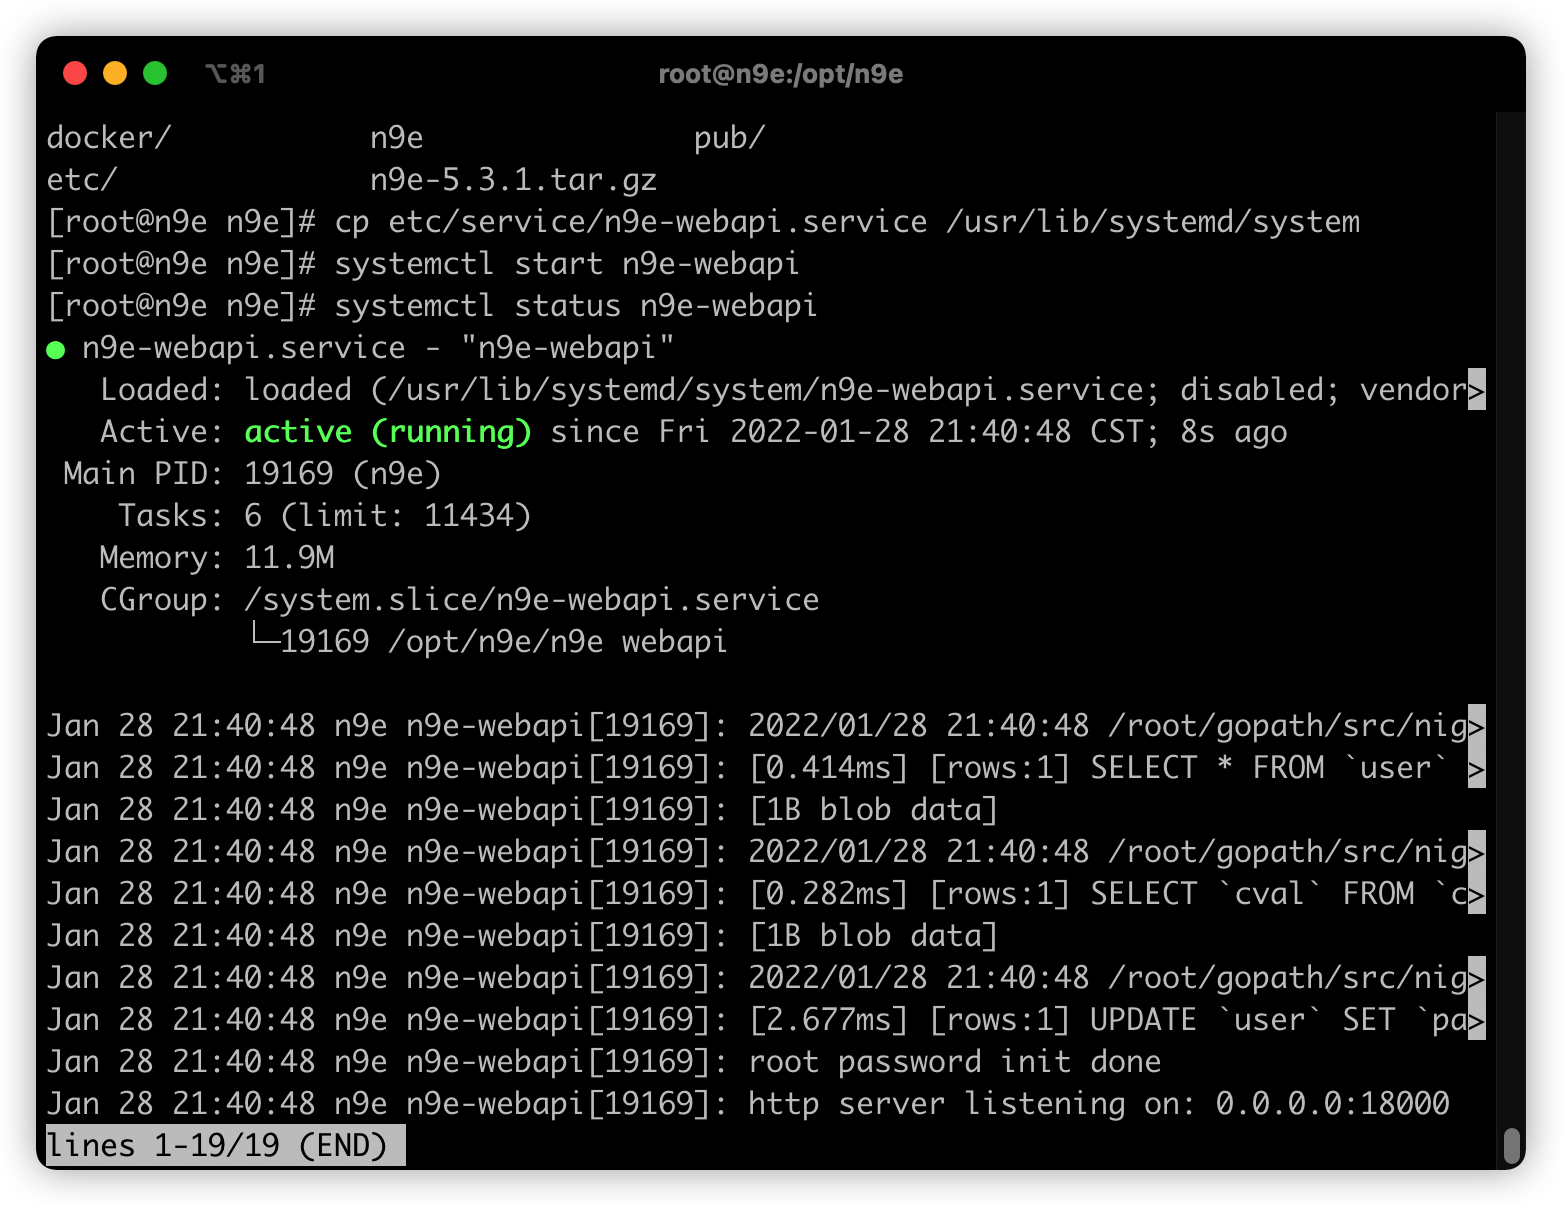
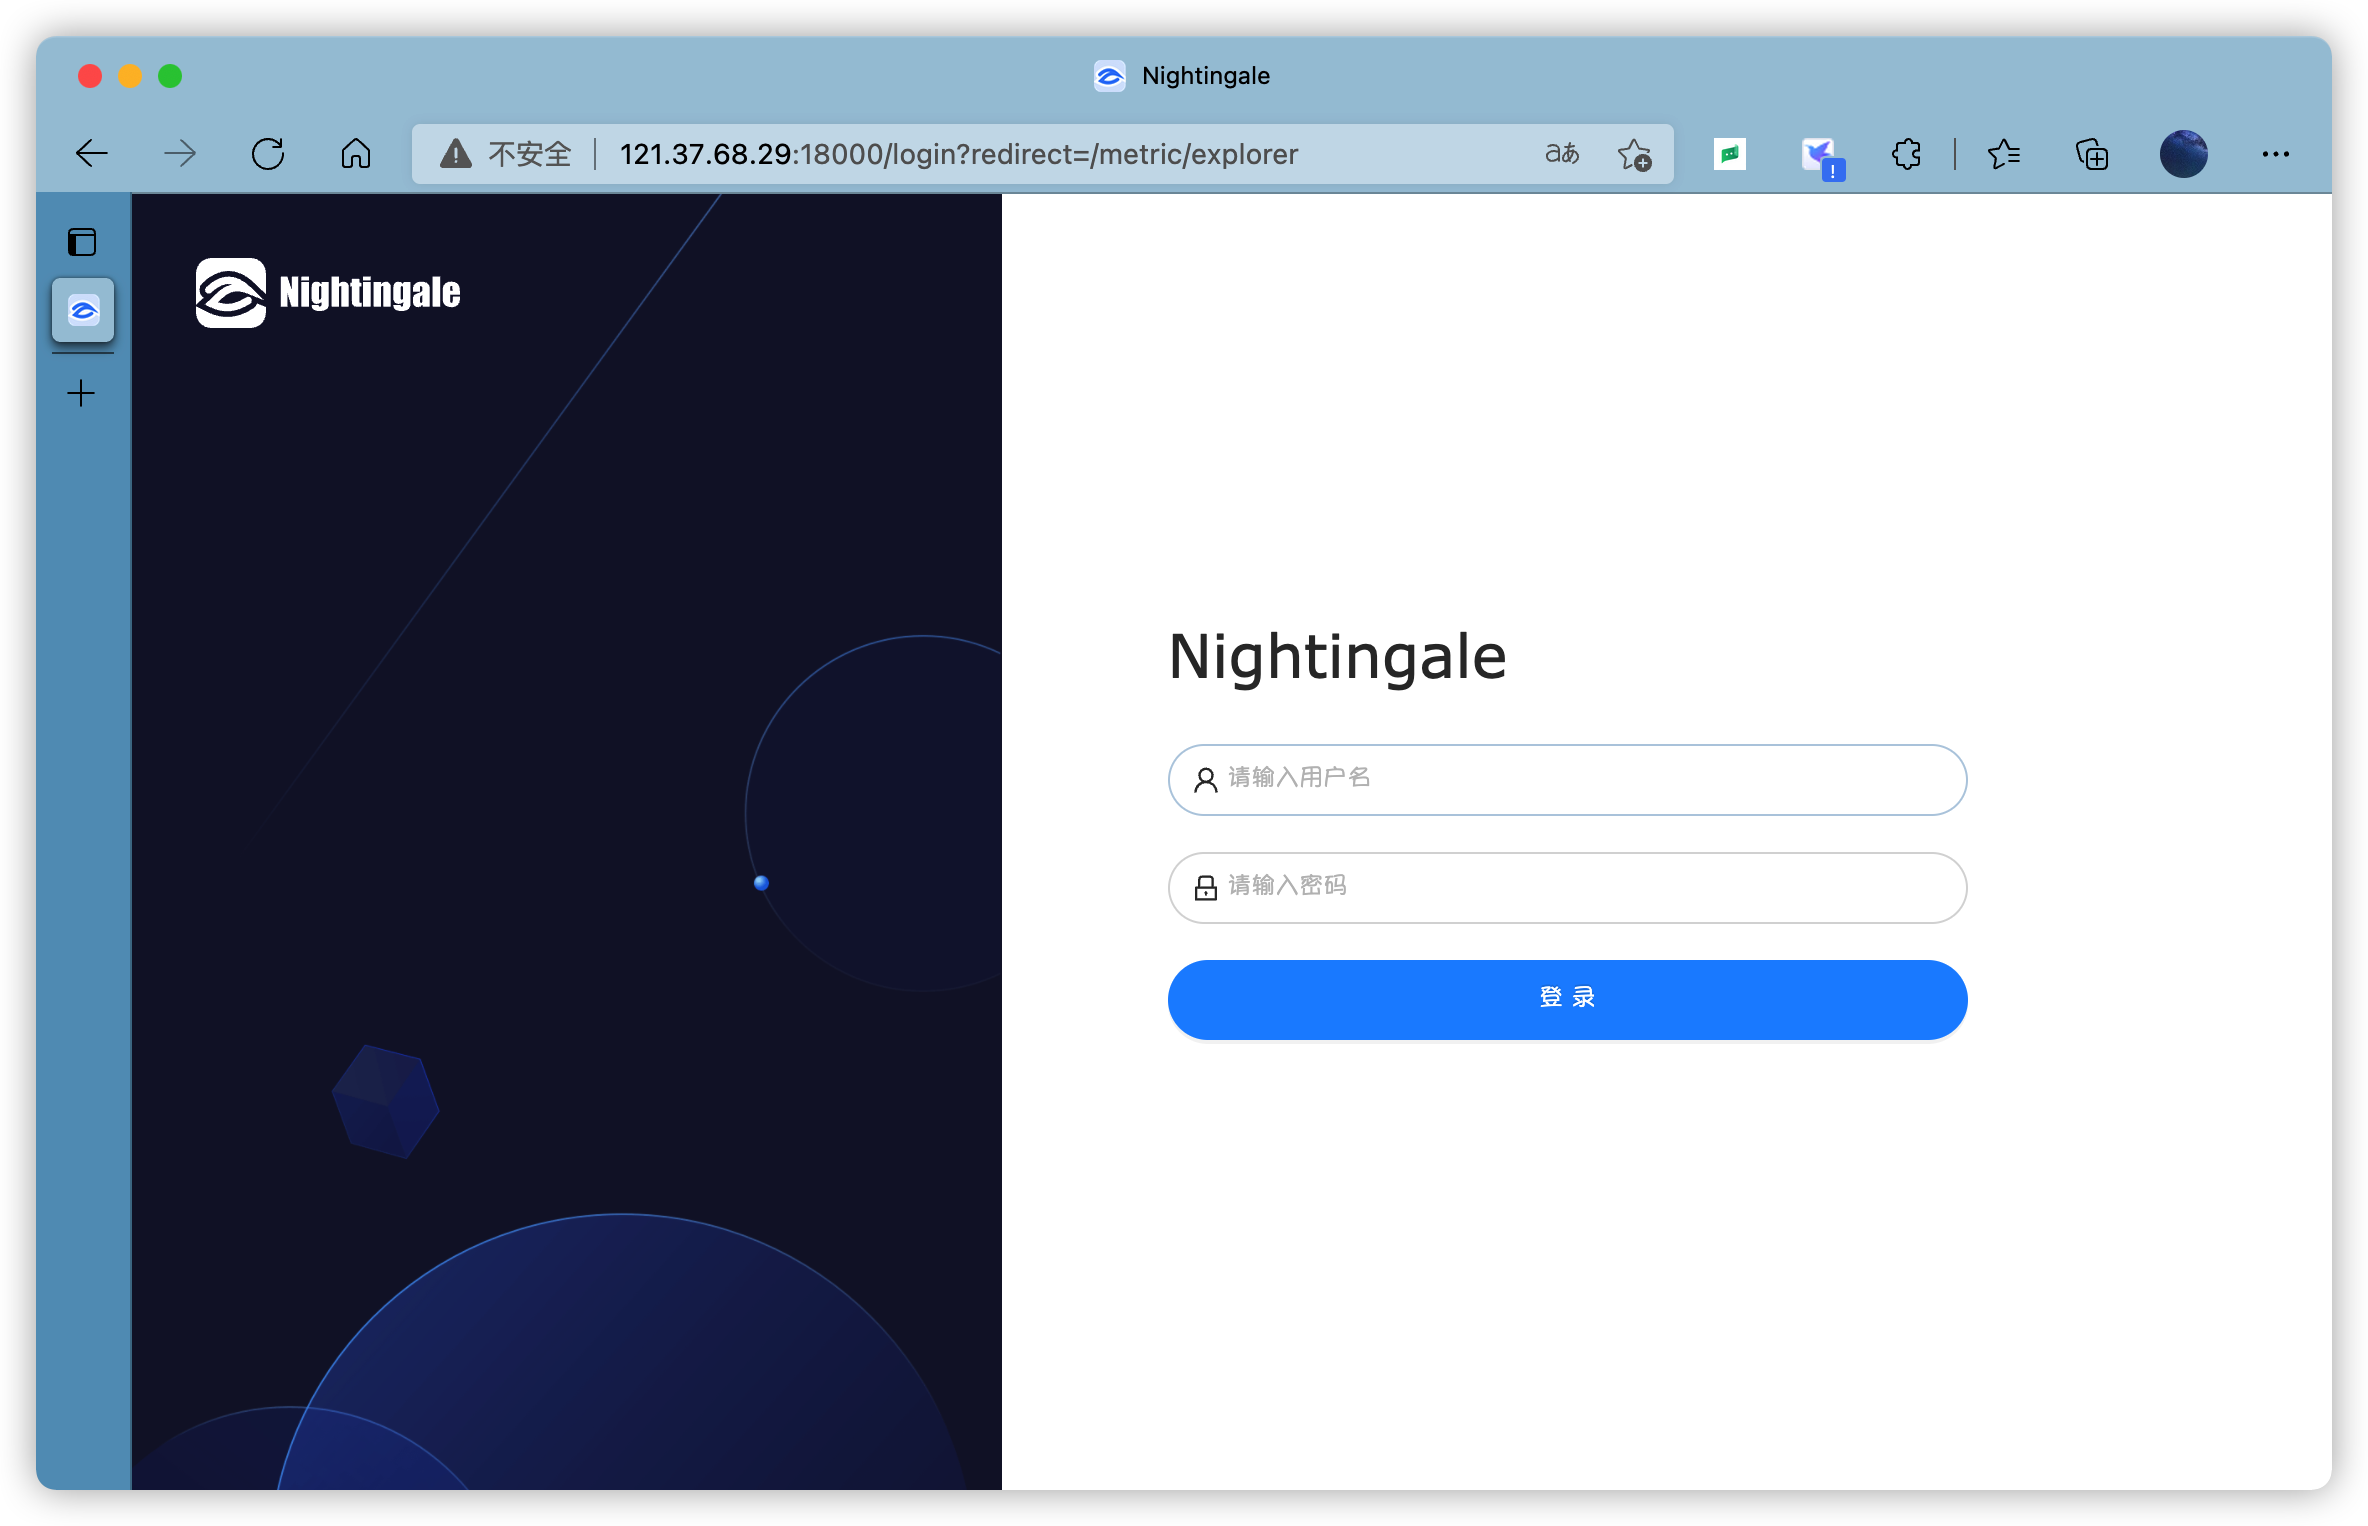
Access test
The default username and password is root / root two thousand and twenty

Download and install VictoriaMetrics standalone
mkdir -p /opt/vm && cd /opt/vm
wget https://github.com/VictoriaMetrics/VictoriaMetrics/releases/download/v1.72.0/victoria-metrics-amd64-v1.72.0.tar.gz
tar zxvf victoria-metrics-amd64-v1.72.0.tar.gz
Start database
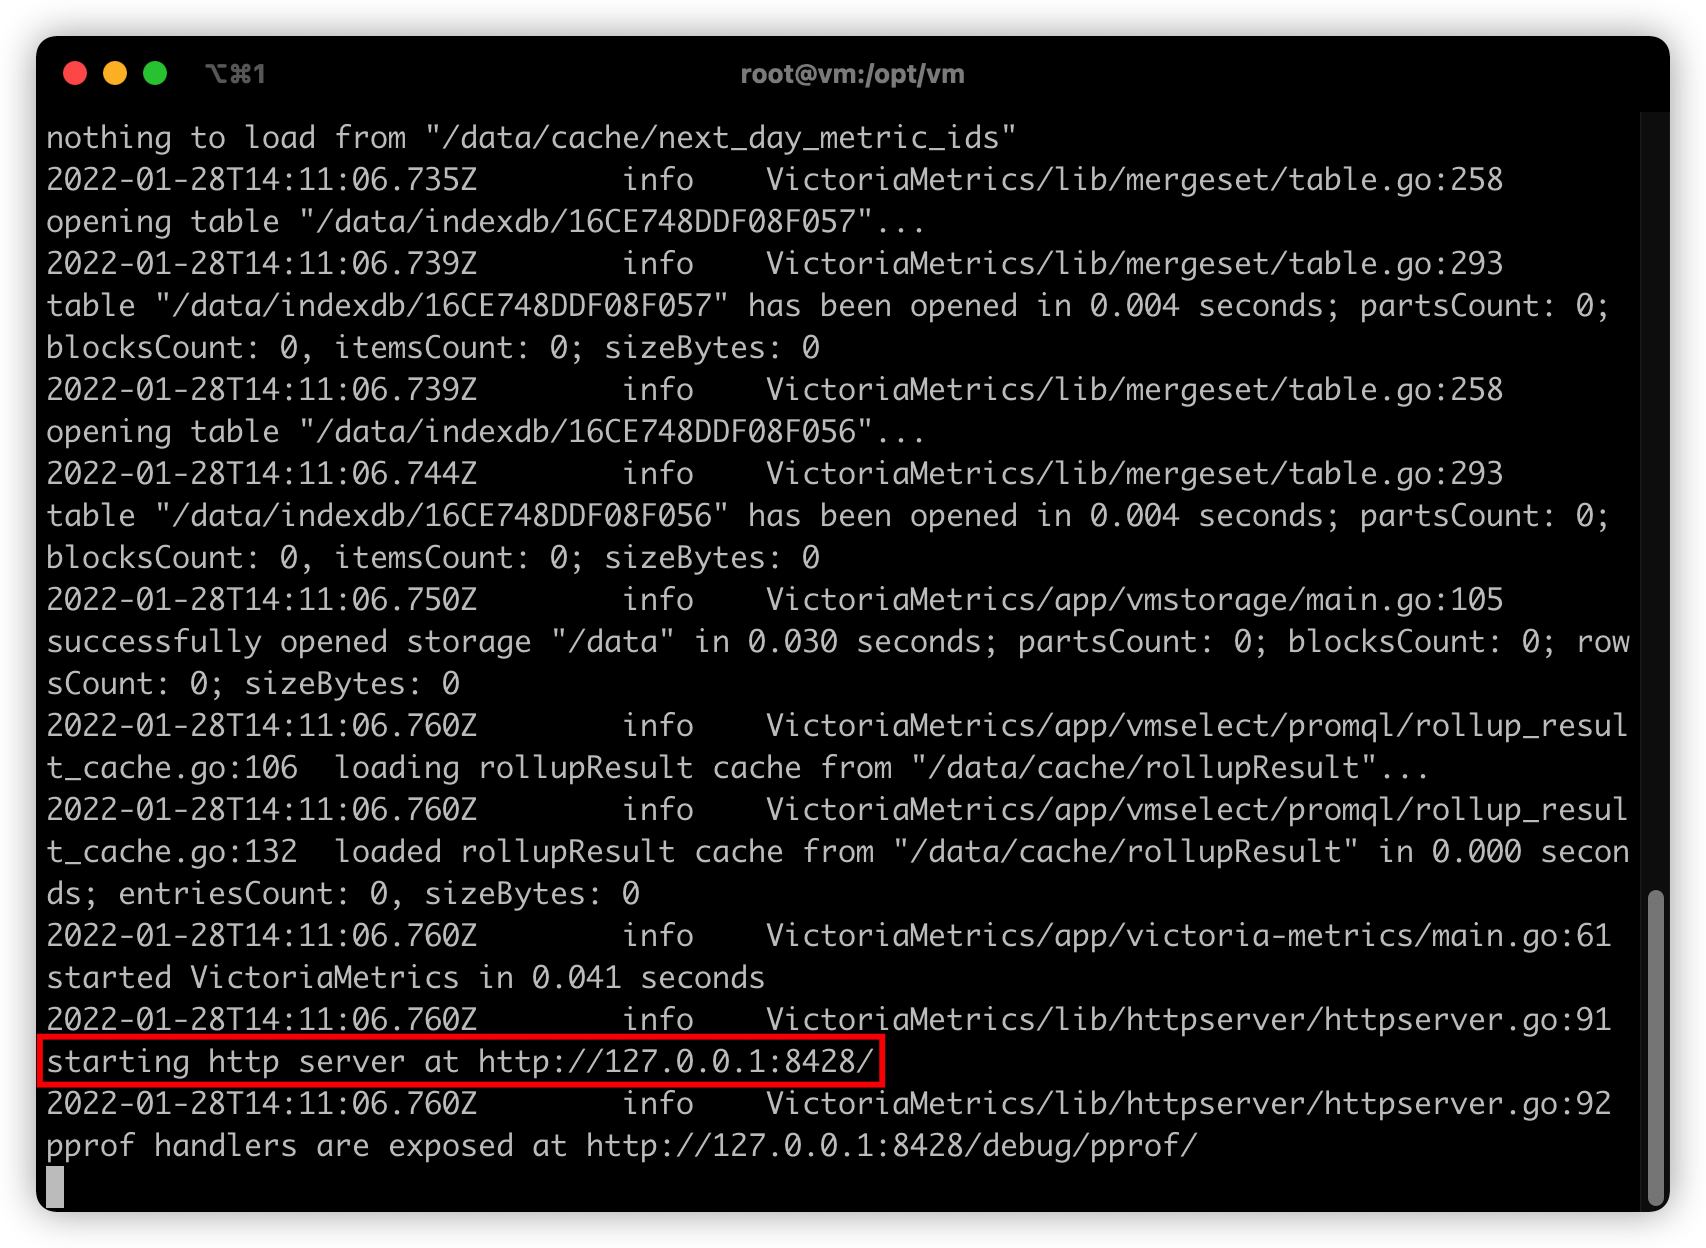
The default stand-alone port number is 8428
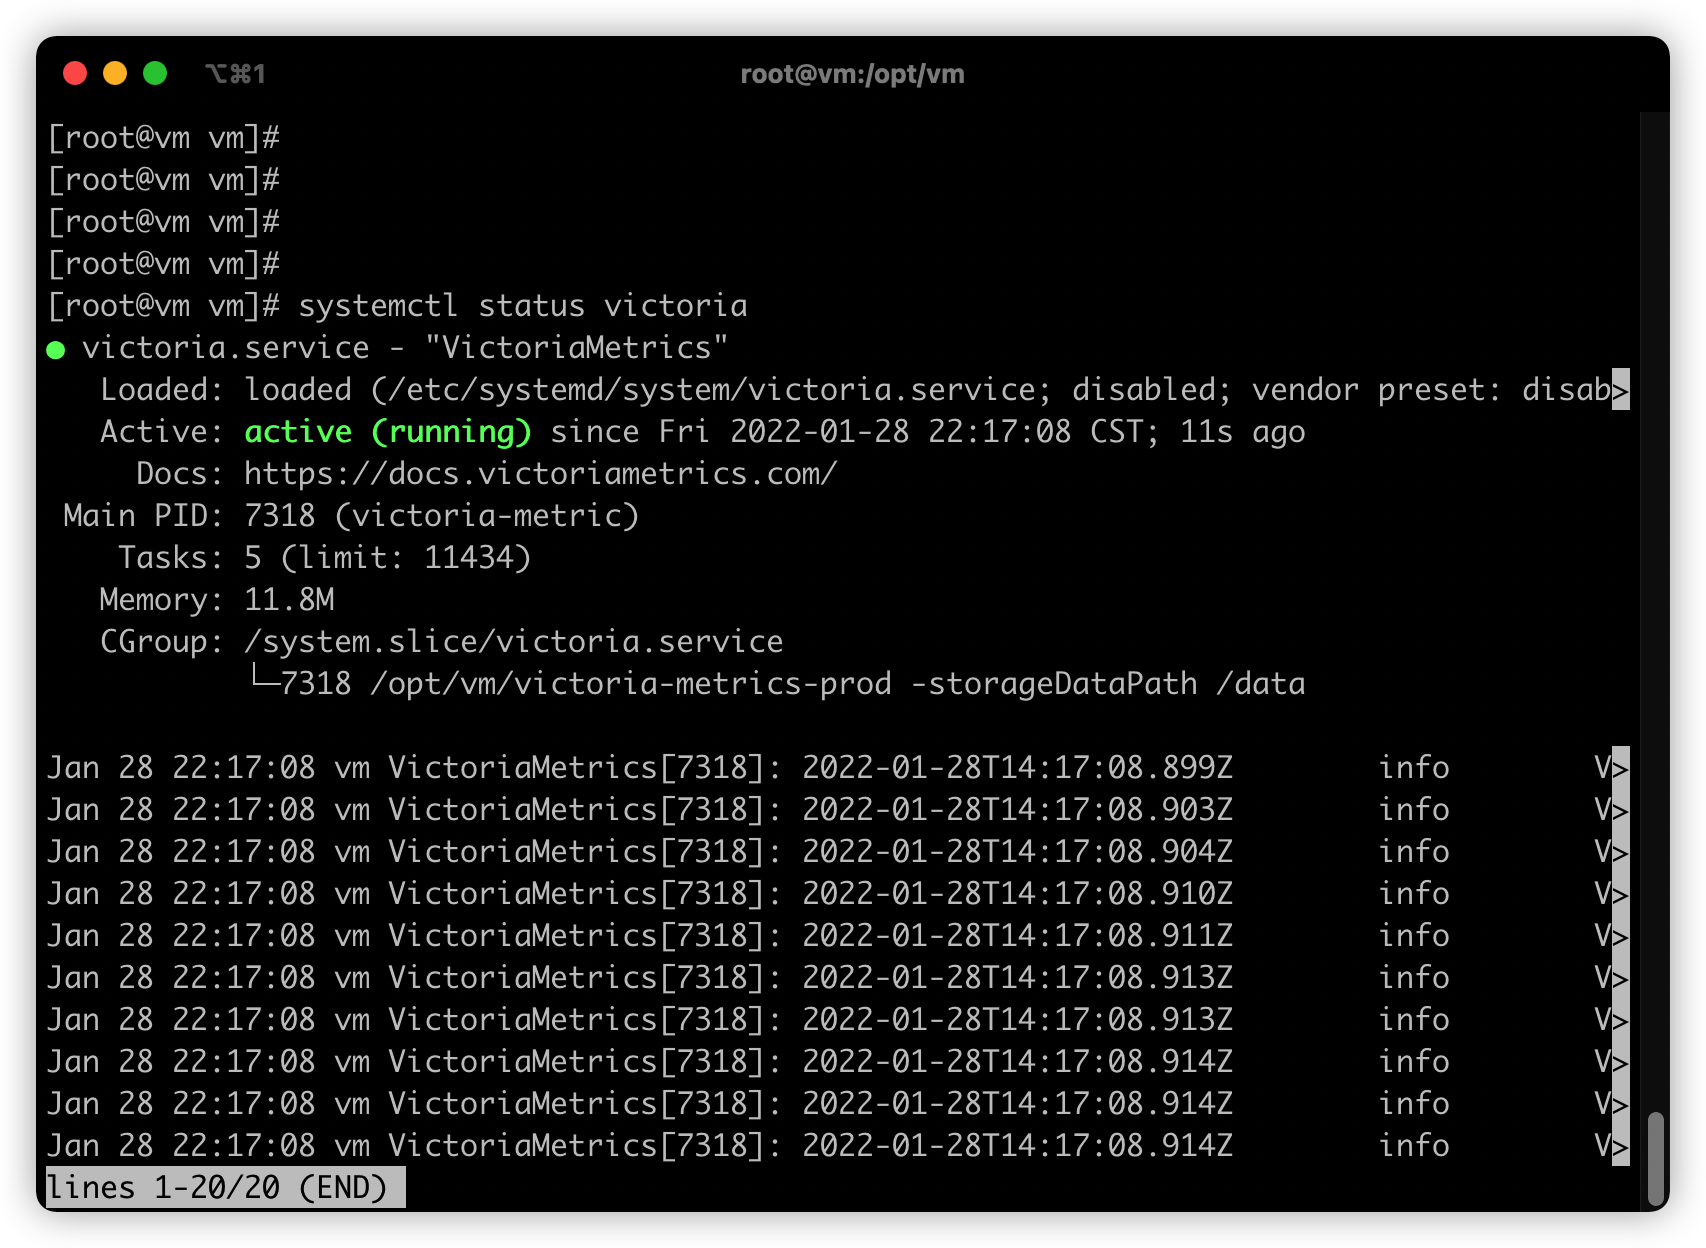
mkdir /data
./victoria-metrics-prod -storageDataPath /data
Create daemon file
cat <<EOF >/etc/systemd/system/victoria.service
[Unit]
Description="VictoriaMetrics"
Documentation=https://docs.victoriametrics.com/
After=network.target

[Service]
Type=simple

ExecStart=/opt/vm/victoria-metrics-prod -storageDataPath /data

Restart=on-failure
SuccessExitStatus=0
LimitNOFILE=65536
StandardOutput=syslog
StandardError=syslog
SyslogIdentifier=VictoriaMetrics


[Install]
WantedBy=multi-user.target
EOF
Start vm database
systemctl start victoria
systemctl enable victoria
Test interface
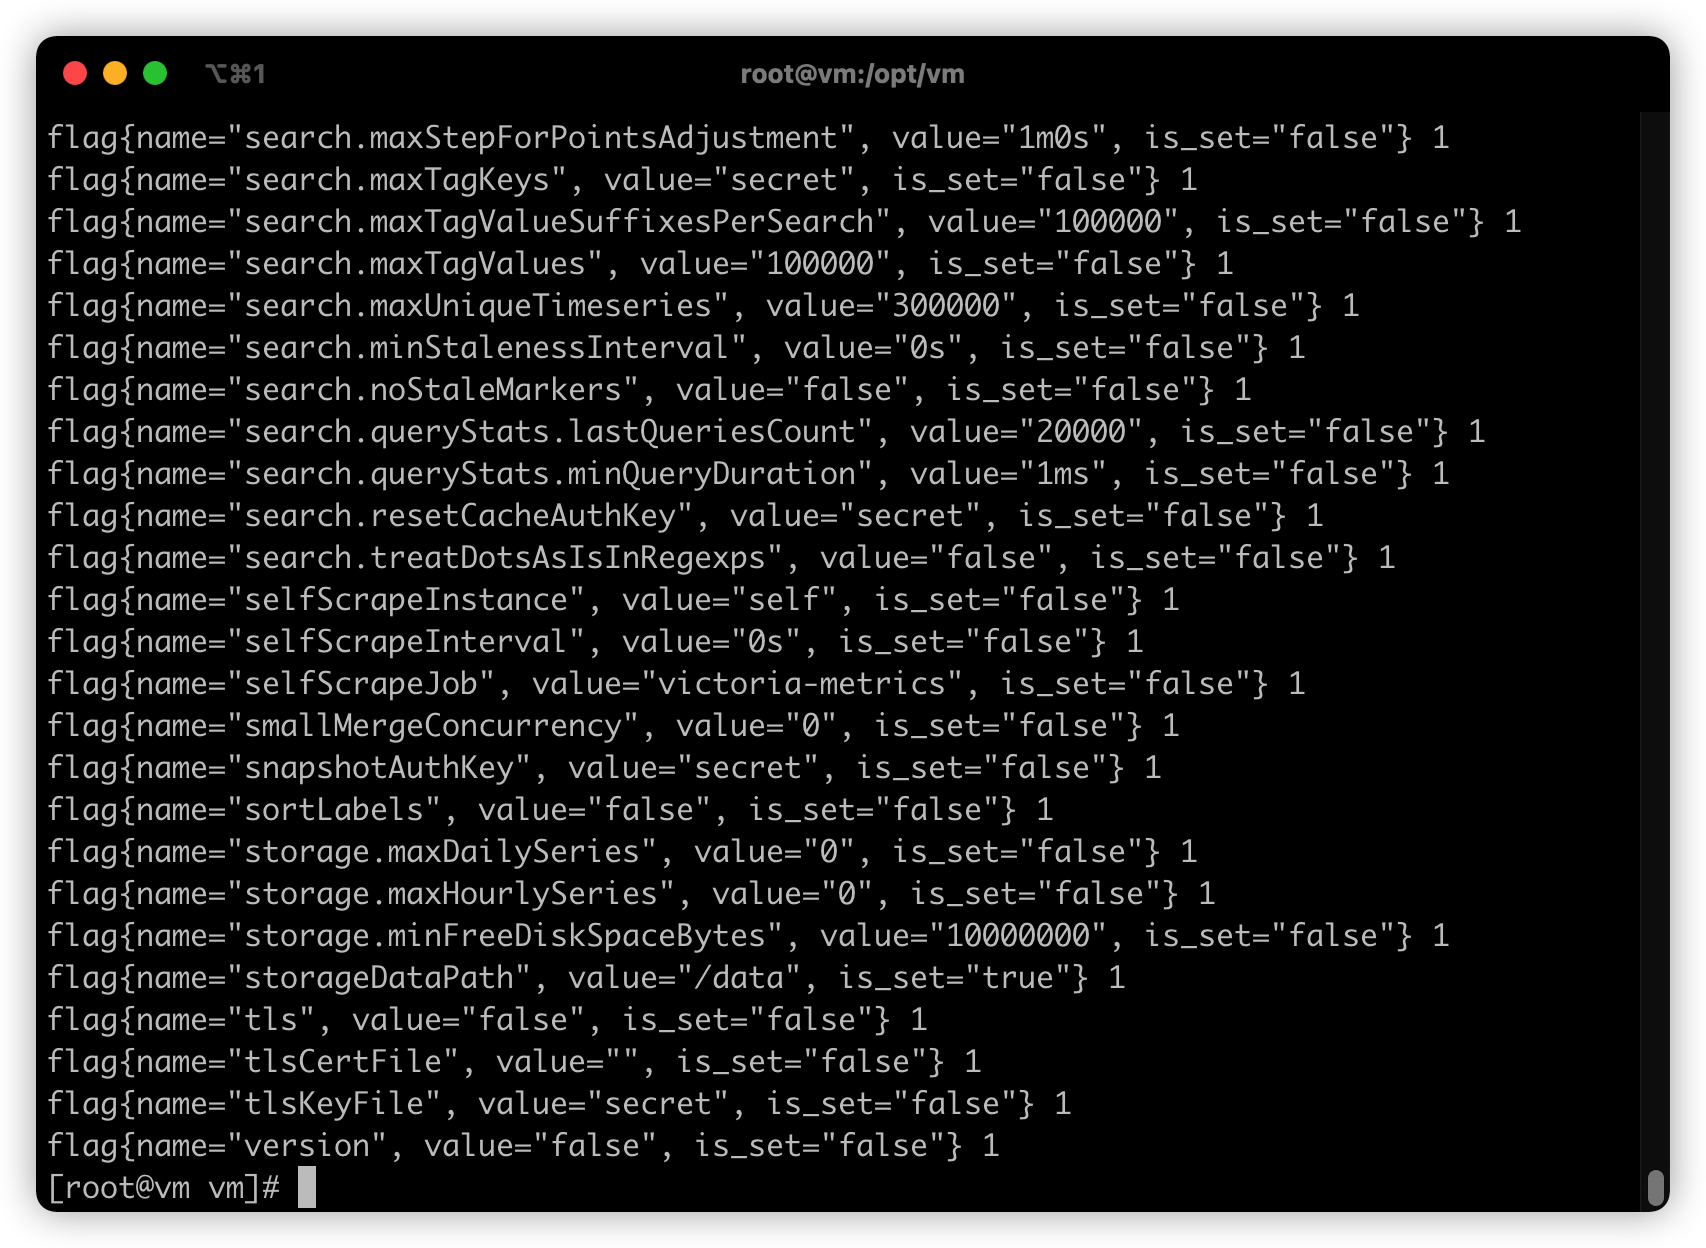
curl http://127.0.0.1:8428/metrics
Modify configuration
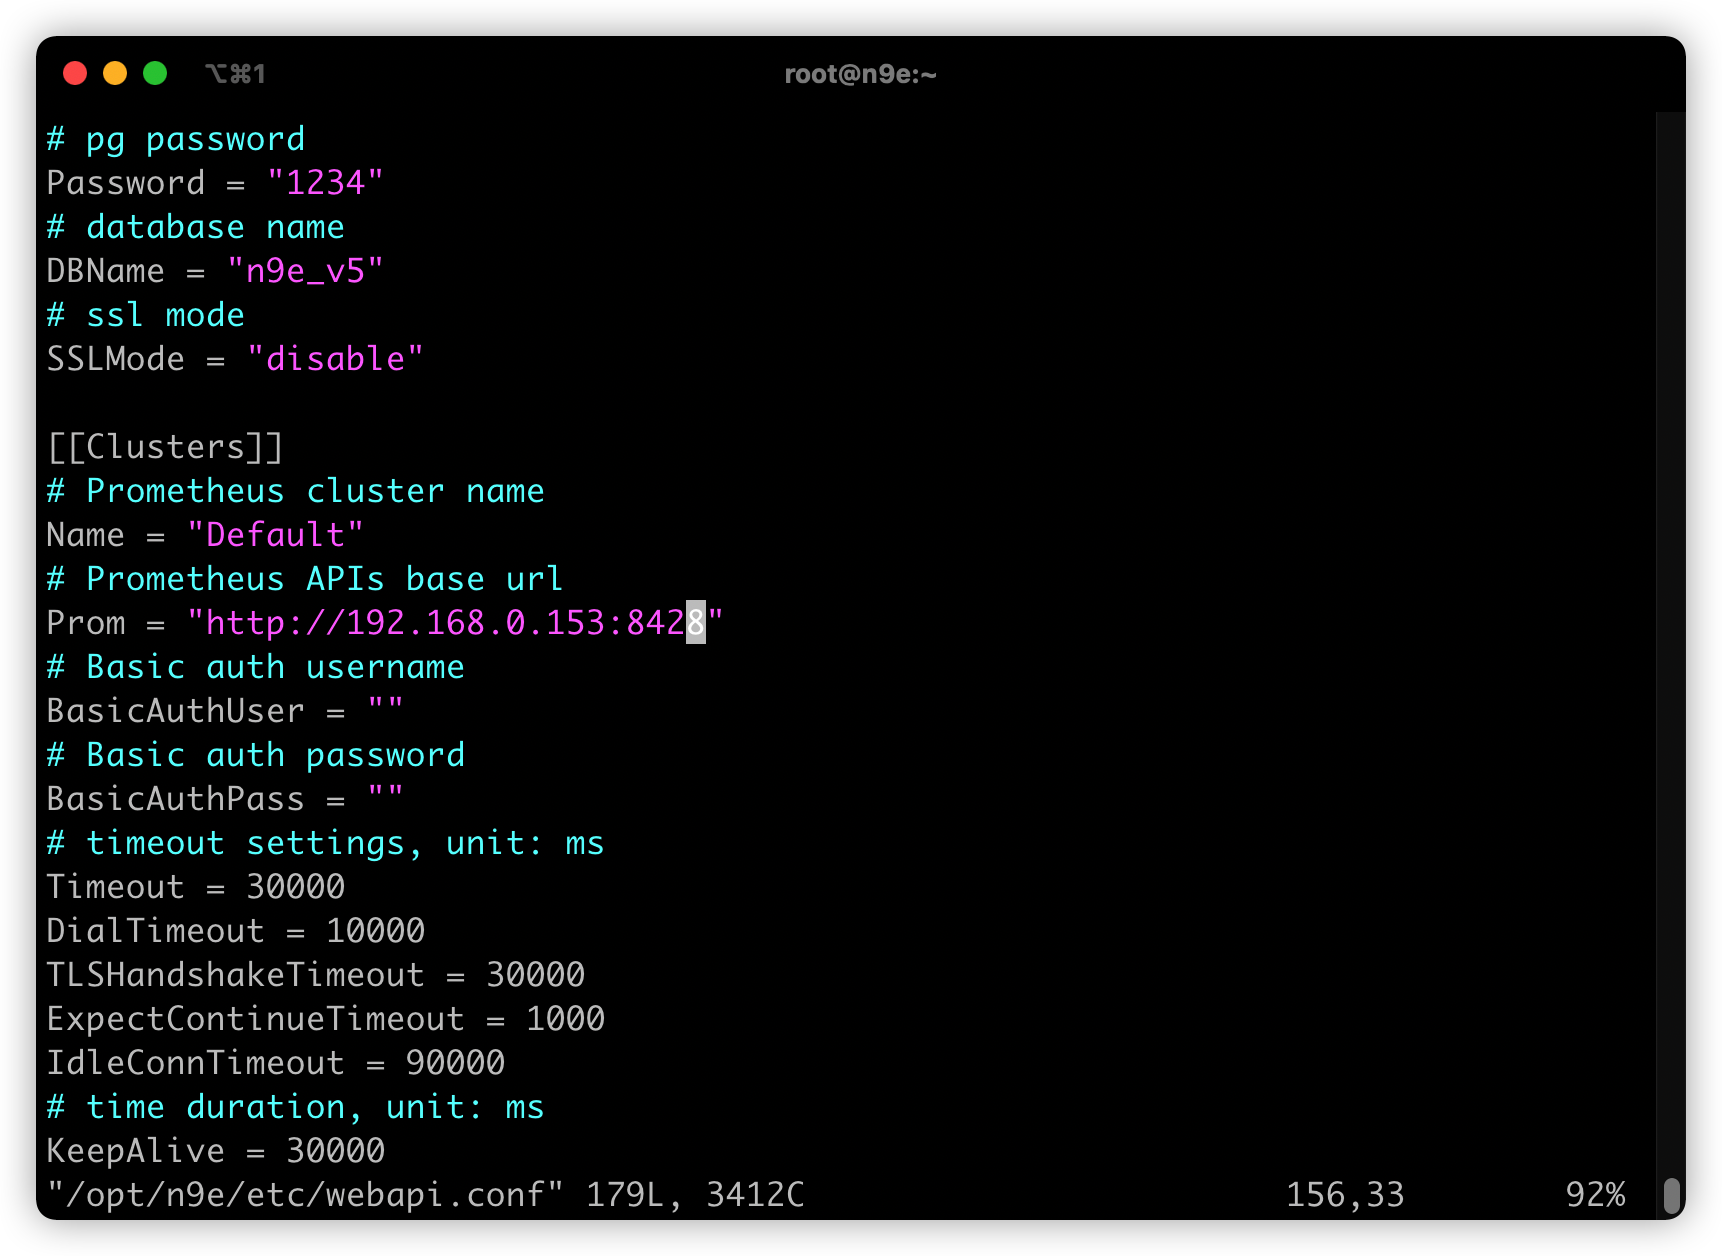
N9e server writes to the timing library through the remote write interface. vm is an option of the timing library, and its remote write interface address is: http://192.168.0.153:8428/api/v1/write , configure this address to server Conf, restart n9e-server after configuration.
vim /opt/n9e/etc/server.conf
vim /opt/n9e/etc/webapi.conf
prometheus add remote write module
vim /opt/prometheus/prometheus.yml
Restart needs to be checked


Write at the end
The overall installation process is relatively simple. The next article will bring about how to use telegraf and exporter to carry out monitoring tasks.