As mentioned last time, the Express framework is used to build a simple back-end, and it can be used to accept various forms of parameters.
In this section, we will solve a very basic but also very important requirement in web Development - file upload and download
File upload
When uploading a file, the http request method is post, and the content type in the request header is multipart / form data. Now, in order to test the background interface, we use postman to send the post request:
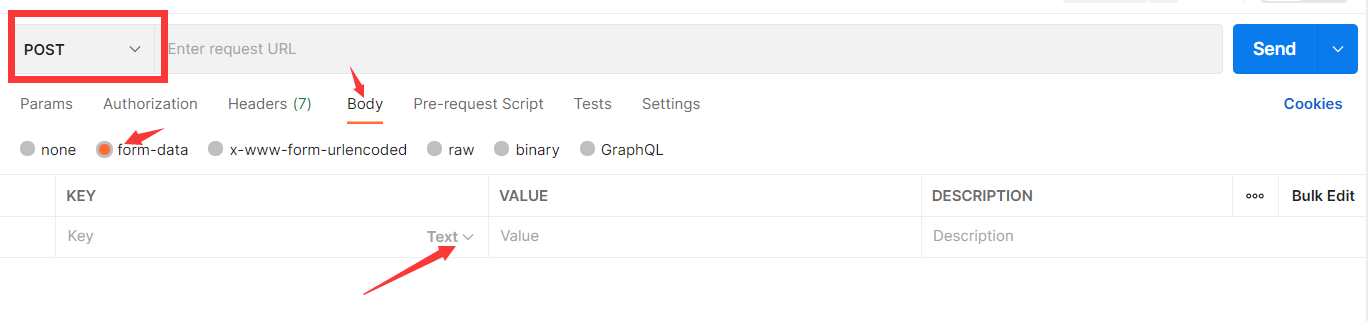
- Change request method
- Select the Body
- Select form data format
- The parameter type below can be modified to file

Multer Middleware
The file sent by http request will arrive at the server through the network in the form of binary stream, but it is obviously inconvenient to deal with it directly, especially when a request contains multiple files and other parameters.
In fact, we prefer to accept and cache the uploaded file before entering the request processing, and encapsulate the information about it in an object for subsequent operations.
Then today's protagonist, Multer middleware, can help us meet these requirements. It can receive, filter and encapsulate the pictures in multipart / form data requests, which is convenient for business processing.
(for more details, you can view Multer's NPM official website document , most of the following contents refer to this document)
First, let's install Multer and reference him in the code:
var multer = require('multer')
multer configuration
Before using, you need to generate an instance of multer and configure it:
var upload = multer({
	dest:'./temp'
})
upload is a multer object generated according to the configuration, which is used in subsequent request processing. The configuration is passed in as an object. The most commonly used is dest, which represents the disk address of the file cache. After configuration, the accepted files will be written directly to the disk as temporary files. If this content is not configured, the file will be saved in memory in the form of buffer.
In addition to dest, there are other configurable options, but in general applications, we only need to configure dest:

Full code:
var multer = require('multer')

var upload = multer({
	dest:'./temp'
})
Single file
When transferring a single file, you need to add upload.single(fileName) middleware in the request processing, for example:
app.post('/file/singleFile',upload.single('file'),(req,res)=>{
    console.log('Received a request with file:');
    console.log(req.file);
    res.send({
        code:200,
        message:'ok'
    });
})
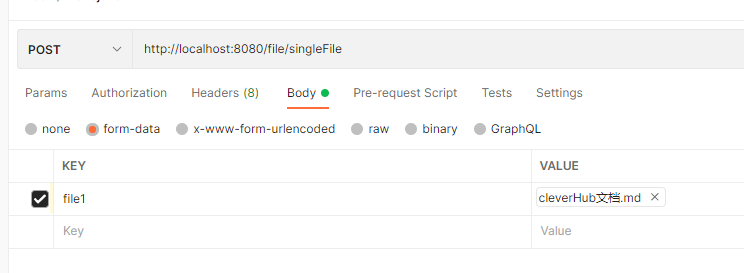
At this point, the file will be processed and encapsulated in the file of req. We use postman to send a request for verification:

You can see that the backend successfully receives files and caches them in the specified directory and encapsulates them:


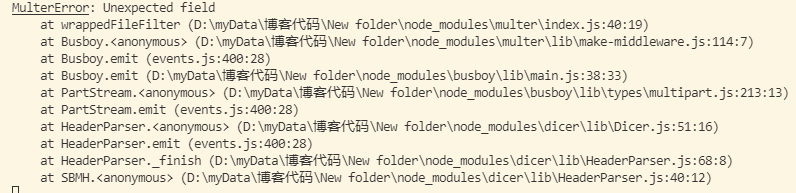
If the sent file name is inconsistent with the received name, the multer will report an error:
Multiple files
Multi file upload is also a common requirement. Sometimes, you need to pass multiple files with one parameter, and you need to pass multiple files with multiple parameters.
In both cases, multer has corresponding acceptance methods.
array form
The array format can accept one parameter and multiple files. You only need to call the array method of upload. Its parameter format is:
upload.array(File parameter name, maximum number of files)
Unlike single, array encapsulates the parsed file list in req.files instead of req.file
Use example:
app.post('/file/arrayFiles',upload.array('files',2),(req,res)=>{
    console.log('Received a request with files:');
    console.log(req.files);
    res.send({
        code:200,
        message:'ok'
    })
})
The above example shows that the modified interface can accept the files parameter of no more than two files.
Use postman to send two files to files:


If the number of files sent exceeds the maximum number of files, the multer will report an error:

Felds form
The fields method is more flexible than the array method. It allows multiple files with multiple parameters, and can limit the maximum number of files for each parameter. The format is as follows:
upload.feilds([{name:File name 1,maxCount:Maximum number of files 1},{name:File name 2,maxCount:Maximum number of files 2}...])
Like the array method, the fields method parses the received files in req.files, but the difference is that the parsed files are not in the form of an array, and the file list corresponding to each parameter is encapsulated into an object in the form of a map
Use example:
app.post('/file/feildsFiles',upload.fields([{name:'files1',maxCount:2},{name:'files2',maxCount:2}]),(req,res)=>{
    console.log('Received a request with files')
    console.log(req.files);
    res.send({
        code:200,
        message:'ok'
    })
})
Use postman to send two files to files1 and files2 respectively:


File download
The file download function is actually the process of parsing the url path of the static resource request, mapping it to its corresponding file, and then returning.
This function is encapsulated in the middleware express.static in the express framework. Its usage is as follows:
app.use(url route,express.static(Static file directory))
This statement can map the previous url path to the following static resource directory. Subsequent requests will be automatically mapped to the static resources in the corresponding directory when there is a url path prefix
Using the example, map the / image path to the images folder under the project root directory:
var express = require('express')
var app = express()

app.use('/image',express.static('./images'))
There is no limit on how many times express.static can be used. We can register more static resource mappings:
app.use('/file',express.static('./files'))
app.use('/audio',express.static('./audios'))
app.use('/vedio',express.static('./vedios'))
app.use('/image',express.static('./images'))
Full code:
var express = require('express')
var app = express()

app.use('/file',express.static('./files'))
app.use('/audio',express.static('./audios'))
app.use('/vedio',express.static('./vedios'))
app.use('/image',express.static('./images'))

var server = app.listen(8080,()=>{
    console.log('Server is listening on port 8080')
})
Put a file under file:

Execute the program and access in the browser: http://localhost:8080/file/hello.txt

The code used in this article has been sorted out and can be downloaded by friends:
reference material
- Multer module npm home page
- <Learn NodeJS in 1 Day>
- <The node craftsman book>
- <MERN Projects for Beginners>