Database, one of the most important parts of the website system, is like a person's brain. It can write down anything developers want it to write down, and it is more reliable and accurate than the human brain.

In essence, any database is a file system, but compared with the files we add by right clicking on the desktop, the database is a regular file system. Unlike we can write anything at will after adding a file, the database file will have special storage rules and specific ways to operate the data content.
The most common SQL statement is actually an operation specification, which restricts the addition, deletion, modification and query to be performed in a specified way, such as select, update, delete and other specific statements. Finally, the standardized data content will be generated.
Next, let's see if Nodejs can operate the "memory system" of the website? If it can be operated, how can it be operated? Enter the content of Nodejs and database to learn.
File database
The essence of a database is to store data, and the files we usually use also store data. So as long as we formulate a specification, ordinary files can also be a database, and ordinary files do not depend on the environment. You do not need to install engines or tools to operate. It is the inherent ability of the operating system, so some scenarios are more suitable for use.
For example, your application is a client application. For example, some client configuration or status data do not want to be uploaded to the cloud server, but want to be stored locally on the client, which is similar to the localstore on the browser. At this time, you can add a file as a database.
In nodejs, lowdb module [1] is the encapsulation library used for file database. Its specification is the well-known json specification. There is no need to install other software to use it. We only need to have nodejs environment.
install
npm i --save lowdb
Example:
// app.js
const low = require('lowdb');
const FileSync = require('lowdb/adapters/FileSync');

// Sync file type
const adapter = new FileSync('db.json');
const db = low(adapter);

// Initialize database fields
db.defaults({ userInfo: {}, time: '' }).write();

db.set('userInfo.name', 'Full stack').write();
db.set('userInfo.title', 'Welcome to pay attention').write();
db.set('time', new Date()).write();

const userInfo = db.get('userInfo').value();
const time = db.get('time').value();

console.log(`userInfo: %o`, userInfo);
console.log(`time: %s`, time);
// Userinfo: {Name: 'full stack', title: 'welcome to follow'}
// time: Tue Aug 27 2019 16:06:13 GMT+0800 (CST)
Look at dB Content in JSON file
{
  "userInfo": {
    "name": "Full stack",
    "title": "Welcome to pay attention"
  },
  "time": "2019-08-27T08:06:13.991Z"
}
Non relational database
Non relational database is also a very common database. Generally, MongoDB and CouchDB used by us belong to this category. Non relational database is actually very similar to the above file database. It is also based on key value pairs as storage specifications.
But compared with the above, it has made many restrictions and specifications. It is widely used in the storage of non relational data, and its performance is also very good compared with relational database. Generally, large-scale applications will use non relational database and relational database together.
Here, let's take Mongodb to see how Nodejs operates non relational databases.
First install Mongodb. It is recommended to use docker to install Mongodb.
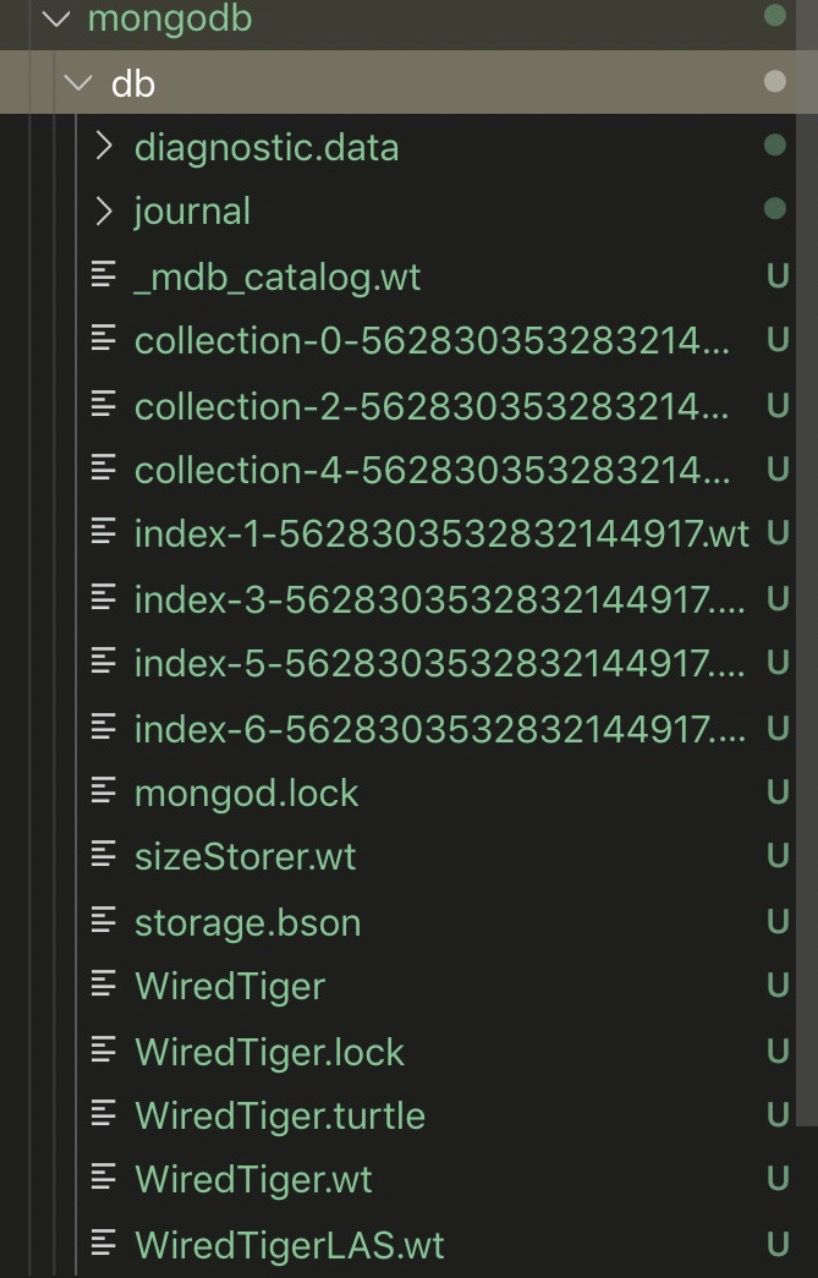
docker search mongo
docker pull mongo
# After being pulled down, the local data file location should be associated with the docker container when starting
# Mount using - v in docker
# docker starts the image and -p exposes port 27017,
# The following file path should be replaced by a file path on your machine to store DB files. For example, I found it in ~ / desktop / practice book / nodejs / db / mongodb / DB
# Save my DB file under the, and my file path is ~ / desktop / practice book / nodejs / db / mongodb / DB
docker run -p 27017:27017 -v ~/Desktop/Practice-book/nodejs/db/mongodb/db:/data/db -d mongo
# After startup, check it out
docker ps
~/The following files will appear in the desktop / practice book / nodejs / db / mongodb / DB folder.
Next, connect and operate the mongodb database. Here, the mongoose module with high usage is selected.
Install mongoose
cnpm i --save mongoose
Example:
const mongoose = require('mongoose');

mongoose.connect('mongodb://127.0.0.1:27017/db', { useNewUrlParser: true });

mongoose.connection.on('error',() => {
  console.log('Connection error:')
});

// Define the sechema where the data is stored
const Sechema = new mongoose.Schema({
  name: String,
  title: String,
  time: Date,
});

// Define the data model, which can directly operate the data, such as creating query, updating and deleting.
const Model = mongoose.model('person',Sechema);

Model.create({
  name: 'Full stack',
  title: 'Welcome to pay attention',
  time: new Date(),
})

Model.find({}, function(err, data) {
  if(err) {
    console.error(err);
  } else {
    console.log(data);
  }
});

Model.findById('5d64f210e38a73dce44956bf', function(err, data) {
  if(err) {
    console.error(err);
  } else {
    console.log('id: 5d64f210e38a73dce44956bf');
    console.log(data);
  }
});
The above code first connects the mongodb service provided by docker, and then defines the data sechema we want to store in mongodb. Sechema is used to limit the field data types stored in mongodb, such as Number, String and other basic types.
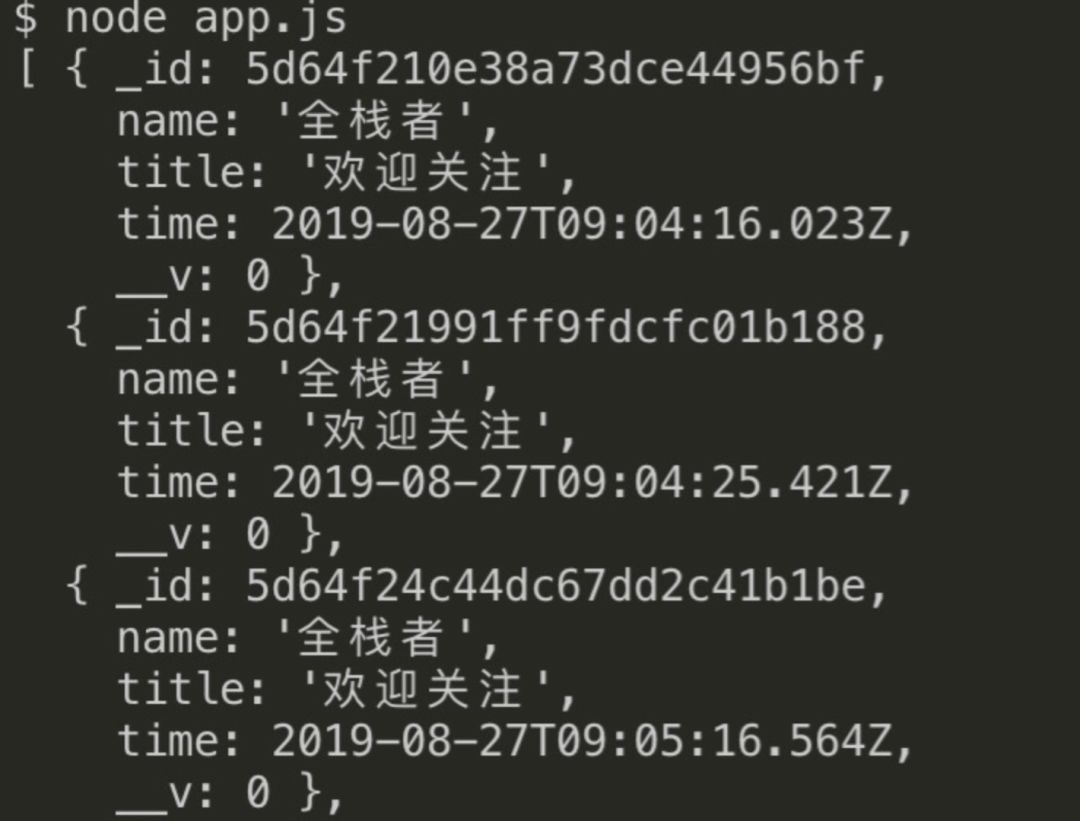
Then, a Model is defined. The Model can be understood as the operation object of an exposed table, such as adding, searching, updating, deleting, etc. are all on the Model. The Model in the example is the operation object of the person table, which contains find, create and other methods. After repeatedly executing the node app several times, look at the execution results of the above code.
Relational database
Relational database is the largest and most widely used database at present. Its advantages are very obvious. Firstly, the structural design of its two-dimensional table is very close to the concept of logical world. The relational model is relatively mesh and hierarchical, which is easy for people to understand. At the same time, its rich integrity also greatly reduces the probability of data redundancy and data inconsistency, Ensure the accuracy and consistency of data.
Another highlight is the support of SQL statements. With SQL statements, many complex queries can be implemented. For example, the operation between multiple tables can be implemented through one SQL statement, which is very convenient. Of course, due to the addition of SQL layer parsing, its read-write performance is relatively low compared with non relational databases.
The relational database demonstrated here adopts the most commonly used mysql. Let's see how Nodejs operates the relational database mysql.
1. Install MySQL first. Here, use docker to install mysql. The steps are the same as those of mongodb above.
docker search mysql
docker pull mysql
# After being pulled down, the local data file location should be associated with the docker container when starting
# docker starts mirroring and -p exposes port 3306
docker run -p 3306:3306  -e MYSQL_ROOT_PASSWORD=123456 -d mysql:5.6
# After startup, check it out
docker ps
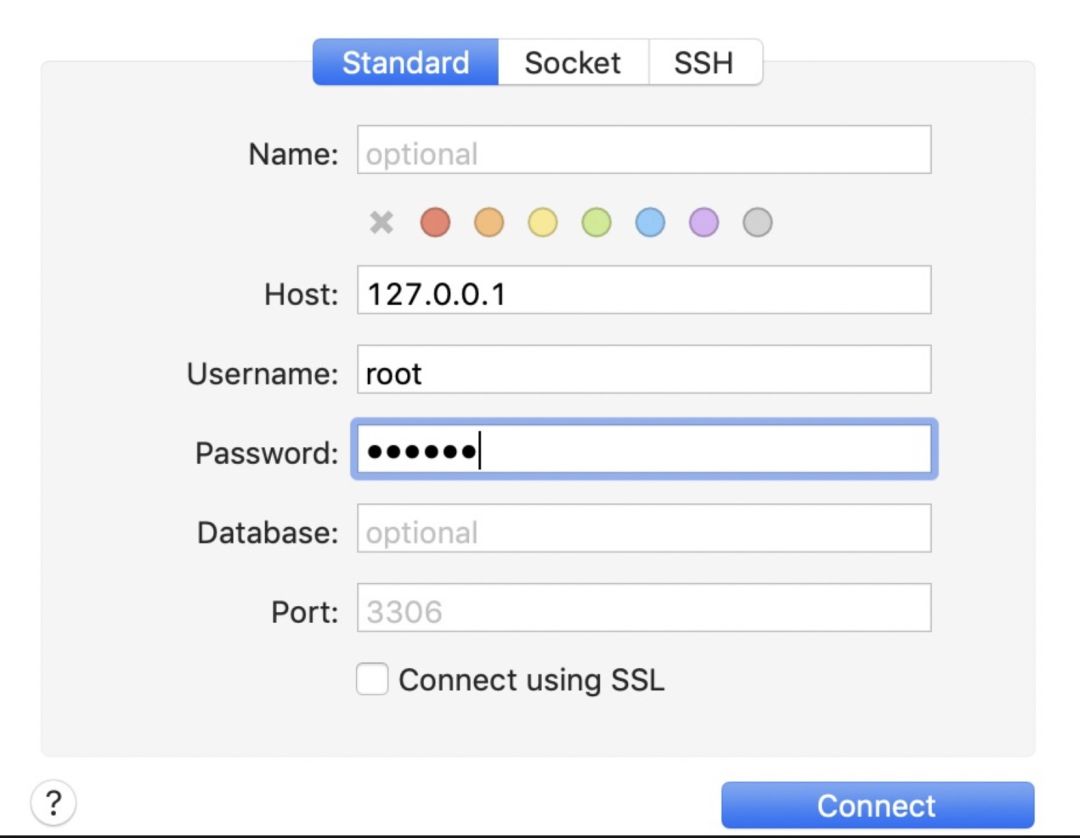
2. Install the visual operation tool. The author recommends the DataGrid tool to operate the database, but there is a charge. I use the free sequelPro.
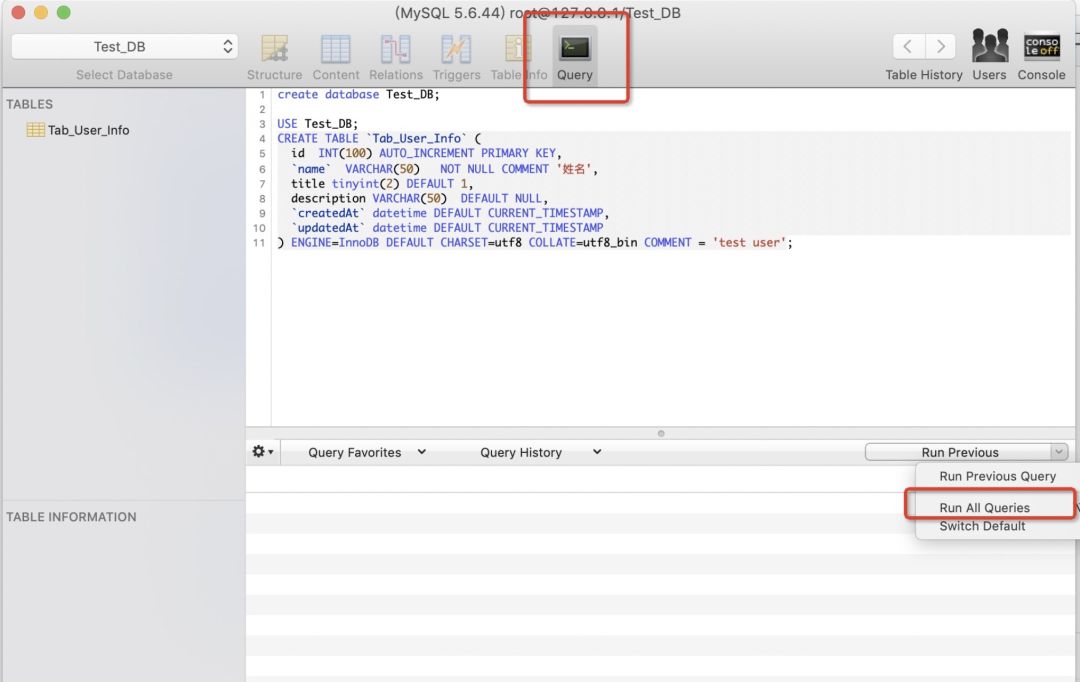
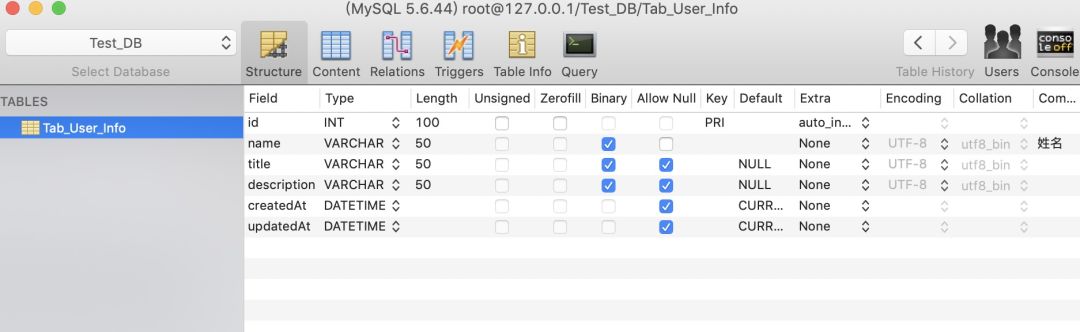
3. Create a database and a table by using the table creation statement [2].
4. Next, use Nodejs to operate mysql. Here, use the MySQL module to demonstrate.
Install mysql module
cnpm i --save mysql
Example:
const mysql = require('mysql');
const connection = mysql.createConnection({
host: '127.0.0.1',
port: 3306,
user: 'root',
password : '123456',
database : 'Test_DB'
});
connection.connect(function(err) {
if (err) {
console.error('error connecting: ' + err.stack);
return;
}
console.log('connected as id ' + connection.threadId);
});
const insert = `INSERT INTO Tab_User_Info (name, title, description) VALUES ('Full stack', 'Welcome to pay attention', 'WeChat official account: the whole stack')`
// Insert a piece of data into Tab_User_Info table
connection.query(insert, function (error, results) {
if (error) console.log(error);
// affectedRows affects the number of rows. If it is 1, the insertion is successful
if (results.affectedRows === 1) {
console.log('Insert successful');
selectTable();
}
});
// Query Tab_User_Info table all data
function selectTable() {
const select = `Select * from Tab_User_Info`;
connection.query(select, function (error, results) {
if (error) console.log(error);
console.log(results)
});
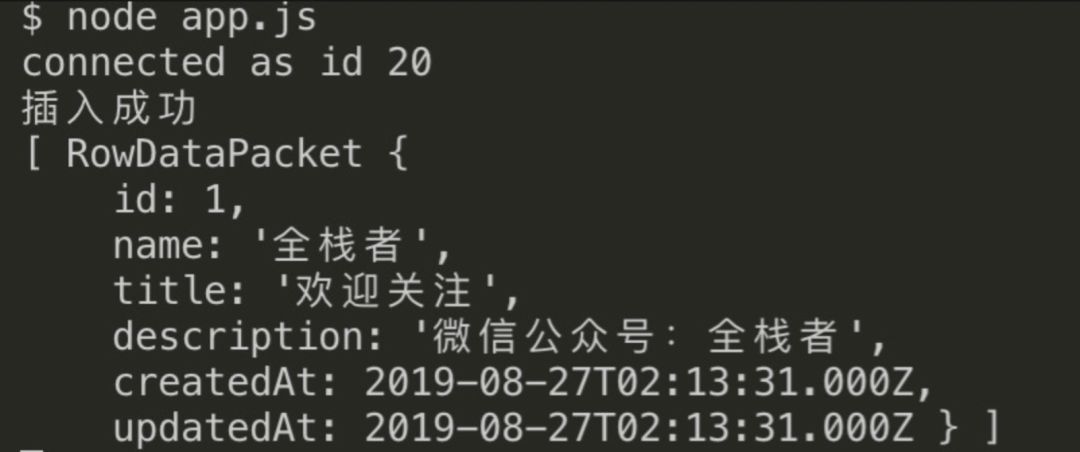
}The above example of Nodejs operating Myql is completed. First, we use the createConnection interface provided by mysql to connect to the mysql service started by docker, then write the insert SQL statement, use the query interface after connecting to the database to execute the written SQL statement, and conduct a query after execution.
5. The results are as follows
actual combat
1. Demand
Provide an interface to the front end. The interface content can be provided by mogodb or mysql. However, it is not randomly determined by the database, but needs to be controlled by internal personnel.
2. Implementation ideas
a. First, two interfaces can be provided according to requirements, one is the switch interface used by internal personnel, and the other is the data interface provided for the front end. b. The switch interface only needs to store the mode in which the current data interface is in, which is a state value. It is only in one state at a certain time, so it is suitable to use FileDB to record the state. c. The provider of the data interface is determined by the status value in the FileDB, so the status judgment in the FileDB is obtained first when the user requests the data interface. 3. Code example:
// http.js
const http = require('http');
const url = require('url');
const qs = require('querystring');
const fileDB = require('./fileDB');
const mongodb = require('./mongodb');
const mysql = require('./mysql');
const genResponse = message => JSON.stringify({
success: true,
data: message
});
http.createServer((req, res) => {
res.setHeader('Content-Type', 'application/json;charset=utf-8');
const reqUrl = url.parse(req.url);
if (reqUrl.pathname === '/api/set/db') {
// Switch interface
const { db } = qs.parse(reqUrl.query);
if (['mongo', 'mysql'].includes(db)) {
fileDB.set('curDb', 'mongo').write();
} else {
return res.end(genResponse('Parameter error'));
}
fileDB.set('curDb', db).write();
fileDB.set('updateTime', new Date()).write();
const result = genResponse(`Modify the database schema to:${db}`);
res.end(result);
} else if (reqUrl.pathname === '/api/get/data') {
// data interface
const db = fileDB.get('curDb').write(); //Get current status
if (db === 'mongo') {
// Get mogondb data
mongodb.find({}, function(err, data) {
if(err) {
console.error(err);
return res.end(genResponse(err));
} else {
const result = genResponse(data);
res.end(result);
}
});
} else {
// Get mysql data
const select = `Select * from Tab_User_Info`
mysql.query(select, function (error, results) {
if (error) {
console.log(error)
res.end(genResponse(error));
} else {
res.end(genResponse(results));
}
});
}
} else {
res.writeHeader(404);
res.end('NotFund');
}
}).listen(8000, ()=> {
console.log('listen on 8000!');
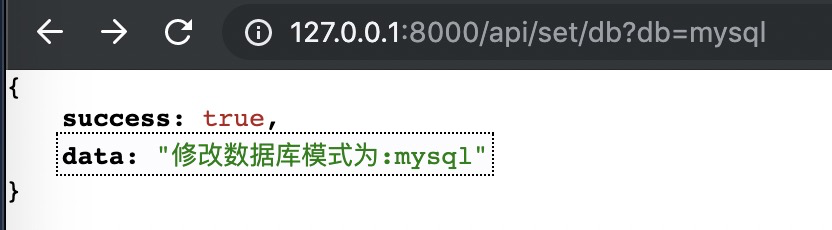
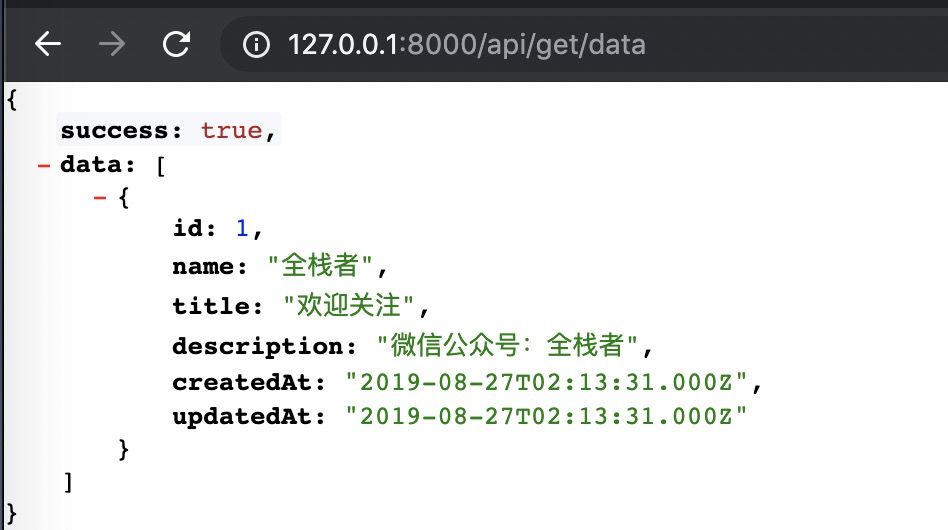
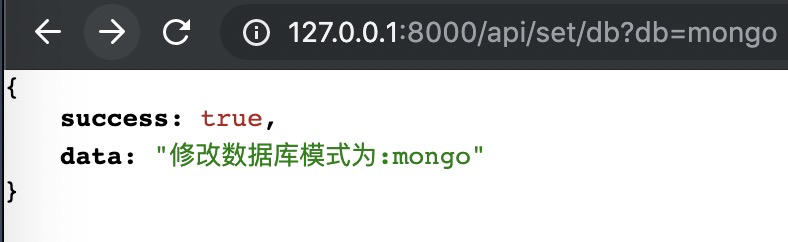
})The above example provides a switch interface / api/set/db, which is triggered by internal personnel to set the provider of the data interface. The other is the data interface / api/get/data, which is used to provide data to the front end. When the interface is triggered, first obtain the status value set by the switch interface, then execute the query operation, and then return the data. 4. Result display A. set the switch interface to mysql
b. Set the switch interface database to mongo

References
[1] lowdb module: https://www.npmjs.com/package/lowdb [2] Create table statement: https://github.com/FantasyGao/Practice-book/blob/master/nodejs/db/mysql/test.sql
The code used in this article can be found below. If you are interested in clone, come down and practice.
The code used in this article can be obtained here: https://github.com/FantasyGao/Practice-book/tree/master/nodejs/db
The above contents are summarized by yourself. It is inevitable that there will be errors or cognitive deviations. If you have any questions, I hope you can leave a message for correction to avoid mistaking people. If you have any questions, please leave a message and try your best to answer them.