Developing single application with Spring Boot (1)
1.SpringBoot Web development
Steps to use SpringBoot:
-
Create a SpringBoot application, select the modules we need, and SpringBoot will automatically configure the modules we need by default;
-
Manually configure some configuration items in the configuration file to run.
-
Focus on writing business code without considering a lot of configuration as before.
automatic assembly
- What exactly does spring boot help us configure? Can we modify it? What can be modified? Can it be expanded?
- Xxxautoconfiguration... Automatically configure components into containers;
- Xxxproperties: automatic configuration class, some customized contents in the assembly configuration file!
2. Static resource processing
Static resource mapping rules
-
Build an ordinary SpringBoot project.
- Writing a request is very simple. We need to introduce our front-end resources. There are many static resources in our project, such as css, js and other files. How to deal with this SpringBoot?
- If we are a web application, there will be a webapp under our main. We used to import all the pages here, right! But our current pom is packaged as jar. Can SpringBoot write pages for us in this way? Of course, it is possible, but SpringBoot has regulations on the location of static resources!
-
In spring boot, the web configuration of spring MVC is in the configuration class webmvcoautoconfiguration; There is one method: addResourceHandlers add resource handlers.
public void addResourceHandlers(ResourceHandlerRegistry registry) {
    if (!this.resourceProperties.isAddMappings()) {
        // Default resource handling is disabled
        logger.debug("Default resource handling disabled");
    } else {
        // Cache processing
        Duration cachePeriod = this.resourceProperties.getCache().getPeriod();
        CacheControl cacheControl = this.resourceProperties.getCache().getCachecontrol().toHttpCacheControl();
        // webjars configuration
        if (!registry.hasMappingForPattern("/webjars/**")) {
            this.customizeResourceHandlerRegistration(registry.addResourceHandler(new String[]{"/webjars/**"}).addResourceLocations(new String[]{"classpath:/META-INF/resources/webjars/"}).setCachePeriod(this.getSeconds(cachePeriod)).setCacheControl(cacheControl));
        }

        // Static resource allocation
        String staticPathPattern = this.mvcProperties.getStaticPathPattern();
        if (!registry.hasMappingForPattern(staticPathPattern)) {
            this.customizeResourceHandlerRegistration(registry.addResourceHandler(new String[]{staticPathPattern}).addResourceLocations(WebMvcAutoConfiguration.getResourceLocations(this.resourceProperties.getStaticLocations())).setCachePeriod(this.getSeconds(cachePeriod)).setCacheControl(cacheControl));
        }

    }
}
- Read the source code: for example, all / webjars / * *, you need to go to classpath:/META-INF/resources/webjars / to find the corresponding resources.
So what is webjars?
- The essence of Webjars is to introduce our static resources in the form of jar package. We used to import a static resource file directly.
- Webjars is required to use SpringBoot. We can search:
- Website: https://www.webjars.org [take a look at the website and introduce jQuery test]
- To use jQuery, we just need to introduce the pom dependency of the corresponding version of jQuery!
<dependency>
    <groupId>org.webjars</groupId>
    <artifactId>jquery</artifactId>
    <version>3.4.1</version>
</dependency>
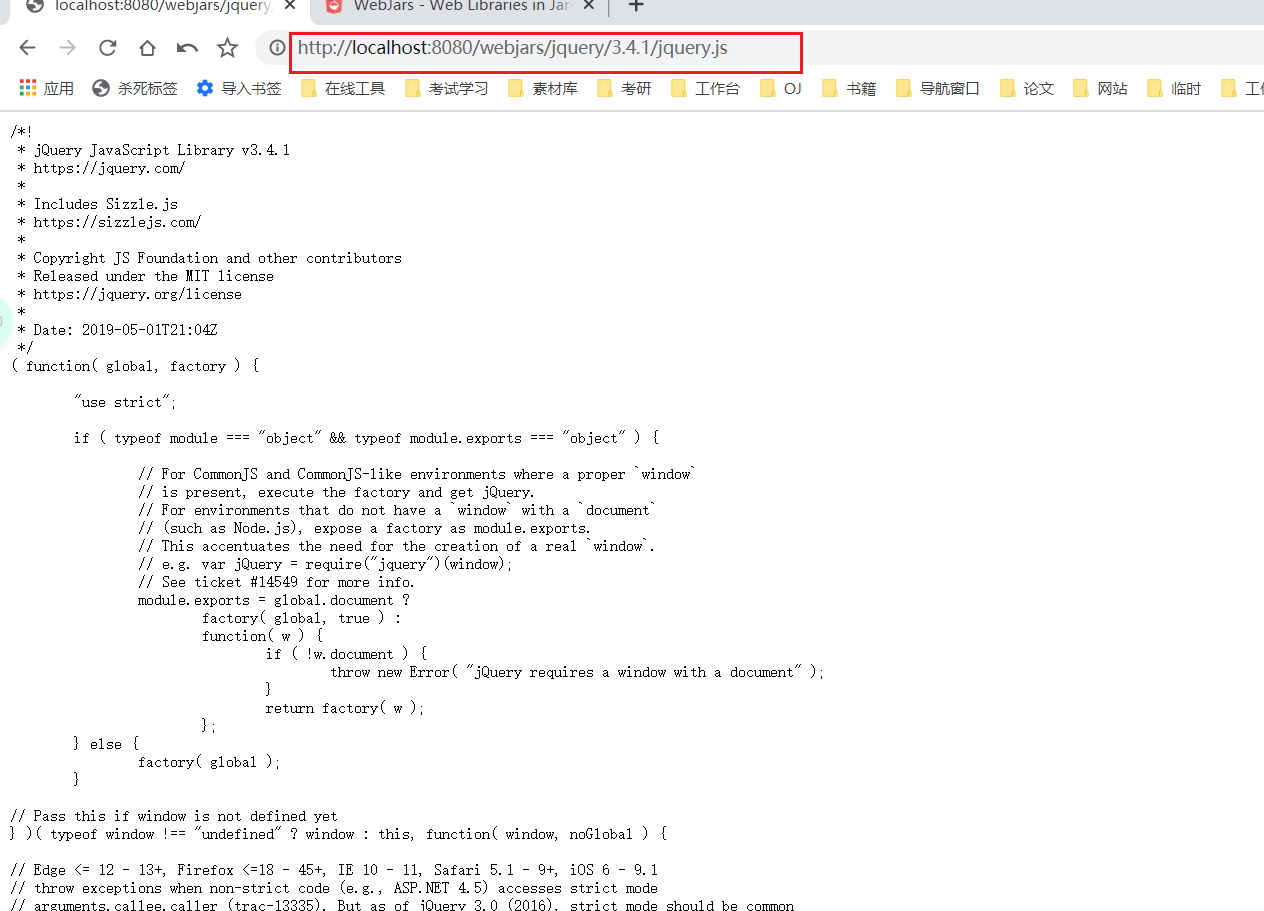
- After importing, check the webjars directory structure and visit jquery.com JS file!
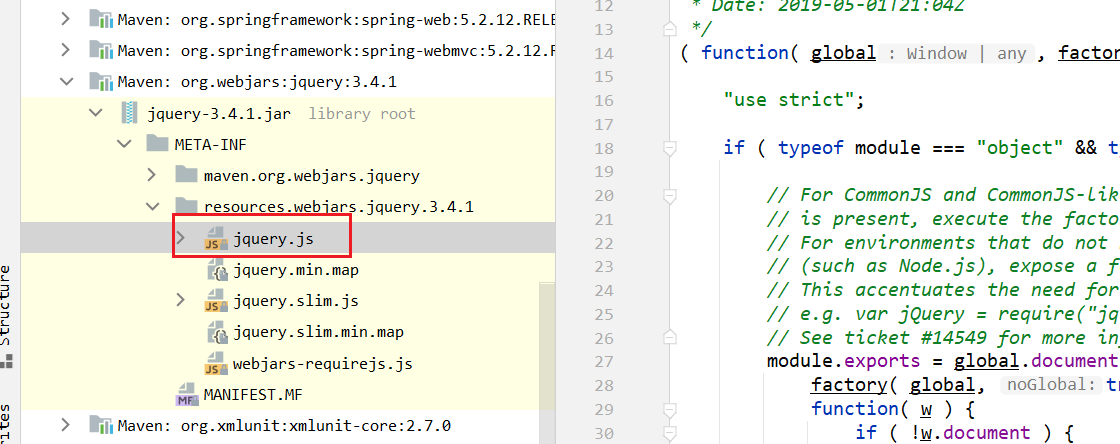
- Access: as long as it is a static resource, SpringBoot will go to the corresponding path to find the resource. Here: http://localhost:8080/webjars/jquery/3.4.1/jquery.js
The second static resource mapping rule
- How to import static resources when using them in a project? Look at the next line of code;
- Go to staticPathPattern and find the second mapping rule: / * *. If you access any resources of the current project, it will find the class resourceProperties. We can click to see the analysis:
public class ResourceProperties {
    // Find the corresponding path
    private static final String[] CLASSPATH_RESOURCE_LOCATIONS = new String[]{"classpath:/META-INF/resources/", "classpath:/resources/", "classpath:/static/", "classpath:/public/"};
    private String[] staticLocations;
    private boolean addMappings;
    private final ResourceProperties.Chain chain;
    private final ResourceProperties.Cache cache;

    public ResourceProperties() {
        // Find the corresponding value
        this.staticLocations = CLASSPATH_RESOURCE_LOCATIONS;
        this.addMappings = true;
        this.chain = new ResourceProperties.Chain();
        this.cache = new ResourceProperties.Cache();
    }

    // Entry method
    public String[] getStaticLocations() {
        return this.staticLocations;
    }

    ......
}
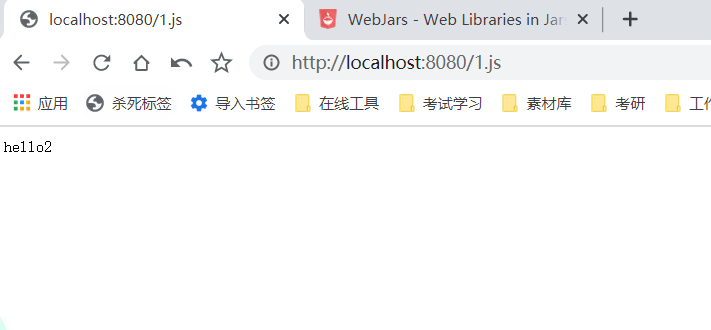
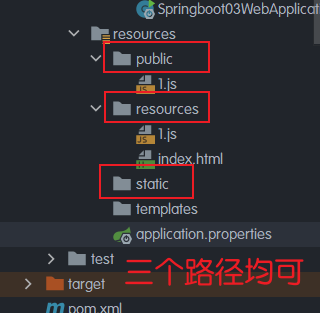
- ResourceProperties can set parameters related to our static resources; This points to the folder where it will look for resources, that is, the contents of the above array. Therefore, it is concluded that the static resources stored in the following four directories can be identified by us:
"classpath:/META-INF/resources/"
"classpath:/resources/"
"classpath:/static/"
"classpath:/public/"
- Create a new folder under the root directory of resources to store our static files; For example, we visit http://localhost:8080/1.js , he will go to these folders to find the corresponding static resource files;

Custom static resource path
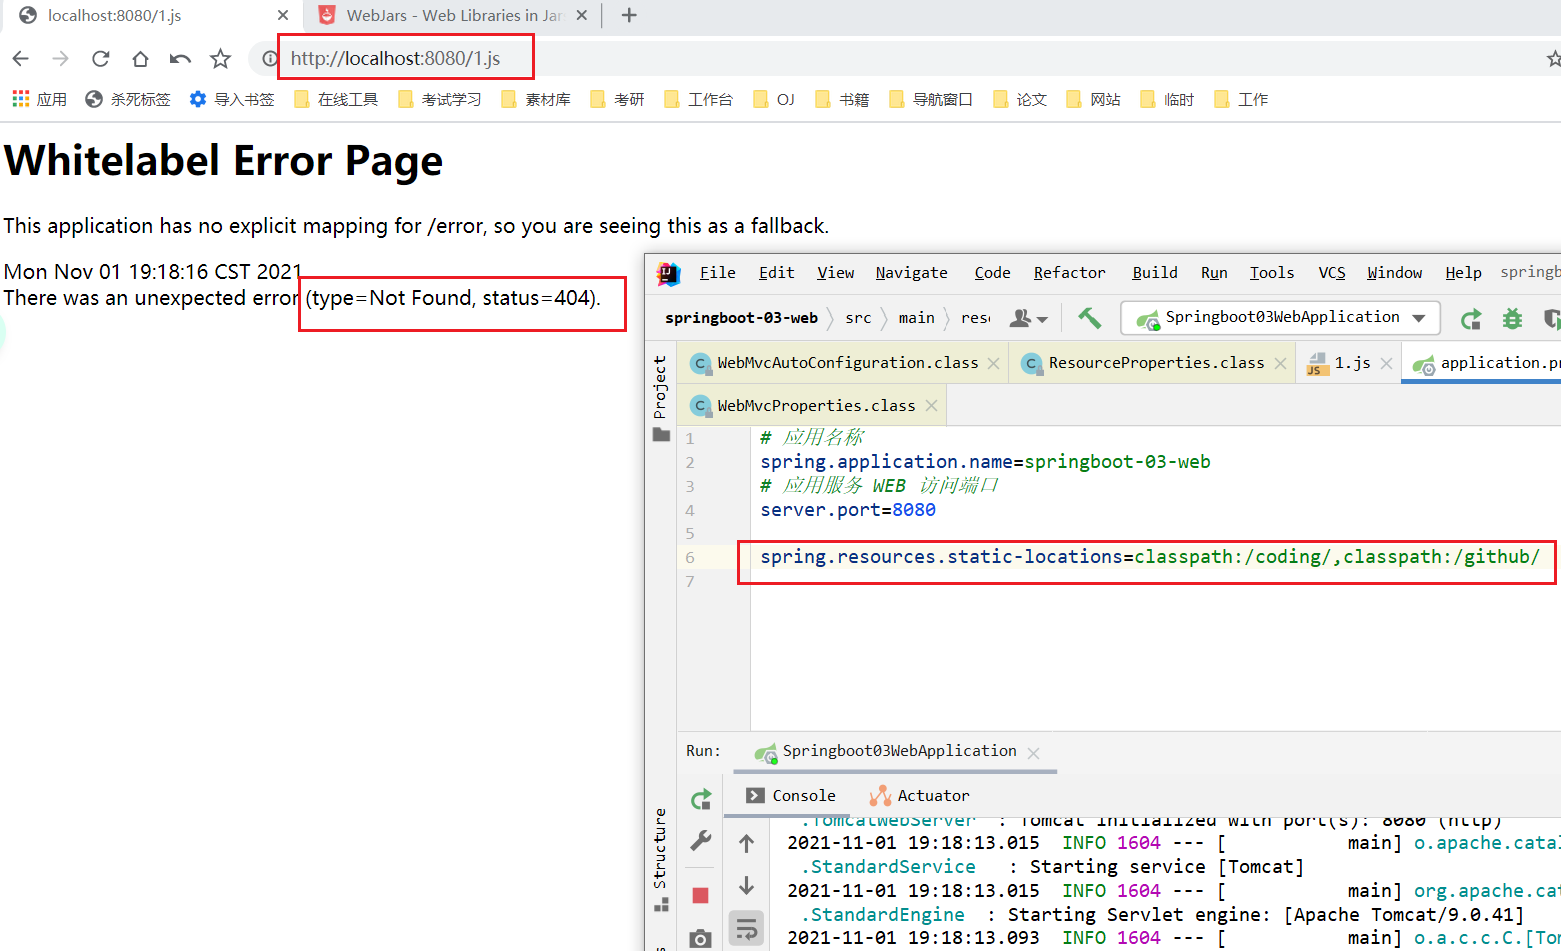
- You can also specify which folders we need to put static resource files through the configuration file. In application Configure in properties;
spring.web.resources.static-locations=classpath:/coding/,classpath:/github/
- Once you define the path of the static folder, the original automatic configuration will be invalid!
3. Homepage and icon customization
- Continue to look down at the source code! You can see a map of the welcome page, which is our home page!
@Bean
public WelcomePageHandlerMapping welcomePageHandlerMapping(ApplicationContext applicationContext, FormattingConversionService mvcConversionService, ResourceUrlProvider mvcResourceUrlProvider) {
    // Getwelcome page get welcome page
    WelcomePageHandlerMapping welcomePageHandlerMapping = new WelcomePageHandlerMapping(new TemplateAvailabilityProviders(applicationContext), applicationContext, this.getWelcomePage(), this.mvcProperties.getStaticPathPattern());
    welcomePageHandlerMapping.setInterceptors(this.getInterceptors(mvcConversionService, mvcResourceUrlProvider));
    welcomePageHandlerMapping.setCorsConfigurations(this.getCorsConfigurations());
    return welcomePageHandlerMapping;
}
- Click to continue
private Optional<Resource> getWelcomePage() {
    String[] locations = WebMvcAutoConfiguration.getResourceLocations(this.resourceProperties.getStaticLocations());
    // : is a new operator introduced in java8
	// When Class::function, function belongs to Class and should be a static method.
	// The fund of this::function belongs to this object.
	// In short, it is just a kind of grammatical sugar, which is a kind of abbreviation
    return Arrays.stream(locations).map(this::getIndexHtml).filter(this::isReadable).findFirst();
}

// The welcome page is an index under location Just HTML
private Resource getIndexHtml(String location) {
    return this.resourceLoader.getResource(location + "index.html");
}
-
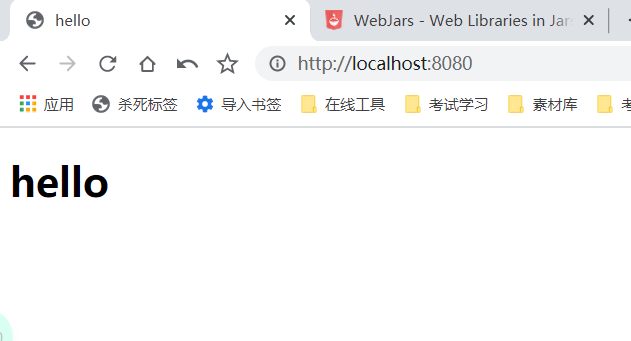
Welcome page, all indexes under the static resource folder HTML page; Mapped by / * * map.
-
Like my visit http://localhost:8080/ , you will find index. In the static resource folder Test [HTML]
-
Create a new index HTML, in any of the above three directories; Then access the test http://localhost:8080/ Look at the results!
-
Note: this function needs to cancel the custom static resource path.
Description of website Icon:
- Deleted after version 2.2!!!
- Like other static resources, Spring Boot looks for favicon in the configured static content location ico. If the application exists, it will be used as a Vicon file automatically.
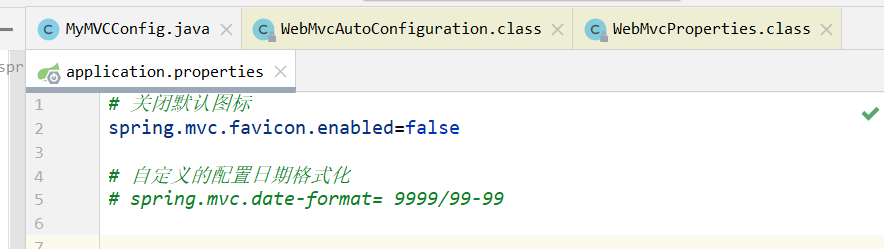
- Turn off the SpringBoot default icon!
# Turn off default icon
spring.mvc.favicon.enabled=false
- Put an icon in the static resources directory. I put it in the resources directory. The name of the icon must be favicon ico!
- Clear browser cache! Refresh the web page and find that the icon has become your own!
4.Thymeleaf template engine and syntax
template engine
-
The page given to us by the front end is an html page. If we developed them before, we need to turn them into JSP pages. The advantage of JSP is that when we find out that some data is forwarded to the JSP page, we can easily realize the display and interaction of data with JSP.
-
jsp supports very powerful functions, including the ability to write Java code. However, in our current situation, the SpringBoot project is first in the form of jar, not war. Second, we still use embedded Tomcat. Therefore, it does not support jsp by default.
-
It doesn't support jsp. If we directly use pure static pages, it will bring us great trouble in development. What should we do?
-
SpringBoot recommends that you use the template engine:
-
In fact, we have heard a lot about template engines. In fact, jsp is a template engine, and there are many freemakers to use, including Thymeleaf recommended by SpringBoot. There are many template engines, but no matter how many template engines, their ideas are the same. What kind of ideas? Let's take a look at this picture:
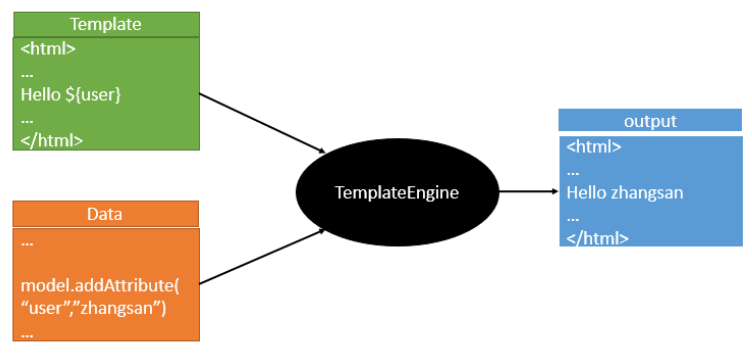
- The function of the template engine is that we write a page template. For example, some values are dynamic. We write some expressions. Where do these values come from? We encapsulate some data in the background. Then give the template and the data to our template engine. The template engine will help you parse and fill the expression to the position we specify according to our data, and then finally generate a content we want to write to us. This is the idea of our template engine, whether jsp or other template engines. It's just that the syntax may be a little different between different template engines. I won't introduce others. I'll mainly introduce the Thymeleaf template engine recommended by SpringBoot. This template engine is a high-level language template engine, and its syntax is simpler. Moreover, the function is more powerful.
- First, let's see how to use it in SpringBoot.
Introduce Thymeleaf
- How to introduce it? For springboot, everything is a start. Let's introduce it into the project. Give the following three websites:
- Thymeleaf official website: https://www.thymeleaf.org/
- Thymeleaf's home page at Github: https://github.com/thymeleaf/thymeleaf
- Spring official document: find our corresponding version, Spring Boot Reference Documentation
- Find the corresponding pom dependency: you can click into the source code to see the original package!
<!--thymeleaf-->
<dependency>
	<groupId>org.springframework.boot</groupId>
	<artifactId>spring-boot-starter-thymeleaf</artifactId>
</dependency>
- Maven will automatically download the jar package. We can go and have a look at the downloaded things;

thymeleaf analysis
- Thymeleaf has been introduced earlier. How to use it?
- First of all, we have to take a look at the automatic configuration rules of Thymeleaf according to the automatic configuration principle of SpringBoot. According to that rule, we use it.
- First, look for the automatic configuration class of Thymeleaf: ThymeleafProperties
@ConfigurationProperties(
    prefix = "spring.thymeleaf"
)
public class ThymeleafProperties {
    private static final Charset DEFAULT_ENCODING;
    public static final String DEFAULT_PREFIX = "classpath:/templates/";
    public static final String DEFAULT_SUFFIX = ".html";
    private boolean checkTemplate = true;
    private boolean checkTemplateLocation = true;
    private String prefix = "classpath:/templates/";
    private String suffix = ".html";
    private String mode = "HTML";
    private Charset encoding;
    private boolean cache;
    private Integer templateResolverOrder;
    private String[] viewNames;
    private String[] excludedViewNames;
    private boolean enableSpringElCompiler;
    private boolean renderHiddenMarkersBeforeCheckboxes;
    private boolean enabled;
    private final ThymeleafProperties.Servlet servlet;
    private final ThymeleafProperties.Reactive reactive;
}
-
You can see the default prefix and suffix in it!
-
We just need to put our html page under the templates under the classpath, and thymeleaf can help us render automatically.
-
There is no need to configure anything to use thymeleaf, just put it in the specified folder!
Test:
- Write a TestController
@Controller
public class TestController {
    @RequestMapping("/t1")
    public String test(){
        // classpath:/templates/test.html
        return "test";
    }
}
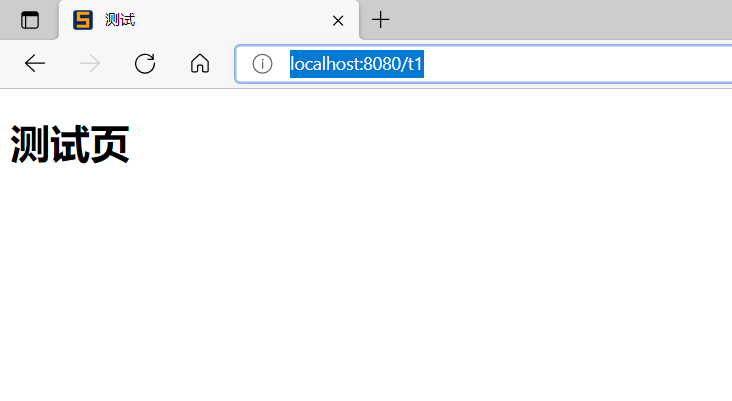
- Write a test page test Html is placed in the templates directory
<!DOCTYPE html>
<html lang="en">
<head>
    <meta charset="UTF-8">
    <title>test</title>
</head>
<body>

  <h1>test page</h1>
</body>
</html>
- Start project request test
Thymeleaf grammar learning
- For grammar learning, please refer to the official website: Thymeleaf
- Do the simplest exercise: we need to find some data and display it on the page.
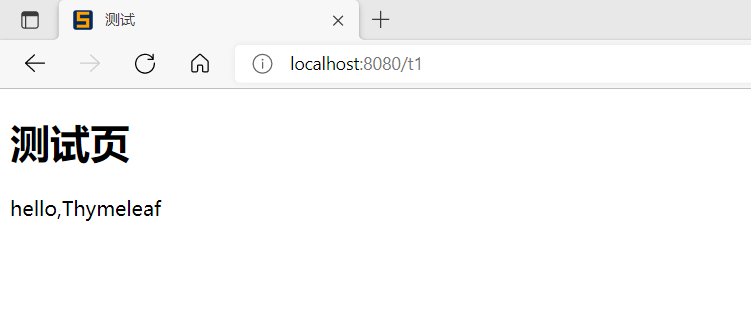
- Modify the test request and add data transmission;
@Controller
public class TestController {
    @RequestMapping("/t1")
    public String test(Model model){
        // Store data
        // Note: if it is not transferred, it is the string. If it is escaped, it is the page
        model.addAttribute("msg","hello,Thymeleaf");
        // classpath:/templates/test.html
        return "test";
    }
}
- To use thymeleaf, you need to import namespace constraints in html files to facilitate prompt. You can go to #3 the official document and take a look at the namespace
<html xmlns:th="http://www.thymeleaf.org">
- Write front page
<!DOCTYPE html>
<html lang="en" xmlns:th="http://www.thymeleaf.org">
<head>
    <meta charset="UTF-8">
    <title>test</title>
</head>
<body>

  <h1>test page</h1>
  <!-- be-all html Elements can be thymeleaf Replace nozzle: th:Yuan Su Ming
  th:text Is to div Set the content in to the value it specifies -->
  <div th:text="${msg}"></div>

</body>
</html>
- OK, the introduction is done. Let's seriously study the usage grammar of Thymeleaf!
- You can use any th:attr to replace the value of the native attribute in Html! Refer to the official website document #10; th grammar
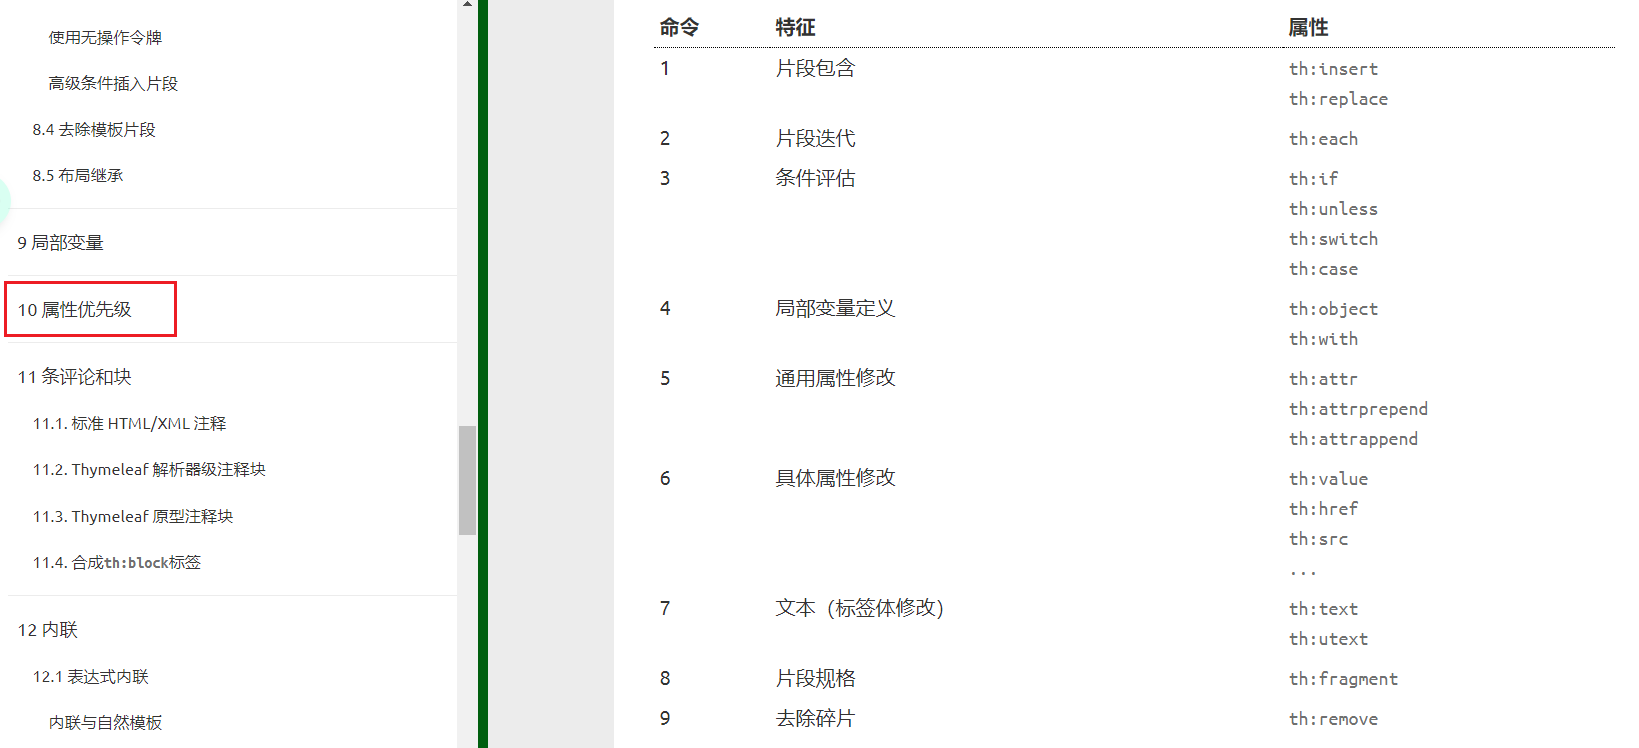
- What expressions can you write? You can refer to the official documents #4
Simple expressions:(Expression syntax)
Variable Expressions: ${...}: Obtain variable value; OGNL;
  1),Get the properties and call methods of the object
  2),Use built-in basic objects: #18
      #ctx : the context object.
      #vars: the context variables.
      #locale : the context locale.
      #request : (only in Web Contexts) the HttpServletRequest object.
      #response : (only in Web Contexts) the HttpServletResponse object.
      #session : (only in Web Contexts) the HttpSession object.
      #servletContext : (only in Web Contexts) the ServletContext object.
  3),Some built-in tool objects:
      #execInfo : information about the template being processed.
      #uris : methods for escaping parts of URLs/URIs
      #conversions : methods for executing the configured conversion
  service (if any).
  	  #dates : methods for java.util.Date objects: formatting, component
  extraction, etc.
  	  #calendars : analogous to #dates , but for java.util.Calendar
  objects.
      #numbers : methods for formatting numeric objects.
      #strings : methods for String objects: contains, startsWith,
  prepending/appending, etc.
      #objects : methods for objects in general.
      #bools : methods for boolean evaluation.
      #arrays : methods for arrays.
      #lists : methods for lists.
      #sets : methods for sets.
      #maps : methods for maps.
      #aggregates : methods for creating aggregates on arrays or
  collections.
  ============================================================================
  ======

      Selection Variable Expressions: *{...}: Select expressions: and ${}It is the same in function;
      Message Expressions: #{...}:  Get international content
      Link URL Expressions: @{...}: definition URL;
      Fragment Expressions: ~{...}: Fragment reference expression
  Literals((literal)
      Text literals: 'one text' , 'Another one!' ,...
      Number literals: 0 , 34 , 3.0 , 12.3 ,...
      Boolean literals: true , false
      Null literal: null
      Literal tokens: one , sometext , main ,...
  Text operations:((text operation)
      String concatenation: +
      Literal substitutions: |The name is ${name}|
  Arithmetic operations:(Mathematical operation)
      Binary operators: + , - , * , / , %
      Minus sign (unary operator): -
  Boolean operations:(Boolean operation)
      Binary operators: and , or
      Boolean negation (unary operator): ! , not
  Comparisons and equality:(Comparison operation)
      Comparators: > , < , >= , <= ( gt , lt , ge , le )
	  Equality operators: == , != ( eq , ne )
  Conditional operators:Conditional operation (ternary operator)
      If-then: (if) ? (then)
      If-then-else: (if) ? (then) : (else)
      Default: (value) ?: (defaultvalue)
  Special tokens:
  	  No-Operation: _
Practice test:
- Write a Controller and put some data.
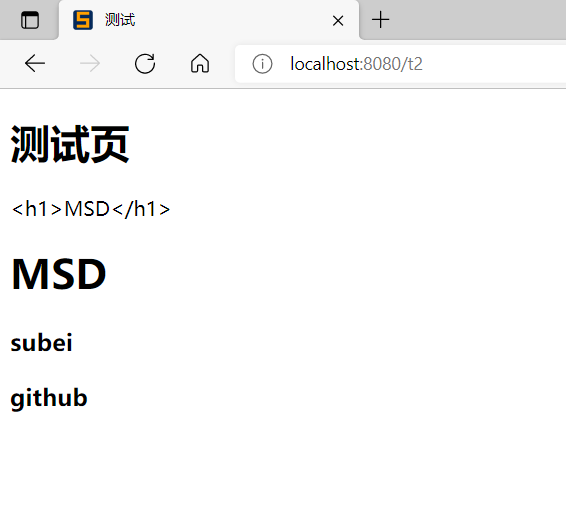
@RequestMapping("/t2")
public String test2(Map<String, Object> map) {
    // Store data
    map.put("msg","<h1>MSD</h1>");
    map.put("users", Arrays.asList("subei","github"));
    return "test";
}
- Write front page
<!DOCTYPE html>
<html lang="en" xmlns:th="http://www.thymeleaf.org">
<head>
    <meta charset="UTF-8">
    <title>test</title>
</head>
<body>

  <h1>test page</h1>
  <!-- be-all html Elements can be thymeleaf Replace nozzle: th:Yuansu name
  th:text Is to div Set the content in to the value it specifies -->
  <div th:text="${msg}"></div>

<!--  No escape  -->
  <div th:utext="${msg}"></div>

<!--Traversal data-->
<!--th:each Each traversal will generate the current tag: official website#9-->
<h3 th:each="user :${users}" th:text="${user}"></h3>

</body>
</html>
- Start the test!
According to the official documents to query, is the most important, to skillfully use the official documents!
5.Spring MVC configuration principle
Read the official website
Before writing the project, we also need to know what configuration SpringBoot has made for our spring MVC, including how to extend and customize it.
Only by making these clear will it be more convenient to use in the future.
-
Approach 1: source code analysis;
-
Way 2: official documents! Address: Spring Boot Reference Documentation
Spring MVC Auto-configuration
// Spring Boot provides automatic configuration for Spring MVC, which works well with most applications.
Spring Boot provides auto-configuration for Spring MVC that works well with most applications.
// The following functions are added on the basis of Spring automatic configuration:
The auto-configuration adds the following features on top of Spring's defaults:
// Include view parser
Inclusion of ContentNegotiatingViewResolver and BeanNameViewResolver beans.
// Support the path of static resource folder and webjars
Support for serving static resources, including support for WebJars
// Automatically registered Converter:
// Converter, which is the thing that our web page submits data to the background and automatically encapsulates it into an object, such as automatically converting the "1" string into int type
// Formatter: [formatter, for example, the page gives us a 2019-8-10, which will automatically format it as a Date object]
Automatic registration of Converter, GenericConverter, and Formatter beans.
// HttpMessageConverters
// Spring MVC is used to convert Http requests and responses. For example, if we want to convert a User object into a JSON string, you can see the official website document explanation;
Support for HttpMessageConverters (covered later in this document).
// To define error code generation rules
Automatic registration of MessageCodesResolver (covered later in this document).
// Homepage customization
Static index.html support.
// icons customizing
Custom Favicon support (covered later in this document).
// Initialize the data binder: help us bind the request data to the JavaBean!
Automatic use of a ConfigurableWebBindingInitializer bean (covered later in this document).

/*
If you want to keep the Spring Boot MVC feature and want to add other MVC configurations (interceptors, formatters, view controllers, and other features), you can add your own
 The @ configuration class of is webmvcconfigurer, but @ EnableWebMvc is not added. If you want to provide
RequestMappingHandlerMapping,RequestMappingHandlerAdapter Or ExceptionHandlerExceptionResolver
 Instance, you can declare a webmvcreationadapter instance to provide such components.
*/
If you want to keep Spring Boot MVC features and you want to add additional MVC configuration
(interceptors, formatters, view controllers, and other features), you can add your own
@Configuration class of type WebMvcConfigurer but without @EnableWebMvc. If you wish to provide
custom instances of RequestMappingHandlerMapping, RequestMappingHandlerAdapter, or
ExceptionHandlerExceptionResolver, you can declare a WebMvcRegistrationsAdapter instance to provide such components.

// If you want to fully control Spring MVC, you can add your own @ Configuration and annotate it with @ EnableWebMvc.
If you want to take complete control of Spring MVC, you can add your own @Configuration annotated with @EnableWebMvc.
- Take a closer look at how it is implemented. It tells us that SpringBoot has automatically configured SpringMVC for us, and then what has been configured automatically?
ContentNegotiatingViewResolver content negotiation view resolver.
ViewResolver is automatically configured, which is the view parser of spring MVC learned before;
That is, the View object is obtained according to the return value of the method, and then the View object determines how to render (forward, redirect).
- Take a look at the source code here: we find webmvcoautoconfiguration and search for content negotiatingviewresolver. Find the following method!
@Bean
@ConditionalOnBean(ViewResolver.class)
@ConditionalOnMissingBean(name = "viewResolver", value = ContentNegotiatingViewResolver.class)
public ContentNegotiatingViewResolver viewResolver(BeanFactory beanFactory) {
    ContentNegotiatingViewResolver resolver = new ContentNegotiatingViewResolver();
    resolver.setContentNegotiationManager(beanFactory.getBean(ContentNegotiationManager.class));
    // Content negotiatingviewresolver uses all other view parsers to locate views, so it should have a higher priority
    resolver.setOrder(Ordered.HIGHEST_PRECEDENCE);
    return resolver;
}
- Click into this category to see! Find the code of the corresponding parsing view;
@Nullable // Parameter Description: @ null able
public View resolveViewName(String viewName, Locale locale) throws Exception {
    RequestAttributes attrs = RequestContextHolder.getRequestAttributes();
    Assert.state(attrs instanceof ServletRequestAttributes, "No current ServletRequestAttributes");
    List<MediaType> requestedMediaTypes = this.getMediaTypes(((ServletRequestAttributes)attrs).getRequest());
    if (requestedMediaTypes != null) {
        // Get candidate view objects
        List<View> candidateViews = this.getCandidateViews(viewName, locale, requestedMediaTypes);
        // Select the most appropriate view object, and then return this object
        View bestView = this.getBestView(candidateViews, requestedMediaTypes, attrs);
        if (bestView != null) {
            return bestView;
        }
    }

    String mediaTypeInfo = this.logger.isDebugEnabled() && requestedMediaTypes != null ? " given " + requestedMediaTypes.toString() : "";
    if (this.useNotAcceptableStatusCode) {
        if (this.logger.isDebugEnabled()) {
            this.logger.debug("Using 406 NOT_ACCEPTABLE" + mediaTypeInfo);
        }

        return NOT_ACCEPTABLE_VIEW;
    } else {
        this.logger.debug("View remains unresolved" + mediaTypeInfo);
        return null;
    }
}
-
Continue to click in to see how he gets the candidate view?
-
In getCandidateViews, you can see that he brings all the view parsers, performs a while loop, and parses them one by one!
Iterator var5 = this.viewResolvers.iterator();
-
Therefore, it is concluded that the view resolver of content negotiation is used to combine all view resolvers
-
Go to study his combinatorial logic and see that there is an attribute viewResolvers to see where it is assigned!
protected void initServletContext(ServletContext servletContext) {
    // Here, it gets all the view parsers in the container from the beanFactory tool
    // ViewRescolver.class combines all view parsers
    Collection<ViewResolver> matchingBeans = BeanFactoryUtils.beansOfTypeIncludingAncestors(this.obtainApplicationContext(), ViewResolver.class).values();
    ViewResolver viewResolver;
    if (this.viewResolvers == null) {
        this.viewResolvers = new ArrayList(matchingBeans.size());
    }
    // ...............
}
-
Since the parser is a view, can it be implemented in a view?
-
You can add a view parser to the container by yourself; This class will help us automatically combine it;
- Try to write a view parser in the main program;
@Bean // Put into bean
public ViewResolver myViewResolver(){
    return new MyViewResolver();
}

// To write a static internal class, the view parser needs to implement the ViewResolver interface
private static class MyViewResolver implements ViewResolver{
    @Override
    public View resolveViewName(String s, Locale locale) throws Exception {
        return null;
    }
}
- See if the view parser we wrote ourselves works? We add a breakpoint to the doDispatch method in the dispatcher servlet for debugging, because all requests will go to this method.
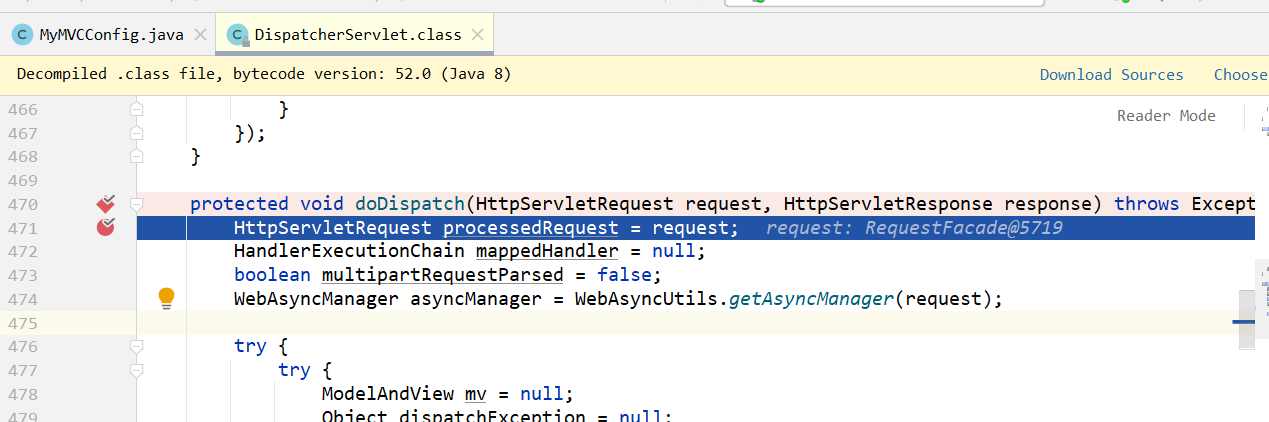
- Start our project, and then visit a random page in the browser to see the Debug information;
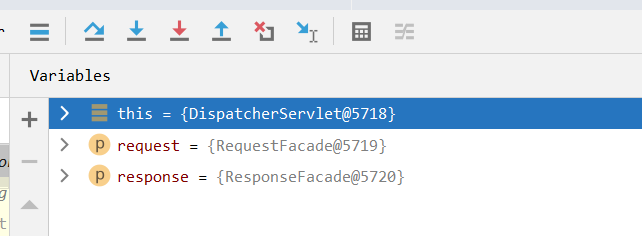
- Find the view parser and see that our own definition is here;
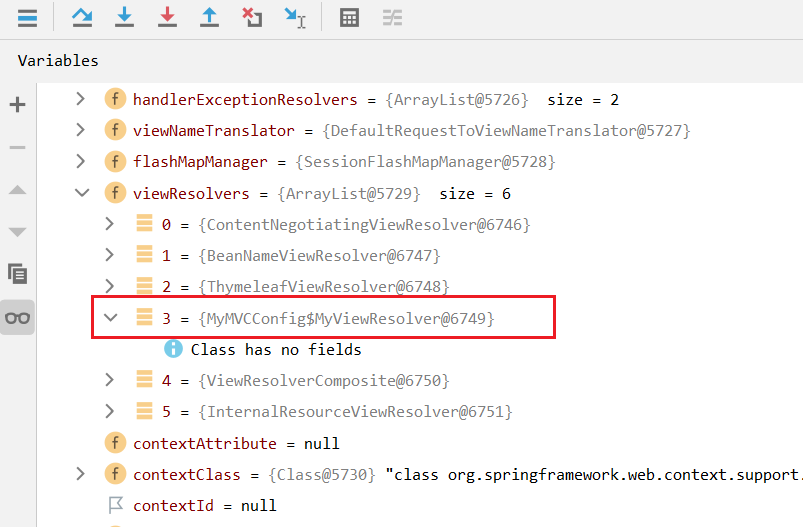
- Therefore, if you want to use your own customized things, you just need to add this component to the container! SpringBoot will do the rest for us!
Converter and formatter
- Format converter found:
@Bean
public FormattingConversionService mvcConversionService() {
    // Get the formatting rules in the configuration file
    WebConversionService conversionService = new WebConversionService(this.mvcProperties.getDateFormat());
    this.addFormatters(conversionService);
    return conversionService;
}
- Click in:
public String getDateFormat() {
    return this.dateFormat;
}

public void setDateFormat(String dateFormat) {
    this.dateFormat = dateFormat;
}

// Date format to use. For instance, `dd/MM/yyyy`.  default
private String dateFormat;
- You can see that in the Properties file, we can automatically configure it!
Modify the default configuration of SpringBoot
The principle of so many automatic configuration is the same. Through the analysis of the principle of automatic configuration of WebMVC, we should learn a learning method and draw a conclusion through source code exploration; This conclusion must belong to itself and be all-round.
The bottom layer of SpringBoot uses a lot of these design details, so you need to read the source code if you have nothing to do! come to conclusion;
When SpringBoot automatically configures many components, first check whether there are user configured components in the container (if the user configures @ bean s), if so, use user configured components, and if not, use automatically configured components;
If there are multiple components, such as our view parser, you can combine the user configured with your own default!
The official documents of the extension using spring MVC are as follows:
If you want to keep Spring Boot MVC features and you want to add additional MVC configuration (interceptors, formatters, view controllers, and other features), you can add your own @Configuration class of type WebMvcConfigurer but without @EnableWebMvc. If you wish to provide custom instances of RequestMappingHandlerMapping, RequestMappingHandlerAdapter, or ExceptionHandlerExceptionResolver, you can declare a WebMvcRegistrationsAdapter instance to provide such components.
- All you need to do is write a @ Configuration annotation class, and the type should be WebMvcConfigurer, and the @ EnableWebMvc annotation cannot be marked; Let's write one by ourselves; We create a new package called config and write a class MyMvcConfig;
// Extend springmvc unpackerservle
//You can use custom classes to extend the functionality of MVC
@Configuration
public class MyMVCConfig implements WebMvcConfigurer {

    @Override
    public void addViewControllers(ViewControllerRegistry registry){
        // When the browser sends / test, it will jump to the test page;
        registry.addViewController("/test").setViewName("test");
    }
}
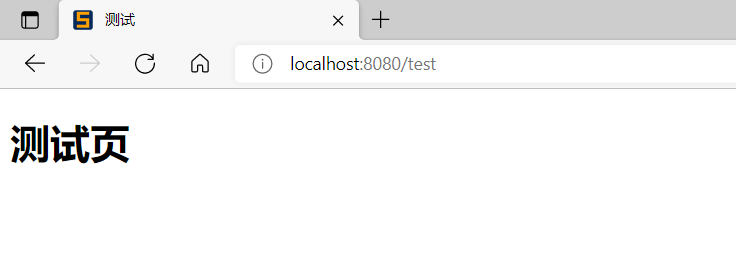
It did jump over! Therefore, to extend spring MVC, we are officially recommended to use it in this way. We can not only keep all the automatic configuration of SpringBoot, but also use the configuration we extended!
- Specifically, we can analyze the principle:
- Webmvcoautoconfiguration is the automatic configuration class of spring MVC, which has a class webmvcoautoconfigurationadapter
- There is an annotation on this class, which will be imported during other automatic configuration: @ Import(EnableWebMvcConfiguration.class)
- When you click EnableWebMvcConfiguration, it inherits a parent class: DelegatingWebMvcConfiguration
@Configuration
public class DelegatingWebMvcConfiguration extends WebMvcConfigurationSupport {
    private final WebMvcConfigurerComposite configurers = new WebMvcConfigurerComposite();

    public DelegatingWebMvcConfiguration() {
    }

    // Get all webmvcconfigurers from the container
    @Autowired(
        required = false
    )
    public void setConfigurers(List<WebMvcConfigurer> configurers) {
        if (!CollectionUtils.isEmpty(configurers)) {
            this.configurers.addWebMvcConfigurers(configurers);
        }

    }
}
- You can find a viewController just set above in this class as a reference and find that it calls one.
public void addWebMvcConfigurers(List<WebMvcConfigurer> configurers) {
    if (!CollectionUtils.isEmpty(configurers)) {
        this.delegates.addAll(configurers);
    }

}
- Click in:
public void addFormatters(FormatterRegistry registry) {
    Iterator var2 = this.delegates.iterator();

    while(var2.hasNext()) {
        // Call all WebMvcConfigurer related configurations together! Including those configured by ourselves and those configured by Spring
        WebMvcConfigurer delegate = (WebMvcConfigurer)var2.next();
        delegate.addFormatters(registry);
    }

}
- Therefore, it is concluded that all WebMvcConfiguration will be used, not only Spring's own configuration class, but also our own configuration class will be called;
Fully take over spring MVC
- Official documents:
If you want to take complete control of Spring MVC
you can add your own @Configuration annotated with @EnableWebMvc.
- Full takeover: spring boot does not need the automatic configuration of spring MVC. We configure everything ourselves!
- Just add a @ EnableWebMvc in our configuration class.
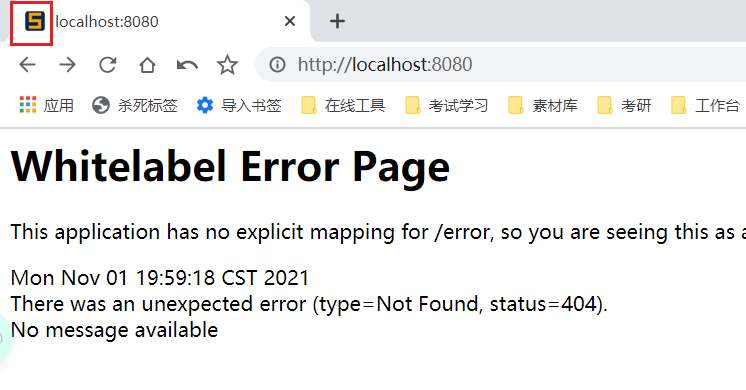
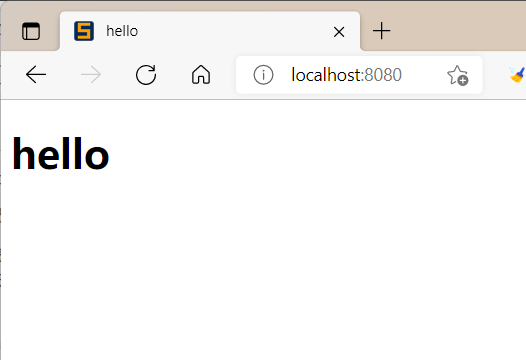
- If we take over spring MVC in full, the static resource mapping configured by SpringBoot will be invalid. We can test it;
- Before adding any comments, visit the home page:
- Annotate the configuration class: @ EnableWebMvc:
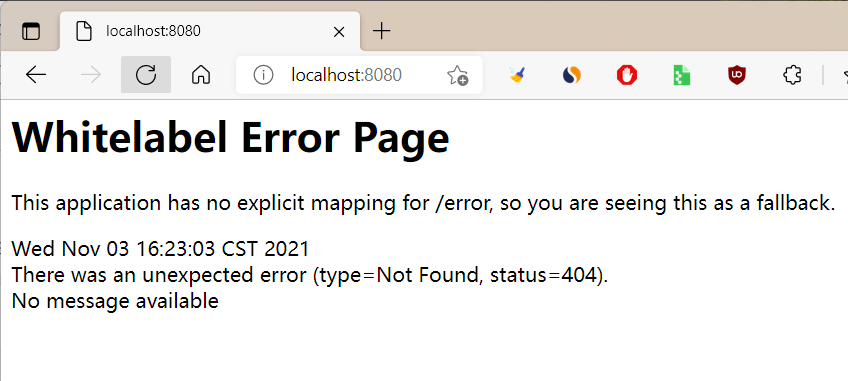
- It is found that all spring MVC automatic configuration has failed! Return to the original appearance;
- Therefore, it is not recommended to use full takeover spring MVC in development.
Why is the automatic configuration invalid after adding an annotation! Look at the source code:
- You can find that it imports a class. You can continue to see:
@Retention(RetentionPolicy.RUNTIME)
@Target({ElementType.TYPE})
@Documented
@Import({DelegatingWebMvcConfiguration.class})
public @interface EnableWebMvc {
}
- It inherits a parent class WebMvcConfigurationSupport:
@Configuration
public class DelegatingWebMvcConfiguration extends WebMvcConfigurationSupport {
    private final WebMvcConfigurerComposite configurers = new WebMvcConfigurerComposite();
.......
}
- Let's review the Webmvc auto configuration class:
@Configuration
@ConditionalOnWebApplication(
    type = Type.SERVLET
)
@ConditionalOnClass({Servlet.class, DispatcherServlet.class, WebMvcConfigurer.class})
// This auto configuration class takes effect only when there is no such component in the container
@ConditionalOnMissingBean({WebMvcConfigurationSupport.class})
@AutoConfigureOrder(-2147483638)
@AutoConfigureAfter({DispatcherServletAutoConfiguration.class, TaskExecutionAutoConfiguration.class, ValidationAutoConfiguration.class})
public class WebMvcAutoConfiguration {
    public static final String DEFAULT_PREFIX = "";
    public static final String DEFAULT_SUFFIX = "";
    private static final String[] SERVLET_LOCATIONS = new String[]{"/"};

    public WebMvcAutoConfiguration() {
    }
    ......
}
- To sum up: @ EnableWebMvc has imported the WebMvcConfigurationSupport component; The imported WebMvcConfigurationSupport is only the most basic function of spring MVC!
- This is to add a layer of encapsulation on spring MVC!