background
With the increasing amount of code and the expansion of the team, when we want to iterate quickly, we often want to get the requirements online as soon as possible, resulting in the code is not very standardized, leaving a pile of technical debt over a long time, and the quality of the code is not guaranteed. So I began to try some code quality related construction, hoping to help us scan out some code vulnerabilities through code static scanning, and then try to repair vulnerabilities and bug s.
Tools and platforms
Tools and platforms involved in this paper:
Introduction and configuration of open source solutions
Most of the static analysis of iOS platform code is basically based on open source oclint or infer. Although this paper uses sonarqube, the core of the free analysis scheme is still oclint and infer
sonarqube is an open-source static code analysis platform, which provides free community version. The free community version does not support Objective-C, but github provides open-source plug-ins, Objective-C, and the paid community version plus has analysis plug-ins that support Objective-C SonarCFamily for C
Both the free scheme and the paid scheme are based on the logs in the xcodebuild process. This time, we mainly focus on the related configuration process of the open source scheme.
For the use of open source solutions, the essential process is as follows:
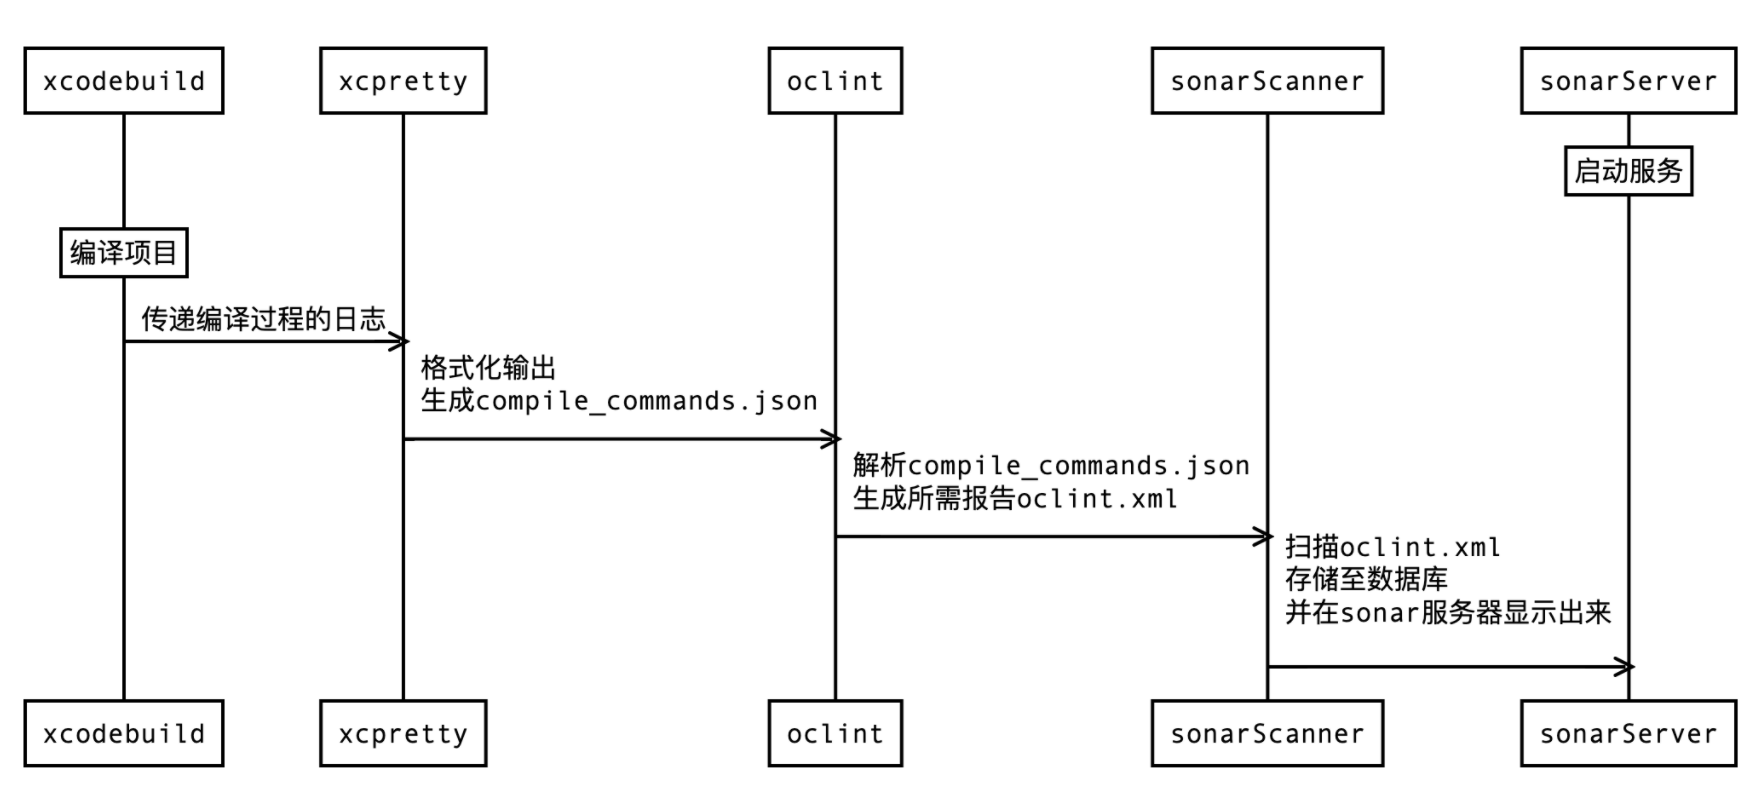
xcodebuild
The iOS core tool comes with Xcode installed. Because the core of oclint analysis is the log of xcodebuild during app compilation, xcodebuild is required (if build fails, the built log will also be analyzed, but try to ensure that the build can succeed)
If the project is in workspace and you need to specify - workspace and the corresponding scheme, you can view it through xcodebuild -list
//implement
$ xcodebuild -list
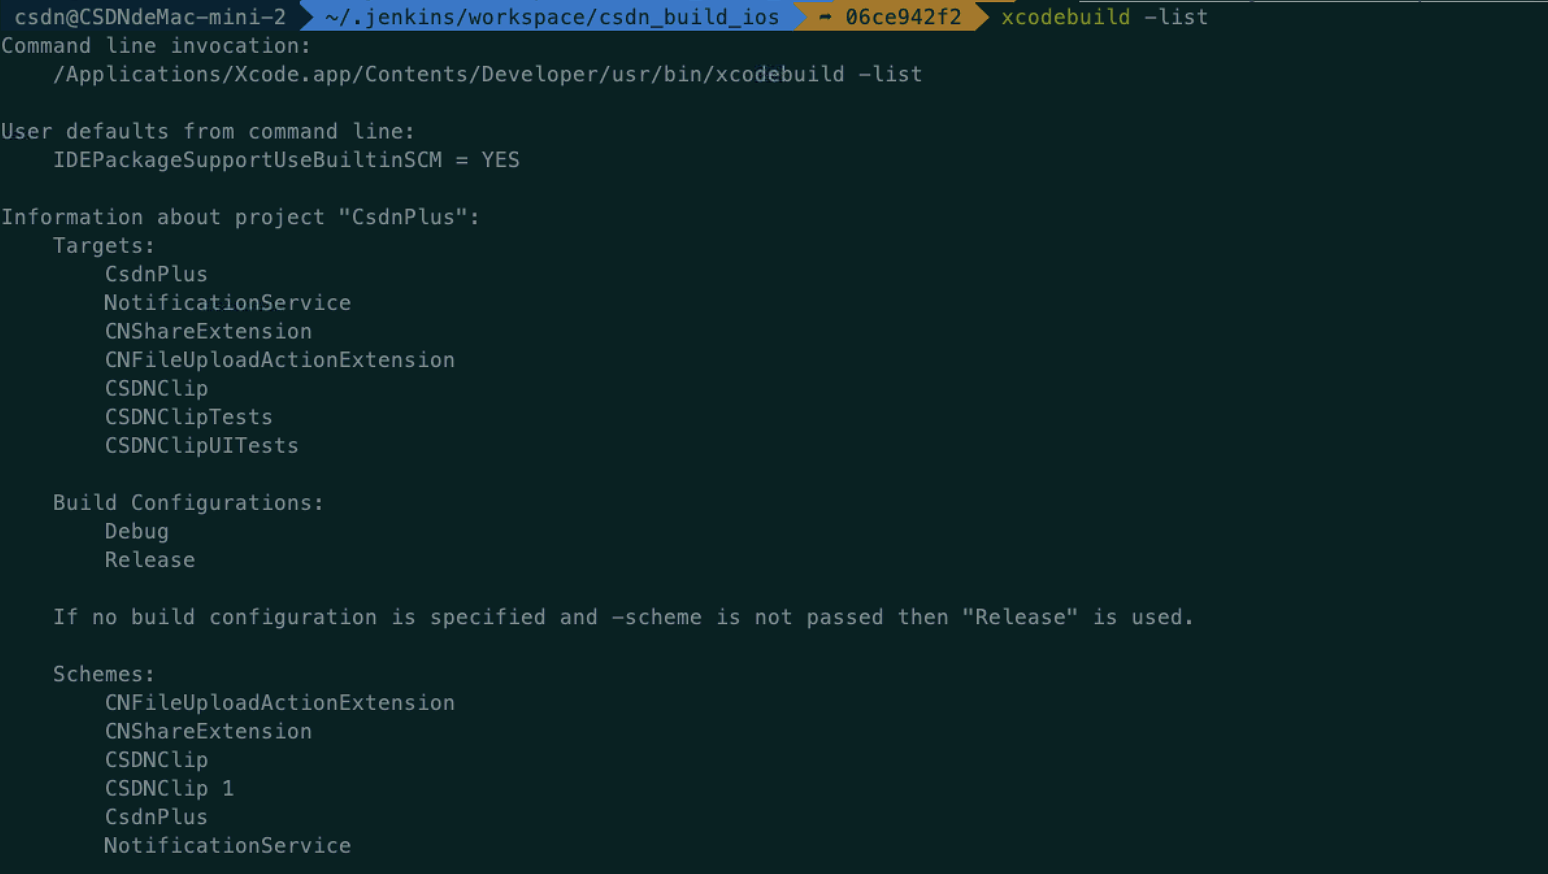
//implement
$ xcodebuild -workspace CsdnPlus.xcworkspace -scheme CsdnPlus

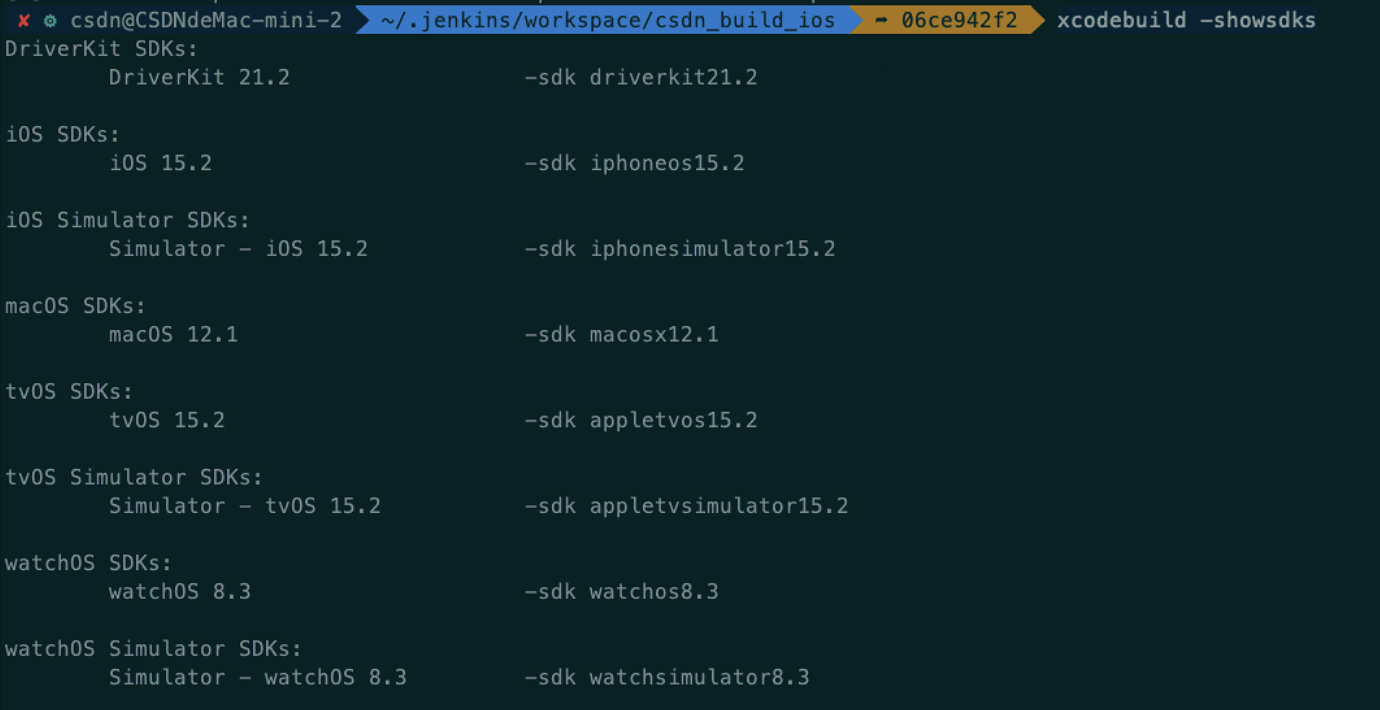
We only need to print out the package of IPA during the installation process, so we only need to print out the package of IPA during the installation process.
//implement
$ xcodebuild -showsdks
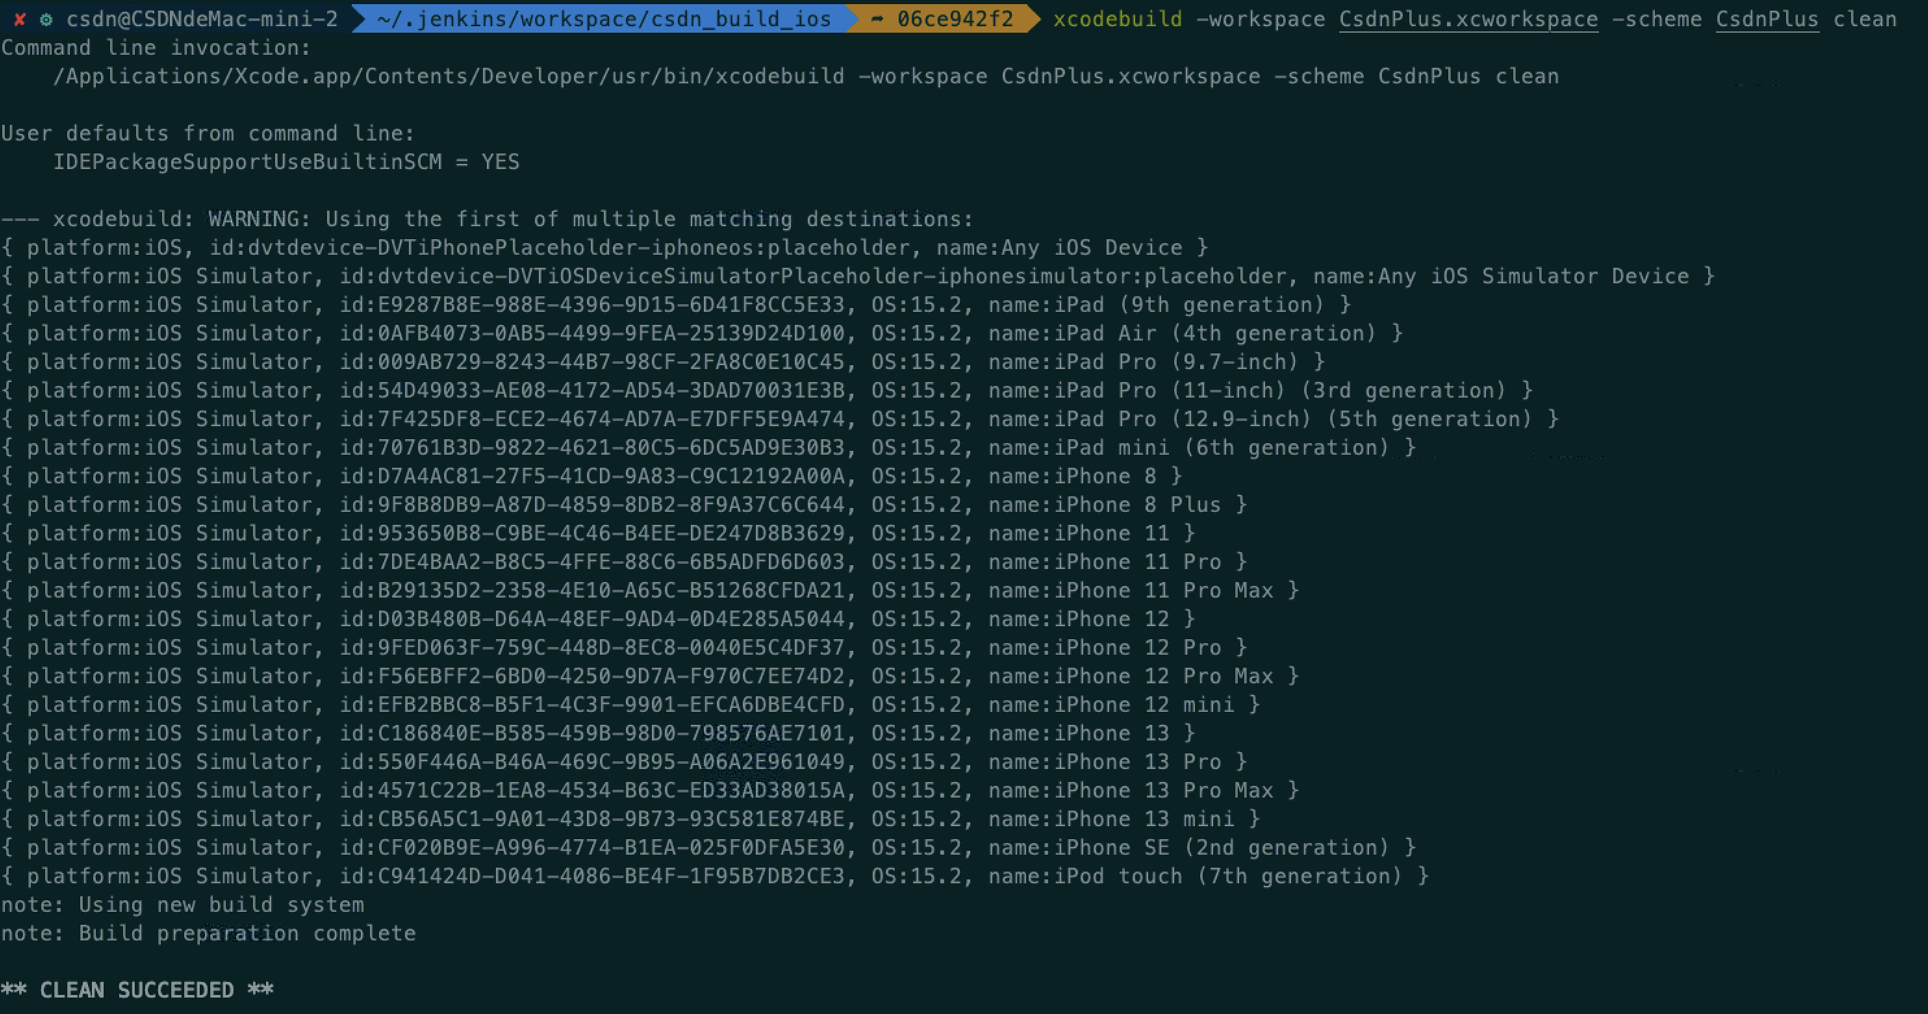
Because xcodebuild has a cache, we need clean before each execution
$ xcodebuild -workspace CsdnPlus.xcworkspace -scheme CsdnPlus clean
Execute build compilation
$ xcodebuild -scheme CsdnPlus -workspace CsdnPlus.xcworkspace -sdk iphonesimulator -destination 'platform=iOS Simulator,name=iPhone 12 Pro Max' -configuration Debug
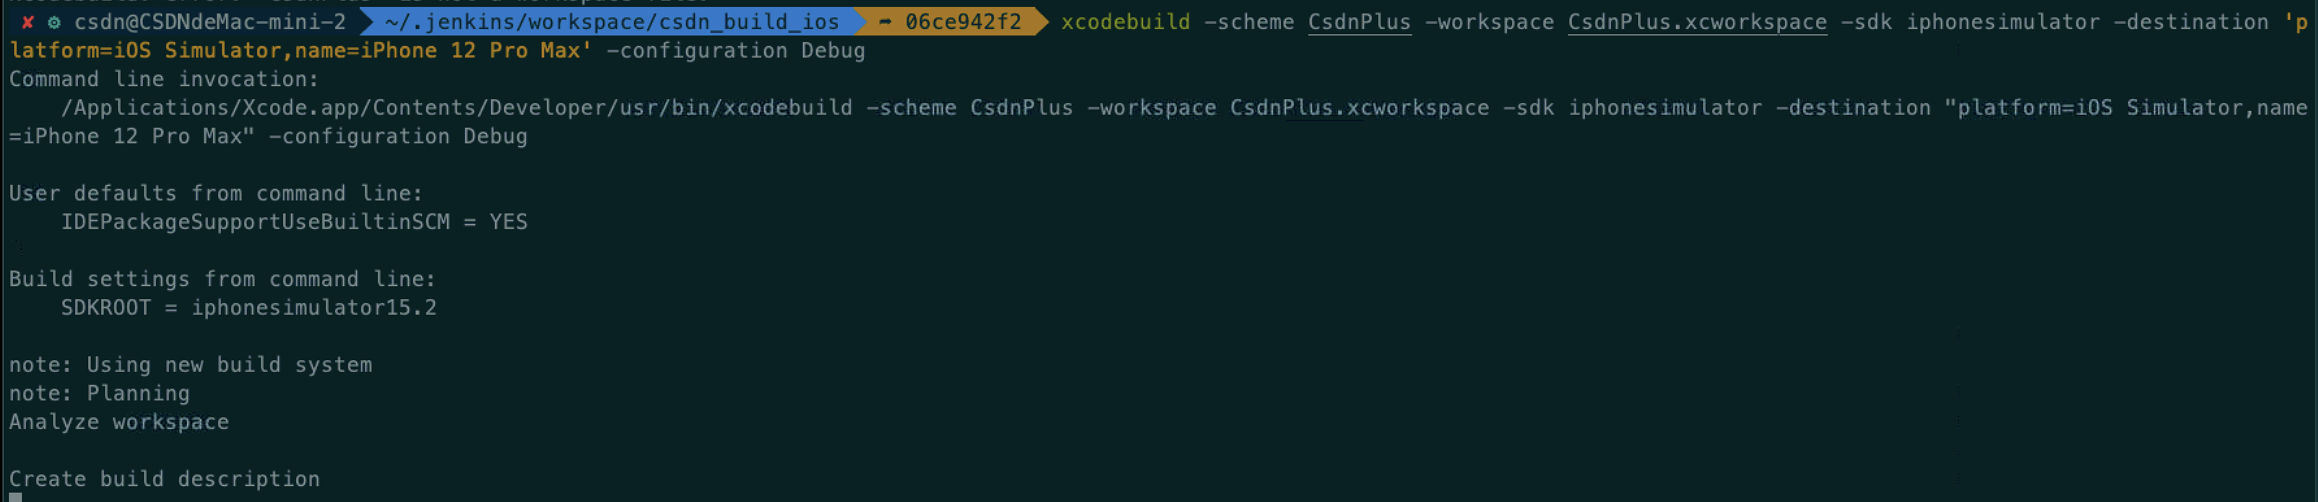
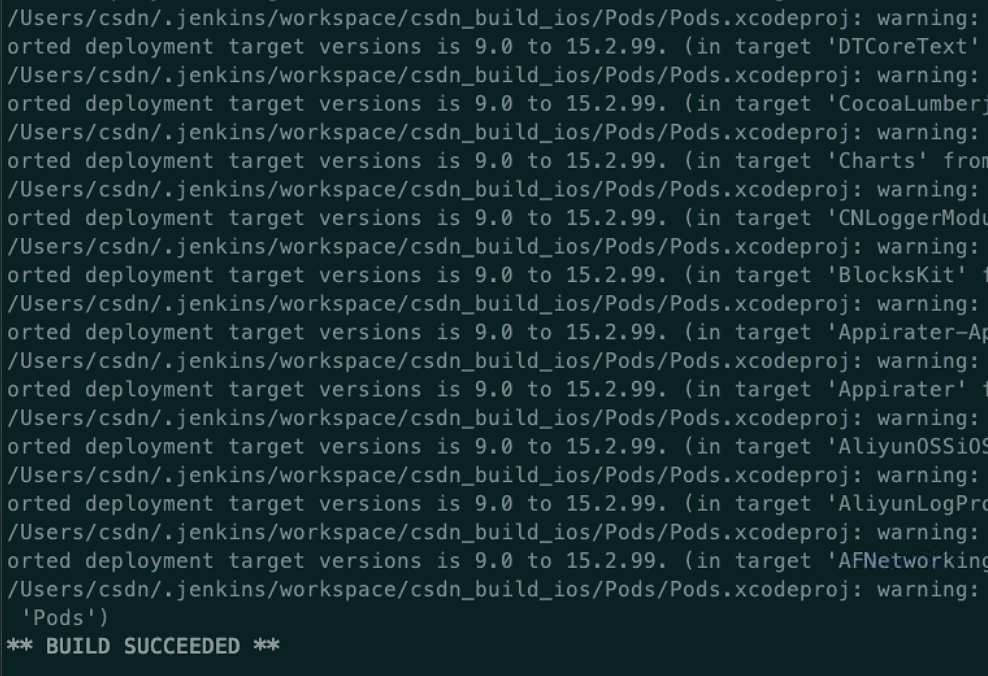
If you can compile successfully, you can go to the next step
xcpretty
xcpretty is a fast and flexible formatter for xcodebuild.
It does one thing, and it should do it well.
Xcretty is a tool for formatting xcodebuild output. Installation:
$ gem install xcpretty
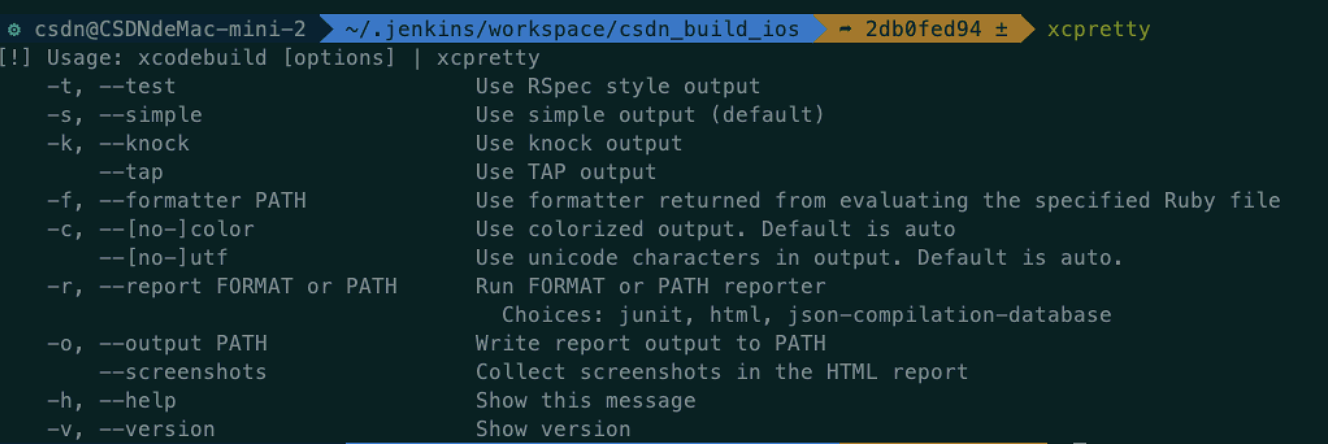
-r. -- report specifies the format of the generated report, which can be JUnit, HTML and JSON compilation database.
-o. -- output specifies the name of the generated file.
Here we use JSON compilation database format, and the output file name is compile_commands.json
(note that the output name cannot be changed, otherwise oclint will report an error later, because the verification name is built in the oclint source code, which can be viewed for details Source code)
Usage:
Immediately follow the xcodebuild related statements, such as:
$ xcodebuild [flags] | xcpretty
Log collection can be combined with tee
$ xcodebuild [flags] | tee xcodebuild.log | xcpretty
Execute the complete command to generate compiled data_ commands. JSON file:
First, you need to use xcodebuild clean and build projects, and add COMPILER_INDEX_STORE_ENABLE=NO parameter, otherwise an error may be reported: oclint: error: one compiler command contains multiple jobs
$ xcodebuild -scheme CsdnPlus -workspace CsdnPlus.xcworkspace -sdk iphonesimulator -destination 'platform=iOS Simulator,name=iPhone 12 Pro Max' -configuration Debug GCC_PRECOMPILE_PREFIX_HEADER=YES CLANG_ENABLE_MODULE_DEBUGGING=NO COMPILER_INDEX_STORE_ENABLE=NO | tee xcodebuild.log | xcpretty -r json-compilation-database -o compile_commands.json
OCLint
OCLint is a static code analysis tool for improving quality and reducing defects by inspecting C, C++ and Objective-C code
OCLint is a static analysis tool developed based on Clang Tooling, which is mainly used to find potential key technical problems that the compiler cannot check. It is the core tool for OC code analysis, mainly for the compile generated in the previous step_ commands. JSON to analyze and generate reports
Command installation:
$ brew tap oclint/formulae
$ brew install oclint
I recommend using the installation package to install OClint. Homebrew installation can only be installed to version 20.11, and the latest Xcode version corresponds to 22.02. If the installed version does not match, OClint analyzes that there are only a bunch of compiler error s.
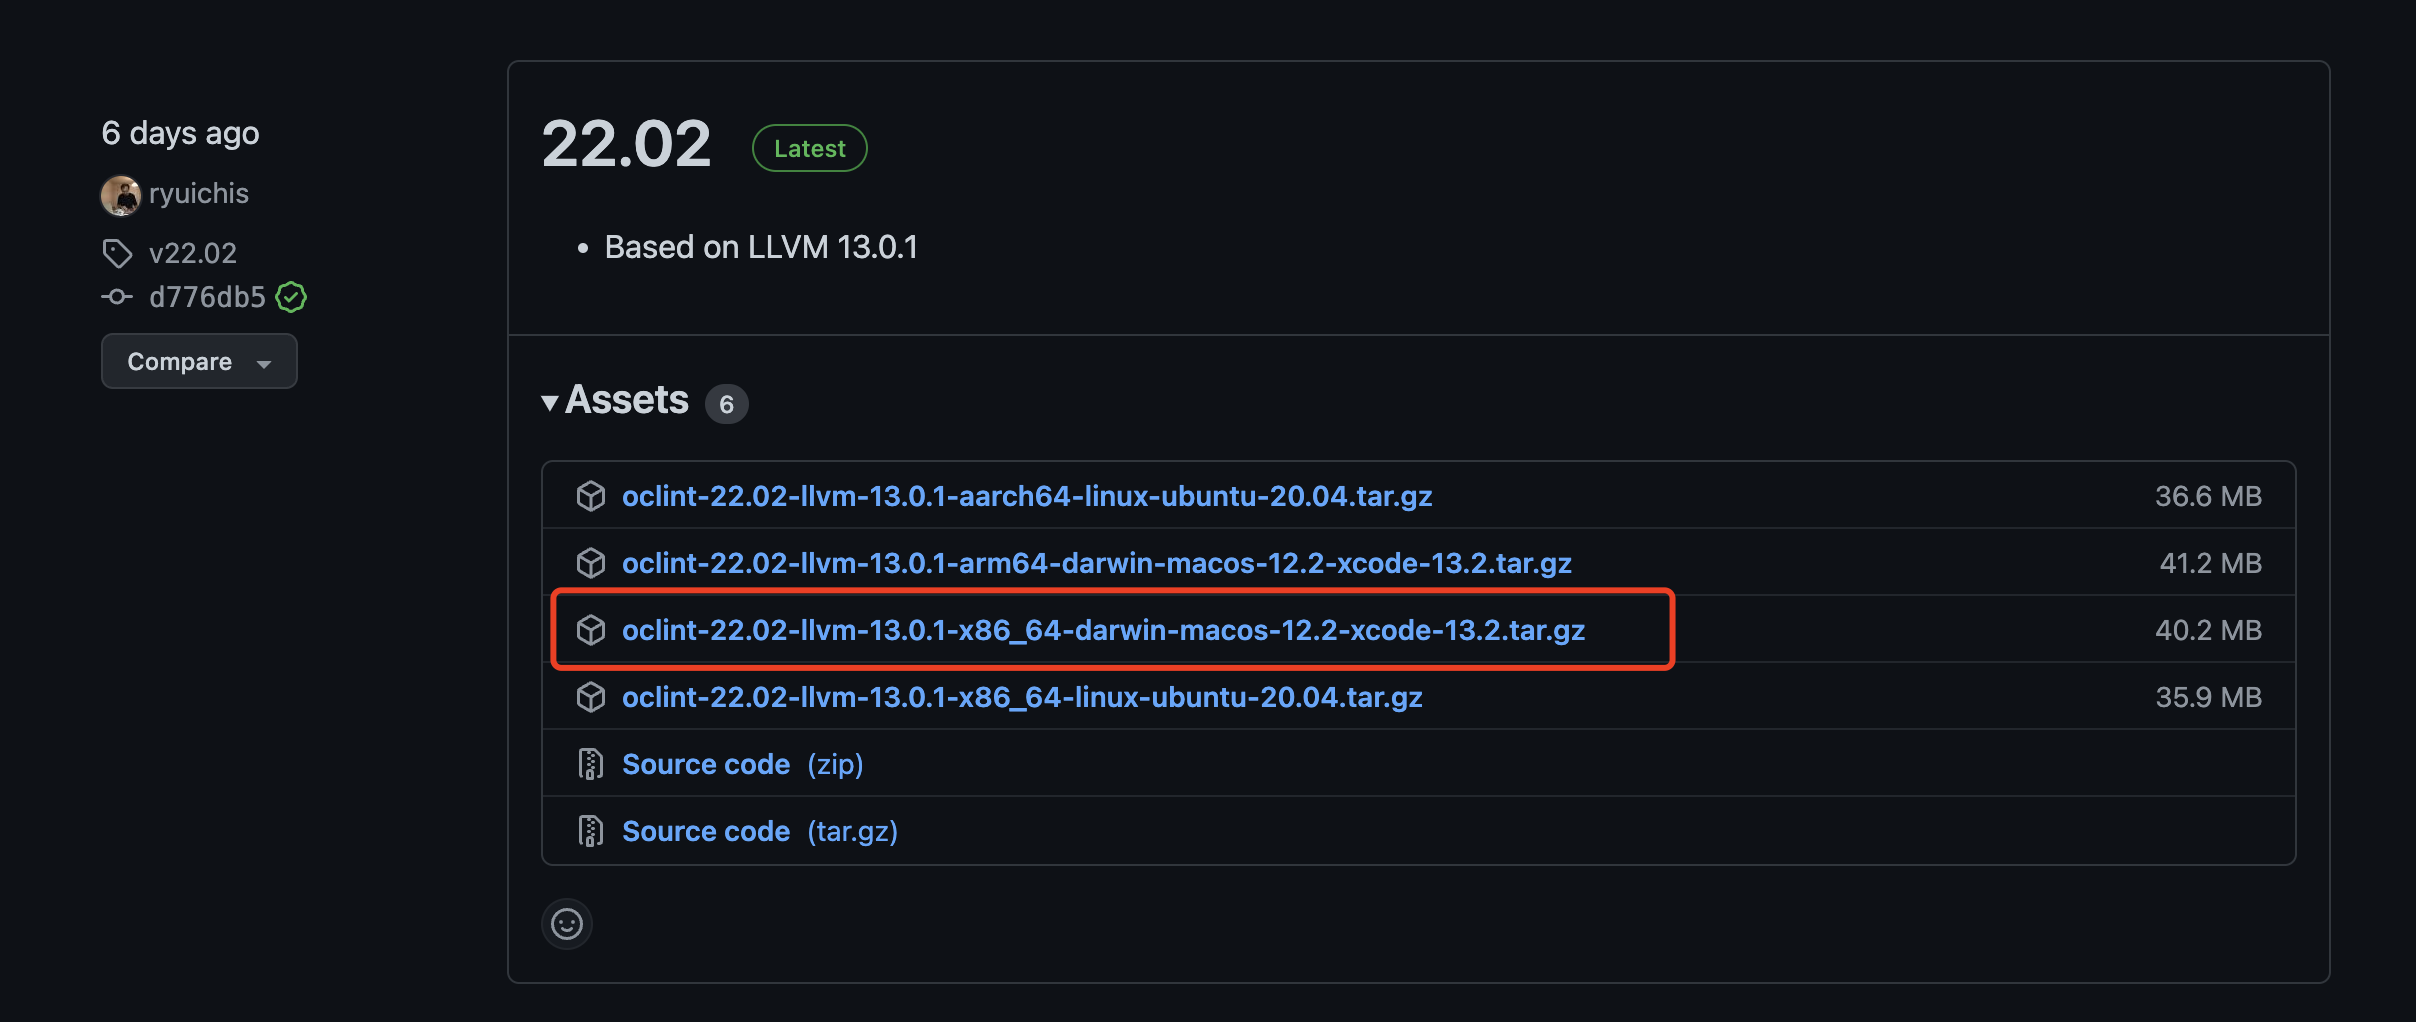
Download the installation package:
https://github.com/oclint/oclint/releases
Configure environment variables:
export PATH="/Users/csdn/oclint-22.02/bin:$PATH"
source ~/.zshrc
Enter oclint --version in the terminal to verify whether the installation is successful.

Enter oclint --help on the terminal to view the introduction of the command
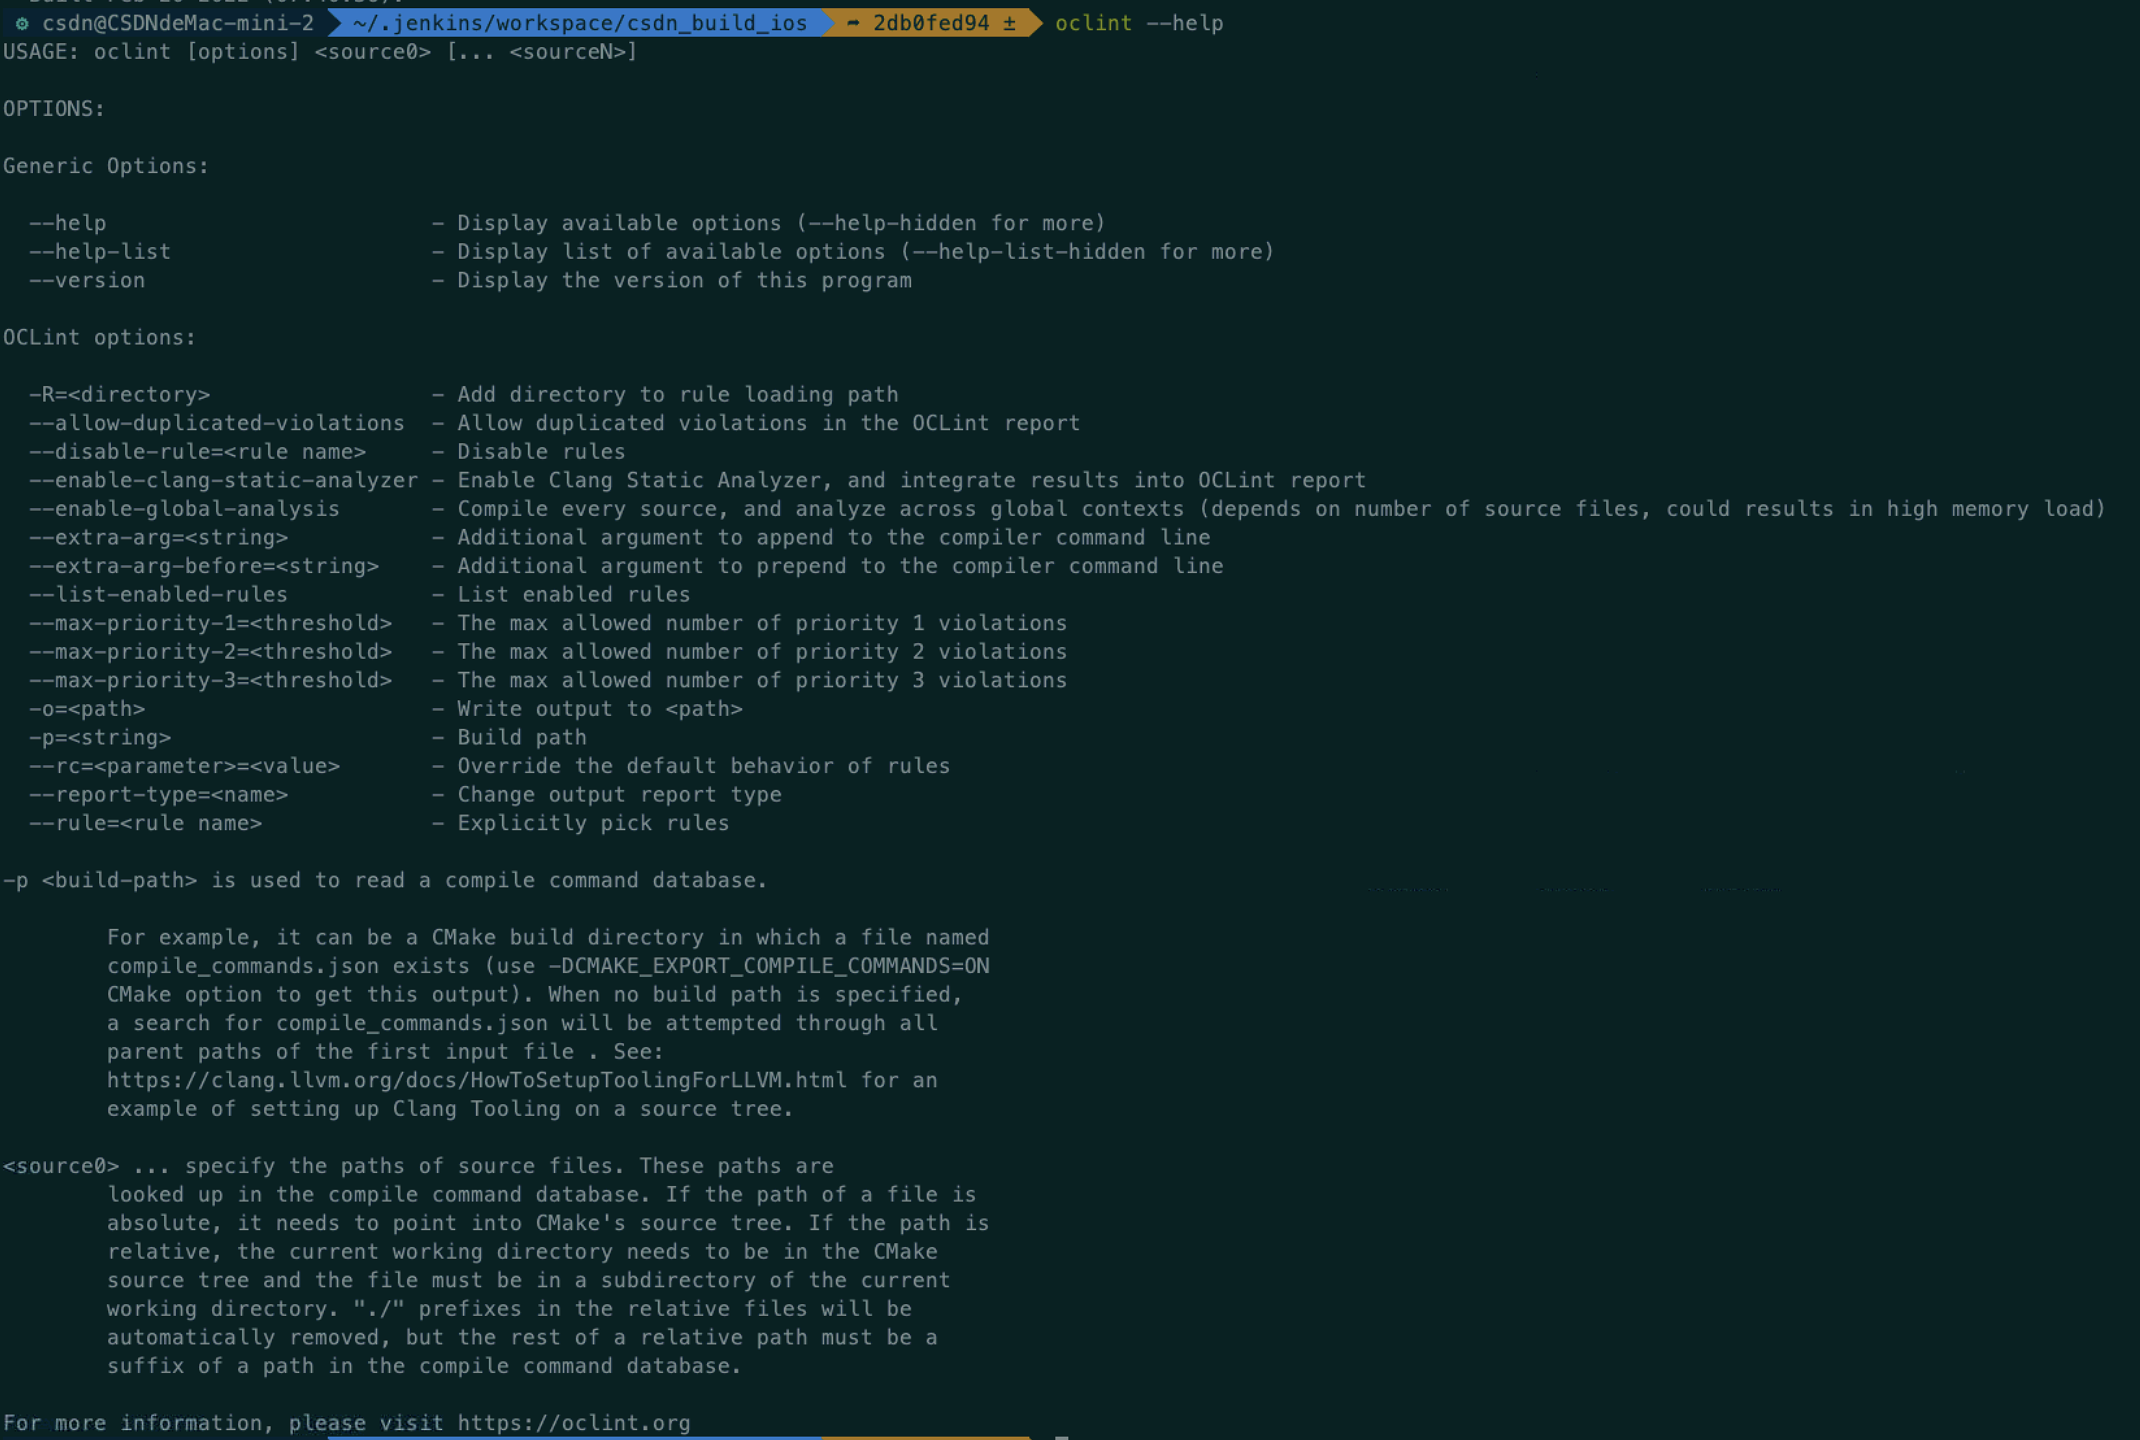
We mainly use oclint-json-compilation-database Orders, Github source code
The oclint JSON compilation database command supports specifying verification folders and filtering specified folders. In essence, the oclint -p command is finally executed, which can be viewed by attaching - v. at the same time, it also supports the use of -- followed by the oclint execution parameters.
For example:
// Here -- the parameter after the symbol is passed to oclint
$ oclint-json-compilation-database -v -e Pods -e xxxx -- -report-type html -o report.html
The - rc option of oclint can customize the parameter value of verification, for example:
$ oclint-json-compilation-database -v -e Pods -e xxxx -- -rc LONG_METHOD=60 -rc LONG_LINE=100
In addition, when we need to customize multiple oclint parameters, we can write the configuration in .oclint In the file
disable-rules:                      // Rules not used
   - LongLine
rulePaths:                          // The path where the oclint verification rule is located is / usr/local/lib/oclint/rules by default on the Mac side. If you do not need custom rules, you can not configure this item
  - /etc/rules
rule-configurations:                // Custom configuration parameters
  - key: CYCLOMATIC_COMPLEXITY
    value: 15
  - key: NPATH_COMPLEXITY
    value: 300
output: oclint.xml                  // Generated report
report-type: xml                    // The generated report format supports html, xml, json, etc
max-priority-1: 20                  // The maximum number of problems in level 1. If more than this number of problems are detected, it will be automatically terminated
max-priority-2: 40                  // Maximum number of level 2 problems
max-priority-3: 60                  // Maximum number of level 3 problems
enable-clang-static-analyzer: false //
The following are 72 built-in support of OCLint Rule , you can view it through -- List enabled rules X
$ oclint --list-enabled-rules x
enabled rules:
- TooManyMethods
- DestructorOfVirtualClass
- DeadCode
- EmptyForStatement
- AvoidDefaultArgumentsOnVirtualMethods
- ProblematicBaseClassDestructor
- MisplacedDefaultLabel
- EmptyFinallyStatement
- CallingProhibitedMethod
- RedundantIfStatement
- CollapsibleIfStatements
- UnnecessaryElseStatement
- ConstantConditionalOperator
- DeepNestedBlock
- AssignIvarOutsideAccessors
- UnnecessaryNullCheckForDealloc
- RedundantNilCheck
- RedundantLocalVariable
- EmptyDoWhileStatement
- UnusedMethodParameter
- BitwiseOperatorInConditional
- ReturnFromFinallyBlock
- MultipleUnaryOperator
- DoubleNegative
- MissingCallToBaseMethod
- EmptyWhileStatement
- ShortVariableName
- ParameterReassignment
- UselessParentheses
- ThrowExceptionFromFinallyBlock
- UnnecessaryDefaultStatement
- HighNcssMethod
- PreferEarlyExit
- MissingBreakInSwitchStatement
- TooManyParameters
- CallingProtectedMethod
- AvoidBranchingStatementAsLastInLoop
- MissingAbstractMethodImplementation
- MissingHashMethod
- MisplacedNullCheck
- MisplacedNilCheck
- UseContainerLiteral
- LongLine
- ForLoopShouldBeWhileLoop
- HighNPathComplexity
- LongMethod
- EmptySwitchStatement
- RedundantConditionalOperator
- EmptyTryStatement
- EmptyCatchStatement
- UseObjectSubscripting
- AvoidPrivateStaticMembers
- EmptyElseBlock
- InvertedLogic
- LongClass
- LongVariableName
- GotoStatement
- BrokenOddnessCheck
- UseNumberLiteral
- TooFewBranchesInSwitchStatement
- UseBoxedExpression
- JumbledIncrementer
- EmptyIfStatement
- BranchDivergence
- MissingDefaultStatement
- HighCyclomaticComplexity
- NonCaseLabelInSwitchStatement
- ConstantIfExpression
- BrokenNullCheck
- BrokenNilCheck
- TooManyFields
- UnusedLocalVariable
If we use oclint eventually we will oclint is placed with compile_commands.json and execute the command in this path:
$ oclint-json-compilation-database -v -e Pods
Or execute the command directly:
$ oclint-json-compilation-database -e Pods -- -report-type pmd \
    -rc=LONG_CLASS=1500 \
    -rc=NESTED_BLOCK_DEPTH=5 \
    -rc=LONG_VARIABLE_NAME=80 \
    -rc=LONG_METHOD=200 \
    -rc=LONG_LINE=300 \
    -disable-rule ShortVariableName \
    -disable-rule ObjCAssignIvarOutsideAccessors \
    -disable-rule AssignIvarOutsideAccessors \
    -allow-duplicated-violations=false\
    -max-priority-1=100000 \
    -max-priority-2=100000 \
    -max-priority-3=100000 >> oclint.xml
Finally, oclint will be generated XML (you can also generate your own html format to directly view the effect)
sonarqube
sonarqube is a platform that provides static analysis of code. It provides a complete set of static analysis schemes, including back-end and front-end pages. It can be combined with jenkins, gitlab and other platforms for code analysis. sonarqube is divided into community version and commercial version. It can scan multiple languages and open source. Official website address.
Because the underlying source code is developed in java, the support for java code is relatively perfect, but the free community version does not support OC. Therefore, if we want to use this platform, we have the following two ways:
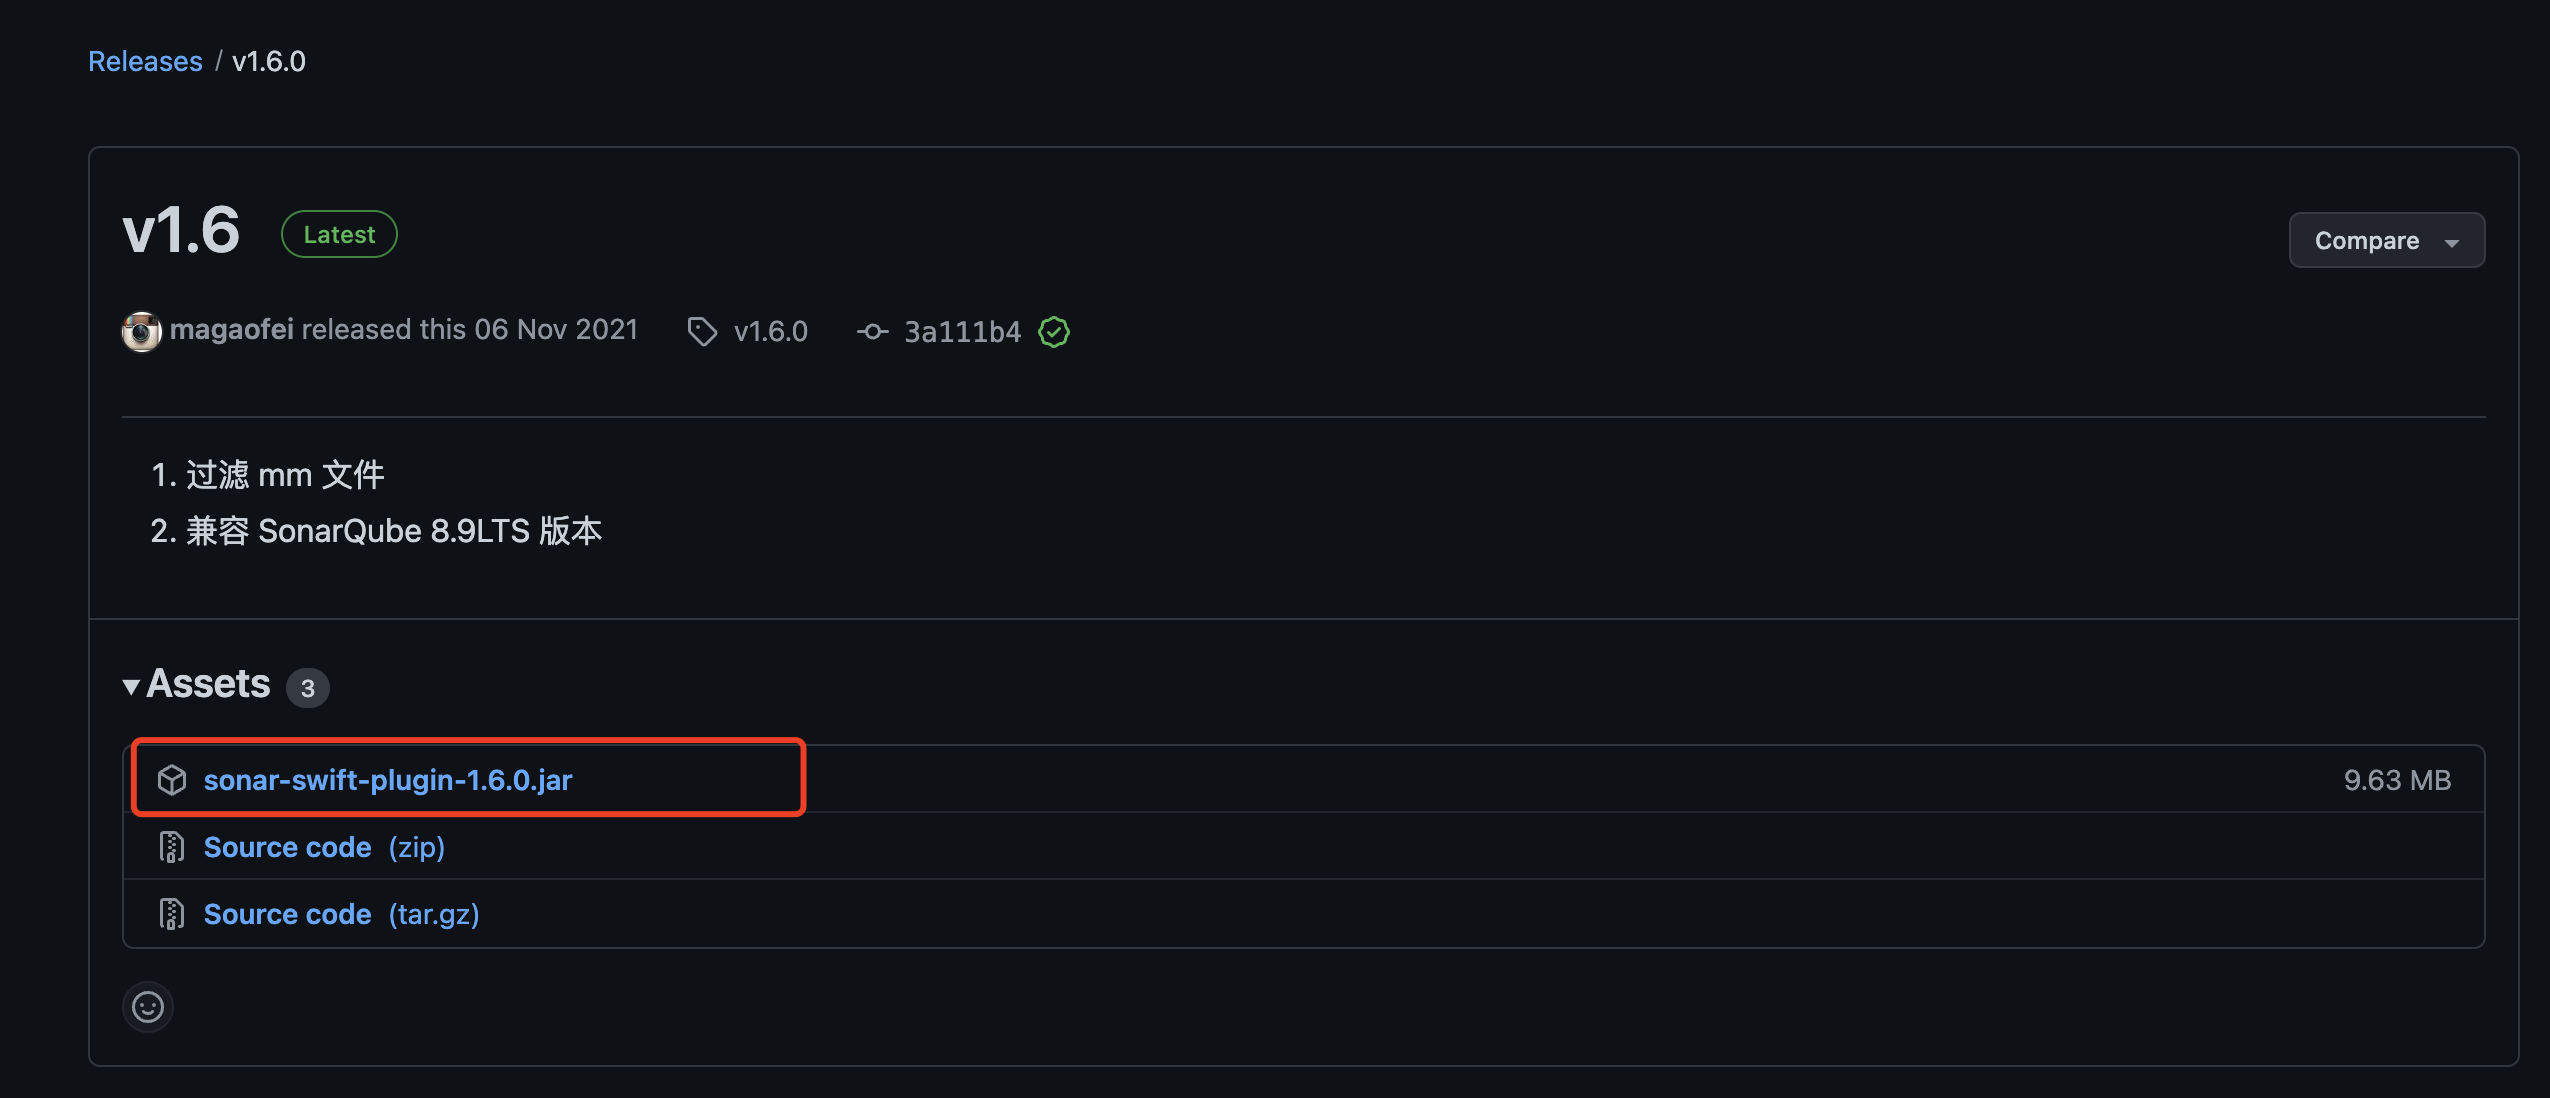
- Open source plug-ins sonar-swift
, support Objective-C and Swift / Java, and import the scanning and analysis results of SwiftLint, Infer, OCLint, Lizard and Fauxpas tools. Latest v1 6 version, compatible with sonarqube 8.9 lts version. The plug-in is developed by TAL R & D team and is open source. - Pay for community plus, which provides SonarCFamily for C plug-in
There are official technical support, 250 + rules to choose from, and rules cannot be customized.
We will use the open source plug-in solution.
Sonar services (sonarqube) installation
There are two ways to install sonarqube
- docker installation
$ docker pull sonarqube:8.9.7-community
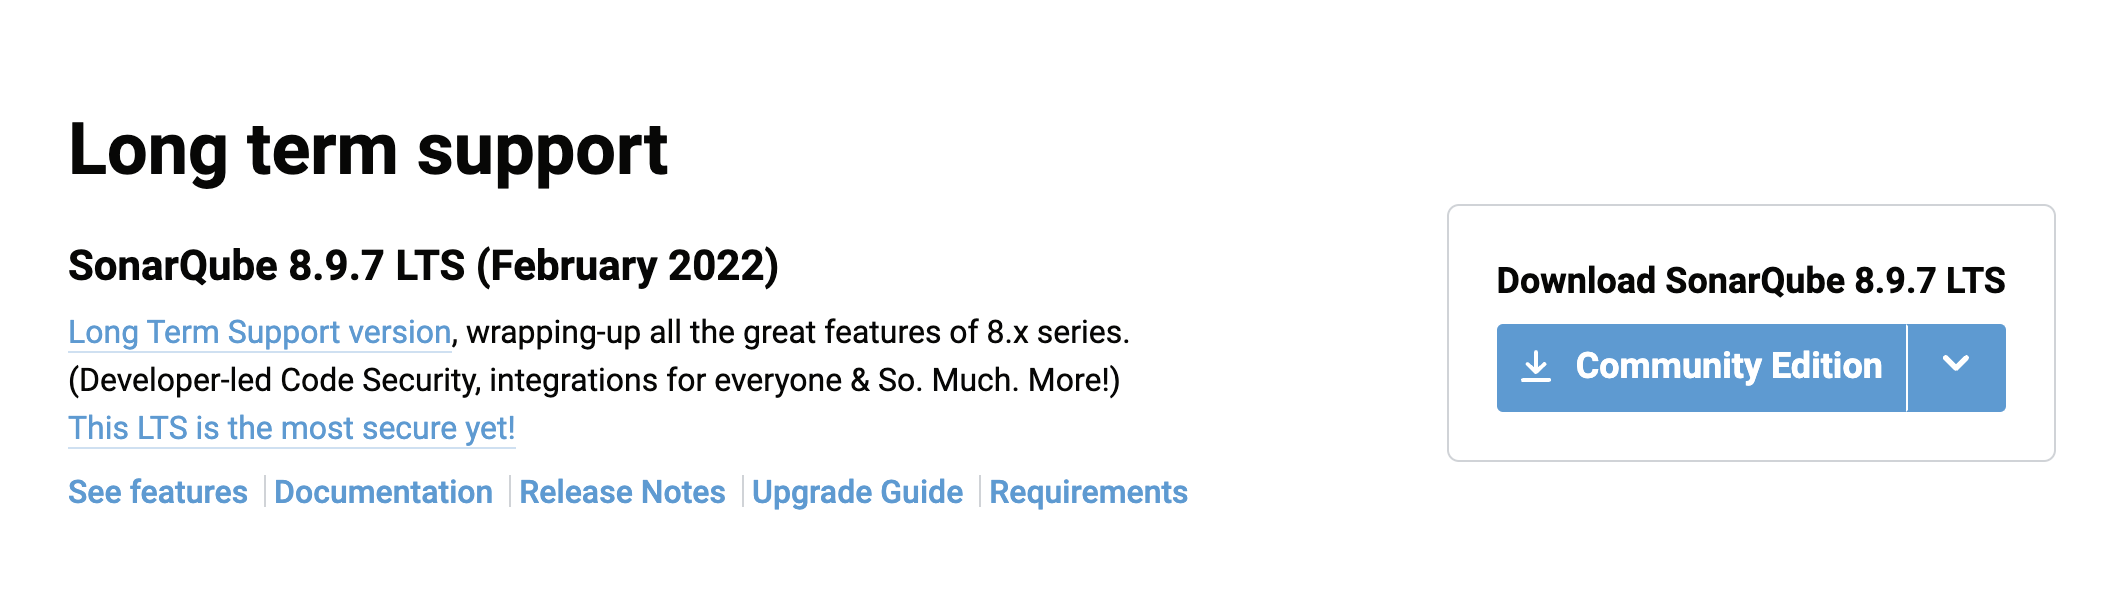
- Download binary Installation package
Select 8.9.7 lts community version and download it
After downloading the installation package, enter the bin/macosx-universal-64 directory. Execute command:
$ sh sonar.sh start

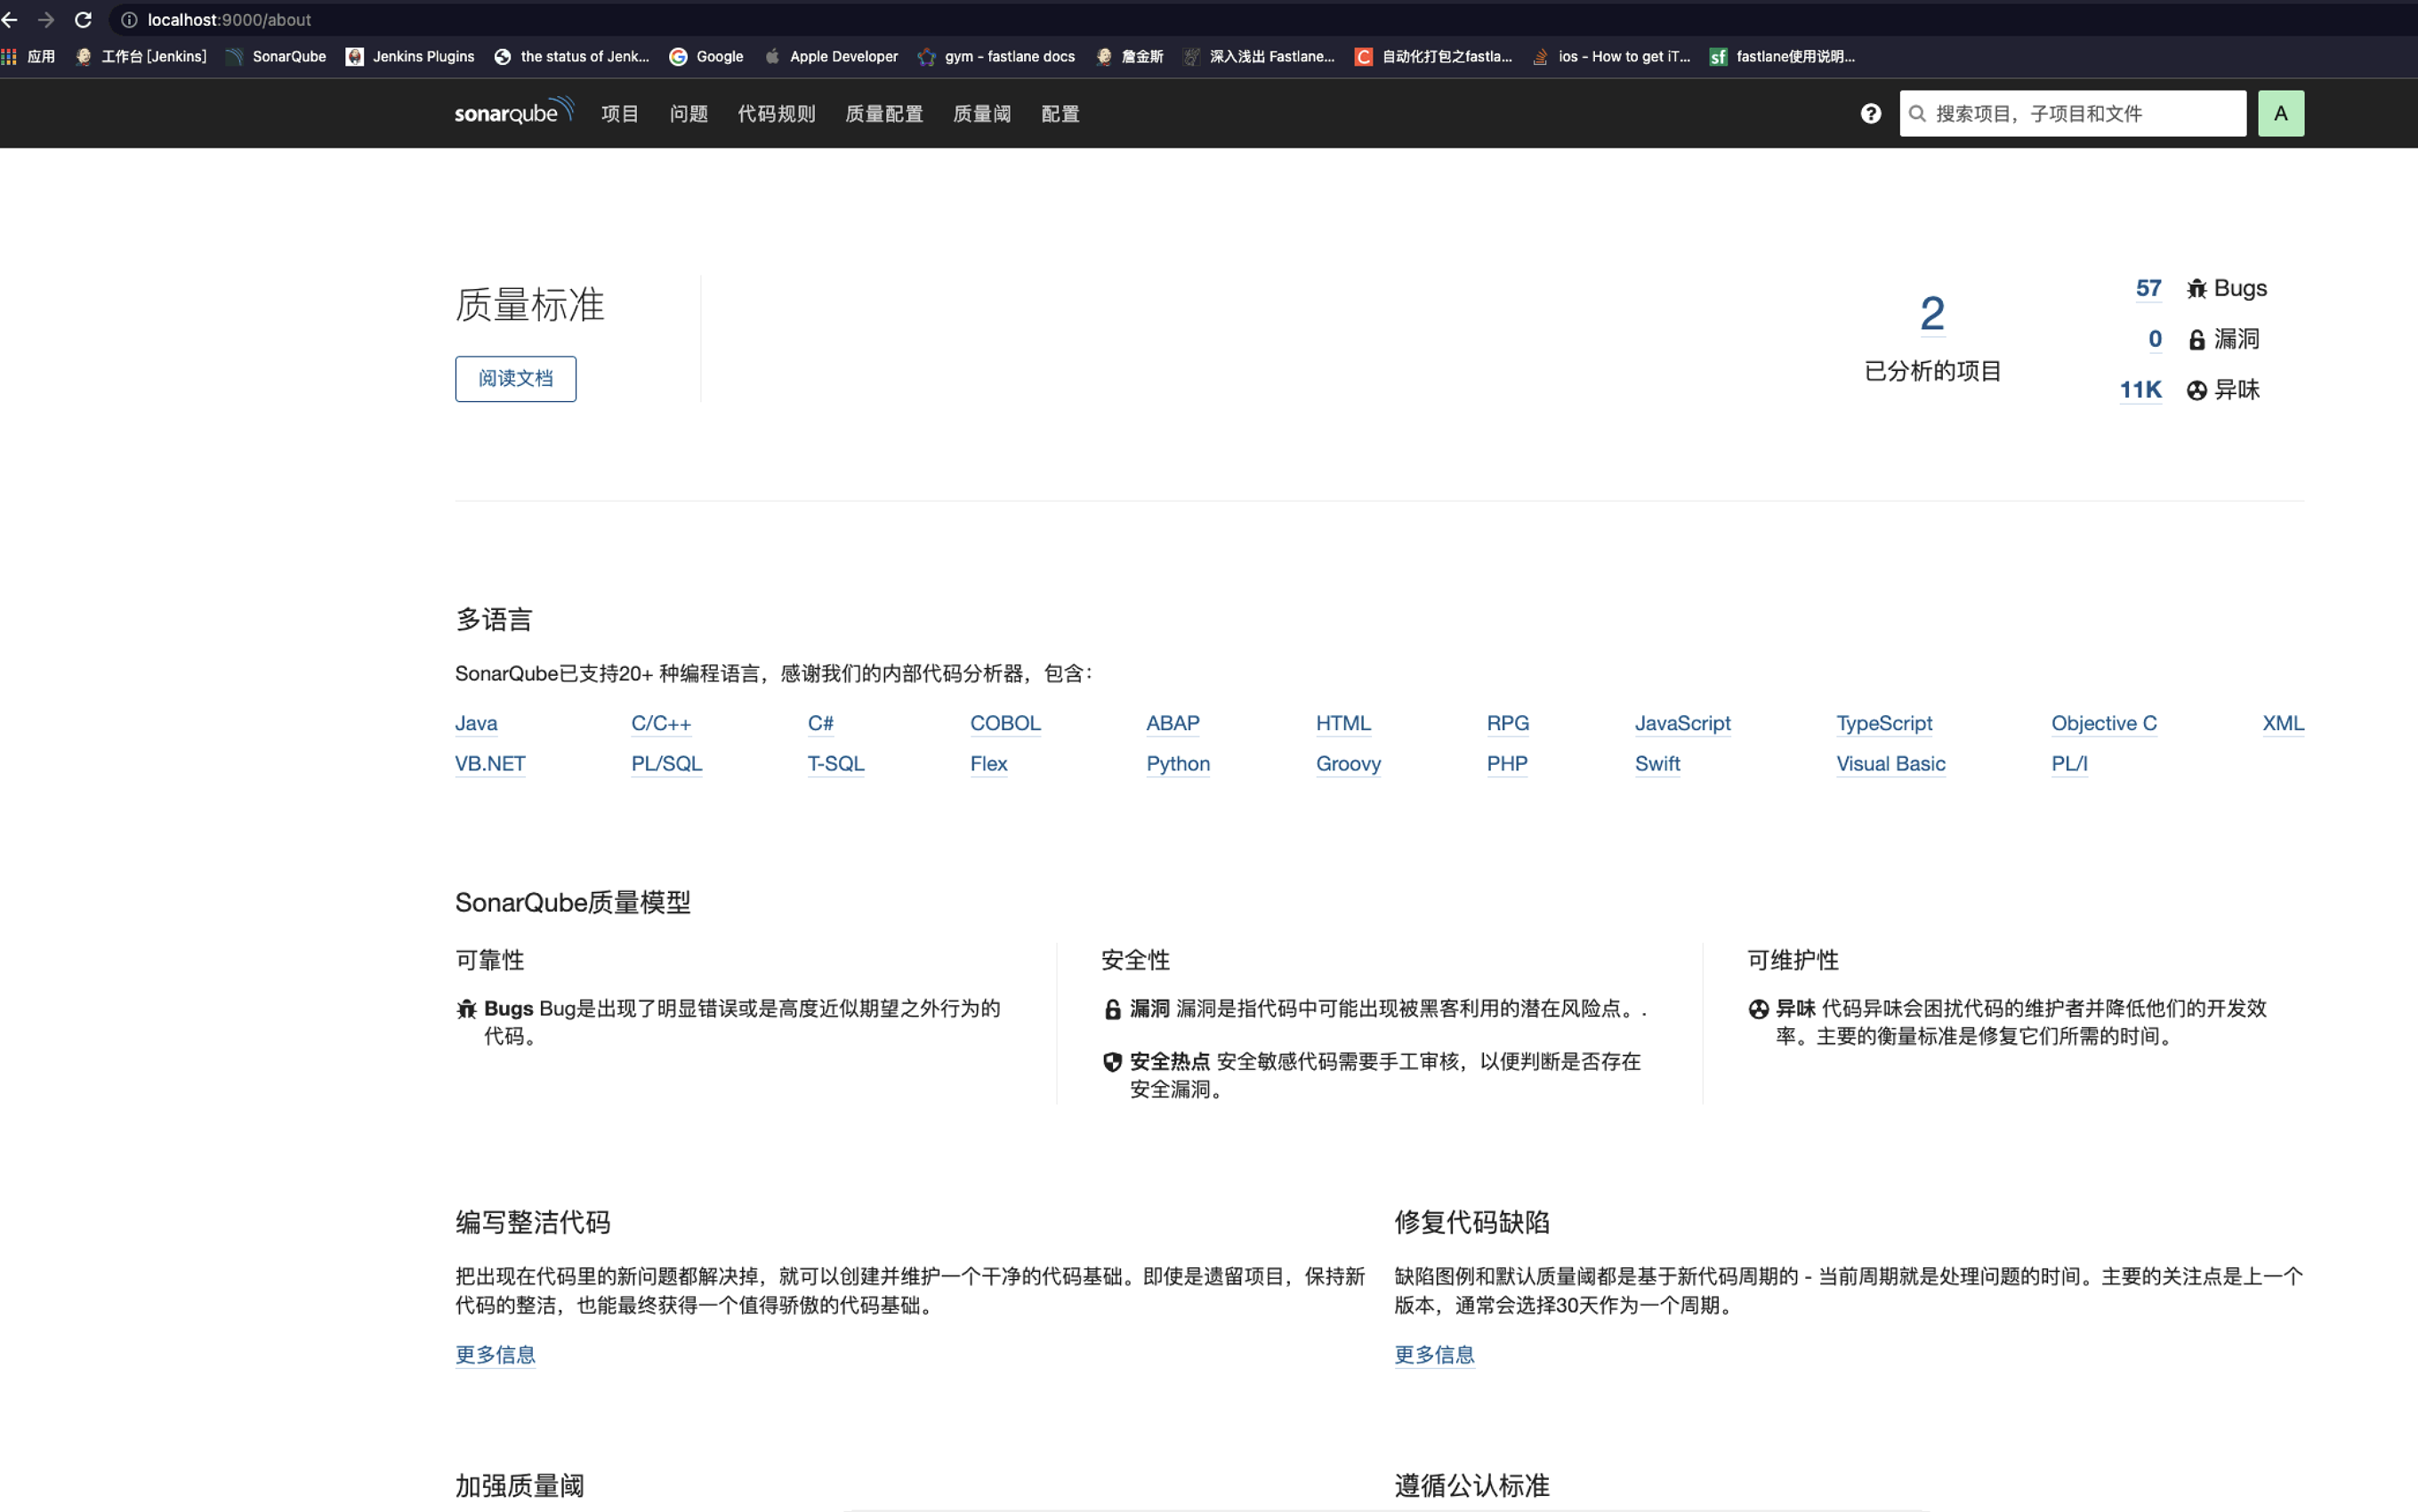
The console outputs Started SonarQube, indicating that the startup is successful.
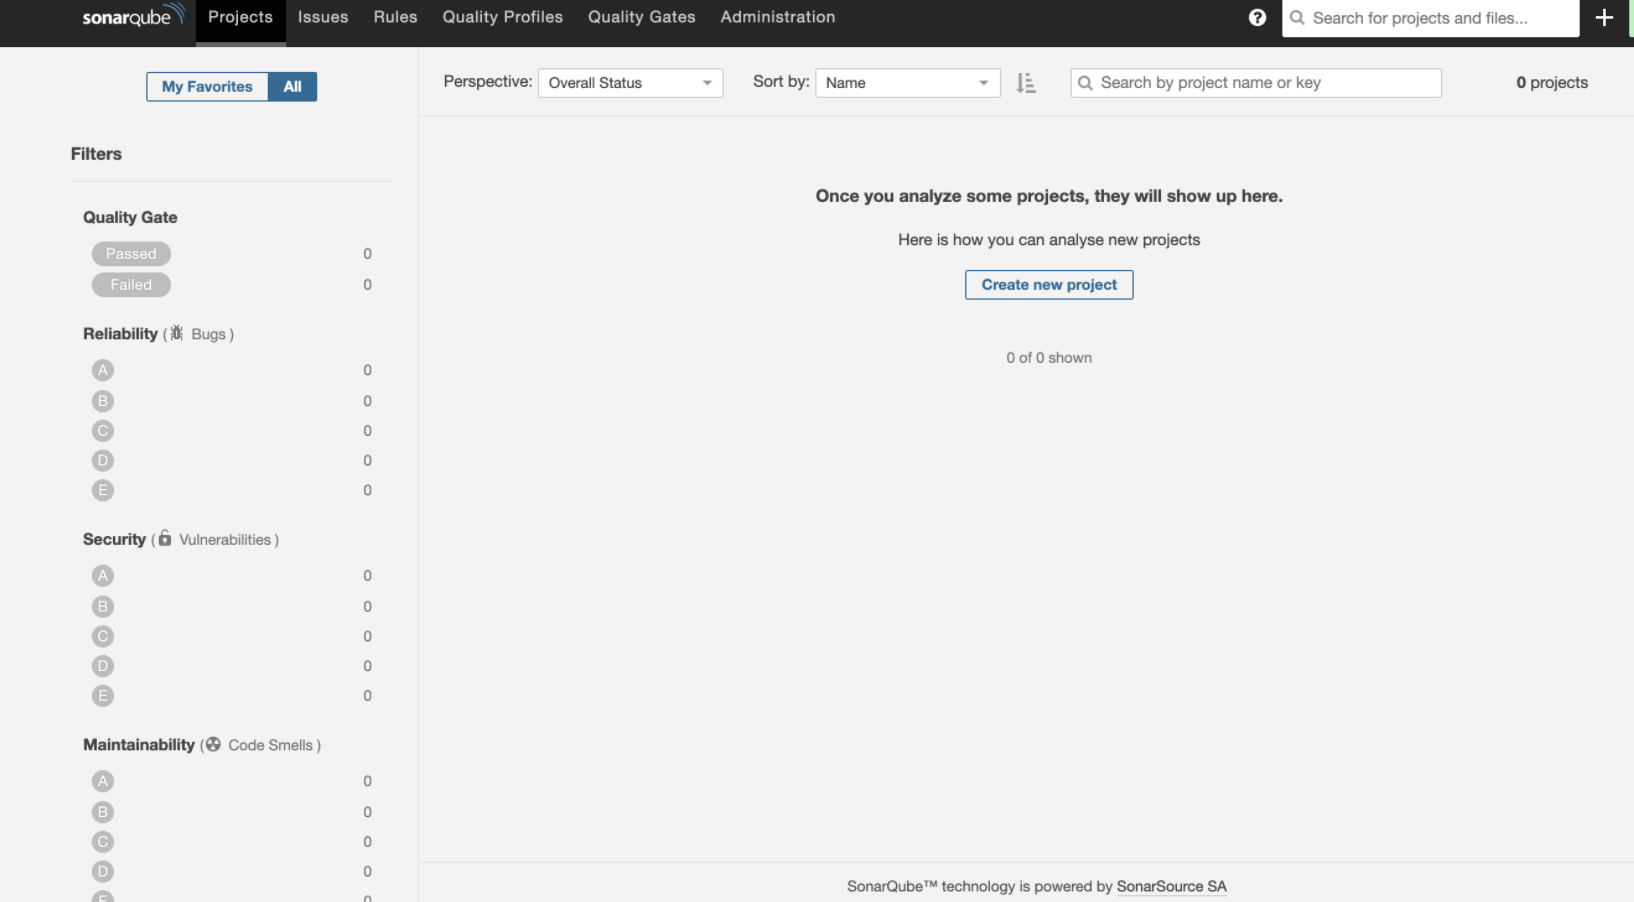
Access in browser http://localhost:9000/ , the page can be opened, indicating that the startup is successful.
The default account is admin and the password is admin.
Note: if the startup fails, you can check the log under sonarqube/logs.
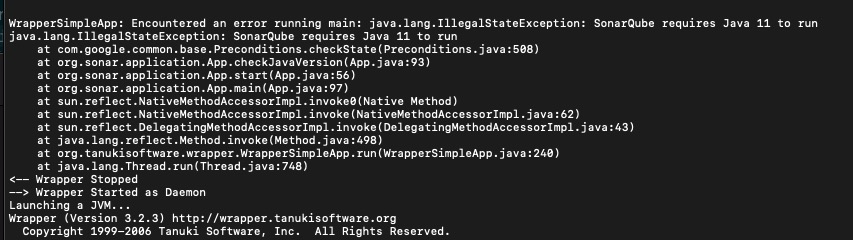
During installation, it was found that sonarqube version 8.9.7 requires Java 11 environment. Therefore, you need to install the Java 11 environment first.
Installing Java 11:

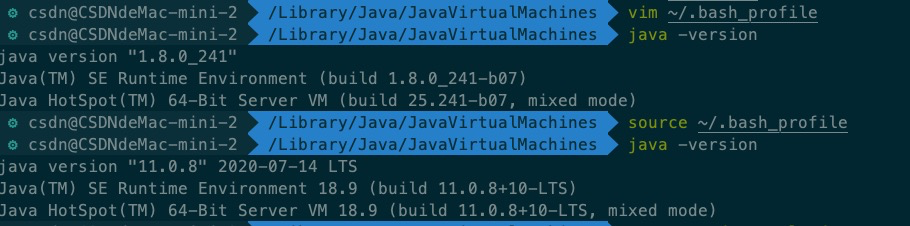
After successful startup, we will see warning at the bottom

Warning: we are recommended to configure the database ourselves. It should be noted that if SonarQube wants to persist and save data, it needs to rely on the database.
SonarQube provides H2 storage by default, and can only temporarily store some small project results for demonstration purposes only.
In conf / sonar Just configure the database address under properties. MySQL, Oracle and PostgreSQL are optional.
Now let's configure the database( mysql will no longer be supported in the future ): PostgreSQL is used here, Configuration reference
PostgreSQL
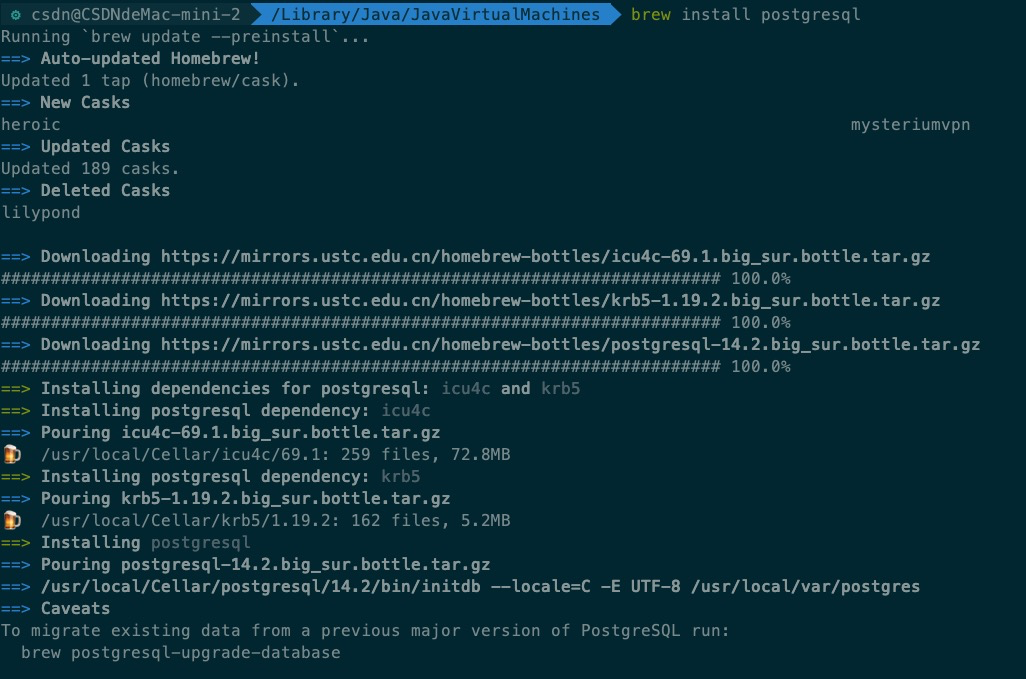
Install PostgreSQL with Homebrew command:
$ brew install postgresql //install
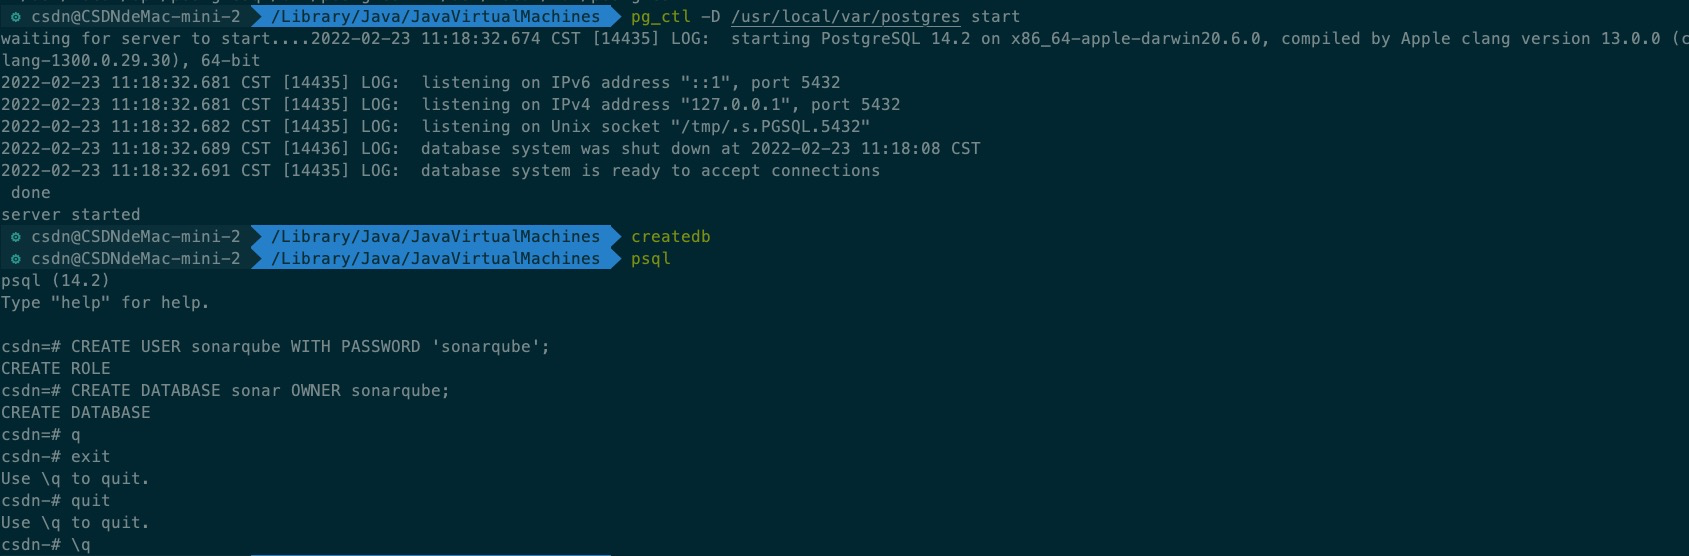
After installing the database, start the database and execute the command:
$ pg_ctl -D /usr/local/var/postgres start //start-up
$ createdb                                //Create database
$ psql                                    //Login console
After the database is installed and created, we need to provide a database and account sonarqube to use. Execute command:
CREATE USER sonarqube WITH PASSWORD 'sonarqube';//Create user
CREATE DATABASE sonar OWNER sonarqube;//Create a database that belongs to this user
After creation, execute the command to exit:
\q
Then we go to the sonarqube/conf directory to edit sonar Properties to complete the corresponding configuration of the database
sonar.jdbc.username=sonarqube
sonar.jdbc.password=sonarqube
sonar.jdbc.url=jdbc:postgresql://localhost/sonar
After editing, execute in the sonarqube/bin/macosx-universal-64 / Directory: SH sonar SH restart, and the warning has been eliminated.
So far, the front-end service of our sonarqube has been configured.
Installation of Chinese package
Download the corresponding version through Github Chinese package jar package plug-in.
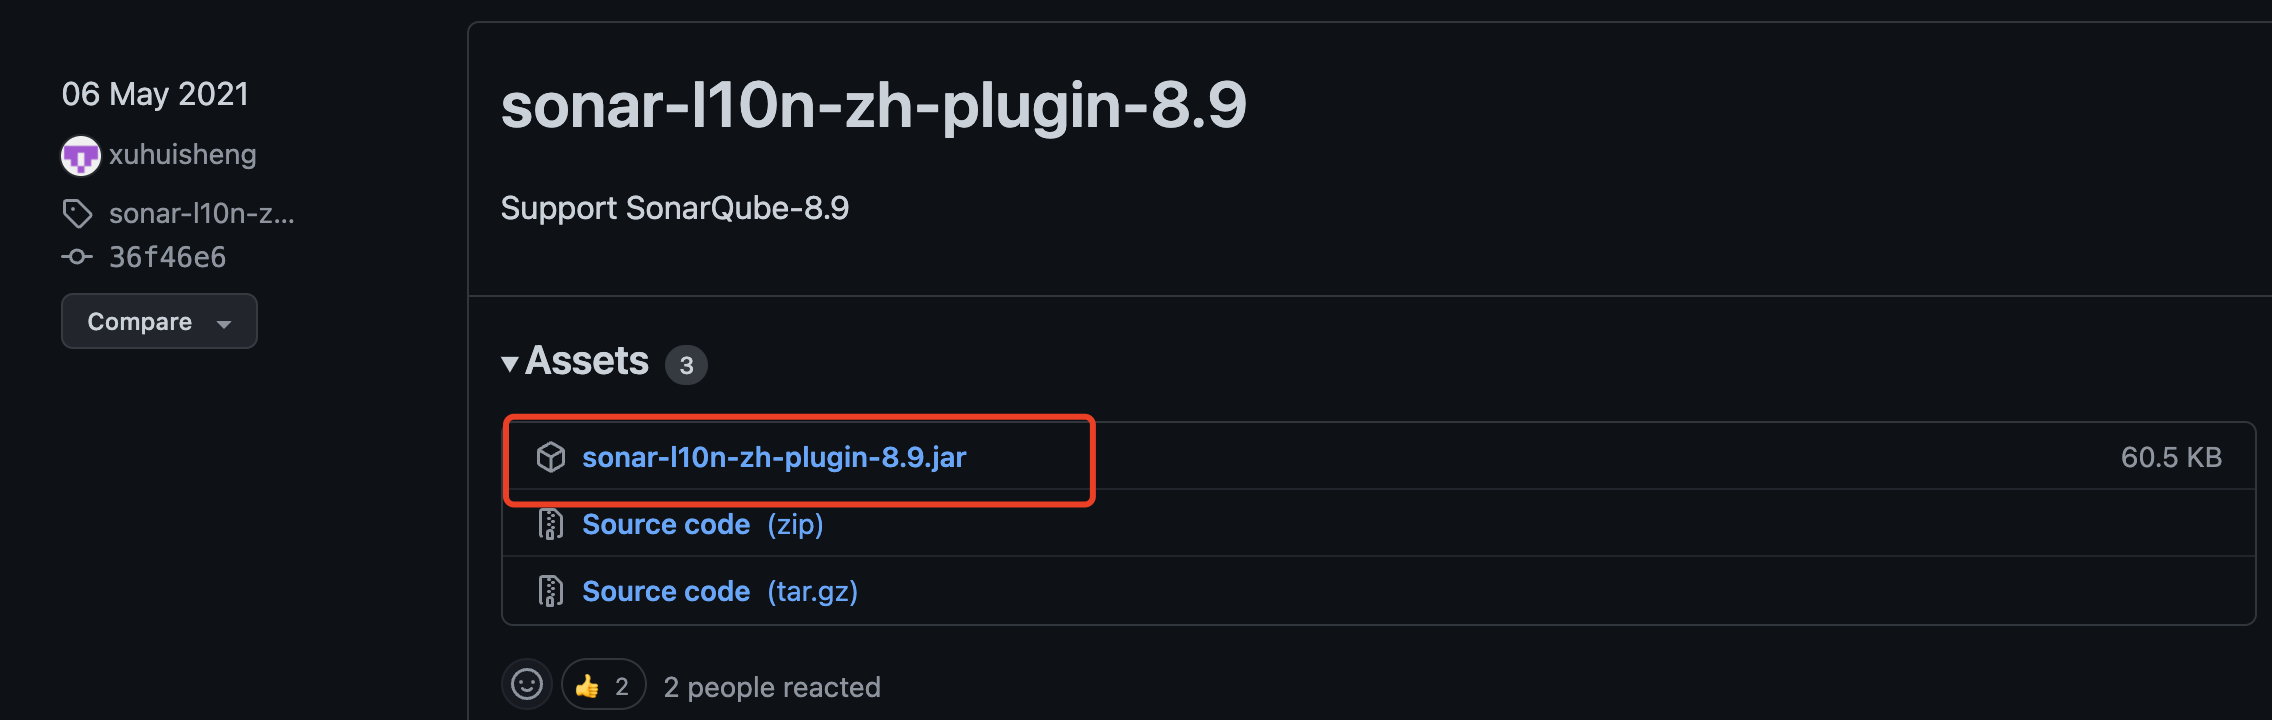
Download the plug-ins and put them in the / extensions/plugins directory. Restart the sonarqube service and you can see the Chinese interface.
sonar-swift
Download the corresponding through GitHub plug-in unit
Download the plug-ins and put them in the / extensions/plugins directory. Just restart the sonarqube service.
sonar-scanner
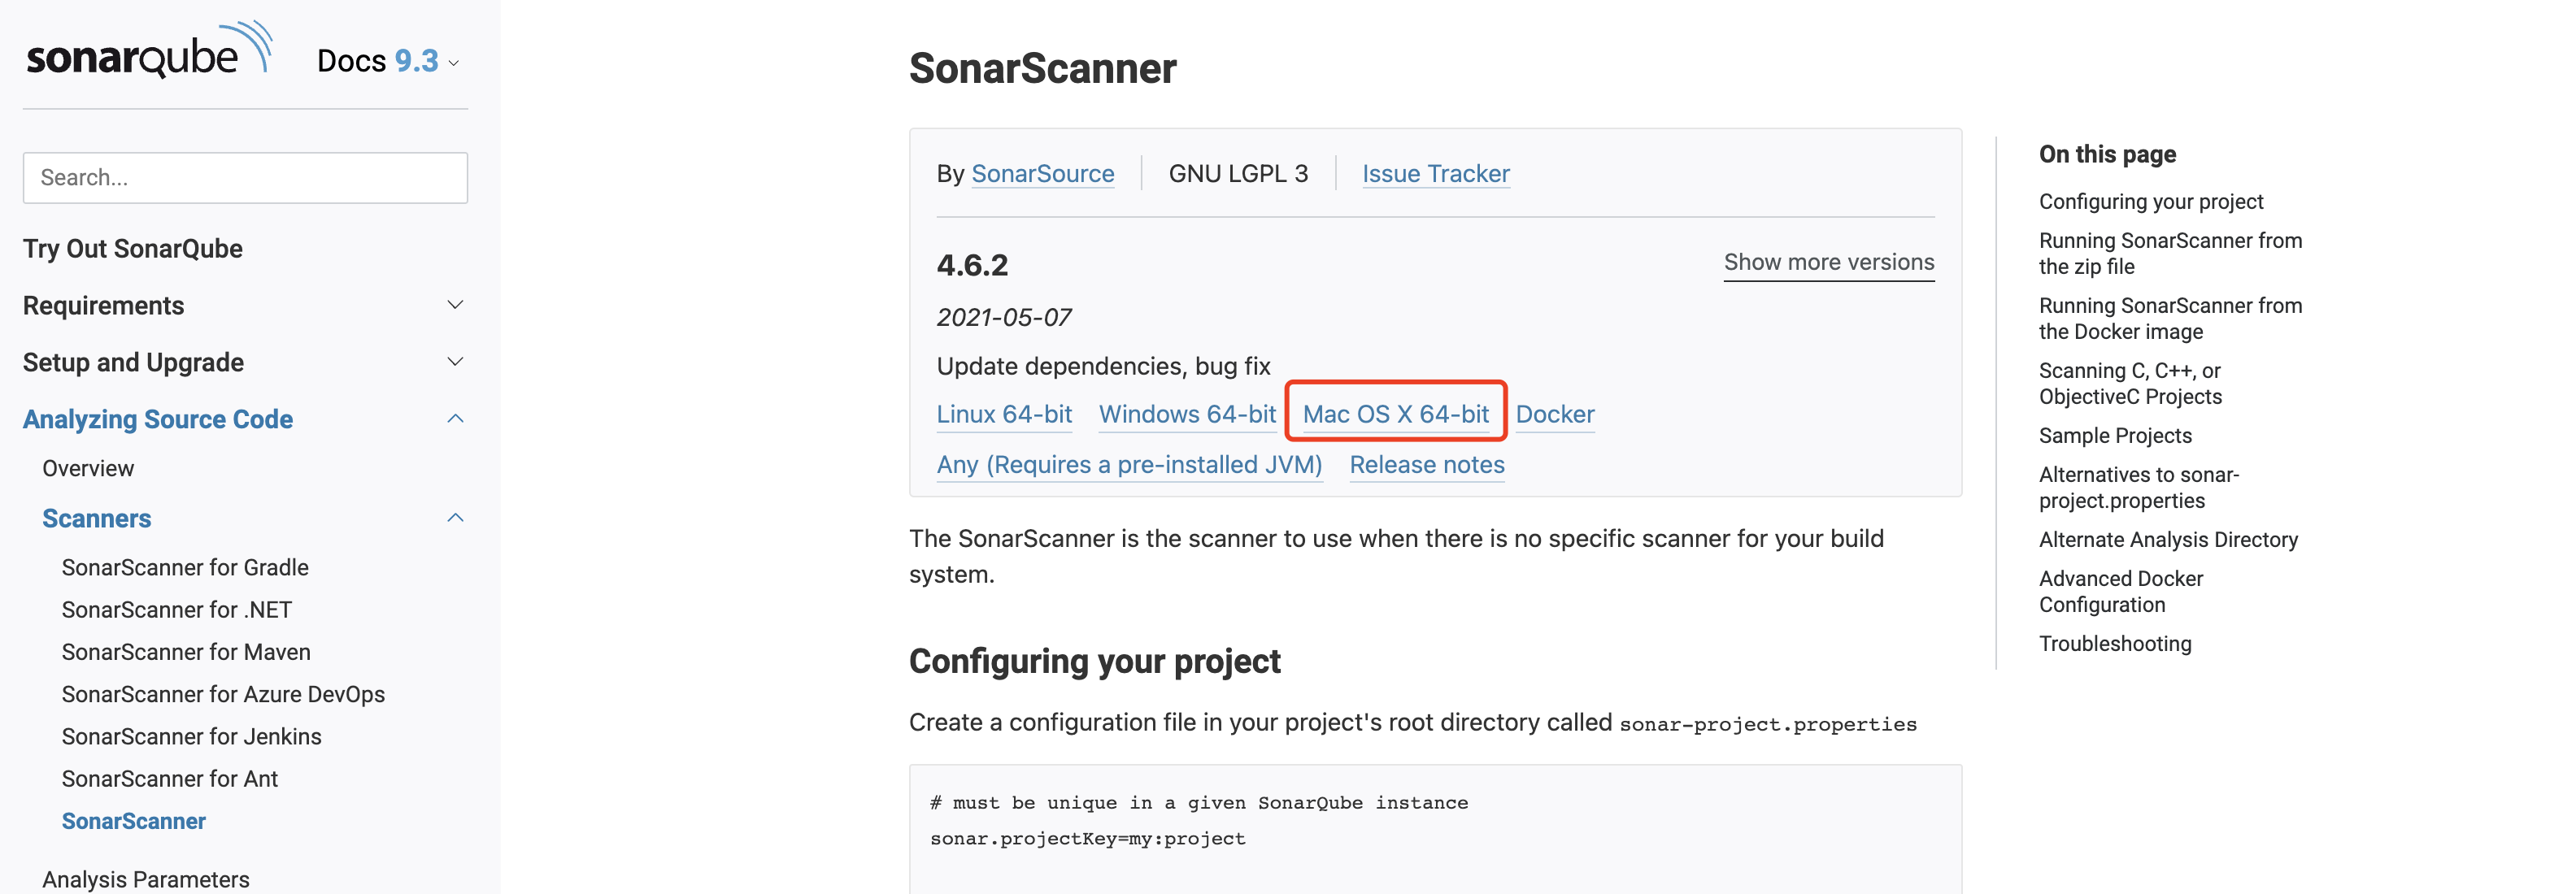
Sonar scanner is used to scan local code and upload it to the SonarQube platform.
- Download installation address ; Select different installation packages according to different operating systems.
- Configure environment variables:
$ vim ~/.bash_profile

#sonar-scanner for cli
export PATH=$PATH:/Users/csdn/scanner/bin:$PATH

$ source ~/.bash_profile
Sonar scanner can be used in two ways:
- Configuration file mode:
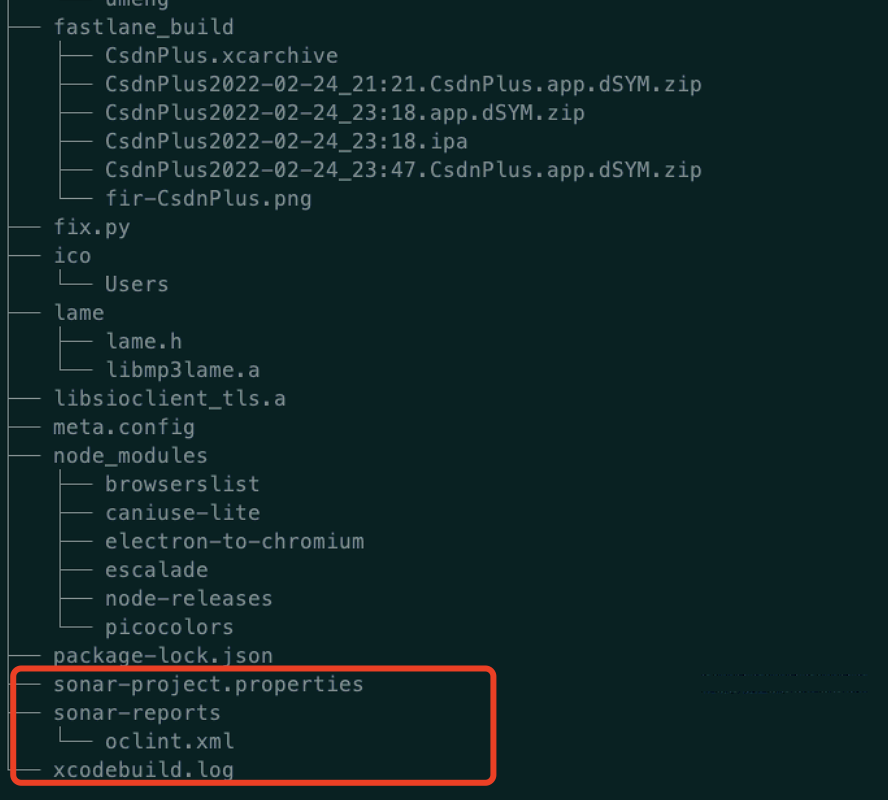
Create a new sonar project under the root directory of the project to be scanned Properties file, as follows:
sonar.projectKey=CsdnPlus
sonar.projectName=CsdnPlus
sonar.language=objc
sonar.sources=/Users/csdn/.jenkins/workspace/csdn_build_ios/
sonar.objectivec.workspace=CsdnPlus.xcworkspace
sonar.objectivec.appScheme=CsdnPlus
sonar.sourceEncoding=UTF-8
sonar.junit.reportsPath=sonar-reports/
sonar.objectivec.oclint.report=sonar-reports/oclint.xml
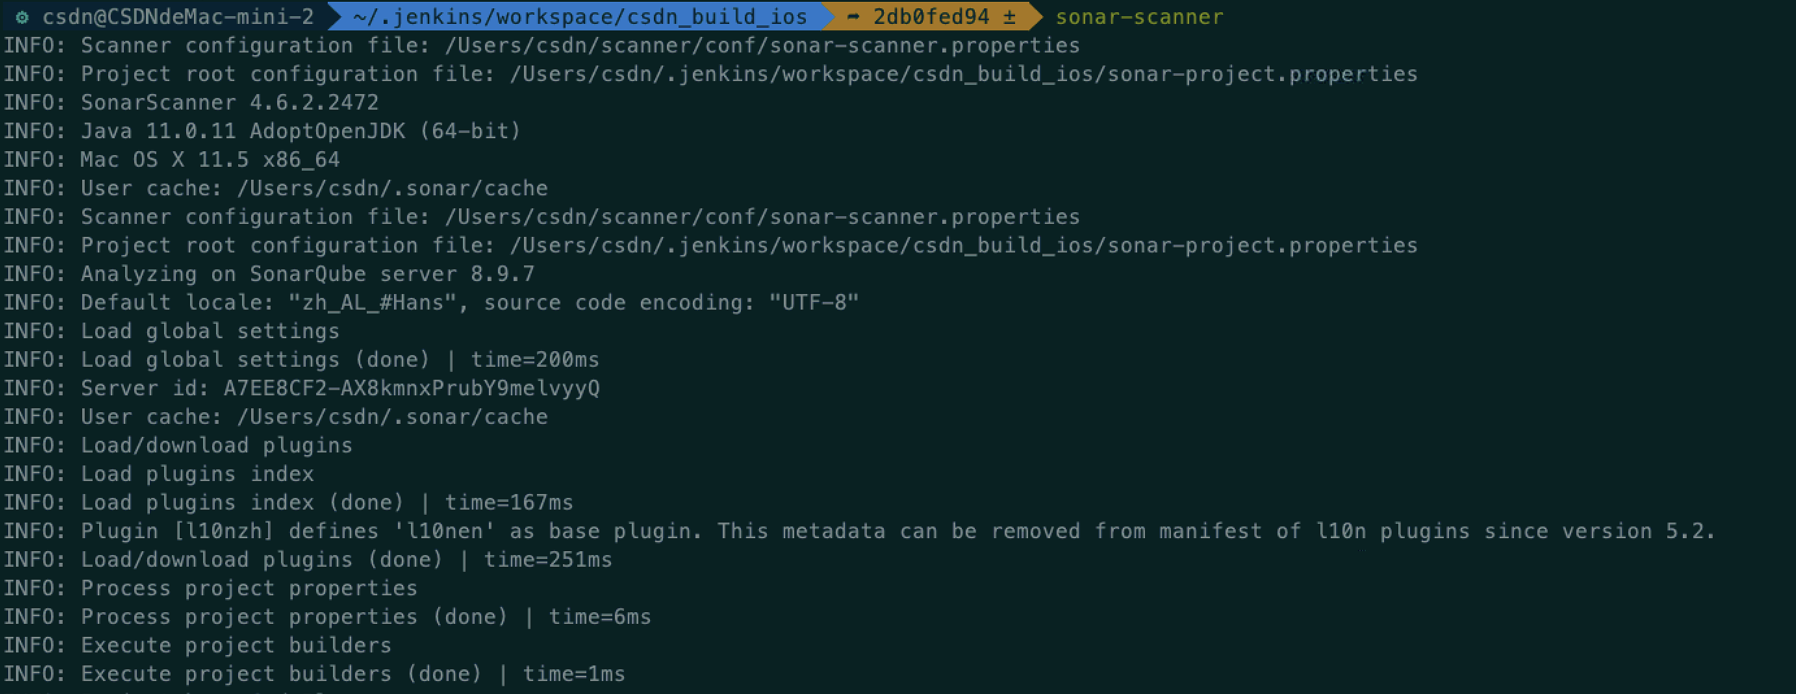
Enter the project root directory, and then enter the sonar scanner command to perform code analysis.
- Command line mode:
Parameters are set in the command:
sonar-scanner -Dsonar.projectKey=CsdnPlus -Dsonar.projectName=CsdnPlus -Dsonar.projectName=CsdnPlus -Dsonar.projectVersion=5.1.0
The core here is the xml file generated by OCLint in the above steps. In addition, pay attention to OCLint xml must be placed under the sonar reports file.
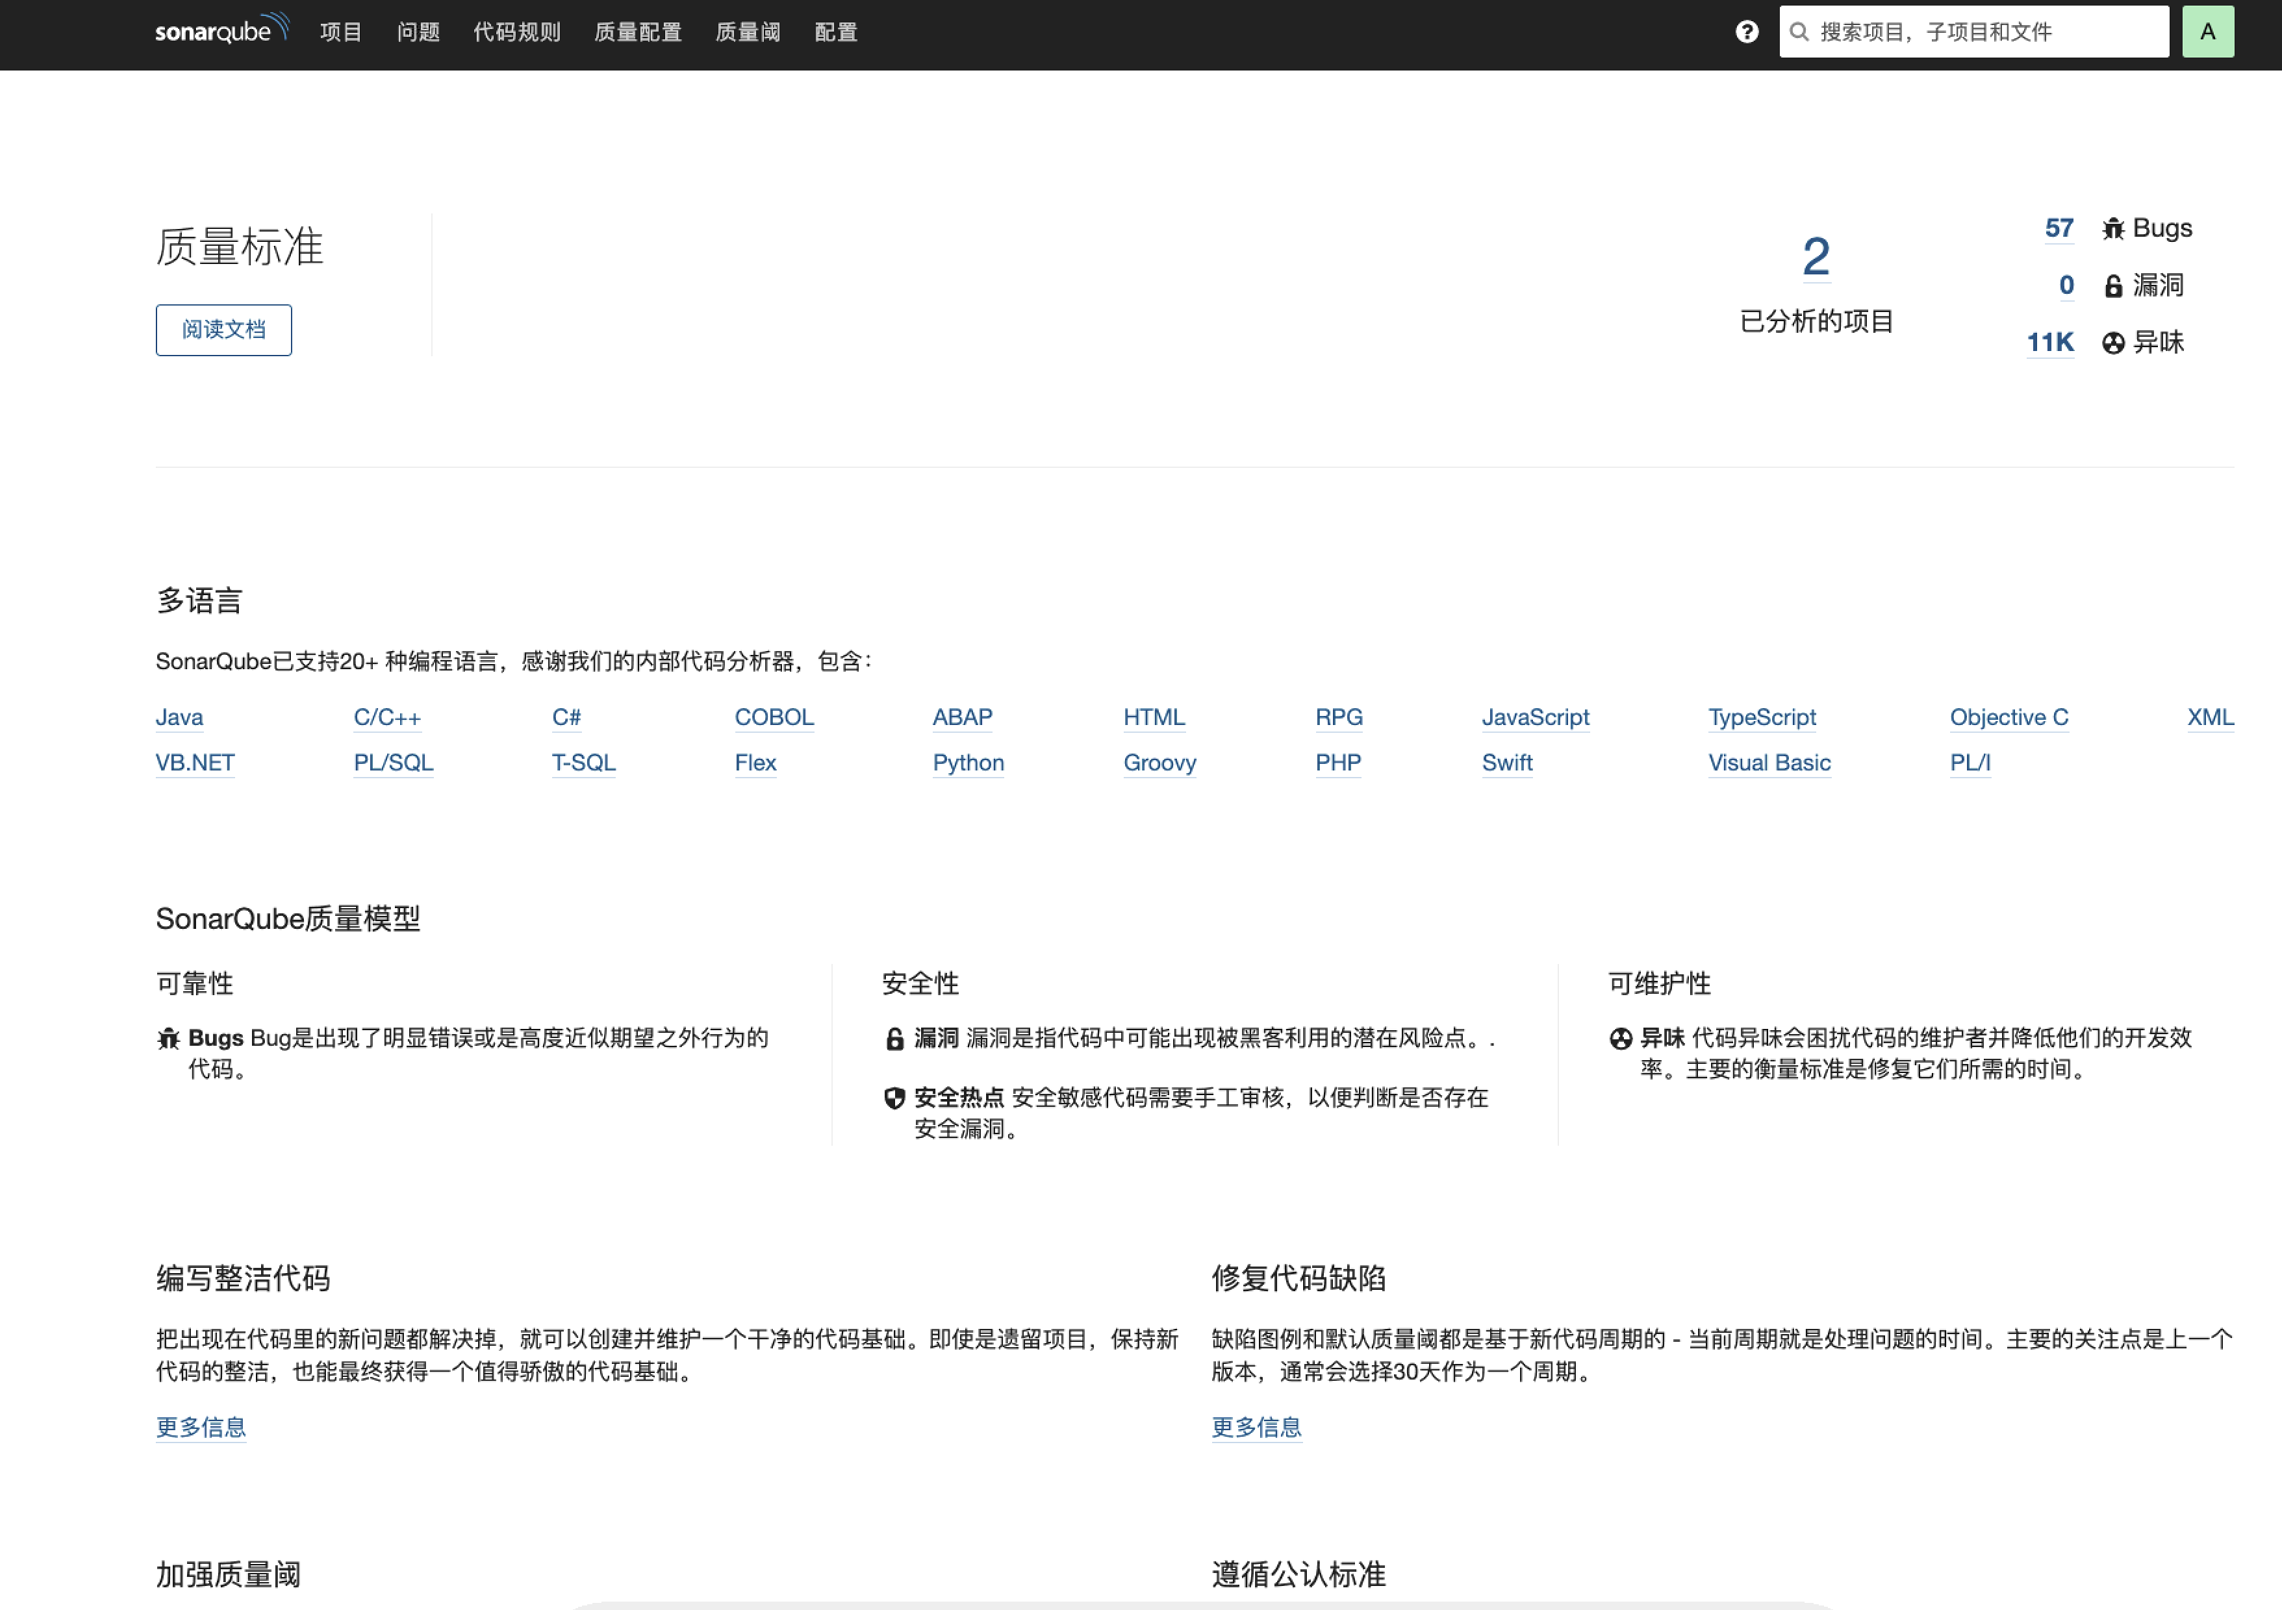
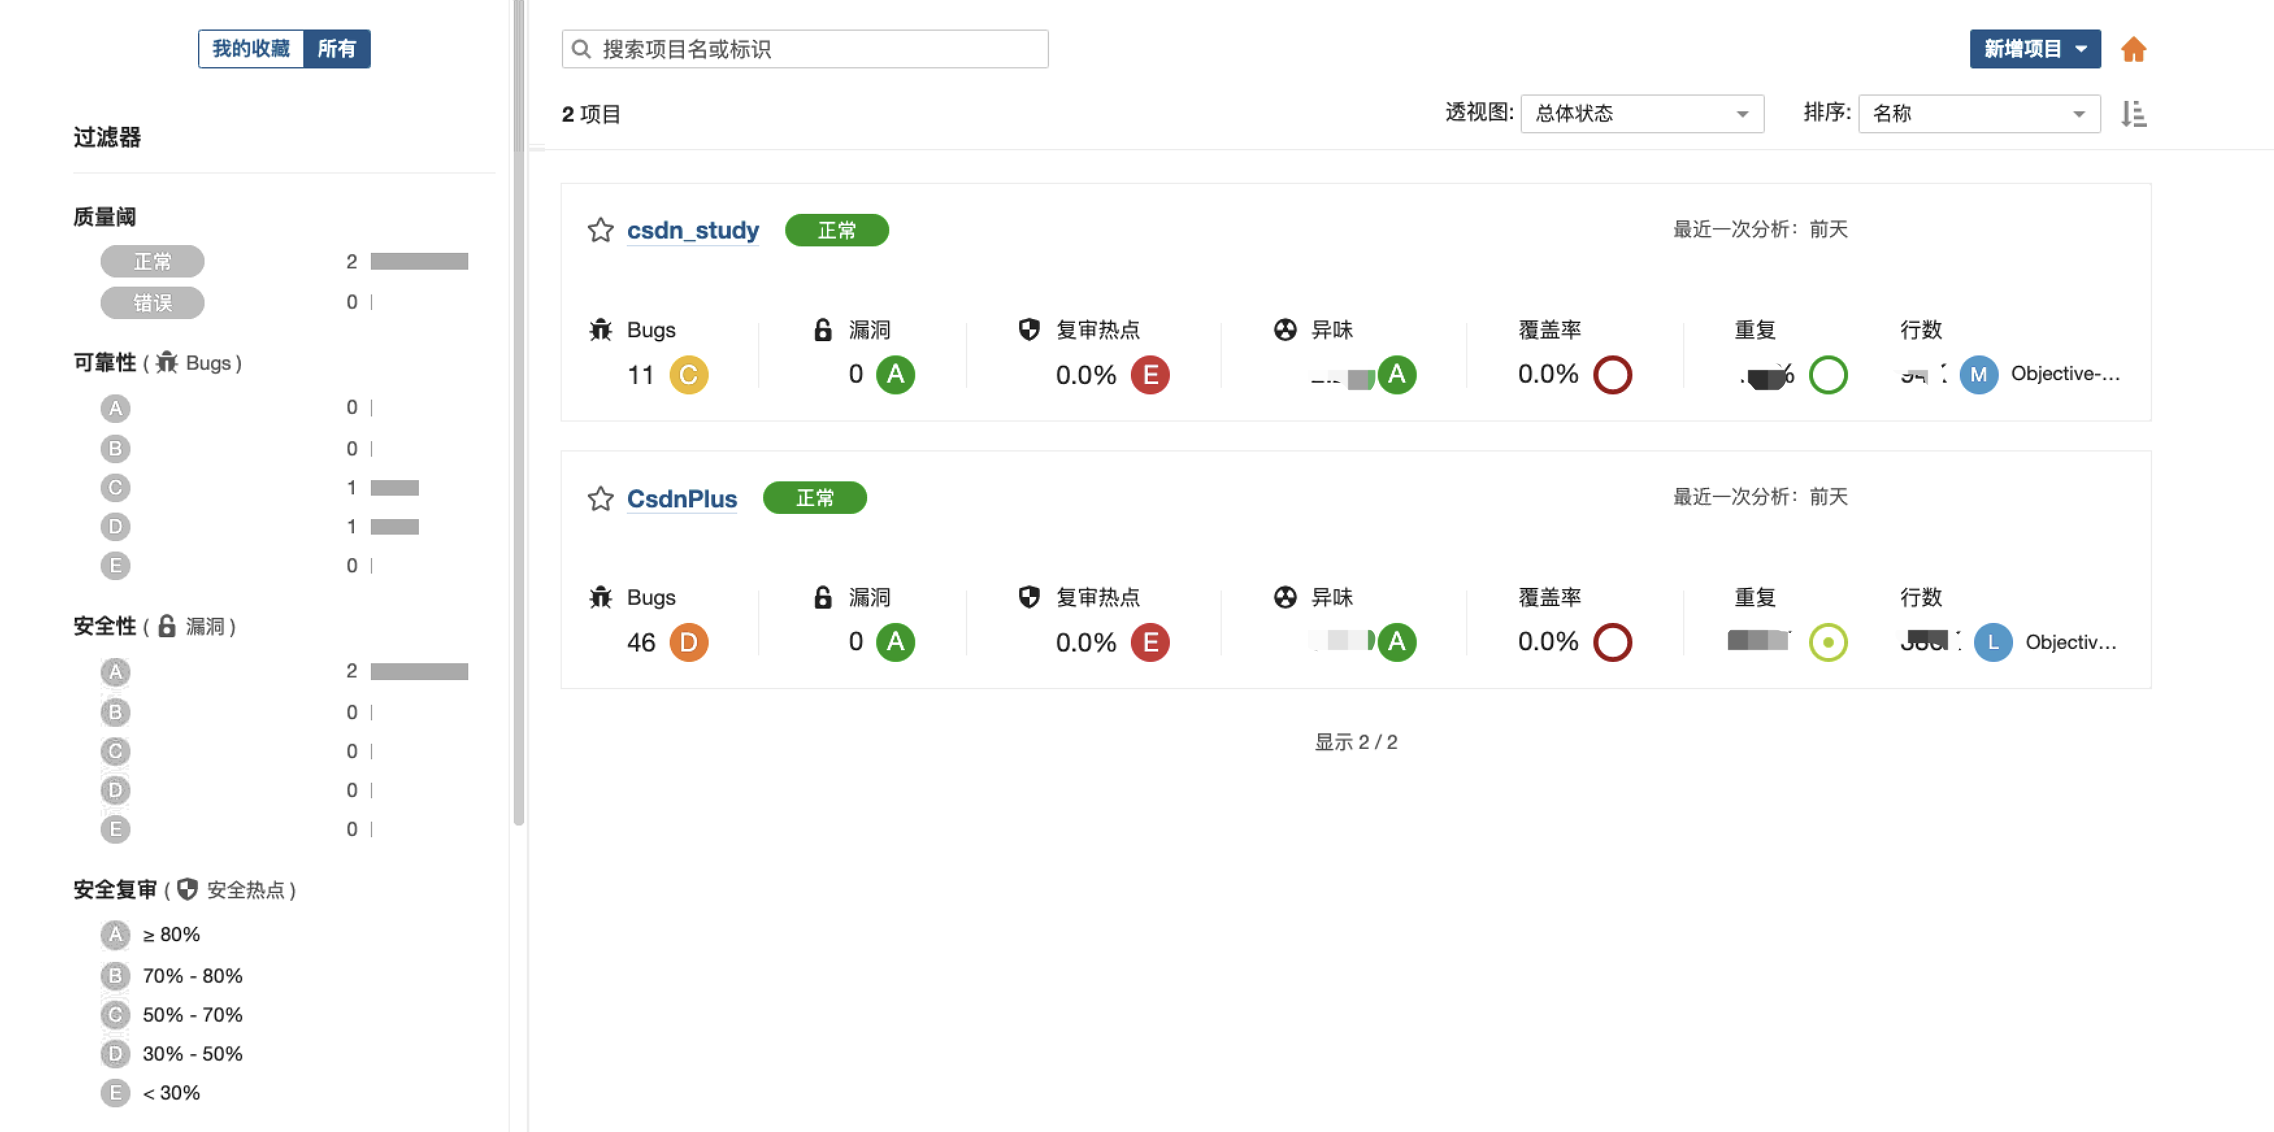
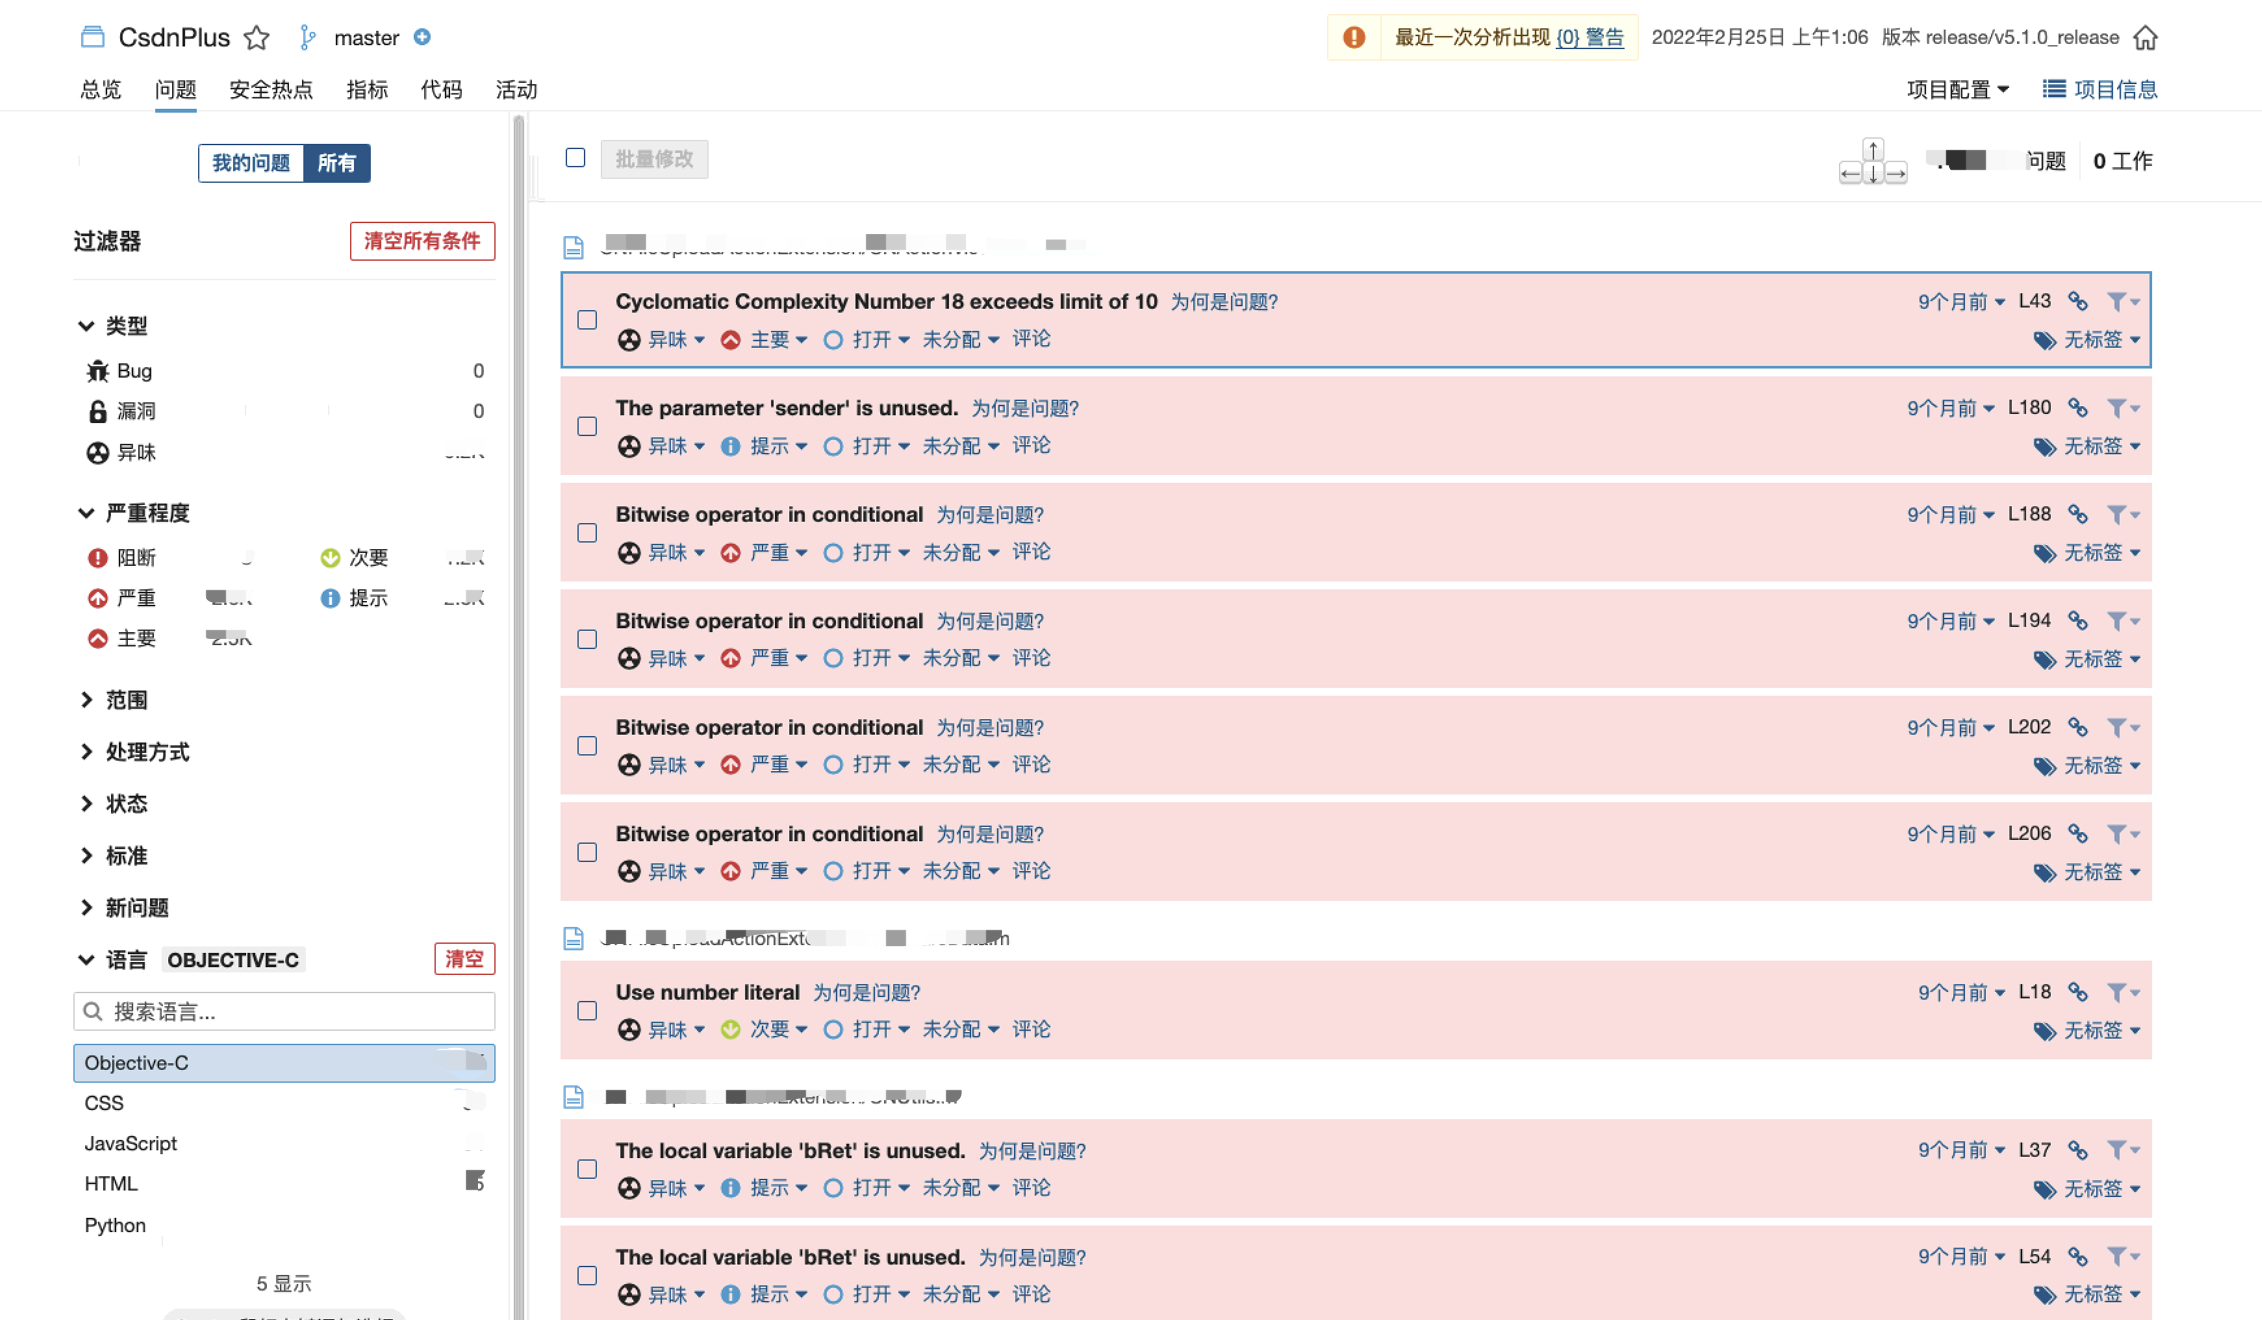
After the command is executed successfully, you can see the corresponding detection effect on the front page of sonarQube.
Test effect drawing:
Integrated into Jenkins
Our project already has automatic construction service, so it is more convenient.
-
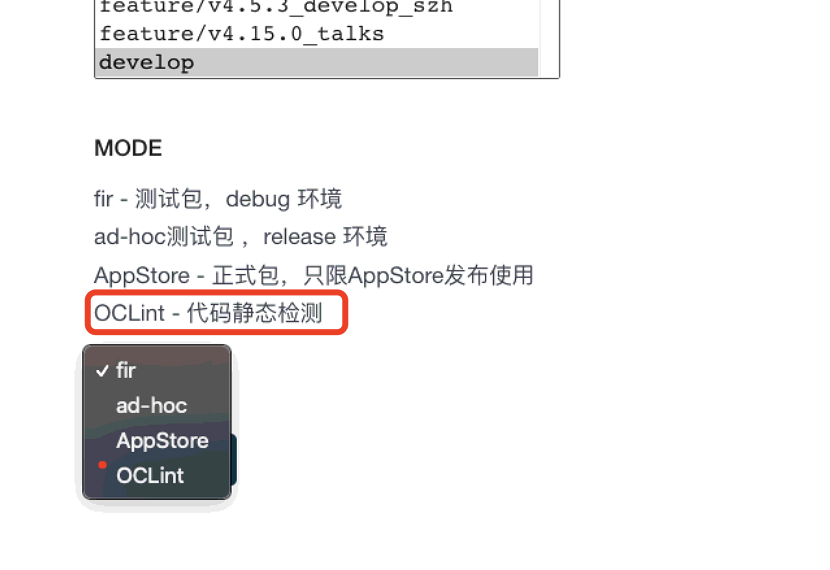
In Jenkins project configuration, OCLint (you can name it yourself) option is added
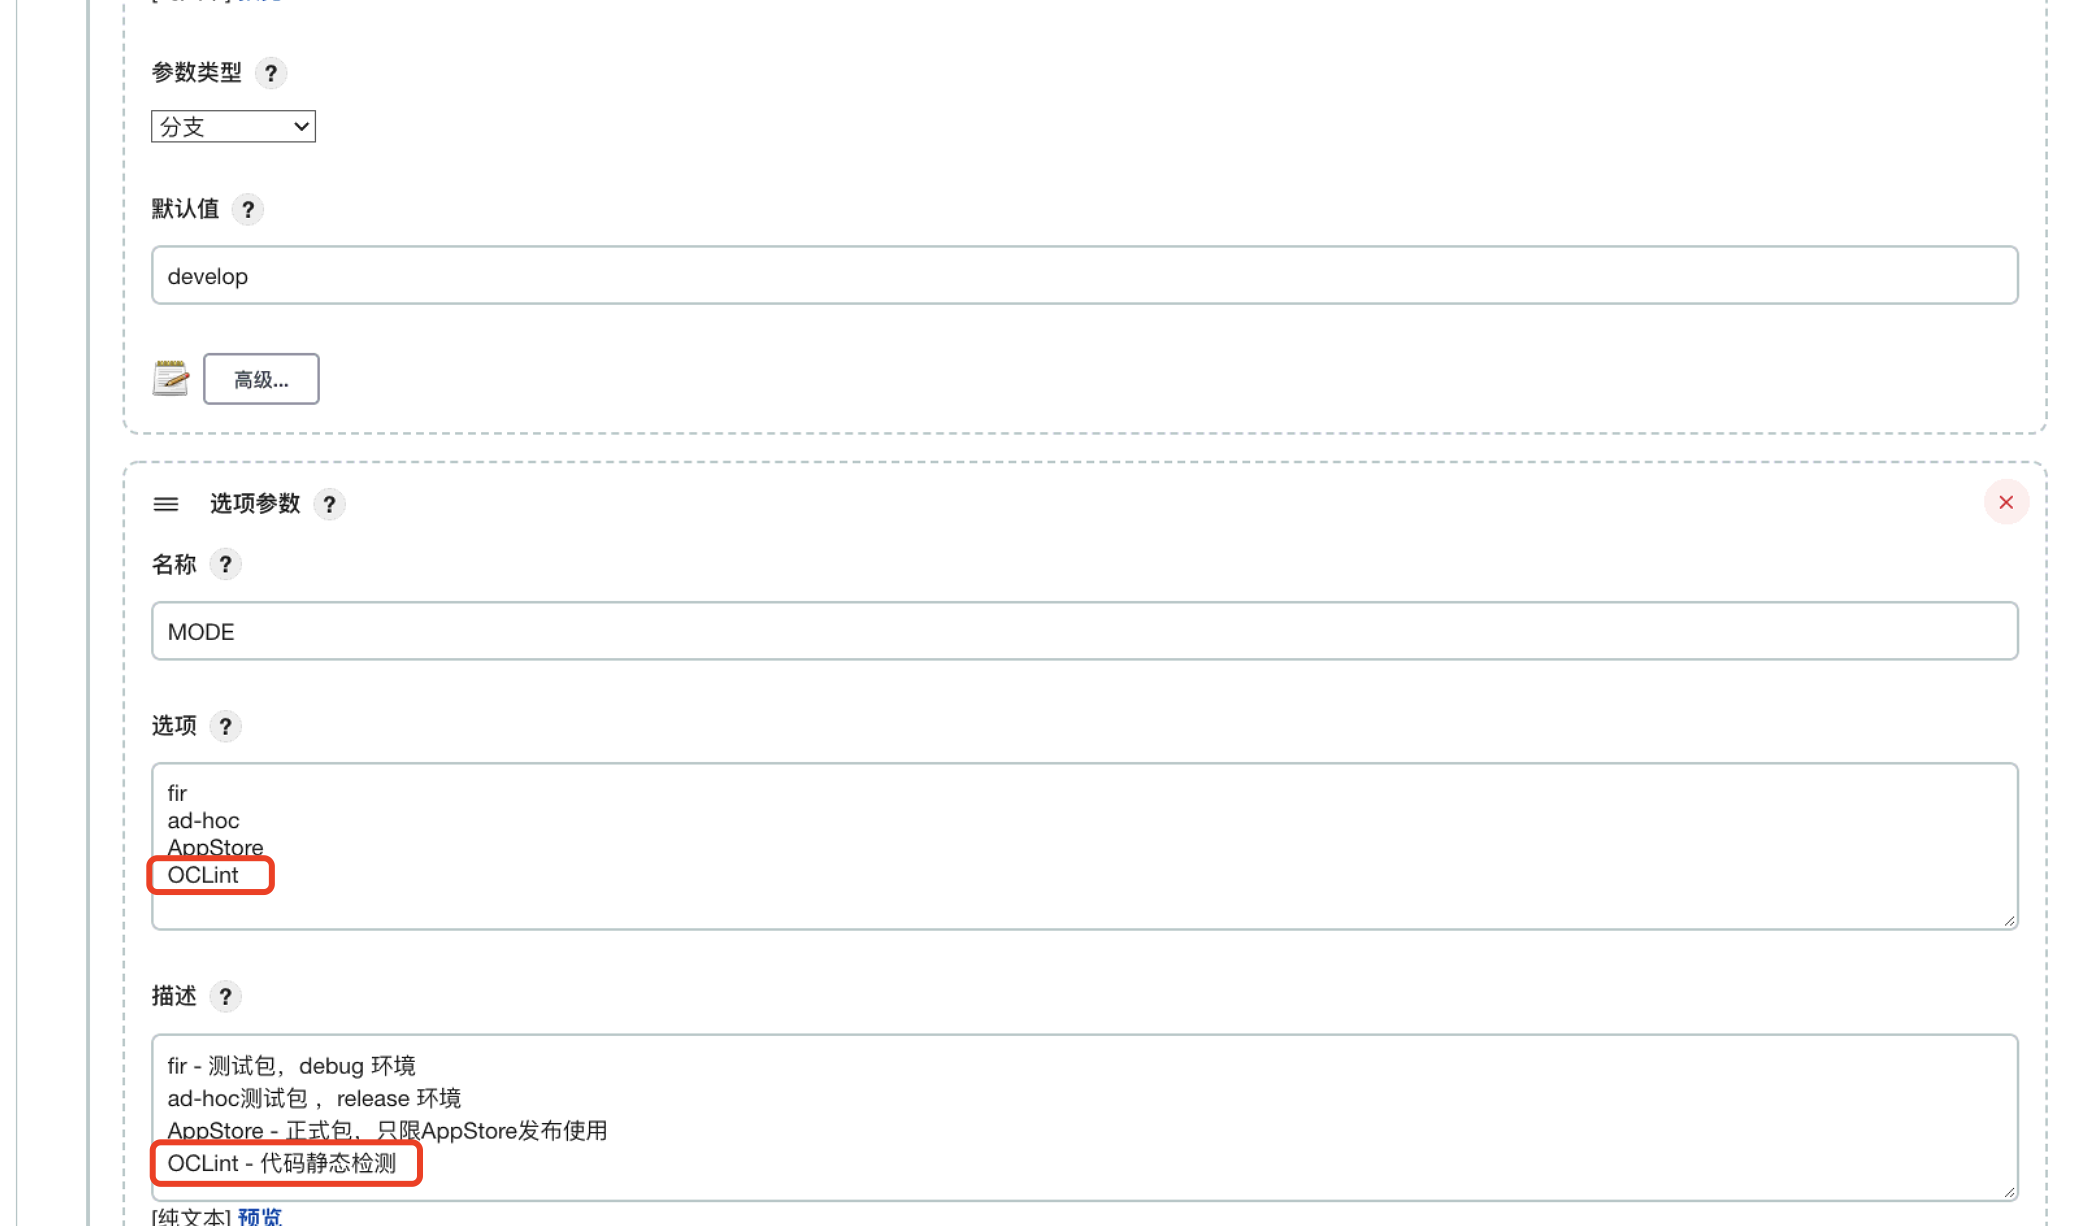
-
Add OCLint related commands in the build Shell command
if [ "$MODE"x = "OCLint"x ]
then
    sh /Users/csdn/.jenkins/workspace/csdn_build_ios/fastlane/oclint.sh "$GIT_BRANCH"
fi
- Attach complete oclint SH command:
#!/bin/bash

COLOR_ERR="\033[1;31m"    #Error prompt
COLOR_SUCC="\033[0;32m"  #Success prompt
COLOR_QS="\033[1;37m"  #Problem color
COLOR_AW="\033[0;37m"  #Answer tips
COLOR_END="\033[1;34m"     #Color Terminator


# Find the ProjectName of the project
function searchProjectName () {
  # maxdepth finds the depth of the folder
  find . -maxdepth 1 -name "*.xcodeproj"
}

function oclintForProject () {
    # Pre detect whether the required installation package exists
    if which xcodebuild 2>/dev/null; then
        echo 'xcodebuild exist'
    else
        echo 'xcodebuild Not installed, please install Xcode'
    fi

    if which oclint 2>/dev/null; then
        echo 'oclint exist'
    else
        echo 'oclint Not installed, please install OCLint'
    fi
    if which xcpretty 2>/dev/null; then
        echo 'xcpretty exist'
    else
        gem install xcpretty
    fi


    # Specify encoding
    export LANG="zh_CN.UTF-8"
    export LC_COLLATE="zh_CN.UTF-8"
    export LC_CTYPE="zh_CN.UTF-8"
    export LC_MESSAGES="zh_CN.UTF-8"
    export LC_MONETARY="zh_CN.UTF-8"
    export LC_NUMERIC="zh_CN.UTF-8"
    export LC_TIME="zh_CN.UTF-8"
    export xcpretty=/usr/local/bin/xcpretty # The installation location of xcretty can be found at the terminal with which xcretty

    searchFunctionName=`searchProjectName`
    path=${searchFunctionName}
    # String replacement function// Indicates global replacement / indicates the first result replacement matched.
    path=${path//.\//}  # ./BridgeLabiPhone.xcodeproj -> BridgeLabiPhone.xcodeproj
    path=${path//.xcodeproj/} # BridgeLabiPhone.xcodeproj -> BridgeLabiPhone

    myworkspace=$path".xcworkspace" # workspace name
    myscheme=$path  # scheme name

    # Clear last compiled data
    if [ -d ./derivedData ]; then
        echo -e $COLOR_SUCC'-----Last compiled data cleared derivedData-----'$COLOR_SUCC
        rm -rf ./derivedData
    fi

    # xcodebuild clean
    xcodebuild -scheme $myscheme -workspace $myworkspace clean


    # # Generate compiled data
    xcodebuild -scheme $myscheme -workspace $myworkspace -sdk iphonesimulator -destination 'platform=iOS Simulator,name=iPhone 12 Pro Max' -configuration Debug GCC_PRECOMPILE_PREFIX_HEADER=YES CLANG_ENABLE_MODULE_DEBUGGING=NO COMPILER_INDEX_STORE_ENABLE=NO | tee xcodebuild.log | xcpretty -r json-compilation-database -o compile_commands.json

    if [ -f ./compile_commands.json ]; then
        echo -e $COLOR_SUCC'Compiled data generation completed'$COLOR_SUCC
    else
        echo -e $COLOR_ERR'Compilation data generation failed'$COLOR_ERR
        return -1
    fi

    # Generate report
    oclint-json-compilation-database -e Pods -- -report-type pmd \
    -rc=LONG_CLASS=1500 \
    -rc=NESTED_BLOCK_DEPTH=5 \
    -rc=LONG_VARIABLE_NAME=80 \
    -rc=LONG_METHOD=200 \
    -rc=LONG_LINE=300 \
    -disable-rule ShortVariableName \
    -disable-rule ObjCAssignIvarOutsideAccessors \
    -disable-rule AssignIvarOutsideAccessors \
    -allow-duplicated-violations=false\
    -max-priority-1=100000 \
    -max-priority-2=100000 \
    -max-priority-3=100000 >> oclint.xml

    if [ -f ./oclint.xml ]; then
        rm compile_commands.json
        echo -e $COLOR_SUCC'Code analysis completed'$COLOR_SUCC

        mv oclint.xml sonar-reports/

        echo -e $COLOR_SUCC'Move to sonar-reports complete'$COLOR_SUCC
        echo -e $COLOR_SUCC'Start execution sonar-scanner Scan file'$COLOR_SUCC
        sonar-scanner  -Dsonar.projectVersion=$1
    else
        echo -e $COLOR_ERR'Analysis failed'$COLOR_ERR
        return -1
    fi
}

oclintForProject $1
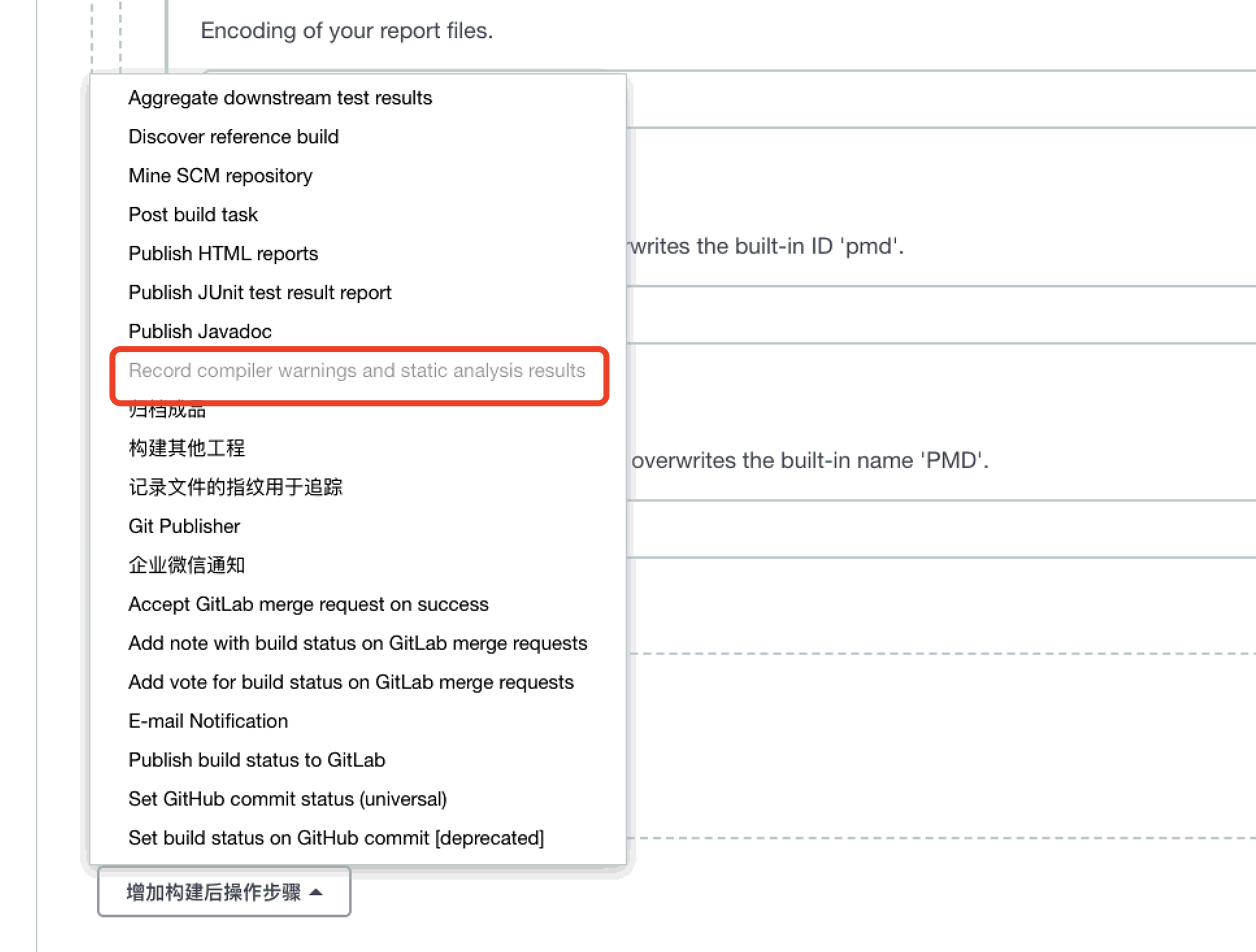
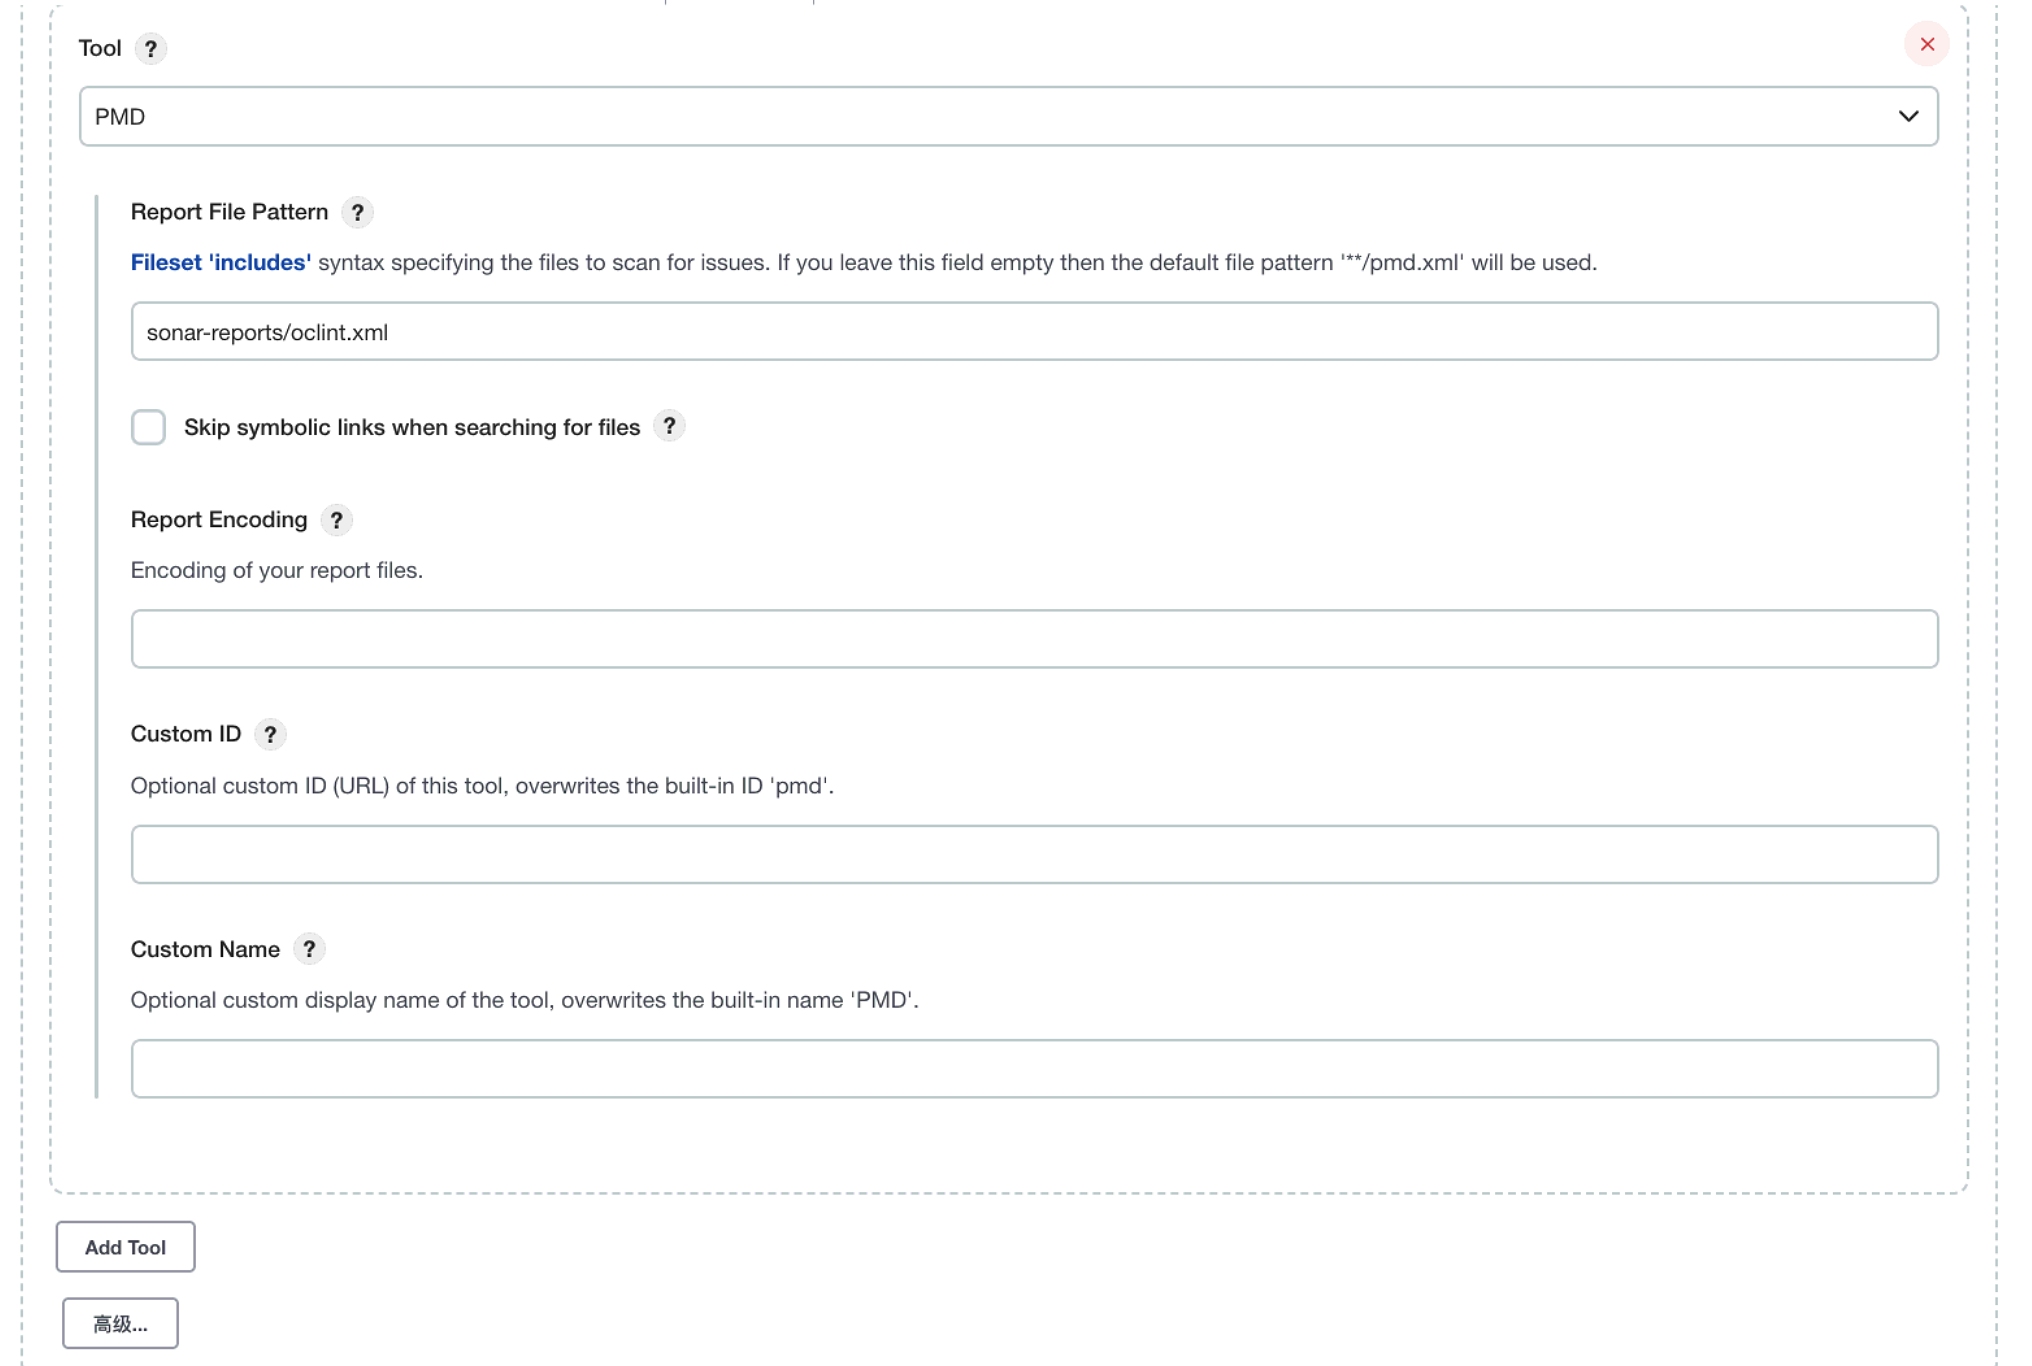
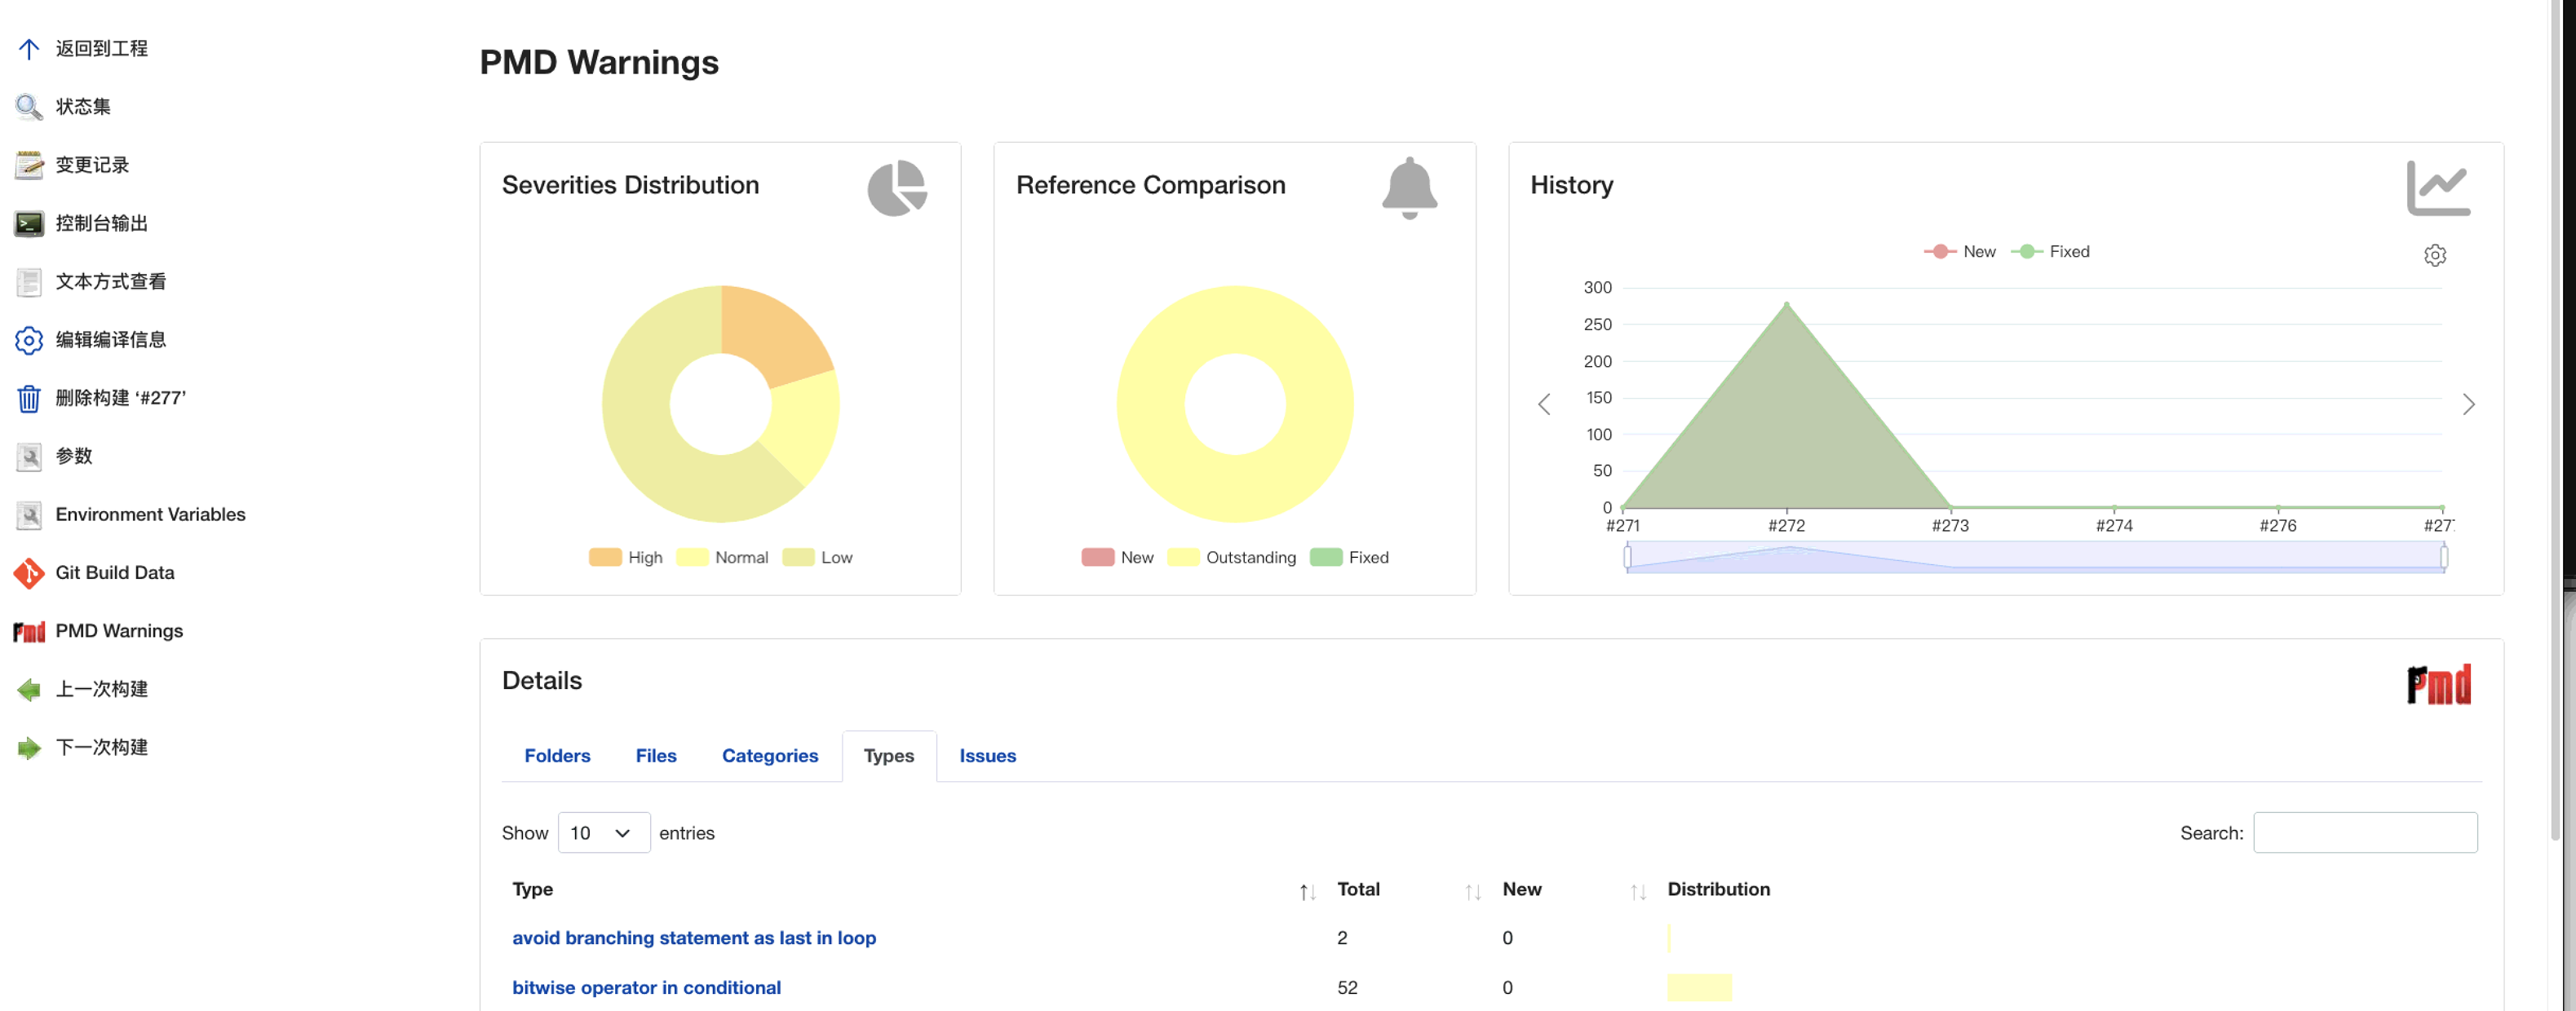
- Jenkins configures PMD (of course, with SonarQube, PMD is very chicken)