preface
Flash is a lightweight Web framework developed by Python. How lightweight is it? A Web service can be developed within 10 lines, but it can only be used for demonstration. Today, I will spend one hour to develop a SMS micro service for production environment. The following service code is directly available in the production environment and is by no means a sample tutorial.
Why develop SMS micro service?We all rely on the implementation of the public cloud for SMS services, which are called directly through the API of the public cloud. Why do we need to encapsulate them ourselves?
- Because in the microservice environment, we need to reduce the amount of code duplication. If multiple microservices need to use SMS services, we need to copy the code multiple times and package the public cloud API into our own microservice API, which can reduce the code replication to one line of Http requests.
- The accesskey and secret calling API do not need to be copied to multiple services to reduce security risks.
- Common business logic can be added according to our business needs.
One more layer call is one more network request, but the impact is minimal. We can't write line by line code because there are too many calls in the object-oriented way.
- The public cloud short message service is an asynchronous call, and error handling is also an asynchronous callback.
- The call of the microservice internal network should be very fast and can be deployed with the virtual machine or the computer room.
start
First, we build the skeleton of the project.
Why build the skeleton of the project?Because Flask is too lightweight, specifications such as configuration and routing need to be defined by developers themselves. Generally, mature development teams have their own development framework, which should be uniformly configured, uniformly developed and integrated with relevant systems. Here I share a very simple development framework suitable for production environment.
Create a new project directory, and then create two Python directories, app and config. App is used to store business related codes, and config is used to store configuration related codes.
Configuration class
Add the following contents to config/config.py. The design of configuration varies from person to person, and Flask does not make any restrictions. My design here is to use BaseConfig as the configuration base class to store all common configurations. Different environments use different configuration subclasses. Subclasses only need to modify specific values for easy viewing.
If the configured value needs to be injected during operation (such as database connection, etc.), you can use the method of environment variables (such as the following SECRET_KEY). I also use or to provide the default value without environment variables.
import os


class BaseConfig:
    """
    The configuration base class is used to store the shared configuration
    """
    SECRET_KEY = os.environ.get('SECRET_KEY') or os.urandom(16)
    DEBUG = False
    TESTING = False


class ProductionConfig(BaseConfig):
    """
    The production environment configuration class is used to store the configuration of the production environment
    """
    pass


class DevelopmentConfig(BaseConfig):
    """
    The development environment configuration class is used to store the configuration of the development environment
    """
    DEBUG = True


class TestingConfig(BaseConfig):
    """
    The test environment configuration class is used to store the configuration of the development environment
    """
    DEBUG = True
    TESTING = True


registered_app = [
    'app'
]

config_map = {
    'development': DevelopmentConfig,
    'production': ProductionConfig,
    'testing': TestingConfig
}
As for the later registered_app and config_ What's the use of map? Automatic injection can be done, which I will talk about later.
Then I add a log configuration. Log configuration is very important. Different development teams often have a set of standardized log configuration templates, which generally will not change, so they can be defined directly in the code or in the form of configuration files.
config/logger.py
from logging.config import dictConfig


def config_logger(enable_console_handler=True, enable_file_handler=True, log_file='app.log', log_level='ERROR',
                  log_file_max_bytes=5000000, log_file_max_count=5):
    # Define the log processor for output to the console
    console_handler = {
        'class': 'logging.StreamHandler',
        'formatter': 'default',
        'level': log_level,
        'stream': 'ext://flask.logging.wsgi_errors_stream'
    }
    # Defines the log processor for output to a file
    file_handler = {
        'class': 'logging.handlers.RotatingFileHandler',
        'formatter': 'detail',
        'filename': log_file,
        'level': log_level,
        'maxBytes': log_file_max_bytes,
        'backupCount': log_file_max_count
    }
    # Define log output format
    default_formatter = {
        'format': '[%(asctime)s] %(levelname)s in %(module)s: %(message)s'
    }
    detail_formatter = {
        'format': '[%(asctime)s] %(levelname)s in %(module)s: %(message)s'
    }
    handlers = []
    if enable_console_handler:
        handlers.append('console')
    if enable_file_handler:
        handlers.append('file')
    d = {
        'version': 1,
        'formatters': {
            'default': default_formatter,
            'detail': detail_formatter
        },
        'handlers': {
            'console': console_handler,
            'file': file_handler
        },
        'root': {
            'level': log_level,
            'handlers': handlers
        }
    }
    dictConfig(d)
The above is a typical Python log configuration method. The variable parts are defined as parameters (log file, level, etc.), and two log processors (file and console) are defined. When using, you only need to call this method.
Application class
After defining the configuration, we start to create our flash application. Students who have used flash know that creating a flash application requires only one line of code.
app = Flask(__name__)
However, this is not an available method for production. For the convenience of production and testing, we need to use a method to obtain the app object.
def create_app(conf=None):
    # initialize logger
    register_logger()
    # check instance path
    instance_path = os.environ.get('INSTANCE_PATH') or None
    # create and configure the app
    app = Flask(__name__, instance_path=instance_path)
    if not conf:
        conf = get_config_object()
    app.config.from_object(conf)
    # ensure the instance folder exists
    if app.instance_path:
        try:
            os.makedirs(app.instance_path)
        except OSError:
            pass
    # register app
    register_app(app)
    return app
Several things have been done here: first, register the log class, second, load the configuration object, third, create the instance directory, and fourth, register the application business.
Why should the registration log be placed on the first line?Many developers will put the log configuration in the configuration class. This is not a big problem, but the earlier you register the log, the earlier your log will start to collect. If the log is configured after loading the configuration class, if an error occurs when creating an app, it cannot be collected by the log collector defined by us.
The log registration method can be written as follows
def register_logger():
    log_level = os.environ.get('LOG_LEVEL') or 'INFO'
    log_file = os.environ.get('LOG_FILE') or 'app.log'
    config_logger(
        enable_console_handler=True,
        enable_file_handler=True,
        log_level=log_level,
        log_file=log_file
    )
I still get the configuration from the environment variable and call the previous configuration function to configure the log.
Method to load the configuration object.
def get_config_object(env=None):
    if not env:
        env = os.environ.get('FLASK_ENV')
    else:
        os.environ['FLASK_ENV'] = env
    if env in config.config_map:
        return config.config_map[env]
    else:
        # set default env if not set
        env = 'production'
        return config.config_map[env]
From flash_ The env environment variable obtains the running environment, and then according to the config in the previous configuration class_ Map obtains the corresponding configuration class to load the configuration class.
The last is to register our business code.
def register_app(app):
    for a in config.registered_app:
        module = importlib.import_module(a)
        if hasattr(module, 'register'):
            getattr(module, 'register')(app)
Registered in the configuration class is used here_ App list, which defines the modules to be loaded. Generally, there is only one module for microservices.
I still need an app here/__ init__. Py file has a register method, which performs specific registration operations, such as registering a flash blueprint.
def register(app):
    api_bp = Blueprint('api', __name__, url_prefix='/api')
app.register_blueprint(api_bp)Because each business module has its own routing, ORM or blueprint, which is the business's own code and must be decoupled from the skeleton. Use a specific method as the specification. First, it is easy to customize the code extension. Second, it is easy for the team to understand. There is no need for flexible configuration. The convention here is greater than the configuration. Of course, you can have your own implementation.
I put the above code into application.py modular
import os
import importlib
from flask import Flask
from config.logger import config_logger
from config import config


def register_logger():
    log_level = os.environ.get('LOG_LEVEL') or 'INFO'
    log_file = os.environ.get('LOG_FILE') or 'app.log'
    config_logger(
        enable_console_handler=True,
        enable_file_handler=True,
        log_level=log_level,
        log_file=log_file
    )


def register_app(app):
    for a in config.registered_app:
        module = importlib.import_module(a)
        if hasattr(module, 'register'):
            getattr(module, 'register')(app)


def get_config_object(env=None):
    if not env:
        env = os.environ.get('FLASK_ENV')
    else:
        os.environ['FLASK_ENV'] = env
    if env in config.config_map:
        return config.config_map[env]
    else:
        # set default env if not set
        env = 'production'
        return config.config_map[env]


def create_app_by_config(conf=None):
    # initialize logger
    register_logger()
    # check instance path
    instance_path = os.environ.get('INSTANCE_PATH') or None
    # create and configure the app
    app = Flask(__name__, instance_path=instance_path)
    if not conf:
        conf = get_config_object()
    app.config.from_object(conf)
    # ensure the instance folder exists
    if app.instance_path:
        try:
            os.makedirs(app.instance_path)
        except OSError:
            pass
    # register app
    register_app(app)
    return app


def create_app(env=None):
    conf = get_config_object(env)
    return create_app_by_config(conf)
Create is provided here_ app_ by_ The config method is used to directly create app objects from configuration classes, mainly to facilitate direct injection of specific configuration classes during unit testing.
Our skeleton is basically formed, including the most basic configuration class, log configuration and application registration mechanism. Then we can run our flash application.
Development test
Flash provides the flash run command to run the test application, but it also needs to provide flash_ App and flash_ Env is started with two environment variables. We can also simplify this step.
to write run.py
import click
from envparse import env
from application import create_app


@click.command()
@click.option('-h', '--host', help='Bind host', default='localhost', show_default=True)
@click.option('-p', '--port', help='Bind port', default=8000, type=int, show_default=True)
@click.option('-e', '--env', help='Running env, override environment FLASK_ENV.', default='development', show_default=True)
@click.option('-f', '--env-file', help='Environment from file', type=click.Path(exists=True))
def main(**kwargs):
    if kwargs['env_file']:
        env.read_envfile(kwargs['env_file'])
    app = create_app(kwargs['env'])
    app.run(host=kwargs['host'], port=kwargs['port'])


if __name__ == '__main__':
    main()
Here, a simple command-line script is created with click, which can directly start a test service through command-line parameters. Of course, the default parameters are directly available, using python run.py Or right click in the IDE to run. At the same time, the env file option is also provided, and users can provide files of environment variables.
Why use environment variable files?Because many configurations of production environment and development environment are different, such as public cloud key, database connection, etc., these information can never be submitted to git and other version control software, so we can create an. env file as follows
ACCESS_KEY=xxx
ACCESS_SECRET=xxx
Add this file to gitignore, and then use -- env file to load this file, which can be used directly in the development environment without manual input every time.
deploy
We will definitely not start the production environment by testing. We need tools like gunicorn to start a formal service. We can also use Docker and other container technologies to automate the production deployment process.
to write server.py
from application import create_app


app = create_app()
It's very simple here. Just create a Flask app object, and then start it through gunicorn server:app.
Write the requirements.txt file to automatically install dependencies. You can write in the dependencies used later.
flask
flask-restful
click
envparse
gunicorn
Write Dockerfile file
FROM python:3.8

COPY . /opt
WORKDIR /opt
RUN pip install --no-cache-dir -r requirements.txt
CMD ["gunicorn", "-b", "0.0.0.0:80", "server:app"]
Then you can start the service container with Docker using the following command.
docker build -t myapp:0.1 .
docker run -d --name myapp -p 80:80 myapp:0.1
So far, a simple flash skeleton has been completed. You can see the complete project below.
https://github. com/wwtg99/flask-skeletongithub.com
Write business
It took about 20 minutes to build a flash skeleton. For the development team, the skeleton only needs to be developed once, and subsequent projects can be cloned directly. Let's write a specific SMS service.
Which public cloud do you use?In actual business, we may use a single cloud or mix multiple clouds. In our actual business, the specific public cloud service depends not on us, but on whose price is low, whose preferential treatment is more, and whose function is strong.
So we can extract the commonness of short message service and write an abstract class. The common points of SMS services mainly include SMS template, signature, receiver, template parameters, etc.
A simple abstract class
class SmsProvider:

    def __init__(self, **kwargs):
        self.conf = kwargs

    def send(self, template, receivers, **kwargs):
        pass
Then there is an alicloud based implementation. The following code is modified according to the official example
class AliyunSmsProvider(SmsProvider):

    def send(self, template, receivers, **kwargs):
        from aliyunsdkcore.request import CommonRequest
        client = self.get_client(self.conf['app_key'], self.conf['app_secret'], self.conf['region_id'])
        request = CommonRequest()
        request.set_accept_format('json')
        request.set_domain(self.conf['domain'])
        request.set_method('POST')
        request.set_protocol_type('https')
        request.set_version(self.conf['version'])
        request.set_action_name('SendSms')
        request.add_query_param('RegionId', self.conf['region_id'])
        request.add_query_param('PhoneNumbers', receivers)
        request.add_query_param('SignName', self.conf['sign_name'])
        request.add_query_param('TemplateCode', self.get_template_id(template))
        request.add_query_param('TemplateParam', self.build_template_params(**kwargs))
        return client.do_action_with_exception(request)

    def get_template_id(self, name):
        if name in self.conf['template_id_map']:
            return self.conf['template_id_map'][name]
        else:
            raise ValueError('no template {} found!'.format(name))

    @staticmethod
    def get_client(app_key, app_secret, region_id):
        from aliyunsdkcore.client import AcsClient
        return AcsClient(app_key, app_secret, region_id)

    @staticmethod
    def build_template_params(**kwargs):
        if 'params' in kwargs and kwargs['params']:
            return json.dumps(kwargs['params'])
        else:
            return ''
Then add the following configuration in BaseConfig, which is the basic configuration of some public cloud API s. It needs to be loaded through environment variables during operation, including template_ id_ The content in the map is the name of the template and the corresponding ID, which is used to distinguish different SMS templates, such as verification code, promotion, etc. the name is used as a parameter for the caller to avoid passing the ID directly.
    # SMS config
    SMS_CONF = {
        'aliyun': {
            'provider_cls': 'app.sms.AliyunSmsProvider',
            'config': {
                'domain': 'dysmsapi.aliyuncs.com',
                'version': os.environ.get('ALIYUN_SMS_VERSION') or '2017-05-25',
                'app_key': os.environ.get('ALIYUN_SMS_APP_KEY'),
                'app_secret': os.environ.get('ALIYUN_SMS_APP_SECRET'),
                'region_id': os.environ.get('ALIYUN_SMS_REGION_ID'),
                'sign_name': os.environ.get('ALIYUN_SMS_SIGN_NAME'),
                'template_id_map': {
                    'captcha': 'xxx'
                }
            }
        }
    }
The template ID, signature, App Key and App Secret need to be obtained on the Alibaba cloud console. The template and signature need to be approved before they can be obtained.
In the same way, you can add the Huawei cloud API or modify it directly from the example. However, Huawei cloud does not have an SDK temporarily and needs to be called through the API, which is similar.
class HuaweiSmsProvider(SmsProvider):

    def send(self, template, receivers, **kwargs):
        header = {'Authorization': 'WSSE realm="SDP",profile="UsernameToken",type="Appkey"',
                  'X-WSSE': self.build_wsse_header(self.conf['app_key'], self.conf['app_secret'])}
        form_data = {
            'from': self.conf['sender'],
            'to': receivers,
            'templateId': self.get_template_id(template),
            'templateParas': self.build_template_params(**kwargs),
        }
        r = requests.post(self.conf['url'], data=form_data, headers=header, verify=False)
        return r

    def get_template_id(self, name):
        if name in self.conf['template_id_map']:
            return self.conf['template_id_map'][name]
        else:
            raise ValueError('no template {} found!'.format(name))

    @staticmethod
    def build_wsse_header(app_key, app_secret):
        now = time.strftime('%Y-%m-%dT%H:%M:%SZ')
        nonce = str(uuid.uuid4()).replace('-', '')
        digest = hashlib.sha256((nonce + now + app_secret).encode()).hexdigest()
        digest_base64 = base64.b64encode(digest.encode()).decode()
        return 'UsernameToken Username="{}",PasswordDigest="{}",Nonce="{}",Created="{}"'.format(app_key, digest_base64,
                                                                                                nonce, now)

    @staticmethod
    def build_template_params(**kwargs):
        if 'params' in kwargs and kwargs['params']:
            return json.dumps(list(kwargs['params'].values()))
        else:
            return ''
It is also a configuration addition. The final BaseConfig is as follows, where SMS_ The provider configures the specified SMS_ The conf key specifies that we now Second hand mobile game account sales platform Which public cloud service is used:
class BaseConfig:
    SECRET_KEY = os.environ.get('SECRET_KEY') or os.urandom(16)
    DEBUG = False
    TESTING = False

    # SMS config
    SMS_PROVIDER = os.environ.get('SMS_PROVIDER')
    SMS_CONF = {
        'aliyun': {
            'provider_cls': 'app.sms.AliyunSmsProvider',
            'config': {
                'domain': 'dysmsapi.aliyuncs.com',
                'version': os.environ.get('ALIYUN_SMS_VERSION') or '2017-05-25',
                'app_key': os.environ.get('ALIYUN_SMS_APP_KEY'),
                'app_secret': os.environ.get('ALIYUN_SMS_APP_SECRET'),
                'region_id': os.environ.get('ALIYUN_SMS_REGION_ID'),
                'sign_name': os.environ.get('ALIYUN_SMS_SIGN_NAME'),
                'template_id_map': {
                    'captcha': 'xxx'
                }
            }
        },
        'huawei': {
            'provider_cls': 'app.sms.HuaweiSmsProvider',
            'config': {
                'url': os.environ.get('HUAWEI_URL'),
                'app_key': os.environ.get('HUAWEI_SMS_APP_KEY'),
                'app_secret': os.environ.get('HUAWEI_SMS_APP_SECRET'),
                'sender': os.environ.get('HUAWEI_SMS_SENDER_ID'),
                'template_id_map': {
                    'captcha': 'xxx'
                }
            }
        }
    }
Other public clouds can also be added in a similar way.
Then we add a method to get the singleton object of the Provider. Here, the flag object is used to register our Provider object as a global singleton object.
from flask import g, current_app
from werkzeug.utils import import_string


def create_sms():
    provider = current_app.config['SMS_PROVIDER']
    sms_config = current_app.config['SMS_CONF']
    if provider in sms_config:
        cls = sms_config[provider]['provider_cls']
        conf = sms_config[provider]['config']
        sms = import_string(cls)(**conf)
        return sms
    return None


def get_sms():
    if 'sms' not in g:
        g.sms = create_sms()
    return g.sms
After all these are completed, you can add a view class. Here, the flash restful library is used to generate API views.
app/api/sms.py
import logging
from flask_restful import Resource, reqparse
from app.sms import get_sms


# Defining parameters, reference https://flask-restful.readthedocs.io/en/latest/reqparse.html
parser = reqparse.RequestParser(bundle_errors=True)
parser.add_argument('receivers', help='Comma separated receivers.', required=True)
parser.add_argument('template', help='Notification template name.', required=True)
parser.add_argument('params', help='Notification template params.', type=dict)


class Sms(Resource):

    def post(self):
        args = parser.parse_args()
        sms = get_sms()
        try:
            res = sms.send(**args)
        except Exception as e:
            logging.error(e)
            return {'message': 'failed'}, 500
        if res.status_code < 300:
            return {'message': 'send'}, 200
        else:
            logging.error('Send sms failed with {}'.format(res.text))
            return {'message': 'failed'}, 500
Then we define the route.
app/api/__init__.py
from flask import Blueprint
from flask_restful import Api
from app.api.health import Health
from app.api.sms import Sms


api_bp = Blueprint('api', __name__, url_prefix='/api')
api = Api(api_bp)

api.add_resource(Sms, '/sms')
Finally, remember to register the blueprint in our application app module.
app/__init__.py
from app.api import api_bp


# register blueprint
def register(app):
    app.register_blueprint(api_bp)
So far, our SMS micro service has been completed. We can test and deploy through the above method.
We define some environment variables, which can be loaded through the environment variable file during testing and the environment variables of the container during runtime. It is placed in the instance directory because instance is our default flash instance directory. This directory will not be submitted to git.
instance/env
SMS_PROVIDER=huawei
HUAWEI_URL=https://rtcsms.cn-north-1.myhuaweicloud.com:10743/sms/batchSendSms/v1
HUAWEI_SMS_APP_KEY=aaa
HUAWEI_SMS_APP_SECRET=bbb
HUAWEI_SMS_SENDER_ID=ccc
Run time loading through environment variables
docker run -d --name sms -p 80:80 \
-e "SMS_PROVIDER=aliyun" \
-e "ALIYUN_SMS_APP_KEY=aaa" \
-e "ALIYUN_SMS_APP_SECRET=bbb" \
-e "ALIYUN_SMS_REGION_ID=cn-hangzhou" \
-e "ALIYUN_SMS_SIGN_NAME=ccc" \
myapp:0.1
The complete project can be viewed here.
wwtg99/sms-apigithub.com

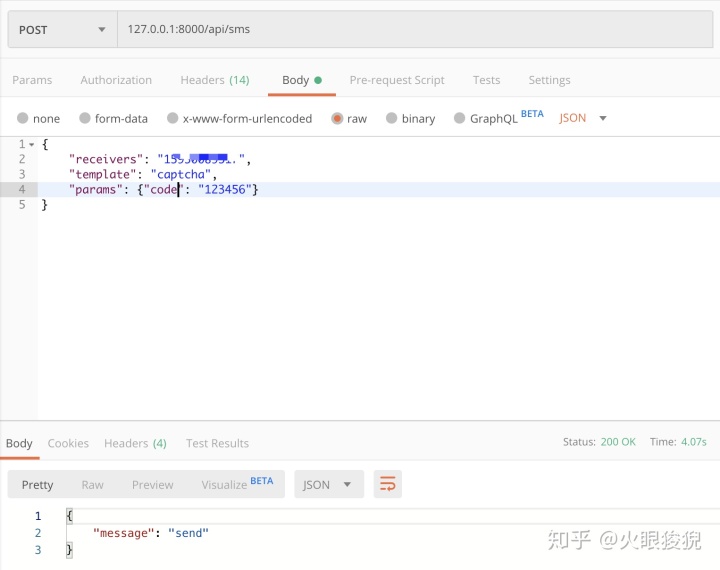
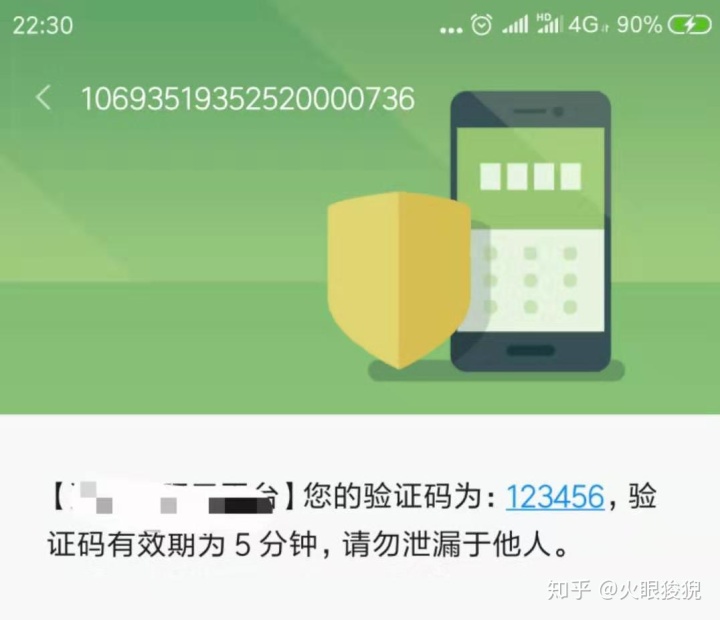
Then we can do the following tests, pay attention to modifying the template ID and environment variables in the configuration, and modify params according to our template parameters.
epilogue
For the old bird, it may not take an hour to develop this project. For standardized online projects, there are still some things missing, such as unit testing. What is your production API service like? Welcome to discuss!
The SMS micro service here is just a brick to attract jade. In fact, all public cloud API services can be applied in the same way. One micro service will be launched in one hour, and the other 7 hours will be spent paddling.