Follow the official website to build an OpenGL development environment, and the whole process is completed on Windows 10
The document address on the official website is here Basically, just follow suit, that is, importing dependencies is different from me. I failed to operate like that, so I imported dependencies myself.
1, Download VS 2019
Of course, you can choose your own version of VS, but it's best not to be too new, otherwise other tools may not have an appropriate version.
2, Download GLFW
To GLFW Official website Download the source code and see that it is the source code, as shown in the figure below:

We'll talk about what we need here later. First unzip it and put it in the appropriate folder.
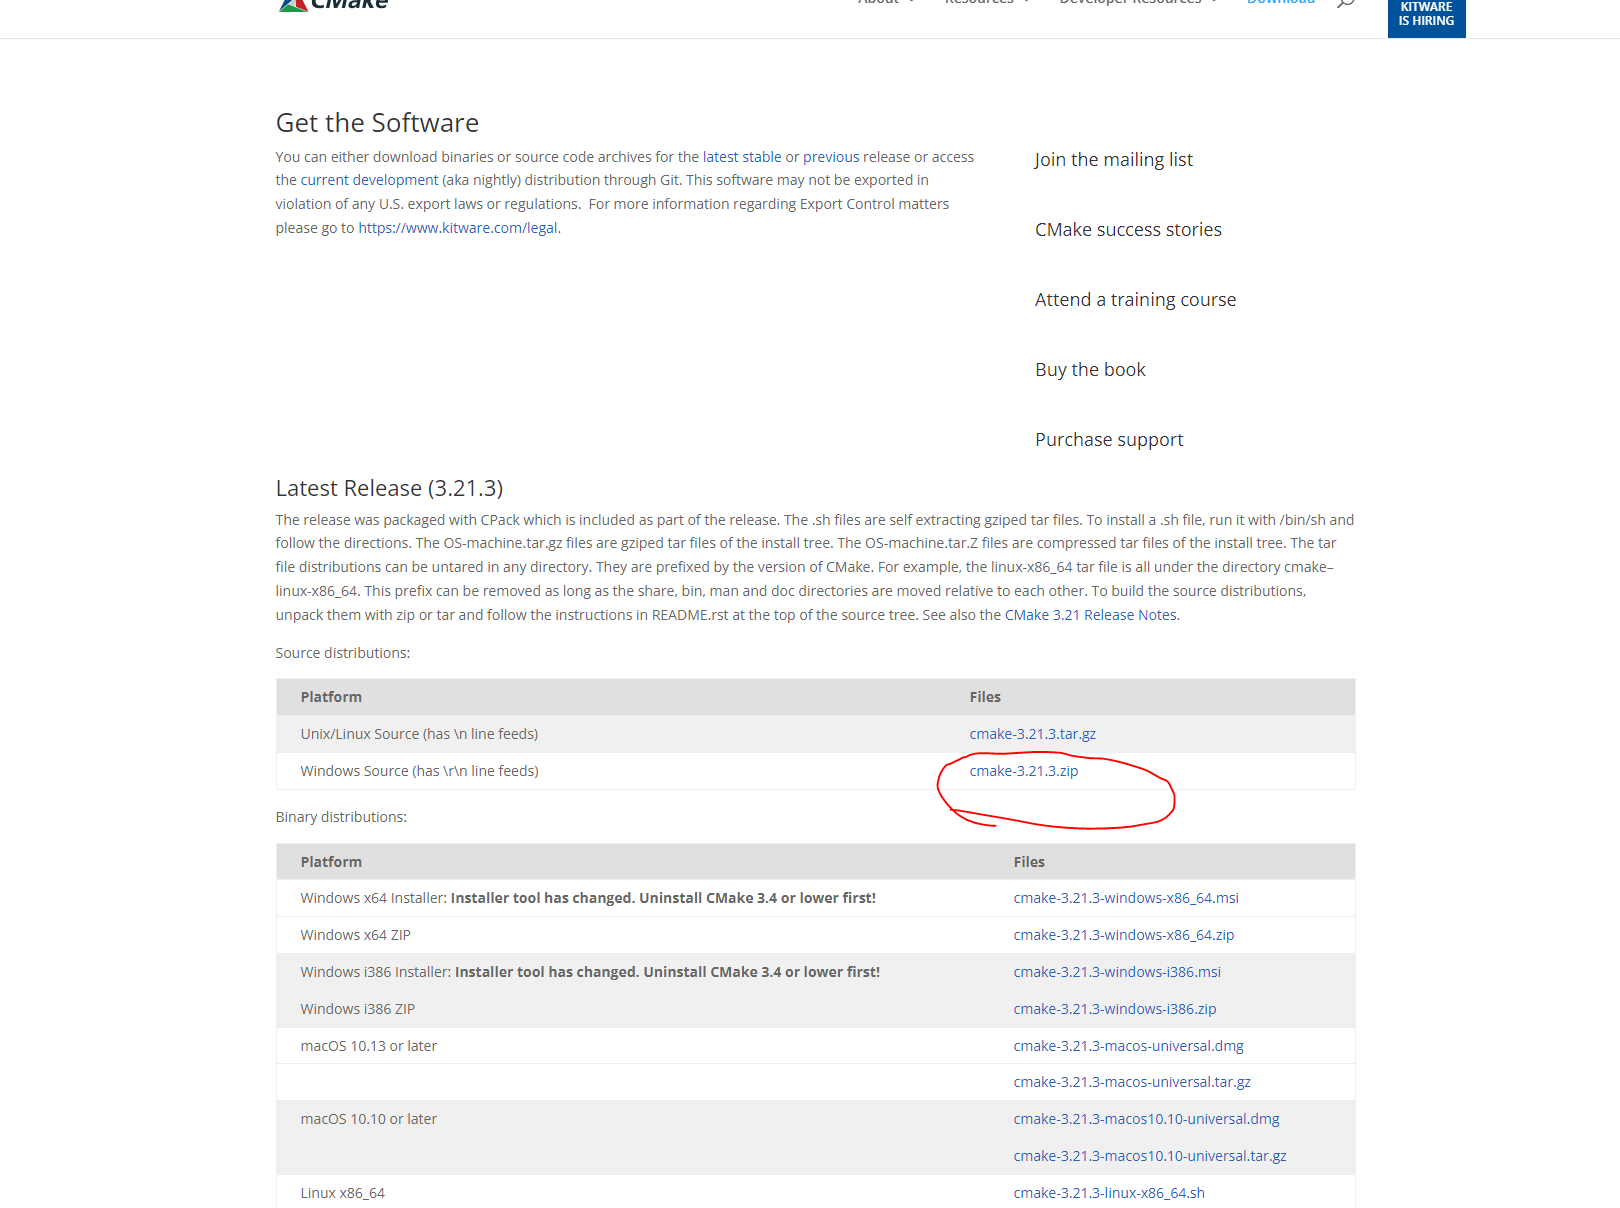
3, Download CMake
To CMake Official website Download the compressed package as shown in the figure below:
- Unzip and open cmake-gui.exe under the bin folder to open Cmake's GUI
- Click the Browse Source button to select the previously downloaded GLFW unzipped source folder
- Create a new output directory of Cmake in the appropriate place, and click Browse build to select it
- Click Configure. If there are no errors, select your own VS version. Here is 2019, Finish; If there is an error, check whether you downloaded the wrong GLFW. The Source to be downloaded is not binary.
- Click Generate to Generate the project in the selected target folder, as shown below:
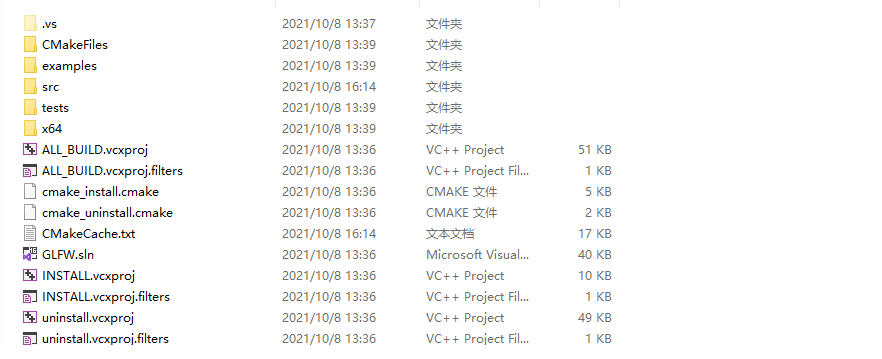
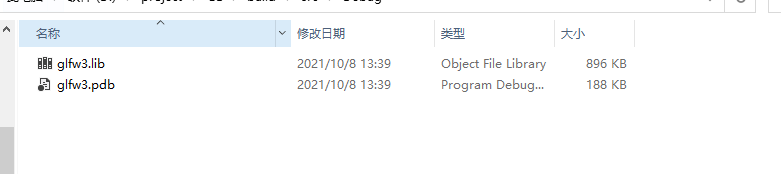
- Use VS 2019 to open GLFW.sln and generate a solution. You can find the important dependency glfw3.lb in src/DeBug.
Download GLAD
There are also import dependencies on the official website. My operation here is unsuccessful and I don't understand VS, so I'll mention how to add dependencies later (don't worry). stay online service Download GLAD.
- Let me explain my choice:

- After clicking Generate, download the zip file and unzip it to the appropriate folder.
4, Import dependency
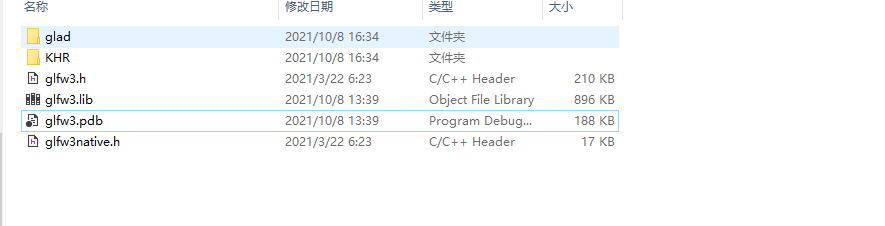
To illustrate, dependencies include the following parts:
-
The dependency of GLFWb itself is under glfw-3.3.4/include/GLFW
-
Generated glfw3.lib Library
-
Dependency of GLAD, two folders under include
Finally, all dependencies should be as follows:
-
Create an empty C + + project
Copy and paste this part into the directory that VS 2019 depends on. What do you think of this dependent directory
- In VS 2019, in project > properties, make the following selections:
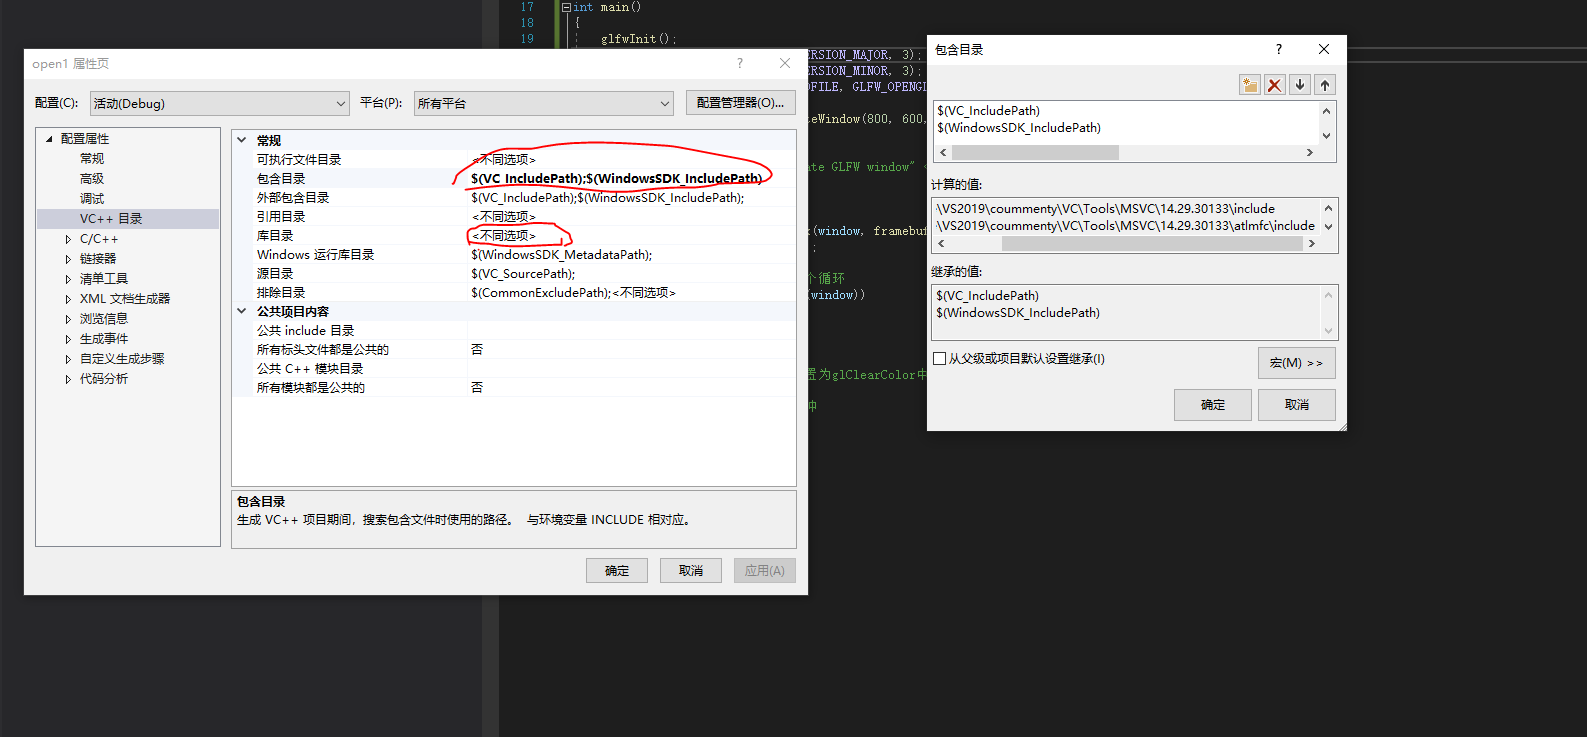
- View the calculated quantity corresponding to these two attributes and copy the dependencies mentioned above to these folders. Remember to put it in both x64 and x86, otherwise it may not be found.
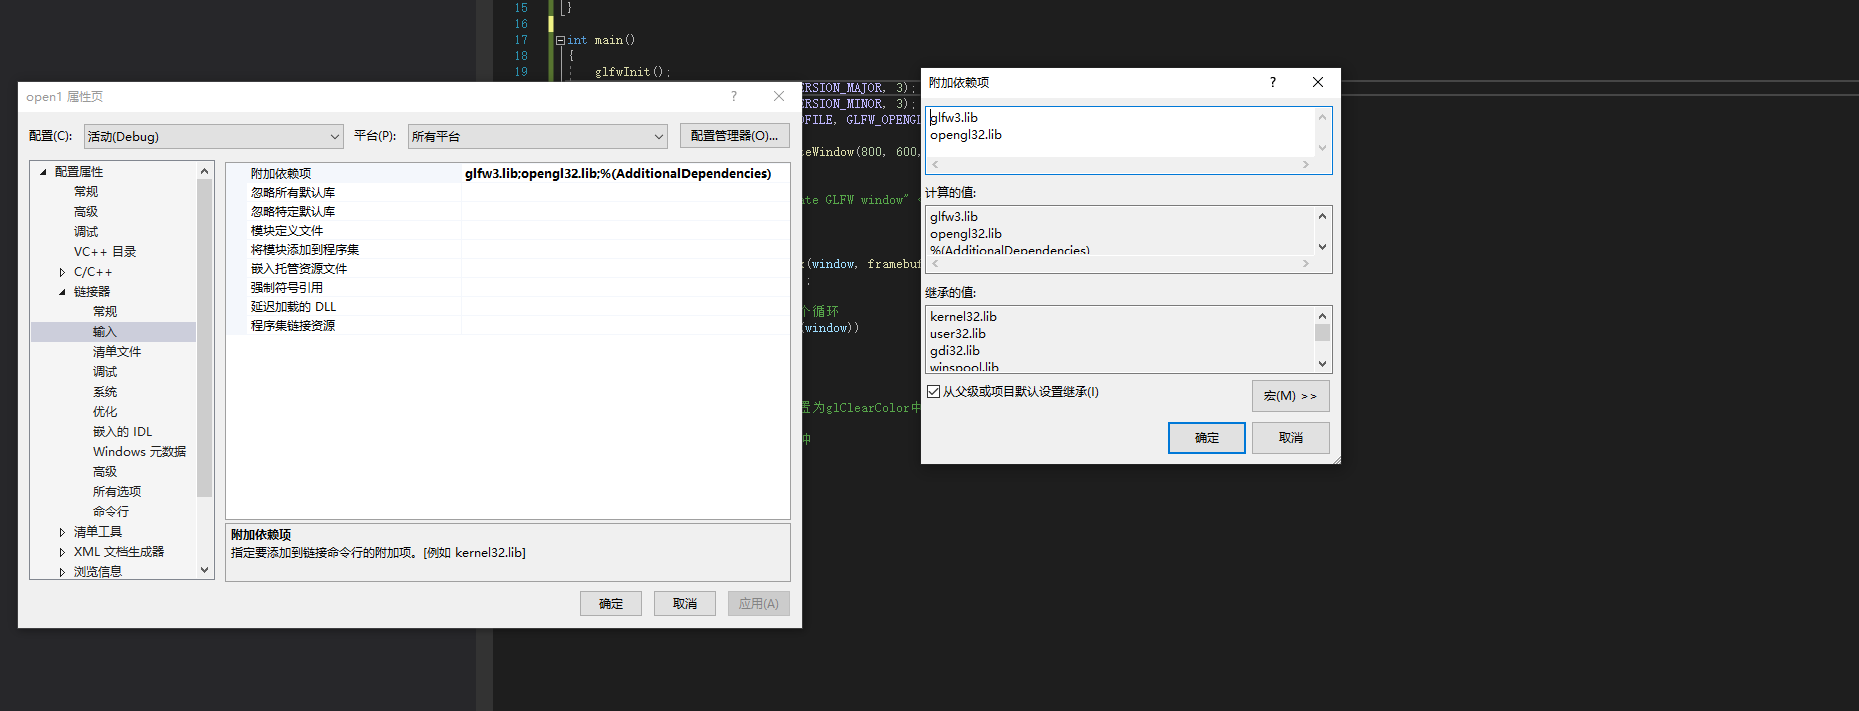
- Add dependencies in the linker as shown in the following figure
- After the dependency loading is completed, add glad.c in the src folder under GLAD to the source code of the created C + + project. If no error is reported during compilation, the dependency is added successfully.
Create a window
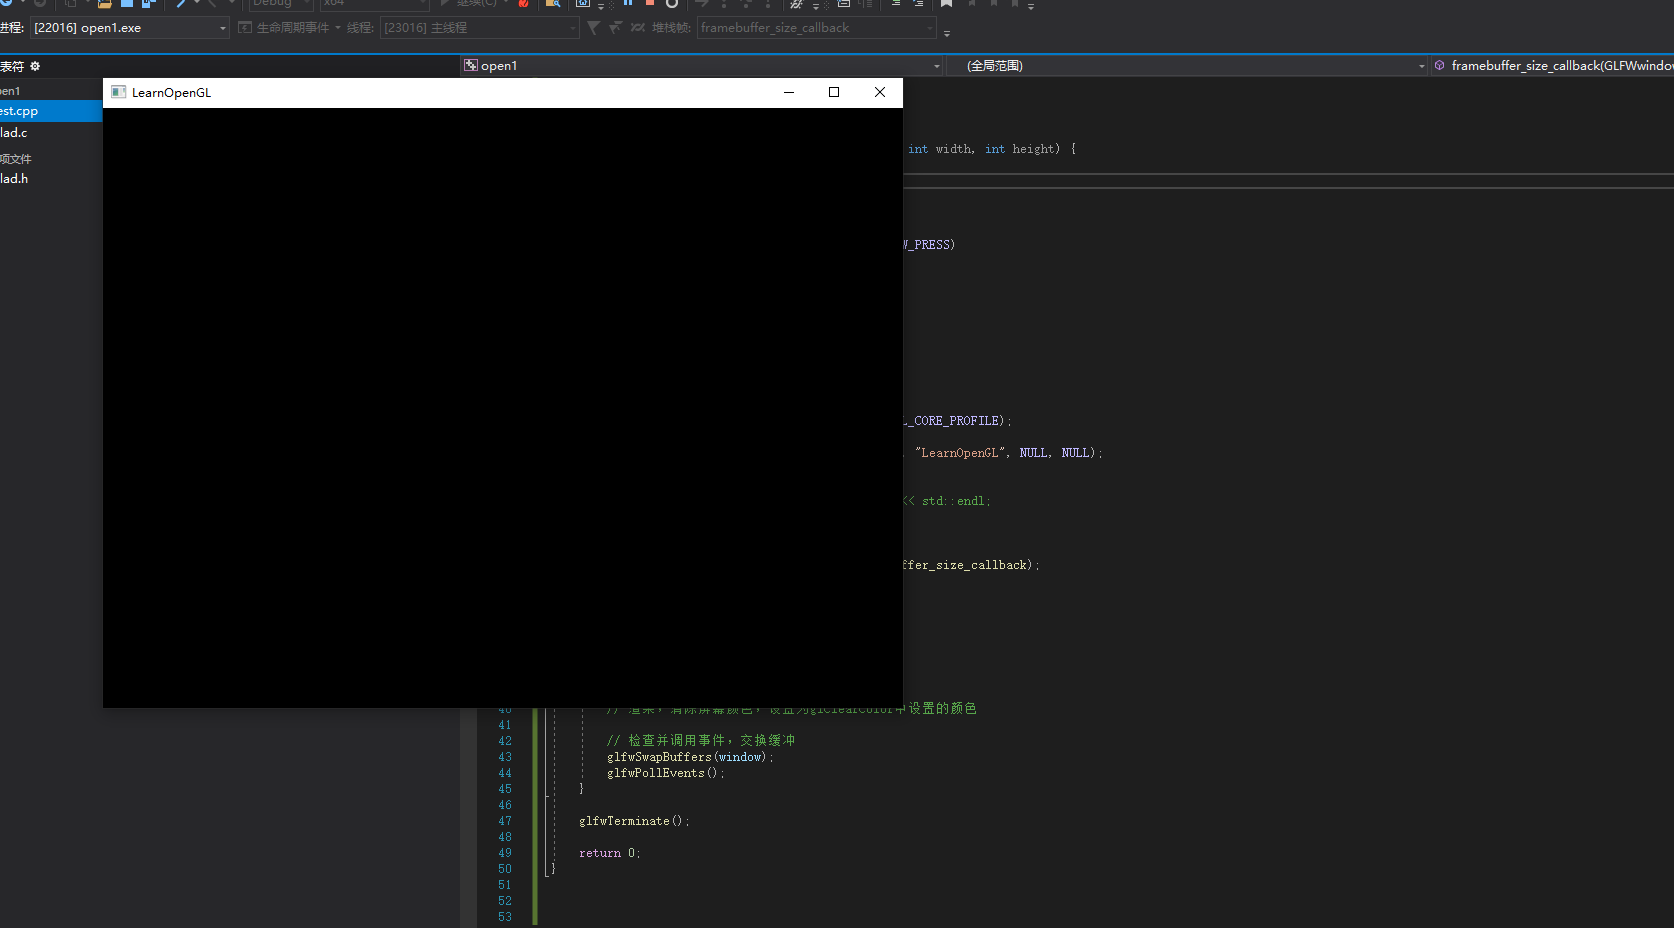
Create a cpp file under the source code. The code is available on the official website as follows:
#include <glad/glad.h>
#include <glfw3.h>

// A callback occurs when the window is resized
void framebuffer_size_callback(GLFWwindow* window, int width, int height) {
	glViewport(0, 0, width, height);
}

// The user's key operation is detected in each frame
void processInput(GLFWwindow* window) {
	if (glfwGetKey(window, GLFW_KEY_ESCAPE) == GLFW_PRESS)
	{
		glfwSetWindowShouldClose(window, true);
	}
}

int main()
{
	glfwInit();
	glfwWindowHint(GLFW_CONTEXT_VERSION_MAJOR, 3);
	glfwWindowHint(GLFW_CONTEXT_VERSION_MINOR, 3);
	glfwWindowHint(GLFW_OPENGL_PROFILE, GLFW_OPENGL_CORE_PROFILE);

	GLFWwindow* window = glfwCreateWindow(800, 600, "LearnOpenGL", NULL, NULL);
	if (window == NULL)
	{
		// cout << "Failed to create GLFW window" << std::endl;
		glfwTerminate();
		return -1;
	}
	glfwSetFramebufferSizeCallback(window, framebuffer_size_callback);
	glfwMakeContextCurrent(window);

	// In order to be able to display persistently, a loop is created
	while (!glfwWindowShouldClose(window))
	{
		// Detect key operation
		processInput(window);

		// Render, clear the screen color and set it to the color set in glClearColor

		// Check and call events, swap buffers
		glfwSwapBuffers(window);
		glfwPollEvents();
	}

	glfwTerminate();

	return 0;
}
- Compile > Build Solution > run.
It took half an hour to set up an environment and more than an hour to write a blog, 233.