openssl components have been integrated in linux, so bloggers use examples to explain how to issue certificates under Linux system, because personal certificates are not recognized by Google Browser, so self-issued certificates can only be tested under Firefox browser!
1 openssl Certificate Generation Process
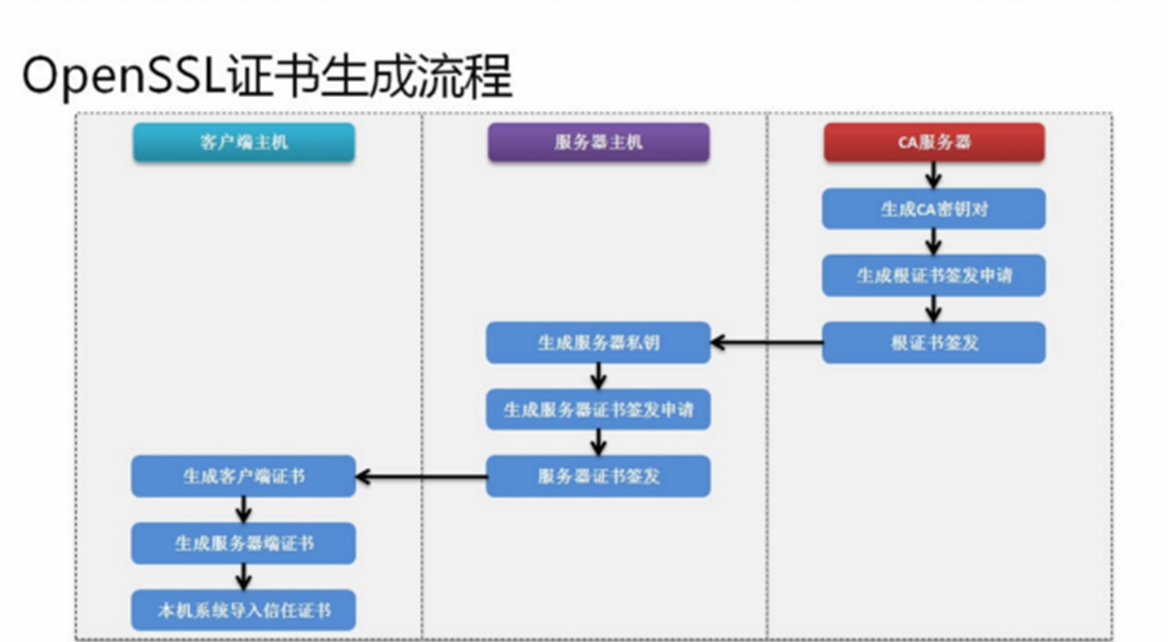
Once the certificate is generated, it needs to be converted into a certificate format that can be used by java, and then configured in tomcat.
This default configuration:
- ca server certificate storage directory / src/ftp/cas
- Server Host Certificate Storage Directory/src/ftp/cas/server
- Client Host Certificate Storage Directory/src/ftp/cas/client
- java certificate save directory / usr / local / tomcatcat/
- Password when generating certificates: hejiejava
- Virtual domain name: cas.com
Because in the process of generating certificates, the commands are more complex and the steps are more clear and simple. After creating the corresponding path folder, all you need to do is copy and paste the commands.
Start without saying much!
1.1 ca Server Certificate Generation (Root Certificate)
- Create a ras-coded CA key to be stored under the / srv/ftp/cas directory with a byte length of 2048
openssl genrsa -out /srv/ftp/cas/cakey.pem 2048 RSA
- Generate a root certificate application for issuance, The server domain name used here is cas.com Virtual domain names can also be set up at / etc/hosts / because certificates must be accessed in the form of domain names.
openssl req -new -key /srv/ftp/cas/cakey.pem -out /srv/ftp/cas/cacert.csr -subj /CN=cas.com
- Application for the issuance of a root certificate, valid for 10 years
openssl x509 -req -days 3650 -sha1 -extensions v3_ca -signkey /srv/ftp/cas/cakey.pem -in /srv/ftp/cas/cacert.csr -out /srv/ftp/cas/ca.cer
1.2 Server-side Certificate
- The generated server key is stored in the / srv/ftp/cas/server directory with the password hejiejava
openssl genrsa -aes256 -out /srv/ftp/cas/server/server-key.pem 2048
- Generate the server-side signing application, and enter the password of the previous step when creating it
openssl req -new -key /srv/ftp/cas/server/server-key.pem -out /srv/ftp/cas/server/server.csr -subj /CN=cas.com
- Generate a 10-year application for issuing server-side certificates (use commands under the cas folder)
openssl x509 -req -days 3650 -sha1 -extensions v3_req -CA /srv/ftp/cas/ca.cer -CAkey /srv/ftp/cas/cakey.pem -CAserial /srv/ftp/cas/server/ca.srl -CAcreateserial -in /srv/ftp/cas/server/server.csr -out /srv/ftp/cas/server/server.cer
1.3 Client Certificate
- Client Certificate Application Operation
openssl genrsa -aes256 -out /srv/ftp/cas/client/client-key.pem 2048
- Client application for certificate issuance
openssl req -new -key /srv/ftp/cas/client/client-key.pem -out /srv/ftp/cas/client/client.csr -subj /CN=cas.com
- Client's application for certificate issuance is valid for 10 years
openssl x509 -req -days 365 -sha1 -CA /srv/ftp/cas/ca.cer -CAkey /srv/ftp/cas/cakey.pem -CAserial /srv/ftp/cas/server/ca.srl -in /srv/ftp/cas/client/client.csr -out /srv/ftp/cas/client/client.cer
Note at this point that the certificate is valid only for cas.com
1.4 Generating Java Certificates
- The certificate generated by the client is sent to the client browser. tomcat needs to be installed ahead of time with the password: hejiejava
openssl pkcs12 -export -clcerts -name cas-client -inkey /srv/ftp/cas/client/client-key.pem -in /srv/ftp/cas/client/client.cer -out /srv/ftp/cas/client/client.p12
- Generate server certificates, mainly using tomcat
openssl pkcs12 -export -clcerts -name cas-server -inkey /srv/ftp/cas/server/server-key.pem -in /srv/ftp/cas/server/server.cer -out /srv/ftp/cas/server/server.p12
- Import the trust certificate into the local system, and then generate the ca-trust.p12 certificate file in the tomcat folder. Attention should be paid to modifying the local tomcat path. After entering the command, you need to enter the password, and then enter yes in the pop-up verification. (Attention to the tomcat path of this command, you need to modify the tomcat path of your local machine.)
keytool -importcert -trustcacerts -alias cas.com -file /srv/ftp/cas/ca.cer -keystore /usr/local/tomcat/ca-trust.p12
- Use keytool tool to view certificate information
keytool -list -keystore /srv/ftp/cas/client/client.p12 -storetype pkcs12 -v
1.5 Configure authentication under tomcat's conf file
Configure the following authentication for server under conf directory in tomcat:
- Modify the port of server.xml in conf to 80 port
- Paste a copy of the following single authentication or two-way authentication into server.xml. It is suggested that the single authentication be tested. The blogger will also give an example below.
1.5.1 One-way Authentication
Note that keystore files and keystore pass are paths and passwords, respectively.
<Connector port="443" protocol="HTTP/1.1" maxThreads="150" SSLEnabled="true" scheme="https" secure="true" clientAuth="false" sslProtocol="TLS" keystoreFile="/srv/ftp/cas/server/server.p12" keystoreType="pkcs12" keystorePass="hejiejava" />
1.5.2 Bidirectional Authentication
<Connector port="443" protocol="HTTP/1.1"
 maxThreads="150" SSLEnabled="true"
 scheme="https" secure="true"
 clientAuth="true" sslProtocol="TLS"
 keystoreFile="/srv/ftp/cas/server/server.p12"
 keystoreType="pkcs12"
 keystorePass="mldnjava"
 truststoreFile="/usr/local/tomcat/ca-trust.p12"
 truststoreType="jks"
 truststorePass="mldnjava"/>
2 Single Certification Tests
2.1 Restart tomcat
- After configuring the Tomcat file, you need to restart Tomcat and enter the bin directory of tomcat.
./catalina.sh stop
./catalina.sh start
2.2 Setting up Virtual Domain Name in windows
Then the virtual domain name is set on the windows host:
Path: C: Windows System32 drivers etc
Modify the hosts file: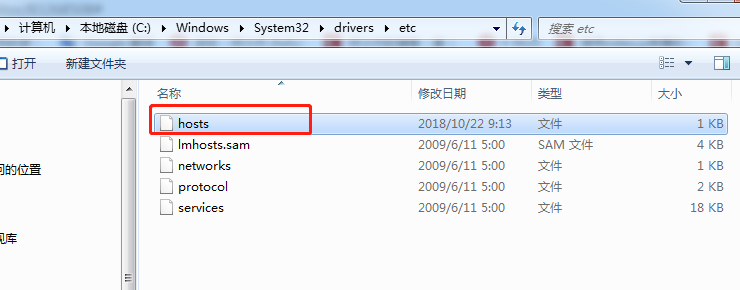

2.3 Setting up Certificate Authentication of Firefox Browser
- Import the file generated by linux locally
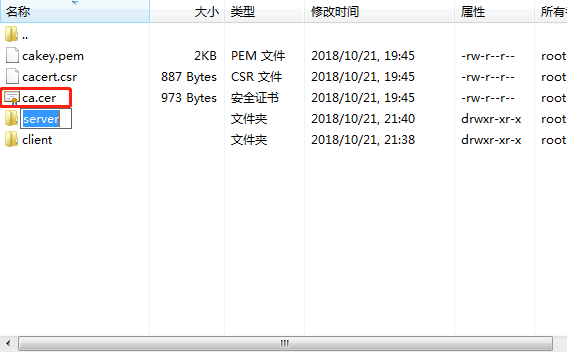
- Import Certificate Authentication to Firefox Browser
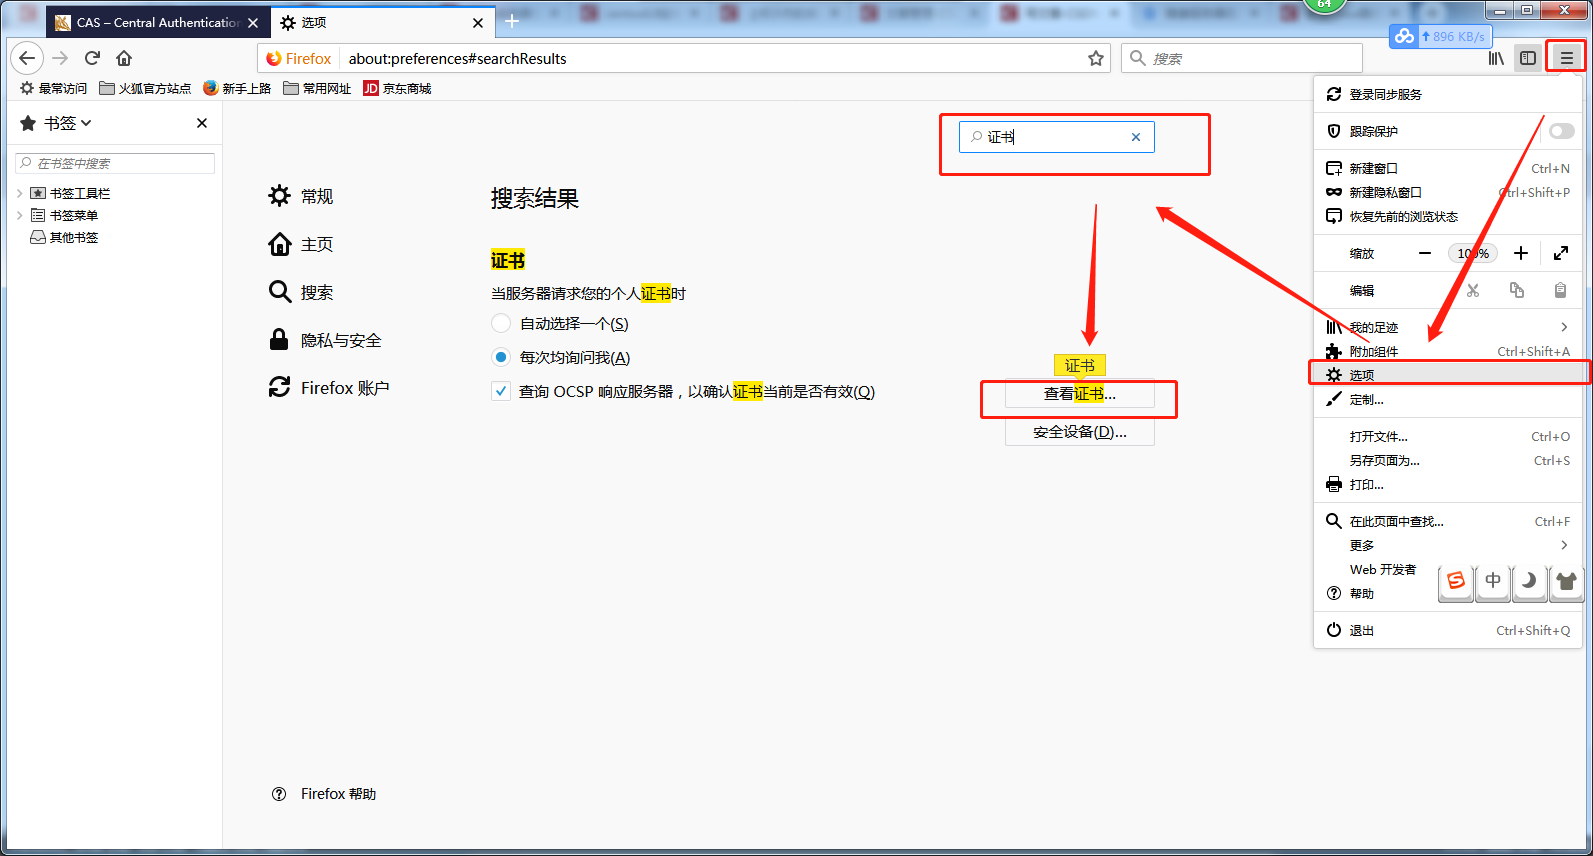
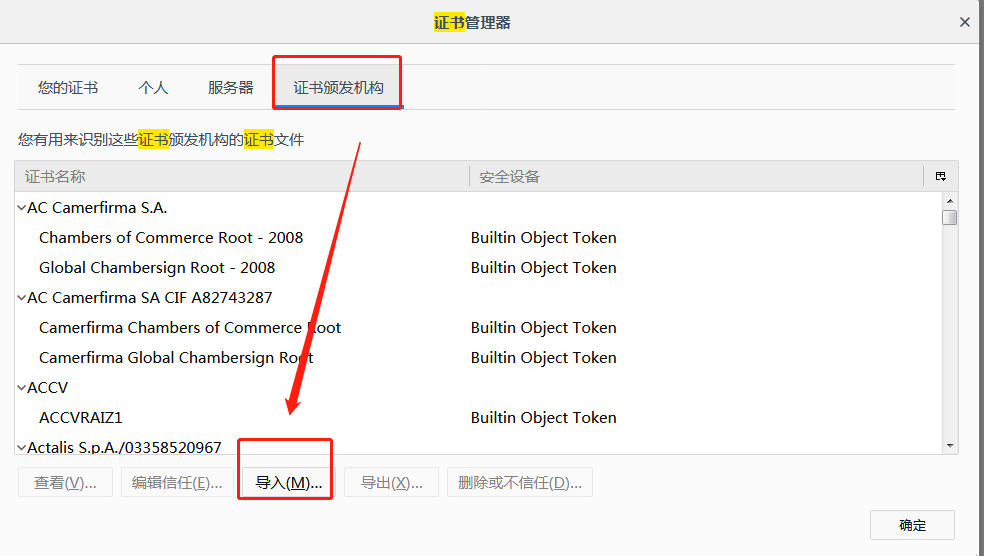
- Check all options to trust!
Then you can go through it.
https://cas.com Secure access to your own configured virtual machine!