1. What is the Pod life cycle
A Pod can contain multiple containers, and a Pod can have one or more Init containers that start before the application container. Init containers are not very different from regular containers, mainly because init runs first, and the main container will not start until the init runs successfully, so the Init container does not support Readiness. If the Init container of a Pod fails to start, Kubernetes restarts the Pod until the Init container succeeds.
Describe as follows
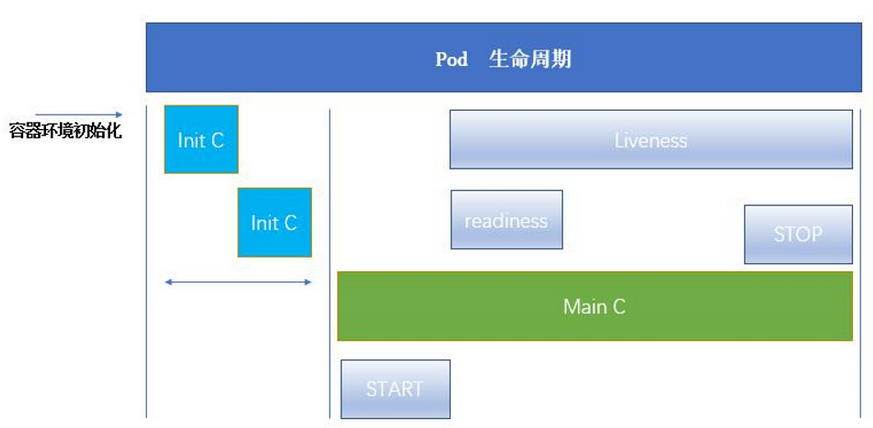
Advantages of Init Containers:
1. If you want to use some tools but don't want them in the main container, put them in the initial mirror init, run them out, end the initial mirror, and use the main container
2. Init containers can safely run these tools to reduce risks
3. Creators and Deployers of application mirrors can work independently
2. Pod Life Cycle Implementation
(1) init container
Write init.yaml file
[root@server2 pod]# cat init.yaml
apiVersion: v1
kind: Pod
metadata:
  name: myapp-pod
  labels:
    app: myapp
spec:
  containers:
  - name: myapp-container
    image: busyboxplus
    command: ['sh', '-c', 'echo The app is running! && sleep 3600']
  initContainers:		%Priority Run init container
  - name: init-myservice
    image: busyboxplus
    command: ['sh', '-c', "until nslookup myservice.default.svc.cluster.local; do echo waiting for myservice; sleep 2; done"]
  - name: init-mydb
    image: busyboxplus
    command: ['sh', '-c', "until nslookup mydb.default.svc.cluster.local; do echo waiting for mydb; sleep 2; done"]

Pull up the pod and you will see that the initialization cannot be completed and the main container will not be able to run

Modify init.yaml file, add services to be satisfied by init
[root@server2 pod]# cat init.yaml
apiVersion: v1
kind: Pod
metadata:
  name: myapp-pod
  labels:
    app: myapp
spec:
  containers:
  - name: myapp-container
    image: busyboxplus
    command: ['sh', '-c', 'echo The app is running! && sleep 3600']
  initContainers:
  - name: init-myservice
    image: busyboxplus
    command: ['sh', '-c', "until nslookup myservice.default.svc.cluster.local; do echo waiting for myservice; sleep 2; done"]
  - name: init-mydb
    image: busyboxplus
    command: ['sh', '-c', "until nslookup mydb.default.svc.cluster.local; do echo waiting for mydb; sleep 2; done"]

---
apiVersion: v1
kind: Service
metadata:
  name: myservice
spec:
  ports:
  - protocol: TCP
    port: 80
    targetPort: 9376
---
apiVersion: v1
kind: Service
metadata:
  name: mydb
spec:
  ports:
  - protocol: TCP
    port: 80
    targetPort: 9377
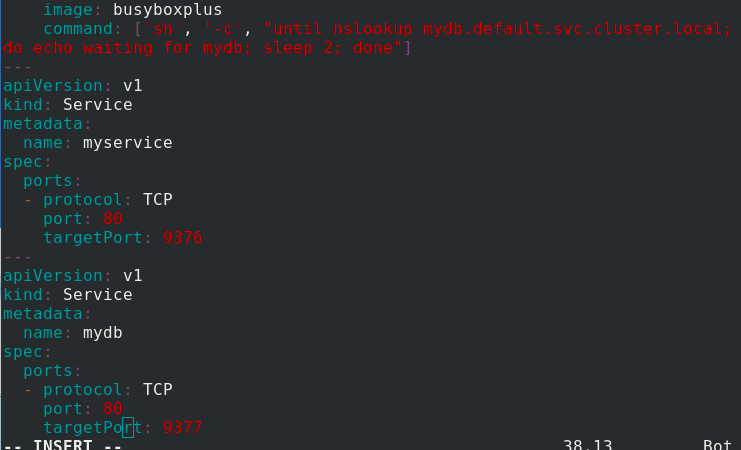
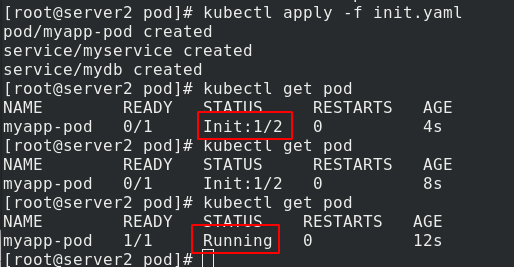
Pull up the pod again and you will see a successful run
(2) Survival probe livenessProbe
Indicates whether the container is running
Note: When both Survival and Ready probes exist, but only when Survival probes pass through, the container will run, but only internally and cannot be accessed externally. External access is only possible if both probes have been successfully run.
Edit pod.yaml, add survival probe
[root@server2 pod]# cat pod.yaml
apiVersion: v1
kind: Pod
metadata:
  name: pod-example
spec:
  nodeName: server4				%Use server4 As Backend
  containers:
  - name: myapp					%myapp Port is 80
    image: myapp:v1
    imagePullPolicy: IfNotPresent
    resources:
      requests:			%Yes cpu and mem Minimum requirements
        cpu: "100m"
        memory: "50Mi"
      limits:			%Yes cpu and mem Maximum limit
        cpu: "200m"
        memory: "100Mi"
    livenessProbe:			%Survival probe to determine survival by monitoring port 8080
      tcpSocket:
        port: 8080
      initialDelaySeconds: 1
      periodSeconds: 3
      timeoutSeconds: 1
Because I changed the port and could not be monitored, the container could not start.
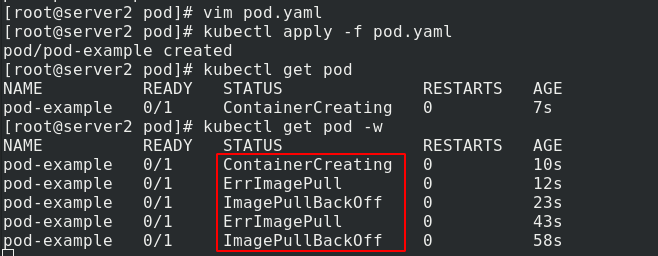
Once port 80 is restored

Container can start normally

(3) Readiness Probe
Indicates whether the container is ready for service requests (ready)
Only use this backend when the probe is ready, otherwise the svc will not expose the port
Edit pod.yaml file, add ready probe
[root@server2 pod]# cat pod.yaml
apiVersion: v1
kind: Pod
metadata:
  name: pod-example
spec:
  nodeName: server4				%Use server4 As Backend
  containers:
  - name: myapp
    image: myapp:v1
    imagePullPolicy: IfNotPresent
    resources:
      requests:			%Yes cpu and mem Minimum requirements
        cpu: "100m"
        memory: "50Mi"
      limits:			%Yes cpu and mem Maximum limit
        cpu: "200m"
        memory: "100Mi"
    livenessProbe:			%Survival probe to determine survival by monitoring port 80
      tcpSocket:
        port: 80
      initialDelaySeconds: 1
      periodSeconds: 3
      timeoutSeconds: 1
    readinessProbe:			%Ready probes, by monitoring/test.html This file determines if it is ready
      httpGet:
        path: /test.html
        port: 80
      initialDelaySeconds: 1
      periodSeconds: 3
      timeoutSeconds: 1
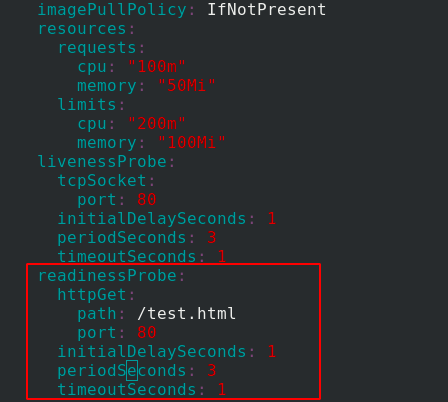
Because of test.html This file does not exist, so it cannot be ready.

Enter pod-example and add test.html, this file is ready to read

Test, successful access to added publishing information
