Perccli requires root privileges
install
wget https://downloads.dell.com/FOLDER03559396M/1/perccli-1.17.10-1.noarch.rpm
rpm –Uvh perccli-1.17.10-1.noarch.rpm
use
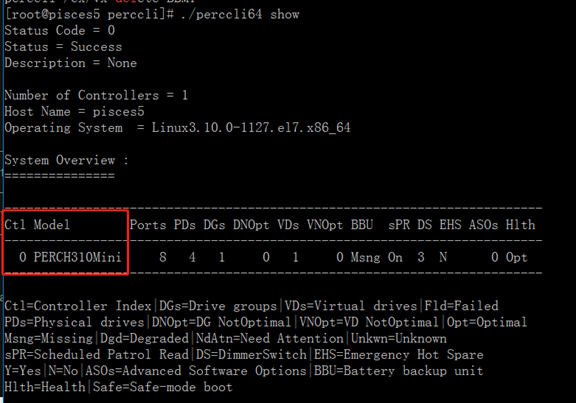
Displays a summary of the controller and controller related information. The summary includes controller numbers sorted by index
./perccli64 show
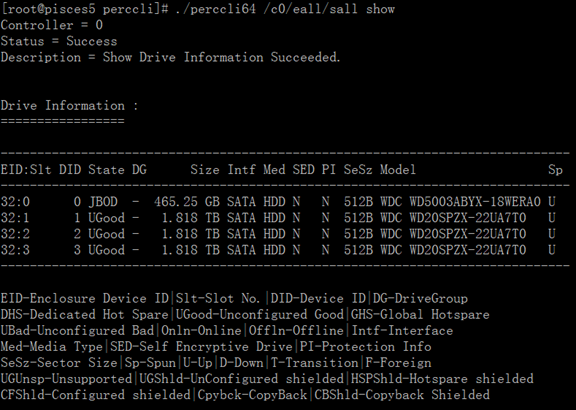
View the list of physical hard disk information
./perccli64 /c0/eall/sall show
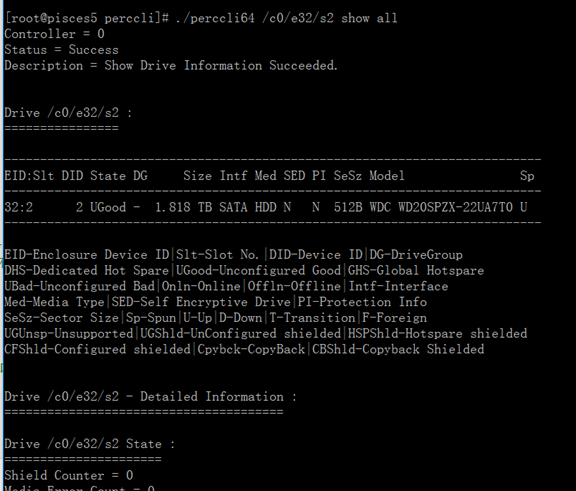
View the details of a disk (e32 is the EID number and s5 is the Slt number)
./perccli64 /c0/e32/s5 show all
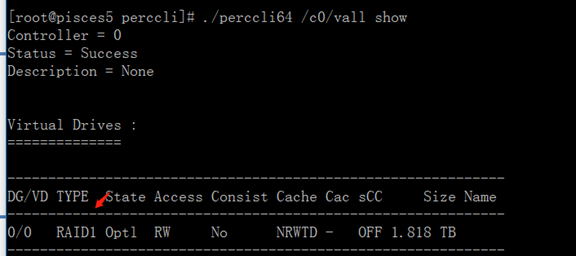
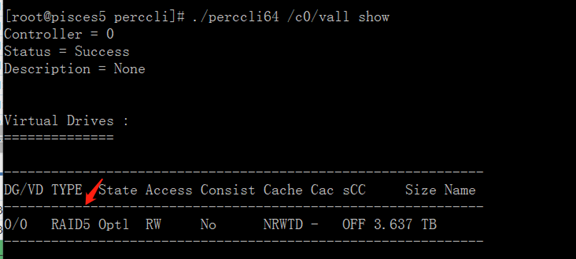
View the list of virtual disk information, that is, array information
./perccli64 /c0/vall show

View virtual disk loss information
./perccli64 /c0 show preservedCache

View offline hard disk information
./perccli64 /c0/fall show all
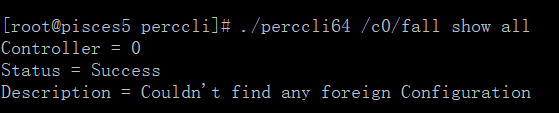
View foreign configuration
./perccli64 /c0/fall show
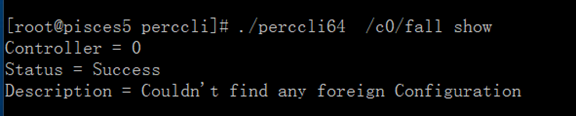
Clear foreign configuration

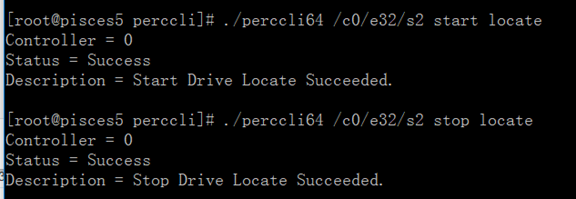
Make the disk status light flash (easy to find the bad disk without hardware alarm)
./perccli64 /c0/e32/s2 start/stop locate
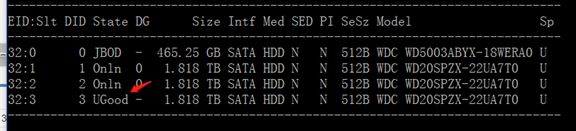
View all physical hard disk status
./perccli64 -PDList -aALL|egrep 'Firmware state'

Raid 0,1,5
raid0
./perccli64 /c0 add vd r0 drives=32:1,32:2

View raid array information
./perccli64 /c0/vall show

View available block information
After the Raid is created, the partition can be mounted
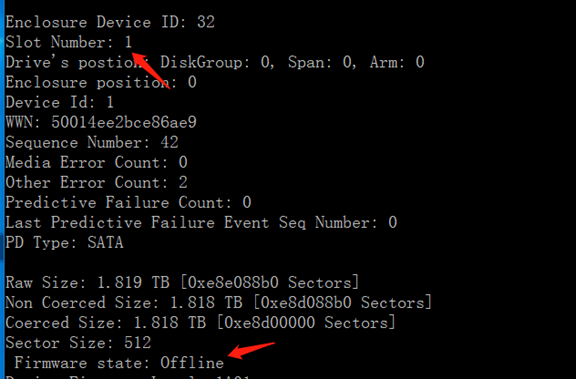
Disk online and offline
We offline one of the disks of raid0
./perccli64 /c0/e32/s1 set offline

Check that the disk status is offline
./perccli64 -PDList –aALL
View that the status of raid0 is OfLn
./perccli64 /c0/vall show

Online disk
./perccli64 /c0/e32/s1 set online

raid status at this time
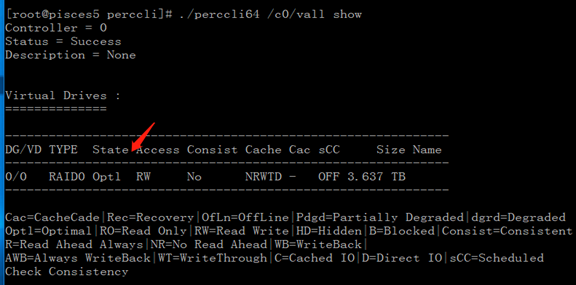
Capacity expansion
./perccli64 /c0/v0 start migrate type=r0 option=add drives=32:3 (RAID1 Capacity expansion (2 hard disks need to be added at the same time)

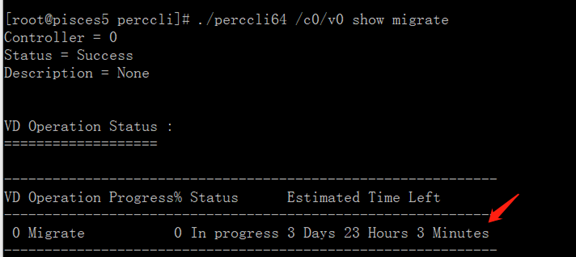
View expansion progress
./perccli64 /c0/v0 show migrate
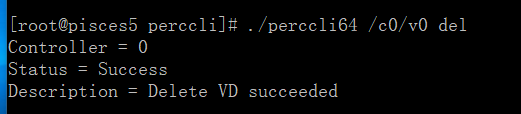
Delete raid
Unmount the disk before performing the delete operation
./perccli64 /c0/v0 del
Raid1
establish
./perccli64 /c0 add vd r1 size=all drives=32:1,32:2

./perccli64 /c0/vall show
You can then create partitions and mount them for use
Online and offline disks are similar to raid0
Offline one of the disks of raid0
./perccli64 /c0/e32/s1 set offline

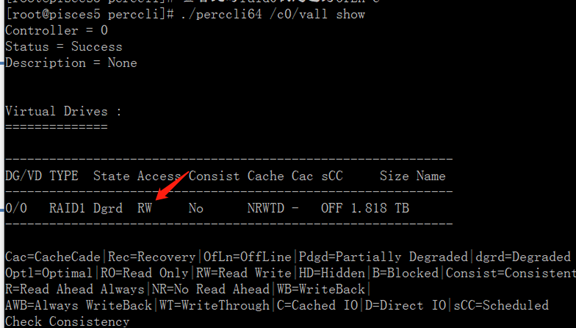
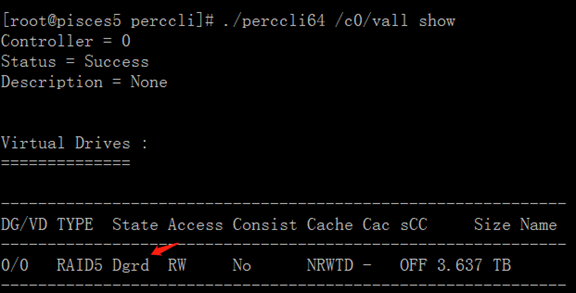
View raid status as degraded
./perccli64 /c0/vall show
Go online again
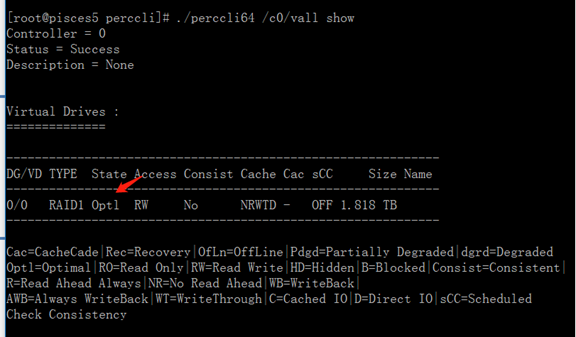
./perccli64 /c0/e32/s1 set online

At this time, the raid status is optimal
Hot standby
Local hot standby
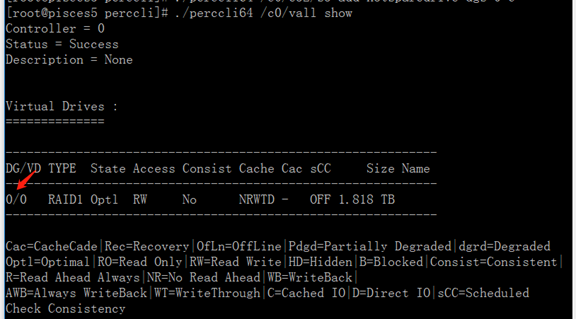
View the DG number of raid
./perccli64 /c0/vall show
Add a disk as a hot spare for lid raid1
./perccli64 /c0/e32/s3 add hotsparedrive dgs=0

Global hot standby
./perccli64 /c0/e32/s3 add hotsparedrive

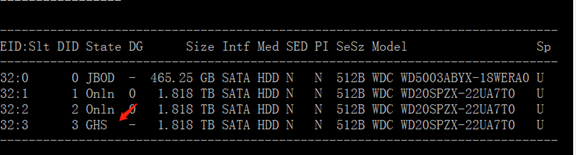
View hot spare
./perccli64 /c0/e32/sall show GHS Indicates a hot spare
Delete hot spare
./perccli64 /c0/e32/s3 delete hotsparedrive

Look at the disk status. It is idle, not hot standby
./perccli64 /c0/e32/sall show
Raid5
Create raid5
./perccli64 /c0 add vd r5 drives=32:1,32:2,32:3

The hot standby of upper and lower lines is similar to the previous raid0,1
Raid status
./perccli64 /c0/vall show
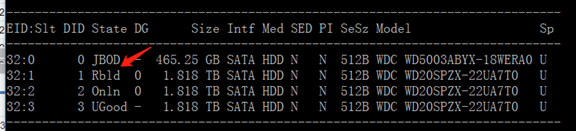
Offline a disk
./perccli64 /c0/e32/s1 set offline
View status degraded
./perccli64 /c0/vall show
Go online again
./perccli64 /c0/e32/s1 set online
reconstruction
If the replacement disk can be rebuilt, the RAID will be rebuilt automatically after the new hard disk is inserted normally
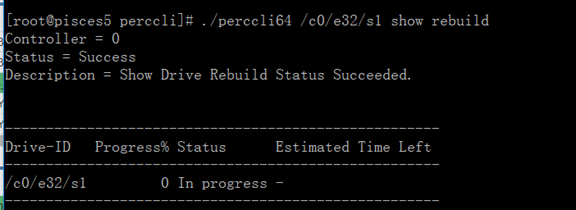
View rebuild progress
./perccli64 /c0/e32/s1 show rebuild
You can also rebuild a hard disk manually
./perccli64 /c0/e32/s1 start rebuild

Stop rebuilding
./perccli64 /c0/e32/s1 stop rebuild

inspect
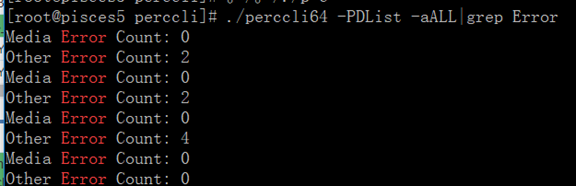
Check the disk for problems
./perccli64 -PDList -aALL|grep Error
This command is the same as the Megacli command