1, Install Ubuntu 20 on raspberry pie 4B 04
Preparation of raspberry pie
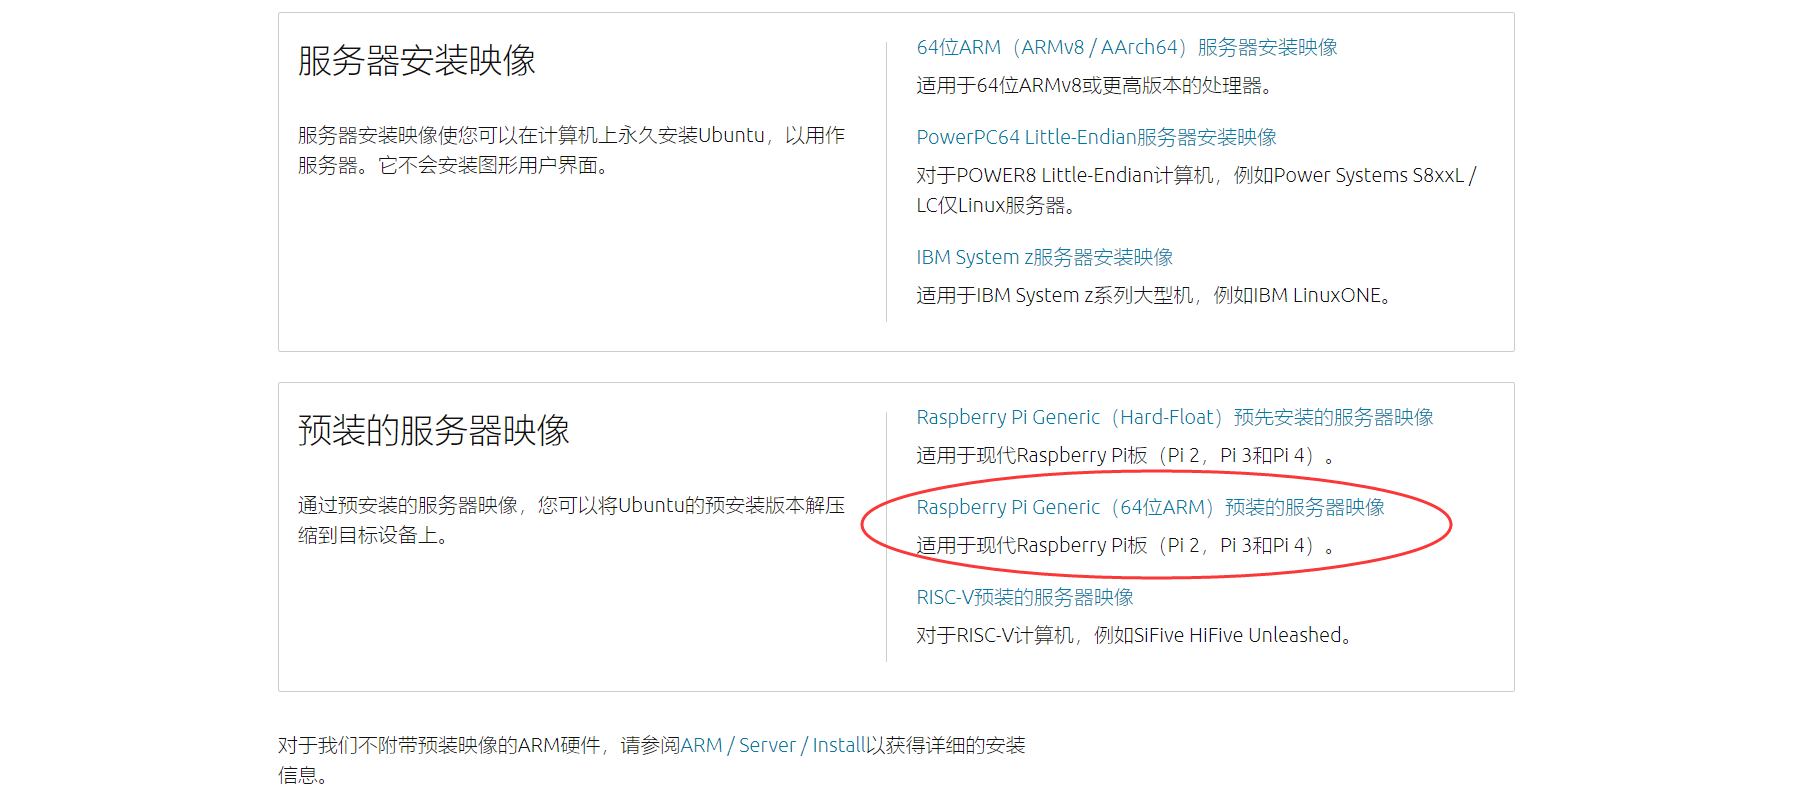
1. Download ubuntu version installation package
You can find it on the official website of ubuntu
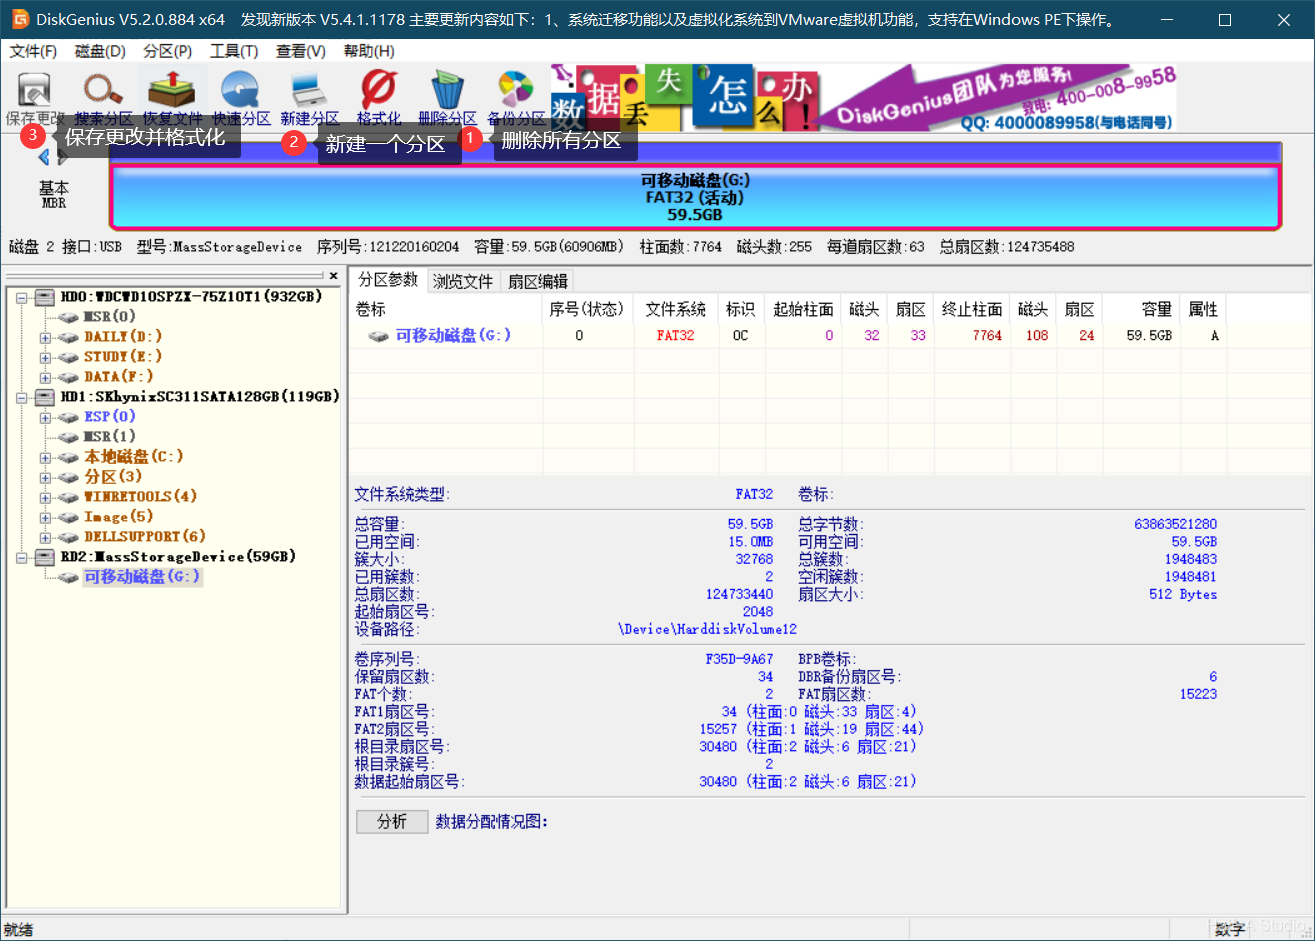
2. Format the SD card with DiskGenius, delete all sectors, and then format.
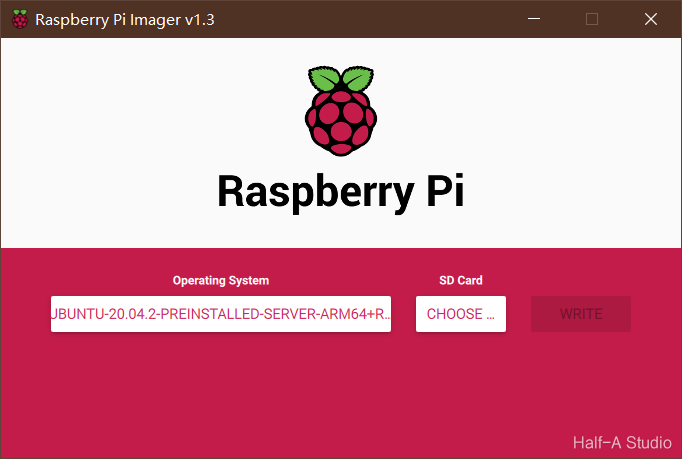
3. Write to SD card
Download the official burning tool, connect the SD card to the computer with the card reader, and write the image into the SD card. Select the image you just downloaded xz file, SD card, select your own card and write it.
After writing, insert the SD card into the raspberry pie.
2, Ubuntu 20 04 system configuration
1. Find the ip address of raspberry pie
1. Connect the raspberry pie to the computer with an Internet cable for the first time. If there is an external monitor, it will be very easy. This tutorial is a tragic tutorial without a monitor.
2. Connect the power supply for raspberry pie (the power supply can be a 2.5mm round head power cable, or a cable with microUSB or TypeC interface, but the charging head is required to reach 5V 3A and the minimum 5V 2.5A)
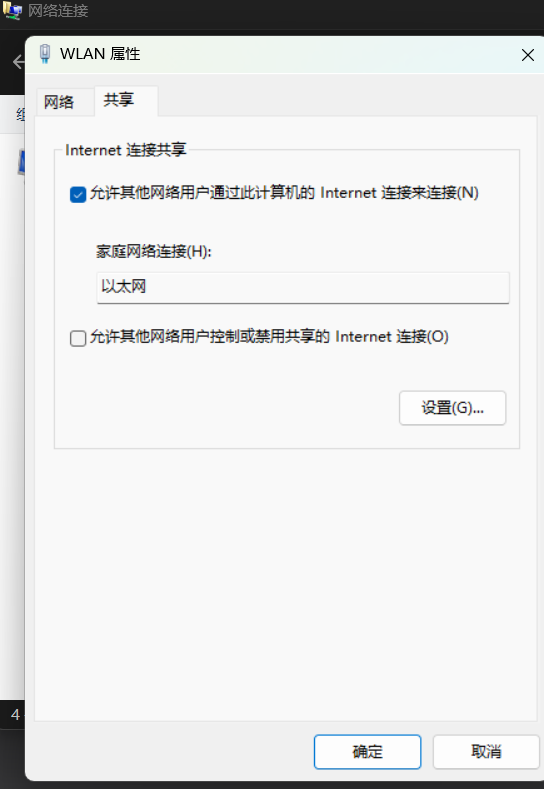
3. Control panel - > Network Sharing Center - > change adapter settings - > WiFi - > properties - > sharing
Check allow other users to connect

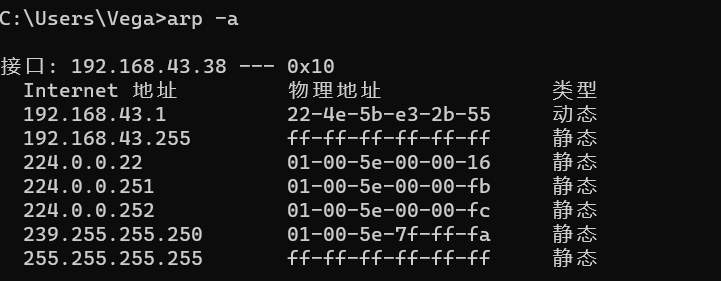
4. Enter the cmd command line and enter arp -a in the command prompt
The address of raspberry pie is generally 192.168.137 XXX, you can confirm the interface corresponding to the raspberry pie address by unplugging the network cable. The interface in the picture is not raspberry pie interface!!!
After confirming the interface, you need to test the addresses one by one. The address range is 192.168.137.1 ~ 192.168.137.254
2. Configure ubuntu system
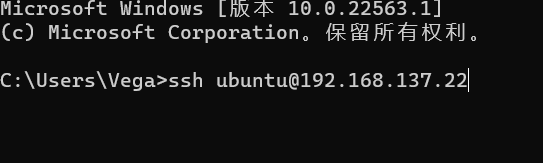
1. Open another cmd window and enter ssh ubuntu@ here to fill in the address of raspberry pie
2. After starting up and waiting for a period of time to enter the system, you first need to log in. The initial user name and password are ubuntu. After logging in, you will be asked to reset the password.
1) WiFi configuration
Get root privileges
sudo passwd root
Use this command to switch to the root administrator:
su root To enter a password sudo su Direct login
Switch back from root to user
su user (user Is your user name at the time of installation),Or direct input exit,Can also Ctrl+D sign out
After entering the root administrator
cd /etc/netplan
In this directory, if it is a server, there will be a 50 cloud init Yaml file, if it is a desktop environment, will have a 01 network manager all yaml
Enter ls or ls -a to browse the files in this directory
Here, take 50 cloud init Yaml as an example
Note the indent format of the file
network:
  version: 2
  wifis:
    wlan0:
      dhcp4: true
      optional: true
      access-points:
        "Yours wifi name":
          password: "wifi password"
Then execute the command to make the configuration effective
sudo netplan generate
sudo netplan apply
If this method still fails to connect to the hotspot
Remove the TF card, plug it into the windows computer, and execute it in powershell (that is, enter cmd under the root directory of the TF Card):
new-item wpa_supplicant.conf -type file
Open the file (wpa_supplicant.conf) and write
country=GB
ctrl_interface=DIR=/var/run/wpa_supplicant GROUP=netdev
update_config=1
network={
 ssid="Fill in the name of the mobile hotspot here. Note that the mobile hotspot cannot have Chinese characters"
 psk="Mobile hotspot password"
 priority=99
 #Priority is the priority. The higher the number, the higher the priority
 #Be careful not to delete "" when filling ssid and psk
}
2) SSH configuration
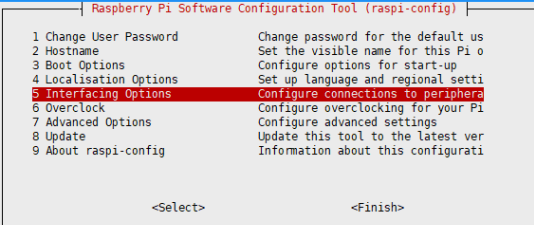
input
sudo raspi-config
If the prompt is wrong, please follow the prompt
Select 5 Interfacing Options
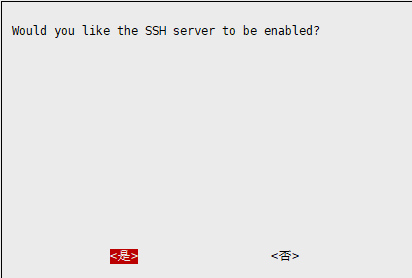
Select "SSH"
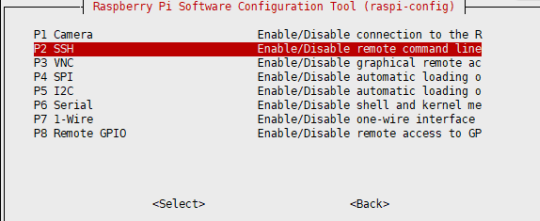
Select Yes, enter
Finally, select finish
ssh self start service
If you want ssh to start with the system, you need to create a blank file named ssh in the root directory of the tf card
Remove the TF card, plug it into the windows computer, and execute it in powershell (that is, enter cmd in the root directory of the TF Card):
new-item ssh -type file
Insert the TF card back into the raspberry pie
3) Update and install desktop environment
Update source
sudo vim /etc/apt/sources.list
Comment out the contents of the document and replace them with the following contents
deb https://mirrors.ustc.edu.cn/ubuntu-ports/ focal main restricted universe multiverse
deb-src https://mirrors.ustc.edu.cn/ubuntu-ports/ focal main main restricted universe multiverse
deb https://mirrors.ustc.edu.cn/ubuntu-ports/ focal-updates main restricted universe multiverse
deb-src https://mirrors.ustc.edu.cn/ubuntu-ports/ focal-updates main restricted universe multiverse
deb https://mirrors.ustc.edu.cn/ubuntu-ports/ focal-backports main restricted universe multiverse
deb-src https://mirrors.ustc.edu.cn/ubuntu-ports/ focal-backports main restricted universe multiverse
deb https://mirrors.ustc.edu.cn/ubuntu-ports/ focal-security main restricted universe multiverse
deb-src https://mirrors.ustc.edu.cn/ubuntu-ports/ focal-security main restricted universe multiverse
# deb https://mirrors.ustc.edu.cn/ubuntu-ports/ focal-proposed main restricted universe multiverse
# deb-src https://mirrors.ustc.edu.cn/ubuntu-ports/ focal-proposed main restricted universe multiverse
Update
sudo apt-get update
sudo apt-get upgrade
Install desktop environment
sudo apt install ubuntu-desktop
sudo apt install xrdp
3, Ubuntu 20 04 installing ROS
1. Add keys and install ROS
1. Add ROS software source
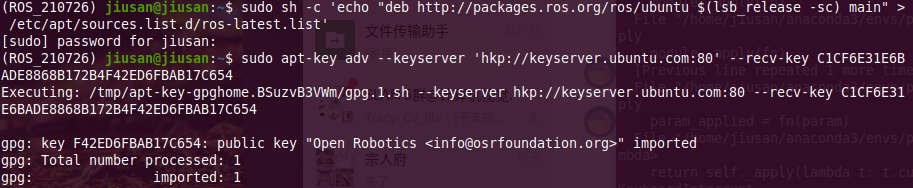
sudo sh -c 'echo "deb http://packages.ros.org/ros/ubuntu $(lsb_release -sc) main" > /etc/apt/sources.list.d/ros-latest.list'
2. Add key
sudo apt-key adv --keyserver 'hkp://keyserver.ubuntu.com:80' --recv-key C1CF6E31E6BADE8868B172B4F42ED6FBAB17C654
give the result as follows
3. Update software source
sudo apt update
4. Install ROS
sudo apt install ros-noetic-desktop-full
5. Initialize rosdep
rosdep can easily install some system dependencies when you need to compile some source code. At the same time, it is also a necessary tool for some core functional components of ROS.
sudo apt install python3-rosdep2
If you continue to run sudo rosdep init command after installation, the following errors will generally appear. Of course, if you successfully execute sudo rosdep init (see below), you can go directly to

Enter the following command to solve the above error, and then enter sudo rosdep init
sudo rm /etc/ros/rosdep/sources.list.d/20-default.list
After that, the following command appears successfully. If it times out, continue sudo rosdep init

If multiple attempts fail, try the following
2. Solve the problem of sudo rosdep init
First, speed up github access
1) Modify local hosts file
The location of hosts file of mac/linux system is as follows: / etc/hosts
2) Increase http://github.global.ssl.fastly.net And http://github.com Mapping of
obtain Github Related websites ip
 visit https://www.ipaddress.com,
Input separately github.global.ssl.fastly.net and github.com,query ip address
This is my configuration
140.82.112.3 github.com
199.232.69.194 github.global.ssl.fastly.net
sudo vim /etc/hosts
Add your own configuration and exit after saving
After returning to the home directory, execute the following command to switch to root
sudo su //Or su root and enter the password to switch to root
input
sudo mkdir -p /etc/ros/rosdep/sources.list.d
cd /etc/ros/rosdep/sources.list.d
then
sudo gedit 20-default.list perhaps sudo vim 20-default.list
After entering the document, copy the following code to enter the document and save it.
# os-specific listings first
yaml https://raw.githubusercontent.com/ros/rosdistro/master/rosdep/osx-homebrew.yaml osx

# generic
yaml https://raw.githubusercontent.com/ros/rosdistro/master/rosdep/base.yaml
yaml https://raw.githubusercontent.com/ros/rosdistro/master/rosdep/python.yaml
yaml https://raw.githubusercontent.com/ros/rosdistro/master/rosdep/ruby.yaml
gbpdistro https://raw.githubusercontent.com/ros/rosdistro/master/releases/fuerte.yaml fuerte

# newer distributions (Groovy, Hydro, ...) must not be listed anymore, they are being fetched from the rosdistro index.yaml instead
exit or Crtl+D//Exit root
3. Solve the problem of rosdep update
After sudo rosdep init is successfully executed, rosdep update can be executed, but under normal circumstances, the timeout error will always appear.
therefore
Acceleration using GitHub Proxy
The reason of this method is similar to the principle of using the image source when installing ROS software, such as replacing the image source of ROS software with Tsinghua source, and replacing the daily apt library with Tsinghua source.
By using GitHub Proxy, we can not directly access GitHub, so we do not directly access GitHub download resources, but indirectly through the proxy.
1) Modify sources_list.py file
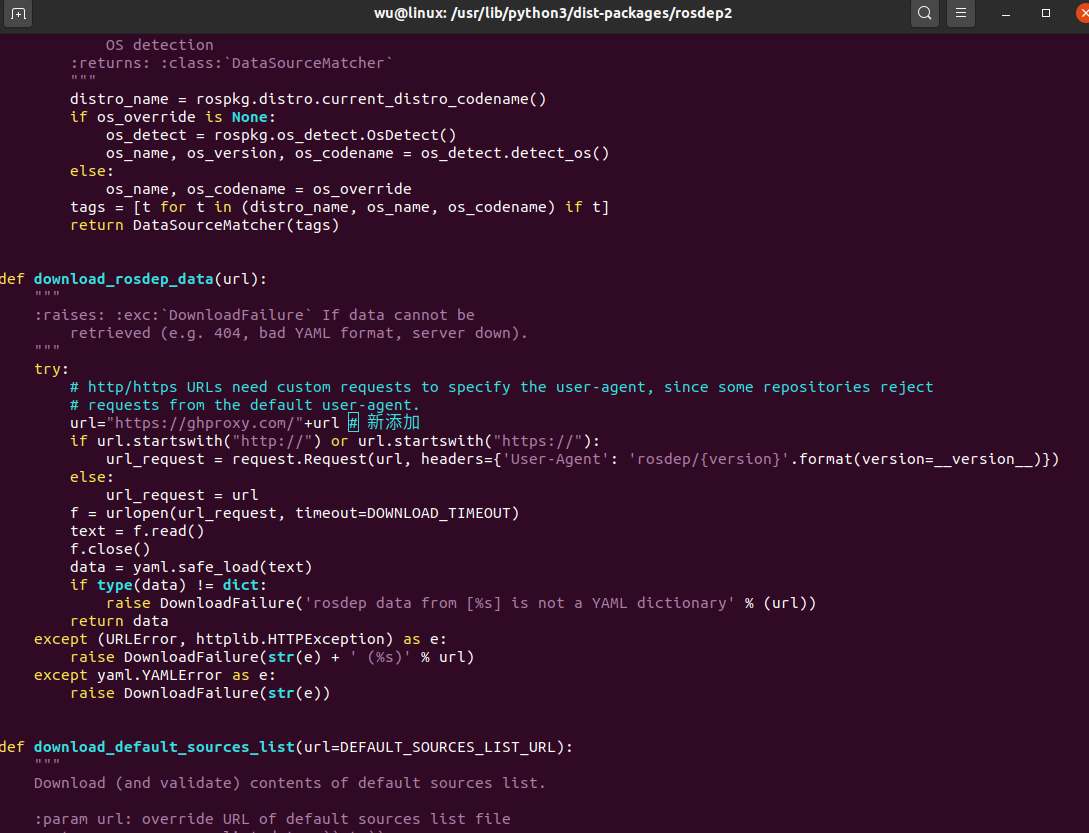
sudo vim /usr/lib/python3/dist-packages/rosdep2/sources_list.py
Add the following contents, as shown in the figure below:
url="https://ghproxy.com/"+url # newly added
2) Modify init Py file
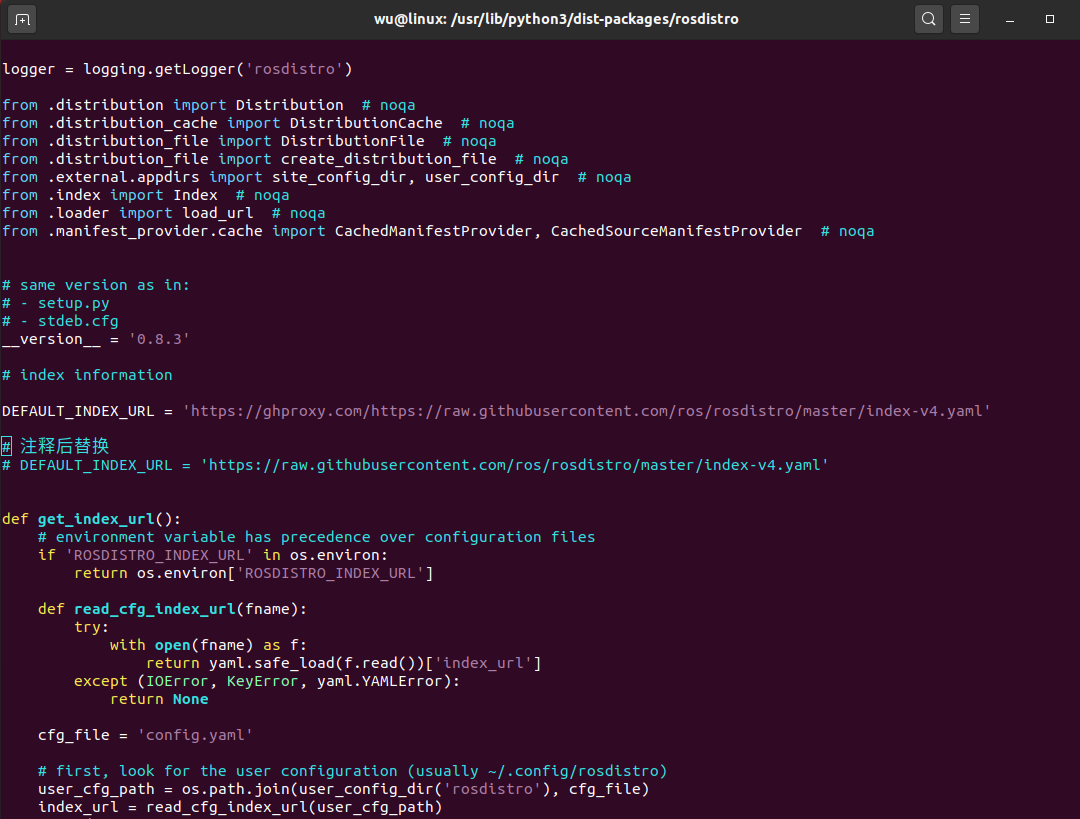
sudo vim /usr/lib/python3/dist-packages/rosdistro/__init__.py
Add the following contents and note the replaced contents, as shown in the figure below:
DEFAULT_INDEX_URL = 'https://ghproxy.com/https://raw.githubusercontent.com/ros/rosdistro/master/index-v4.yaml'
In addition to this, the following files also contain github addresses:
/usr/lib/python3/dist-packages/rosdep2/gbpdistro_support.py  36 that 's ok
/usr/lib/python3/dist-packages/rosdep2/sources_list.py  72 that 's ok
/usr/lib/python3/dist-packages/rosdep2/rep3.py  39 that 's ok
/usr/lib/python3/dist-packages/rosdistro/manifest_provider/github.py  68 Line 119
take https://ghproxy.com/ Add it to the front of github address for proxy
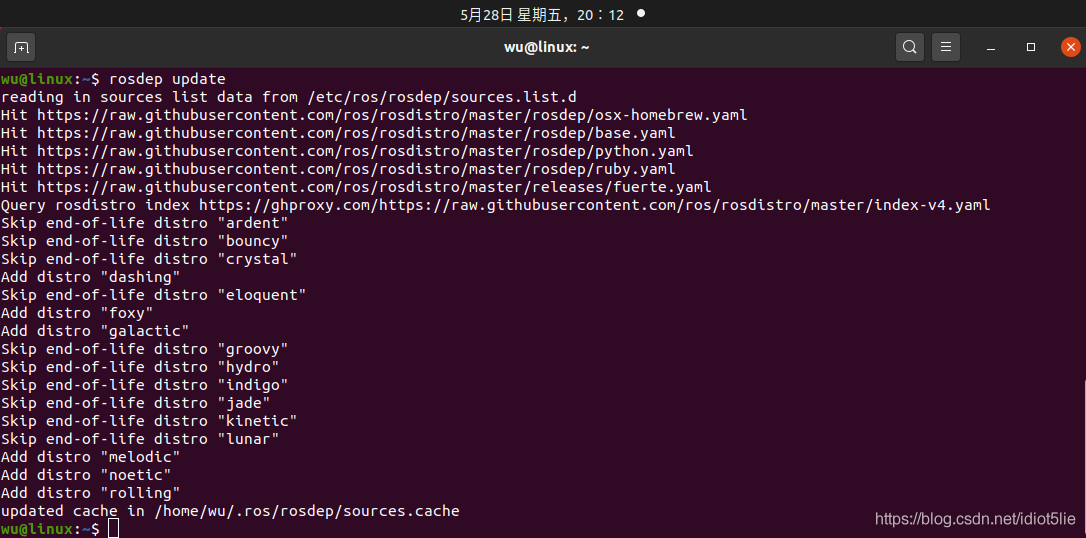
Input at terminal
rosdep update
rosdep update succeeded
3. The little turtle test verifies that ROS is installed successfully
1) Remote Desktop Connection implementation
Connect raspberry pie using the remote desktop connection tool (open it through [Start Menu] - [windows accessories] - [Remote Desktop Connection]) provided by Windows system. SSH connection is to remotely operate raspberry pie through the command line, while remote desktop is to operate directly through the GUI interface of raspberry pie, which is as simple as raspberry pie is directly connected to the display, Better interactivity.
2) Implementation principle of Remote Desktop Connection
Xrdp is an open source remote desktop server that supports Windows remote desktop connection, but xrdp needs to use tightvncserver as its basic service. Therefore, xrdp and tightvncserver need to be installed on raspberry pie at the same time before Windows can connect to raspberry pie remotely.
3) Raspberry pie remote desktop connection service installation
Install xrdp service on raspberry pie
sudo apt-get install xrdp
Install tightvncserver service on raspberry pie
sudo apt-get install tightvncserver
After installing the above two services, you can remotely connect to raspberry pie using the tools provided by WIndows.
4) Raspberry pie Remote Desktop Connection example
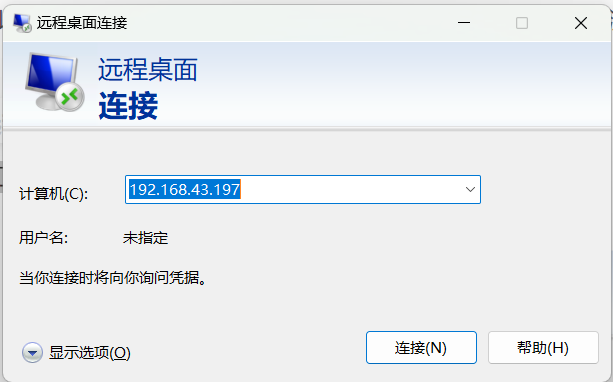
Open the remote desktop connection tool that comes with Windows
Enter the raspberry pie address
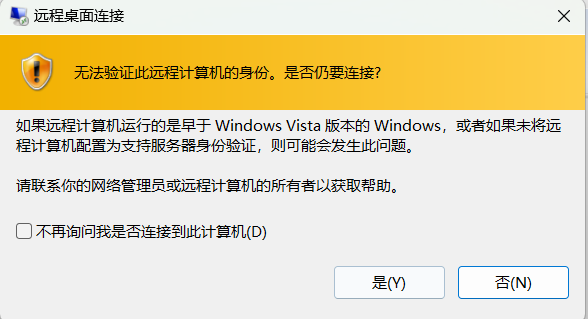
For connection verification, select Yes
Fill in the connection user name and password. The user name is ubuntu, and the password is the opening password of ubuntu
If the connection is successful, you will enter the graphical interface of ubuntu.
5) Little turtle test
Normally, ROS has been installed. Now let's verify and enter the following command:
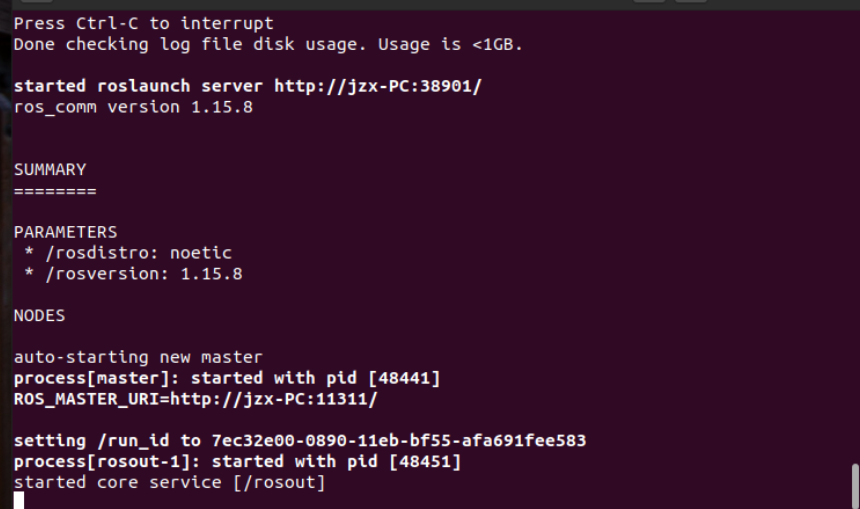
roscore
If the following problems occur, the previous installation is not fully installed. Continue to enter the following command to complete the installation package
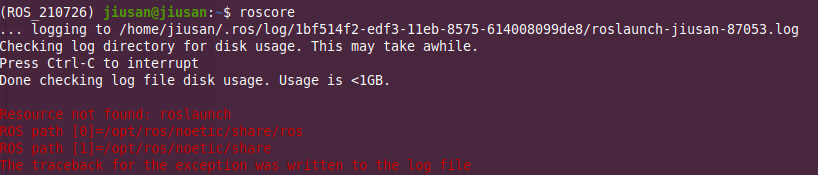
sudo apt install ros-noetic-desktop-full
Enter roscore here. If the installation is successful, the following interface will be displayed:
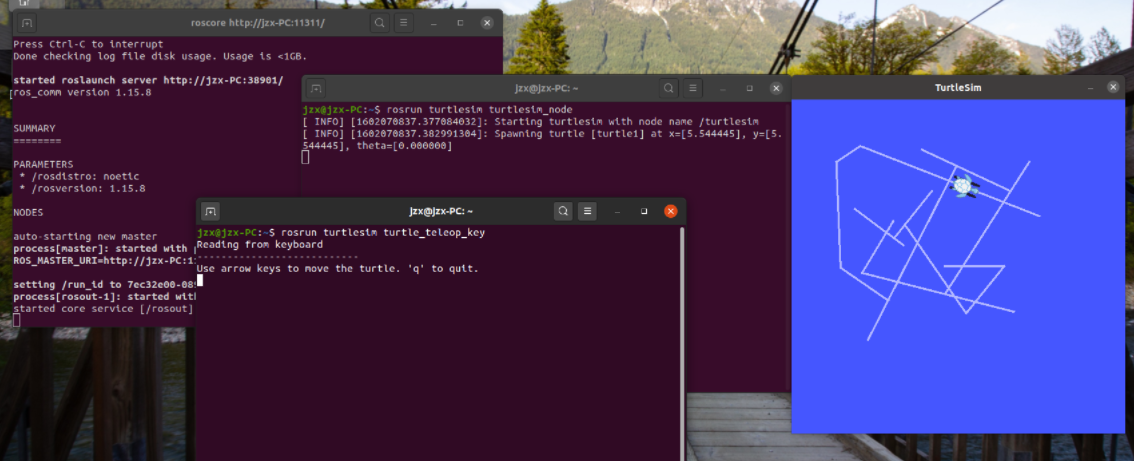
Then we start the little turtle simulator and try it. Press ctrl+alt+t to open a new terminal and enter the following command
rosrun turtlesim turtlesim_node
Press ctrl+alt+t to open a new terminal and enter the following command
rosrun turtlesim turtle_teleop_key
At this time, you can control the movement of the little turtle by pressing the ↑↓←→ key on the keyboard!
Then your ROS has been successfully installed
summary
This article refers to a large number of tutorials and summarizes the results after continuous trial and error.
reference resources:
In Ubuntu 20 Install ROS noetic under 4 (the whole step has been verified successfully repeatedly)
[solved] perfectly solve the error timeout problem of ROS installation rosdep update (timed out)