3 advanced usage
3.1 creating virtual environment based on Pipfile
pipenv install
Practical examples are as follows:
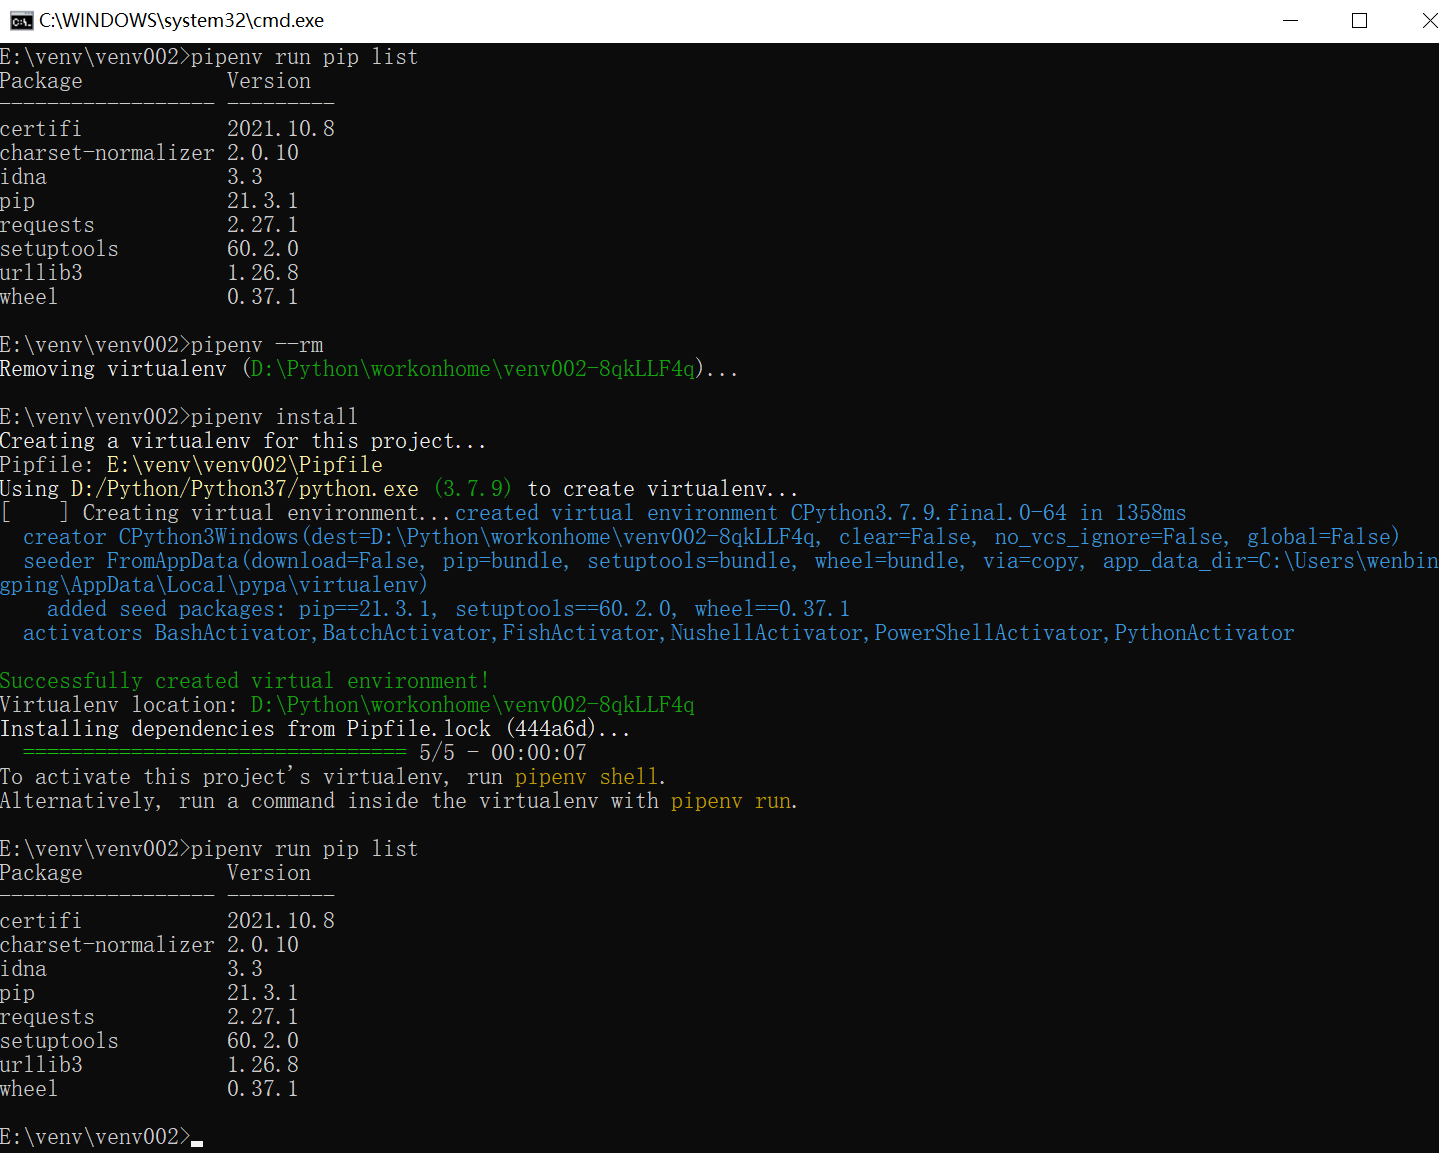
Here, delete the current virtual environment first, and then recreate the virtual environment. You can see that the recreated environment is the same as that before deletion. Not only the virtual environment is recreated, but also pipfile is installed The related packages in lock are very useful for environment migration.
Specific methods:
(1) Copy the current project's Pipfile and Pipfile Lock to the new directory.
(2) cmd enters the new directory.
(3) Use the pipenv install command to create.
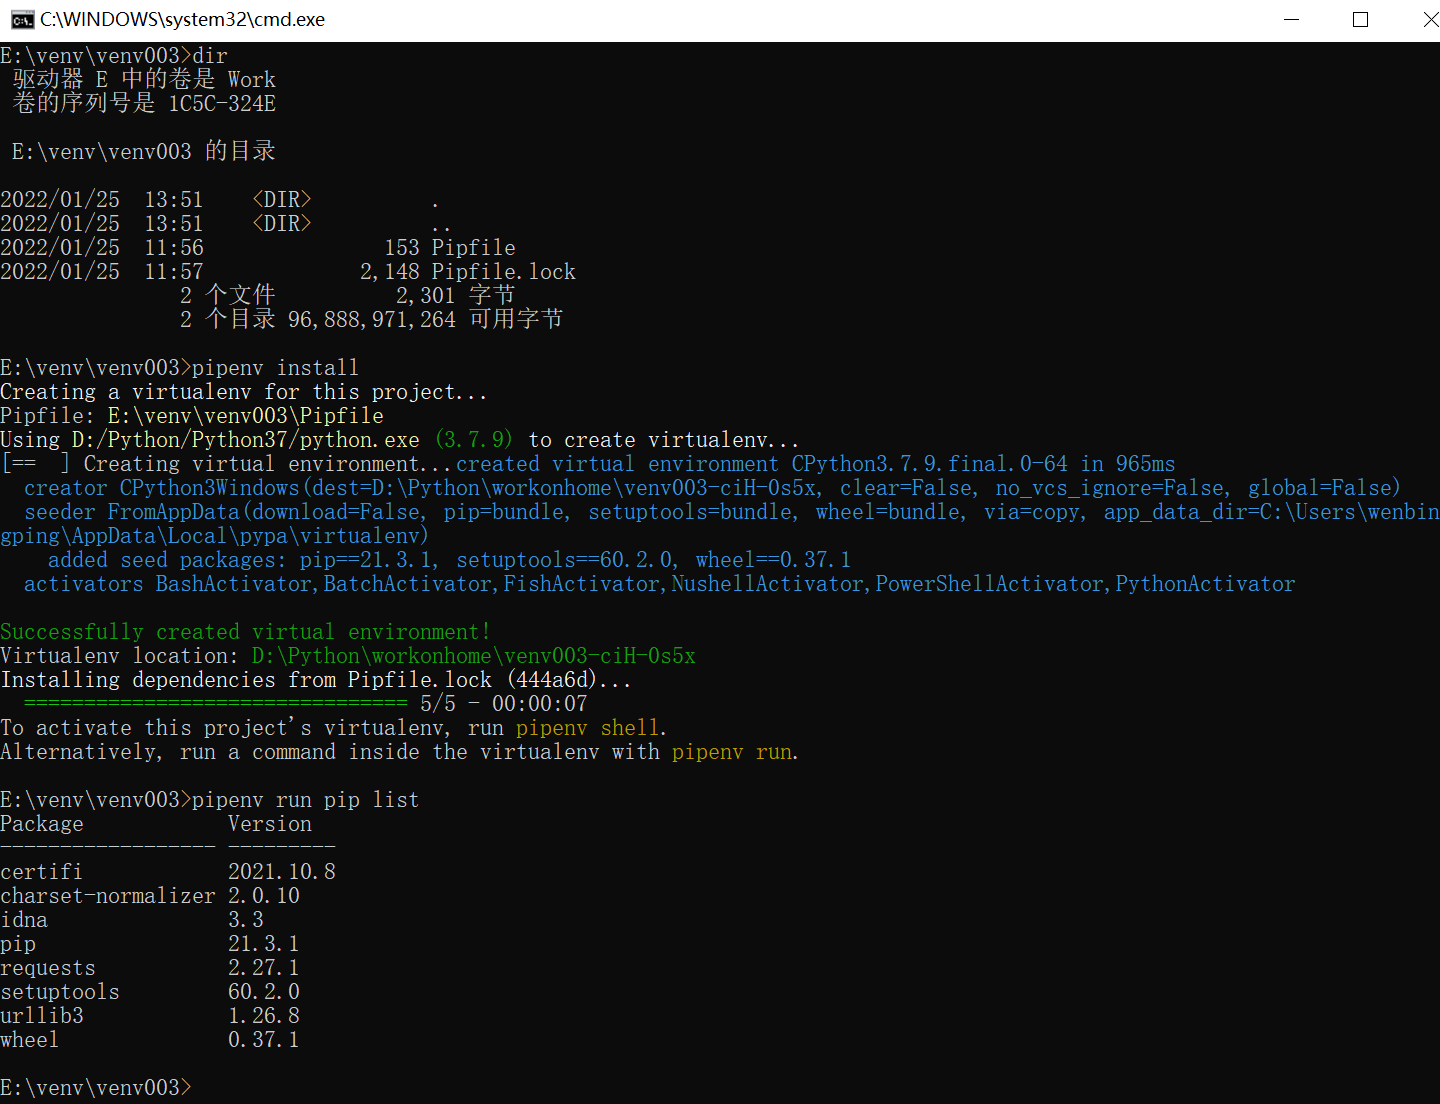
This is of great significance for the unified development and operation environment. The personnel of the whole team use the same operation environment, so it is very simple to combine this Pipfile and Pipfile All locks can be submitted to the code base for maintenance.
3.2 determine the directory to create the virtual environment
3.2.1 virtual environment path
By default, the virtual environment is stored in the python installation directory, for example: D:\Python\workonhome
The great advantage of this way is that it is separated from the source code of the project. When managing the source code, it is not disturbed by the files related to the virtual environment.
The virtual environment directory is defined by the environment variable "WORKON_HOME".
Under Windows, cmd view environment variables:
set WORKON_HOME

3.2.2 modifying virtual environment path
If you don't want to put it in the default location, you can modify this variable.
Generally speaking, in order to facilitate management, it is best to specify a location that is easier to manage.

It should be noted that if this path is changed, the previous virtual environment may become invalid.
You need to migrate the previous virtual environment files, otherwise it will be considered as a new virtual environment.
If only the virtual environment files are copied in the past, they will still be invalid. The error is as follows:

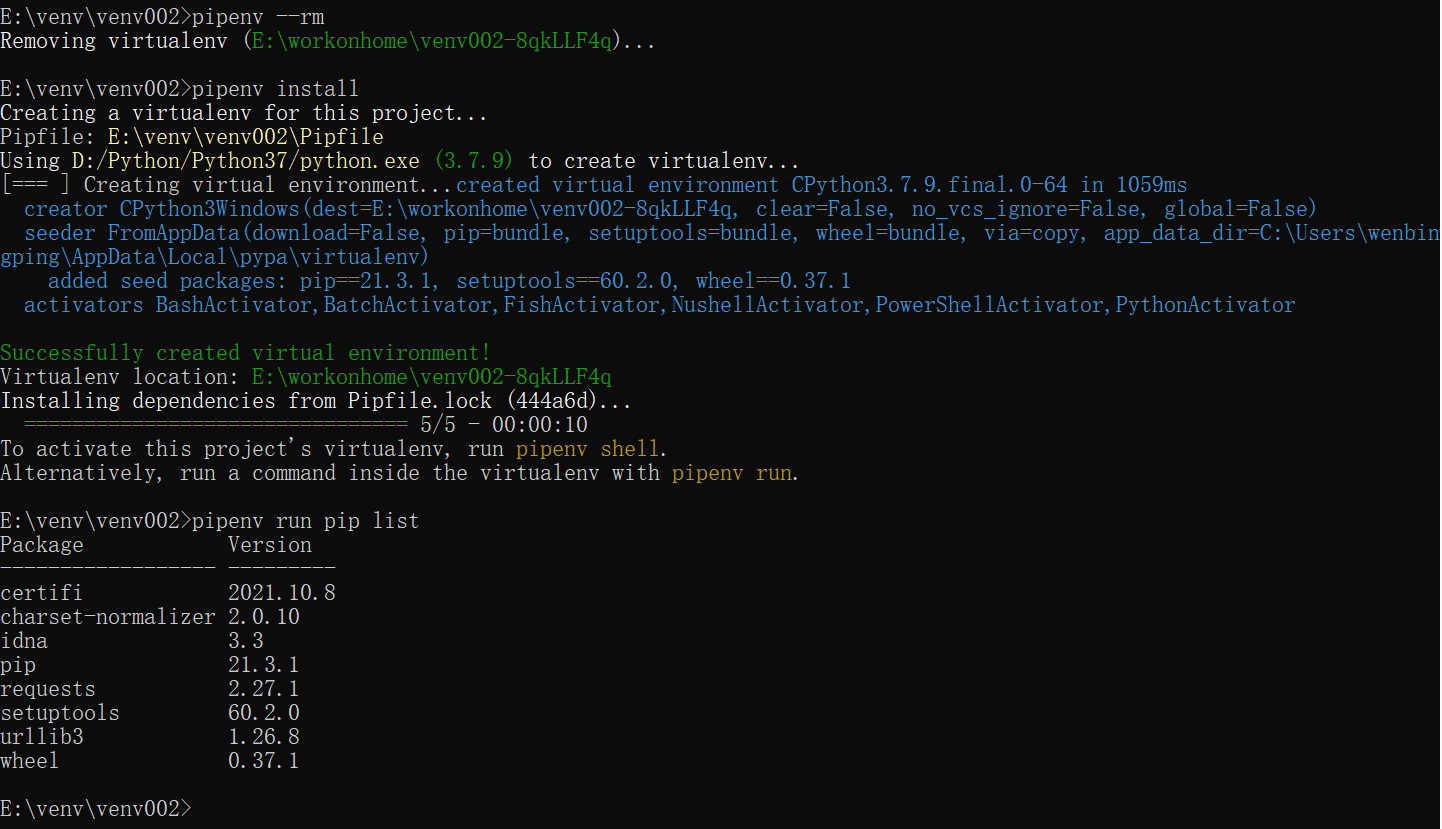
We need to deal with this problem. The simpler way is reconstruction.
pipenv --rm
pipenv install
alternative
Of course, you can also try to modify the virtual environment file: activate bat
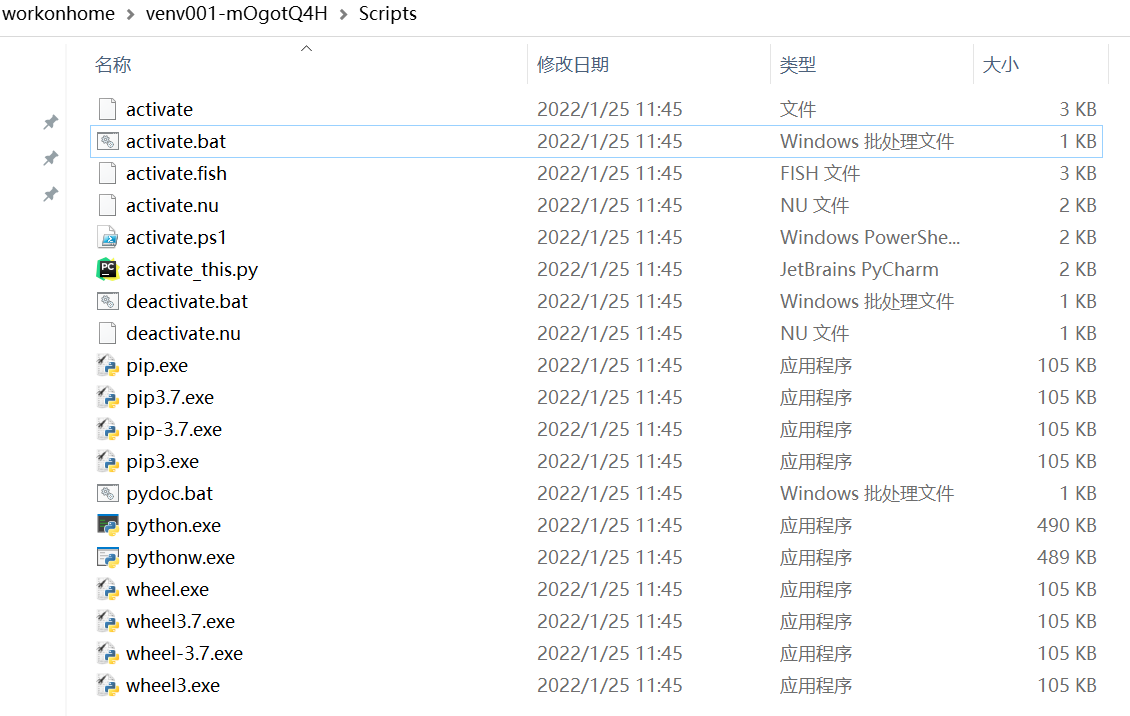
Modified content:
@echo off

set "VIRTUAL_ENV=D:\Python\workonhome\venv001-mOgotQ4H"

if defined _OLD_VIRTUAL_PROMPT (
    set "PROMPT=%_OLD_VIRTUAL_PROMPT%"
) else (
    if not defined PROMPT (
        set "PROMPT=$P$G"
    )
    if not defined VIRTUAL_ENV_DISABLE_PROMPT (
        set "_OLD_VIRTUAL_PROMPT=%PROMPT%"
    )
)
if not defined VIRTUAL_ENV_DISABLE_PROMPT (
    if "venv001" NEQ "" (
        set "PROMPT=(venv001) %PROMPT%"
    ) else (
        for %%d in ("%VIRTUAL_ENV%") do set "PROMPT=(%%~nxd) %PROMPT%"
    )
)

REM Don't use () to avoid problems with them in %PATH%
if defined _OLD_VIRTUAL_PYTHONHOME goto ENDIFVHOME
    set "_OLD_VIRTUAL_PYTHONHOME=%PYTHONHOME%"
:ENDIFVHOME

set PYTHONHOME=

REM if defined _OLD_VIRTUAL_PATH (
if not defined _OLD_VIRTUAL_PATH goto ENDIFVPATH1
    set "PATH=%_OLD_VIRTUAL_PATH%"
:ENDIFVPATH1
REM ) else (
if defined _OLD_VIRTUAL_PATH goto ENDIFVPATH2
    set "_OLD_VIRTUAL_PATH=%PATH%"
:ENDIFVPATH2

set "PATH=%VIRTUAL_ENV%\Scripts;%PATH%"
Change this place to a new path:
set "VIRTUAL_ENV=D:\Python\workonhome\venv001-mOgotQ4H"
Change to
set "VIRTUAL_ENV=E:\workonhome\venv001-mOgotQ4H"
Modify these files in the same way and replace the path with the new path: activate, activate fish,activate.nu,
3.2.3 set the virtual environment to the current project directory
However, in some special cases, if you need to create the virtual environment under the root directory of the project.
You can set the environment variable PIPENV_VENV_IN_PROJECT, let pipenv attach the virtual environment to the root directory of the project Under the venv path.
set PIPENV_VENV_IN_PROJECT=1
See below:
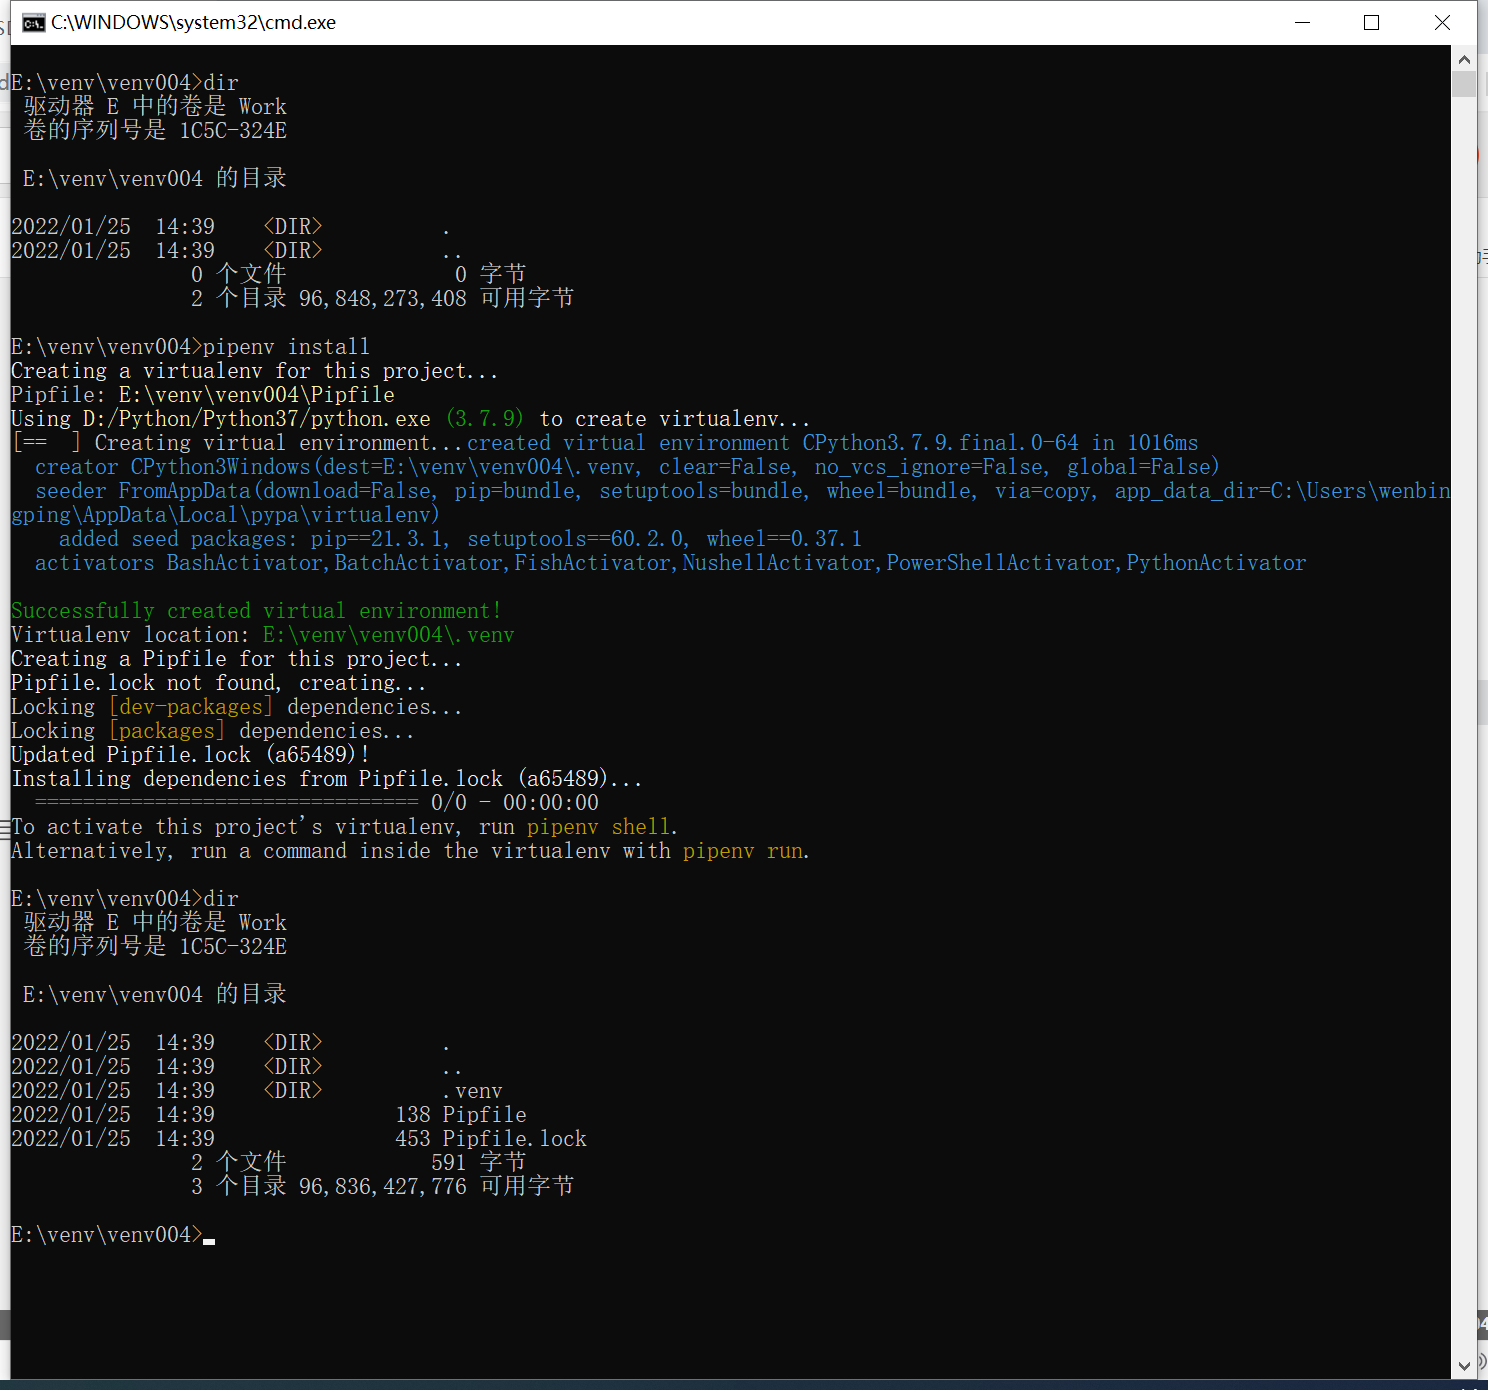
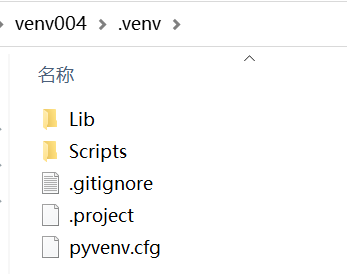
Of course, this is generally done when there is special need. If it is a general project, this method is not recommended.
Because it's going to kill you venv is included in the project file, which is not convenient for code submission and storage.
Restore and remove the environment variable PIPENV_VENV_IN_PROJECT
set PIPENV_VENV_IN_PROJECT=
Set to blank to delete.
3.3 user defined image
The default image of pip is a foreign image, which is sometimes slow and needs to be customized into a domestic image.
3.3.1 specify image during installation
Format: pipenv install -- pypi mirror < mirror_ url>
Example:
pipenv install requests --pypi-mirror https://pypi.tuna.tsinghua.edu.cn/simple/
3.3.2 modify Pipfile file
Directly modify the url value of Pipfile file:
[[source]]
url = "https://pypi.tuna.tsinghua.edu.cn/simple"
verify_ssl = true
name = "pypi"

[packages]
requests = "*"

[dev-packages]

[requires]
python_version = "3.7"
At this time, the related packages are installed using the configured pip source.
Pipfile. The pip source in the lock file will also be updated (this is automatic):
{
    "_meta": {
        "hash": {
            "sha256": "1ab3c5705a51db454d107dc642a8f4fc5d34e86e09d1d9b25c2588d718e6894d"
        },
        "pipfile-spec": 6,
        "requires": {
            "python_version": "3.7"
        },
        "sources": [
            {
                "name": "pypi",
                "url": "https://pypi.tuna.tsinghua.edu.cn/simple",
                "verify_ssl": true
            }
        ]
    },
3.3.3 configuring multiple pip source images
[[source]]
url = "https://pypi.org/simple"
verify_ssl = true
name = "pypi"

[[source]]
url = "https://pypi.tuna.tsinghua.edu.cn/simple"
verify_ssl = true
name = "tsinghua"

[packages]
requests = {version="*", index="pypi"}
numpy = {version="*", index="tsinghua"}

[dev-packages]

[requires]
python_version = "3.7"
Two sources are configured here, one is pypi default and the other is Tsinghua University.
The following package specifies a specific source. requests uses the default source, while numpy uses the source of Tsinghua University.
Through this configuration, you can find the appropriate source for each package to optimize the configuration.