Our company has a workbench building product, which allows you to build a workbench page by dragging widgets. The platform has built-in some common widgets. In addition, it also allows you to upload and use self-developed widgets. This paper will introduce its implementation principle from the perspective of practice.
ps. this project was created using Vue CLI, and the Vue version used is 2.6 11. The webpack version is 4.46 0
Create project
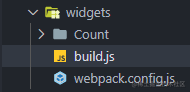
First, create a project using Vue CLI, and create a new widgets directory under src directory to store widgets:
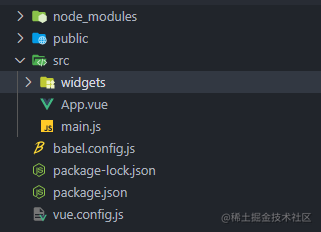
A widget consists of a Vue single file and a js file:
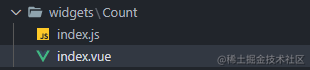
Test component index Vue is as follows:
<template>
  <div class="countBox">
    <div class="count">{{ count }}</div>
    <div class="btn">
      <button @click="add">+1</button>
      <button @click="sub">-1</button>
    </div>
  </div>
</template>

<script>
export default {
  name: 'count',
  data() {
    return {
      count: 0,
    }
  },
  methods: {
    add() {
      this.count++
    },
    sub() {
      this.count--
    },
  },
}
</script>

<style lang="less" scoped>
.countBox {
  display: flex;
  flex-direction: column;
  align-items: center;

  .count {
    color: red;
  }
}
</style>
A very simple counter.
index.js is used to export components:
import Widget from './index.vue'

export default Widget

const config = {
    color: 'red'
}

export {
    config
}
In addition to exporting components, export configuration is also supported.
Project's app Vue components are used as the development preview and test of widgets. The effects are as follows:
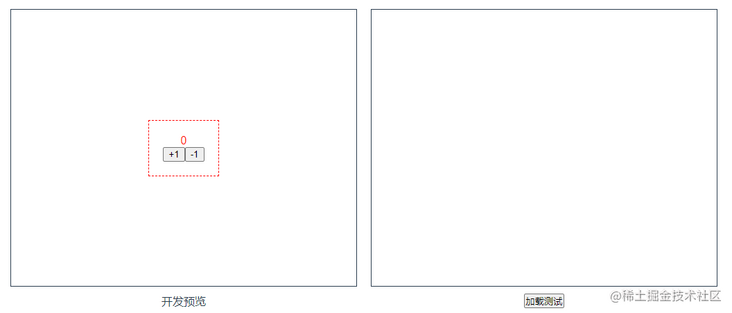
The configuration of the widget affects the border color of the container that wraps the widget.
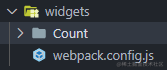
Package widget
Assuming that our widget has been developed, we need to package and compile the Vue single file into a js file. The package uses webpack. First, create a webpack configuration file:
The common configuration items of webpack are: entry, output, module and plugins. Let's look at them one by one.
1.entry
The entry is obviously the index under each widget directory JS file. Because the number of widgets is variable and may increase, the entry cannot be written dead and needs to be generated dynamically:
const path = require('path')
const fs = require('fs')

const getEntry = () => {
    let res = {}
    let files = fs.readdirSync(__dirname)
    files.forEach((filename) => {
        // Is it a directory
        let dir = path.join(__dirname, filename)
        let isDir = fs.statSync(dir).isDirectory
        // Does the entry file exist
        let entryFile = path.join(dir, 'index.js')
        let entryExist = fs.existsSync(entryFile)
        if (isDir && entryExist) {
            res[filename] = entryFile
        }
    })
    return res
}

module.exports = {
    entry: getEntry()
}
2.output
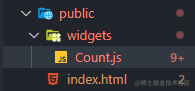
Because we have to test after development, it is convenient to request packaged files. We directly output the packaging results of widgets to the public directory:
module.exports = {
    // ...
    output: {
        path: path.join(__dirname, '../../public/widgets'),
        filename: '[name].js'
    }
}
3.module module
Here we want to configure the loader rule:
- We need Vue loader to process Vue single files
- Babel loader is required to compile the latest syntax of js
- Less loader is required to handle less
Because Vue loader and Babel loader related package Vue projects are already installed, we don't need to install them manually. Just install the loader that handles less files:
npm i less less-loader -D
Different versions of less loader also have requirements for the version of webpack. If an installation error occurs, you can specify to install a less loader version that supports the current version of webpack.
Modify the configuration file as follows:
module.exports = {
    // ...
    module: {
        rules: [
            {
                test: /\.vue$/,
                loader: 'vue-loader'
            },
            {
                test: /\.js$/,
                loader: 'babel-loader'
            },
            {
                test: /\.less$/,
                loader: [
                    'vue-style-loader',
                    'css-loader',
                    'less-loader'
                ]
            }
        ]
    }
}
4.plugins plug-in
We use two plug-ins. One is specified by Vue loader and the other is used to empty the output directory:
npm i clean-webpack-plugin -D
Modify the configuration file as follows:
const { VueLoaderPlugin } = require('vue-loader')
const { CleanWebpackPlugin } = require('clean-webpack-plugin')

module.exports = {
    // ...
    plugins: [
        new VueLoaderPlugin(),
        new CleanWebpackPlugin()
    ]
}
The configuration of webpack is written here. Next, write the packaged script file:
We use webpack through api:
const webpack = require('webpack')
const config = require('./webpack.config')

webpack(config, (err, stats) => {
    if (err || stats.hasErrors()) {
        // Handle errors here
        console.error(err);
    }
    // Processing complete
    console.log('Packaging complete');
});
Now we can type node Src / widgets / build. On the command line JS is packaged. If it is troublesome, it can also be configured to package JSON file:
{
    "scripts": {
        "build-widgets": "node src/widgets/build.js"
    }
}
After running, you can see that the packaging results have been:
Working with widgets
Our requirement is to dynamically request the file of the widget online, and then render the widget. Request to use ajax to get the js file content of the widget. Our first idea is to use Vue The component () method registers, but this is not possible because the global registration of components must occur before the root Vue instance is created.
Therefore, we use the component component here. The component component of Vue can accept to register the name of the component or the option object of a component, and we can just provide the option object of the widget.
To request js resources, we use axios to get the js string, and then use new Function to execute dynamically to get the exported option object:
// Call the method after clicking the load button.
async load() {
    try {
        let { data } = await axios.get('/widgets/Count.js')
        let run = new Function(`return ${data}`)
        let res = run()
        console.log(res)
    } catch (error) {
        console.error(error)
    }
}
Normally, we can get the exported module, but we report an error!

To tell you the truth, I can't understand what's wrong. Baidu didn't succeed after a while, but after some attempt, I found that the Babel of the project config. The preset in JS can be changed from @ Vue / cli plugin Babel / preset to @ Babel / preset env. Why? I don't know anyway. Of course, it may not be enough to only use @ Babel / preset Env, which needs to be adjusted according to the actual situation.
Later, however, when I read the official Vue CLI documentation, I saw the following:
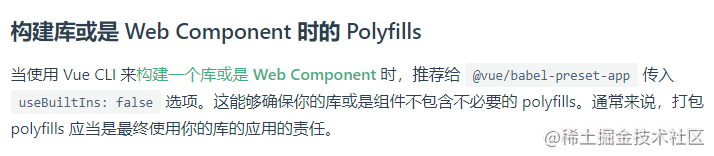
My intuition told me that this problem must have caused it, so I put Vue config. JS is modified as follows:
module.exports = {
  presets: [
    ['@vue/cli-plugin-babel/preset', {
      useBuiltIns: false
    }]
  ]
}
Then package. Sure enough, everything is normal (it's right to look at the documents), but it's not elegant to manually modify the babel.config.js file every time. We can modify it before packaging through the script, recover after packaging, and modify the build.js file:
const path = require('path')
const fs = require('fs')

// babel.config.js file path
const babelConfigPath = path.join(__dirname, '../../babel.config.js')
// Cache original configuration
let originBabelConfig = ''

// Modify configuration
const changeBabelConfig = () => {
    // Save the original configuration
    originBabelConfig = fs.readFileSync(babelConfigPath, {
        encoding: 'utf-8'
    })
    // Write new configuration
    fs.writeFileSync(babelConfigPath, `
        module.exports = {
            presets: [
                ['@vue/cli-plugin-babel/preset', {
                    useBuiltIns: false
                }]
            ]
        }
    `)
}

// Restore to original configuration
const resetBabelConfig = () => {
    fs.writeFileSync(babelConfigPath, originBabelConfig)
}

// Modify before packaging
changeBabelConfig()
webpack(config, (err, stats) => {
    // Recovery after packaging
    resetBabelConfig()
    if (err || stats.hasErrors()) {
        console.error(err);
    }
    console.log('Packaging complete');
});
A few lines of code liberate your hands. Now let's take a look at the widget export data we finally obtained:
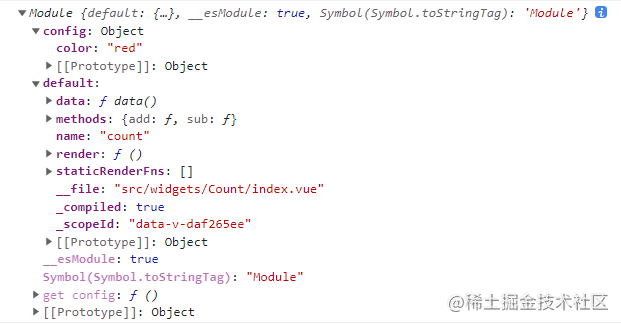
Now that you have the option object of the widget, you can throw it to the component component:
<div class="widgetWrap" v-if="widgetData" :style="{ borderColor: widgetConfig.color }">
    <component :is="widgetData"></component>
</div>
export default {
data() {
return {
widgetData: null,
widgetConfig: null
}
},
methods: {
async load() {
try {
let { data } = await axios.get('/widgets/Count.js')
let run = new Function(`return ${data}`)
let res = run()
this.widgetData = res.default
this.widgetConfig = res.config
} catch (error) {
console.error(error)
}
}
}
}The effects are as follows:

Isn't it simple.
Drill down into component components
Finally, let's see how component components work from the perspective of source code. First, let's see what the rendering function generated by component components looks like:
_ c is the createElement method:
vm._c = function (a, b, c, d) { return createElement(vm, a, b, c, d, false); };function createElement (
context,// Context, i.e. parent component instance, i.e. App component instance
tag,// The option object of our dynamic component Count
data,// {tag: 'component'}
children,
normalizationType,
alwaysNormalize
) {
// ...
return _createElement(context, tag, data, children, normalizationType)
}Ignore some branches that do not enter and enter directly_ createElement method:
function _createElement (
 context,
 tag,
 data,
 children,
 normalizationType
) {
    // ...
    var vnode, ns;
    if (typeof tag === 'string') {
        // ...
    } else {
        // Component option object or constructor
        vnode = createComponent(tag, data, context, children);
    }
    // ...
}
tag is an object, so it will enter the else branch, that is, execute the createComponent method:
function createComponent (
 Ctor,
 data,
 context,
 children,
 tag
) {
    // ...
    var baseCtor = context.$options._base;

    // Option object: convert to constructor
    if (isObject(Ctor)) {
        Ctor = baseCtor.extend(Ctor);
    }
    // ...
}
baseCtor is the Vue constructor, and Ctor is the option object of the Count component, so Vue. Com is actually executed Extend() method:
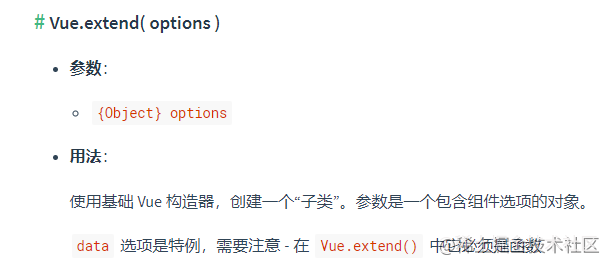
This method actually creates a subclass with Vue as the parent class:
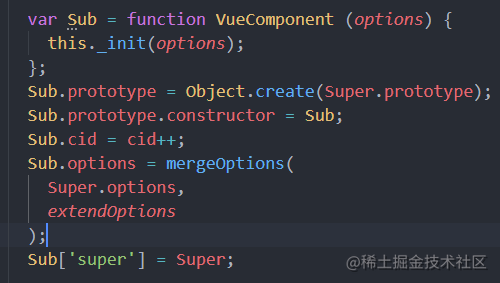
Continue to look at the createComponent method:
// ...
// Returns a placeholder node
var name = Ctor.options.name || tag;
var vnode = new VNode(
    ("vue-component-" + (Ctor.cid) + (name ? ("-" + name) : '')),
    data, undefined, undefined, undefined, context,
    { Ctor: Ctor, propsData: propsData, listeners: listeners, tag: tag, children: children },
    asyncFactory
);

return vnode
Finally, a placeholder VNode is created:
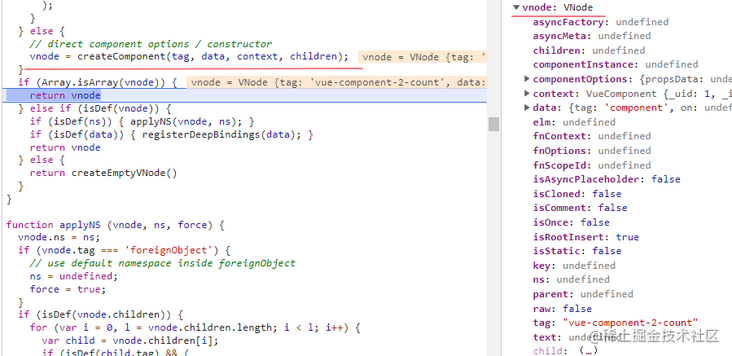
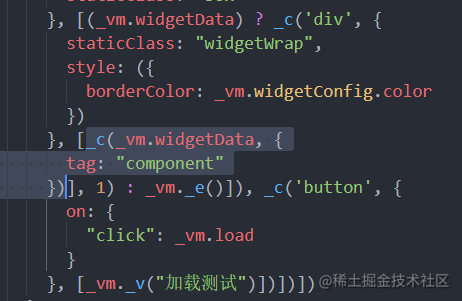
The createElement method will finally return the created VNode. After the rendering function is executed, the VNode tree is generated. In the next step, the virtual DOM tree will be converted into a real dom. There is no need to look at this stage, because we can find that after compilation, that is, at the stage of compiling the template into the rendering function, the component component has been processed, The following method for creating VNode is obtained:
_c(_vm.widgetData,{tag:"component"})If the is attribute we passed to the component is the name of a component, the first if branch in the following figure will be taken in the createElement method:
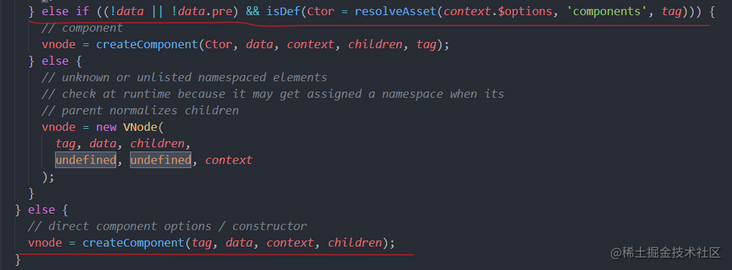
That is, the branch that our ordinary registered components will take. If we pass the option object to is, compared with ordinary components, there is actually a process of finding the option object according to the component name. There is no difference between other components and ordinary components. As for the template compilation stage, its processing is also very simple:
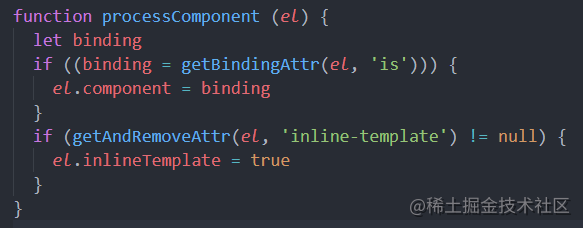
Directly take out the value of is attribute and save it to component attribute. Finally, in the stage of generating rendering function:
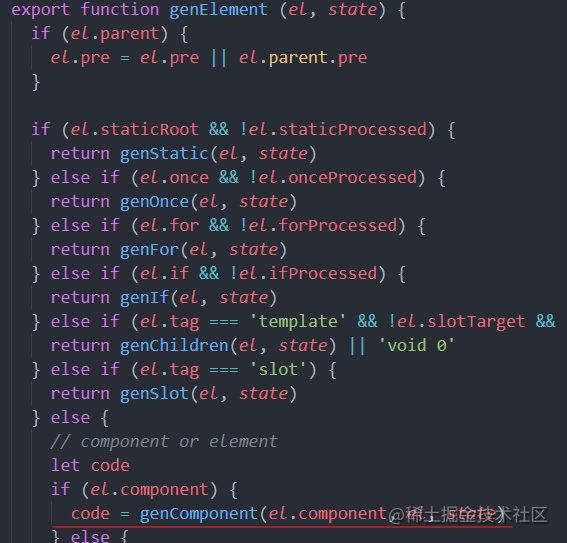

In this way, the final generated rendering function is obtained.