Seata is an open source distributed transaction solution, which is committed to providing high-performance and easy-to-use distributed transaction services. It provides users with several different transaction modes such as AT, TCC, SAGA and XA. There are three main roles in Seata. TM and RM are integrated with the business system as Seata's client, and TC is deployed independently as Seata's Server (hereinafter referred to as Seata Server). Seata Server supports multiple deployment modes: direct deployment, using Docker, Docker compose, Kubernetes, Helm, etc
This article mainly introduces how to deploy Seata server using docker. The document address of the operation manual on the official website is: https://seata.io/zh-cn/docs/ops/deploy-by-docker.html , the advantages of using docker are not introduced here. Since my computer is a window system, I need to install docker desktop for window in advance. Please search for the installation tutorial by yourself
1, Preparation:
1. Create tables required by Seata server
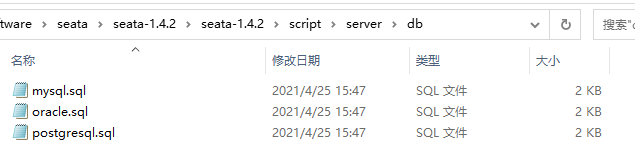
https://github.com/seata/seata/tree/1.4.2/script/server/db
The TC operation needs to save the transaction information in the database, so you need to create some tables. Find the script\server\db directory of the seata-1.4.2 source code, and you will see the following SQL files:
Take MySQL database as an example, create database seata and execute mysql sql statement in sql file:
CREATE TABLE IF NOT EXISTS `global_table`
(
    `xid`                       VARCHAR(128) NOT NULL,
    `transaction_id`            BIGINT,
    `status`                    TINYINT      NOT NULL,
    `application_id`            VARCHAR(32),
    `transaction_service_group` VARCHAR(32),
    `transaction_name`          VARCHAR(128),
    `timeout`                   INT,
    `begin_time`                BIGINT,
    `application_data`          VARCHAR(2000),
    `gmt_create`                DATETIME,
    `gmt_modified`              DATETIME,
    PRIMARY KEY (`xid`),
    KEY `idx_gmt_modified_status` (`gmt_modified`, `status`),
    KEY `idx_transaction_id` (`transaction_id`)
) ENGINE = InnoDB
  DEFAULT CHARSET = utf8;

-- the table to store BranchSession data
CREATE TABLE IF NOT EXISTS `branch_table`
(
    `branch_id`         BIGINT       NOT NULL,
    `xid`               VARCHAR(128) NOT NULL,
    `transaction_id`    BIGINT,
    `resource_group_id` VARCHAR(32),
    `resource_id`       VARCHAR(256),
    `branch_type`       VARCHAR(8),
    `status`            TINYINT,
    `client_id`         VARCHAR(64),
    `application_data`  VARCHAR(2000),
    `gmt_create`        DATETIME(6),
    `gmt_modified`      DATETIME(6),
    PRIMARY KEY (`branch_id`),
    KEY `idx_xid` (`xid`)
) ENGINE = InnoDB
  DEFAULT CHARSET = utf8;

-- the table to store lock data
CREATE TABLE IF NOT EXISTS `lock_table`
(
    `row_key`        VARCHAR(128) NOT NULL,
    `xid`            VARCHAR(128),
    `transaction_id` BIGINT,
    `branch_id`      BIGINT       NOT NULL,
    `resource_id`    VARCHAR(256),
    `table_name`     VARCHAR(32),
    `pk`             VARCHAR(36),
    `gmt_create`     DATETIME,
    `gmt_modified`   DATETIME,
    PRIMARY KEY (`row_key`),
    KEY `idx_branch_id` (`branch_id`)
) ENGINE = InnoDB
  DEFAULT CHARSET = utf8;
The three tables created are as follows:

- global_table: global transaction table. Whenever a global transaction is initiated, the ID of the global transaction will be recorded in the table
- branch_table: Branch transaction table, which records the ID of each branch transaction, which database the branch transaction operates, and other information
- lock_table: global lock
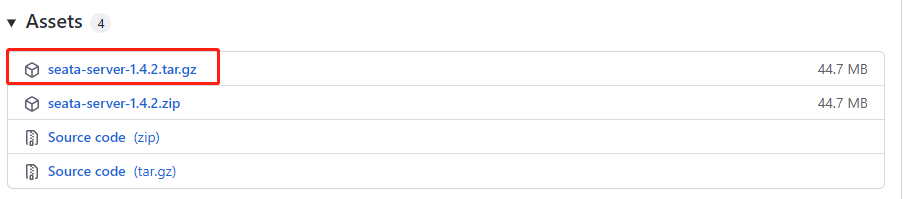
2. Download Seata server:
Seata server download address: Releases · seata/seata · GitHub
3. Build project:
Locally unzip seata-server-1.4.2 tar. GZ compress the package and take out conf / file Conf and conf / registry Conf is used to configure the relevant parameters of the runtime, and finally create the Dockerfile file required for image creation. The final file directory structure is as follows:
4. Modify the registry and configuration center of Seata server:
In registry The registration center and configuration center of TC can be configured in the conf file. The default registration center is in the form of file, which must not be used in actual use. Here we change it to the form of nacos; Similarly, the configuration center of Seate TC also uses the file form by default, which needs to be modified to nacos as the configuration center:
registry {
  type = "nacos"
  nacos {
    application = "seata-server"
    serverAddr = "localhost:8848"
    namespace = "XXXXXXXXXX"
    cluster = "default"
    username = "nacos"
    password = "nacos"
  }
}

config {
  type = "nacos"
  nacos {
    serverAddr = "localhost:8848"
    namespace = "XXXXXXXXXX"
    group = "SEATA_GROUP"
    username = "nacos"
    password = "nacos"
  }
}
The changes are as follows:
- type: change to nacos, which means that nacos is used as the registry or configuration center
- application: name of the service
- serverAddr: address of nacos
- group: group
- Namespace: namespace
- username: user name
- Password: password
After the above configuration is modified, the configuration of nacos will be automatically read when TC starts
5. Import seata Server configuration:
It is recommended to download the seata project locally and read it https://github.com/seata/seata/tree/1.4.2/script/config-center Readme under path MD content
We have configured the configuration center of seata TC above. What are the configurations that TC needs to store in Nacos and how to push them? stay https://github.com/seata/seata/tree/1.4.2/script/config-center There is a config Txt file, which is all the configurations required by TC, and https://github.com/seata/seata/tree/1.4.2/script/config-center/nacos There is a nacos config The SH script can convert config Txt is automatically pushed to nacos.
We start the nacos service first, and then in nacos config Execute the following command under the SH directory to set config Txt to nacos:
#- h represents the IP of nacos service- p represents the port number of nacos- g) grouping information- t namespace ID- u user name, - p password
$ sh nacos-config.sh -h 127.0.0.1 -p 8080 -g SEATA_GROUP -t 7a7581ef-433d-46f3-93f9-5fdc18239c65 -u nacos -w nacos
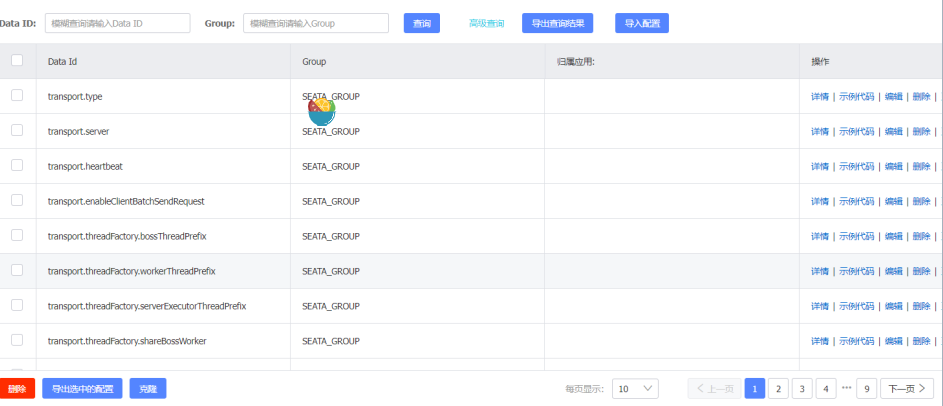
After the command is executed successfully, you can see the following configuration in nacos:
6. Modify the TC transaction information storage method:
There are three transaction information storage modes (store.mode) on the TC side of seata: file, db and redis. The file mode does not need to be changed and can be started directly. The following steps are devoted to the startup of db and redis.
Note: the file mode is stand-alone mode. The global transaction session information is read and written in memory and the local file root is persisted Data, high performance;
(1) Store in DB mode:
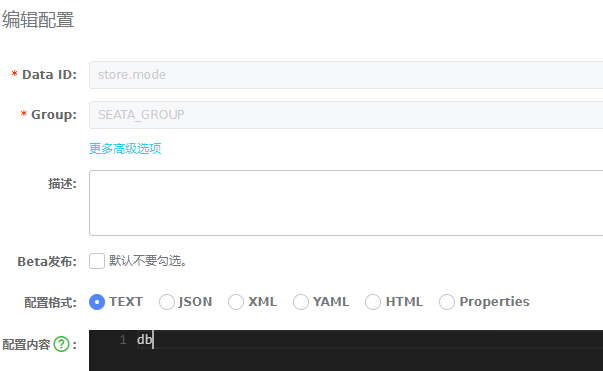
The db mode is highly available. The global transaction session information is shared through db, and the corresponding performance is worse; In the previous section, all configuration information has been pushed to Nacos, and TC will be read from Nacos when it is started. Therefore, we need to modify it in Nacos. The configuration to be modified is as follows:
## db storage form is adopted
store.mode=db
## druid data source
store.db.datasource=druid
## mysql database
store.db.dbType=mysql
## mysql driver
store.db.driverClassName=com.mysql.jdbc.Driver
## Database url of TC
store.db.url=jdbc:mysql://127.0.0.1:3306/seata_server?useUnicode=true
## user name
store.db.user=root
## password
store.db.password=Nov2014
Search for the above configuration in nacos and directly modify the values, such as store Mode, as shown below:
(2) store in Redis mode:
The redis mode supported by Seata server version 1.3 and above has high performance, but there is a risk of loss of transaction information. Therefore, the redis persistence configuration suitable for the current scenario needs to be configured in advance. The following configuration needs to be changed for this mode:
store.mode=redis
store.redis.host=127.0.0.1
store.redis.port=6379
store.redis.password=123456
So far, all preparations for Seata server have been completed. Next, let's introduce how to create a docker image of seate
2, Production and deployment of seata image:
1. Write Dockerfile:
FROM openjdk:8
MAINTAINER zhangweipeng

# set environment
ENV SEATA_USER="seata" \
    BASE_DIR="/home/seata" \
    JVM_XMS="1g" \
    JVM_XMX="1g" \
    JVM_XMN="512m" \
    JVM_MS="128m" \
    JVM_MMS="320m" \
    TIME_ZONE="Asia/Shanghai"

ARG SEATA_VERSION=1.4.2
# Set working directory
WORKDIR $BASE_DIR

COPY seata-server-${SEATA_VERSION}.tar.gz /home

# Setting time, East Zone 8
RUN set -x \
    && rm -f /etc/localtime \
    && ln -snf /usr/share/zoneinfo/$TIME_ZONE /etc/localtime \
    && echo '$TIME_ZONE' > /etc/timezone \
    && tar -xzvf /home/seata-server-${SEATA_VERSION}.tar.gz -C /home/seata \
    && rm -rf /home/seata-server-${SEATA_VERSION}.tar.gz

ADD conf/registry.conf /home/seata/seata/seata-server-${SEATA_VERSION}/conf/registry.conf
ADD conf/file.conf /home/seata/seata/seata-server-${SEATA_VERSION}/conf/file.conf

#port
EXPOSE 8091
RUN chmod +x /home/seata/seata/seata-server-${SEATA_VERSION}/bin/seata-server.sh
ENTRYPOINT ["/home/seata/seata/seata-server-1.4.2/bin/seata-server.sh" ]
2. To build a mirror:
Enter the following command in the directory where Dockerfile is located to build the image:
docker build -t seata-docker .
3. Run mirror:
(1) Start Seata server
docker run --name seata-docker -p 8091:8091 seata-docker
(2) Specify the IP and boot port of the Seata server:
docker run --name seata-docker -p 8091:8091 -e SEATA_IP=172.28.190.100 -e SEATA_PORT=8091 seata-docker
For the Seata server started in this way, the IP and port registered in the registry is SEATA_IP and Seata_ In addition to the value specified by port, Seata server also supports the following environment variables:
- SEATA_IP: optional. Specify the IP that Seata server starts. This IP is used when registering with the registry
- SEATA_PORT: optional. Specify the port that Seata server starts. The default is 8091
- STORE_MODE: optional. Specify the transaction log storage mode of Seata server. db, file and redis are supported. The default is file
- SERVER_NODE: optional, used to specify the Seata server node ID, such as 1,2,3, Generated by IP by default
- SEATA_ENV: optional. Specify the running environment of Seata server, such as dev, test, etc. the configuration of registry-dev.conf will be used when the service is started
- SEATA_CONFIG_NAME: optional. Specify the location of the configuration file, such as file:/root/registry, which will load / root / registry Conf as the configuration file. If necessary, specify file Conf file, you need to set registry Conf file. The value of name is changed to something like file: / root / file conf:
4. Push to remote warehouse:
(1) Log in to the remote warehouse:
docker login -u username -p password repo-address.com
(2) Image labeling:
Docker tag 1f86b8e86442 (image ID) repo address com/seata-docker:v1
The reason for labeling is that the image tag of docker is latest by default. If it is in other versions, it should be noted.
(3) Push to remote warehouse:
docker push repo-address.com/seata-docker:v1