Headline notes
1. The mobile terminal rem solves multi screen adaptation
introduce
reason:
This project is a mobile terminal, so it needs to adapt to different mobile phone screens. We hope to achieve the effect of adaptation: it is related to the screen size. Take buttons as an example: in large screen mobile phones, the width and height of buttons are larger, and in small screen mobile phones, the size is smaller.
analysis:
The style in Vant uses px as the unit by default. If you need to use rem unit, it is recommended to use the following two tools to work together to achieve the goal- Official website address
- Convert px units to rem units, and use postcss and postcss pxtorem plug-ins to automatically convert px units to rem units
- rem is the font size change relative to the root label. Use amfe flexible plug-in to set the font size of the root label (production dependent)
step
1. Installation package
yarn add postcss postcss-pxtorem@5.1.1 -D
# Production dependence
# Used in the post processor development phase
# Function: automatically convert px unit to rem unit

yarn add amfe-flexible
# Development dependency
# js plug-ins that modify rem benchmark values need to be used after packaging
# Function: adjust the value of rem (the size of font size on html tags) according to the width of the setting screen
#      Its default calculation method is 1 / 10 of the screen width, and the default value is 37.5
2. Set postcss
Create postcss.com under the root directory config. JS file, as follows:
module.exports = {
  plugins: {
    'postcss-pxtorem': {
      // The px unit of all elements can be converted to Rem
      // rootValue: base value of converted px.
      // For example, if the width of an element is 75px, it will be 2rem after rem.
      rootValue: 37.5,
      propList: ['*']
    }
  }
}
Restart the server
npm run serve
yarn  serve
3. Introduce flexible
Entry file main JS import amfe flexible
import 'amfe-flexible'
2. Encapsulating the axios request function is improved through awaitTo
introduce
reason:
For the convenience of invoking ajax, we first encapsulate axios into an independent module, which can be loaded and used directly when needed.
Idea:
- Install axios package
- Secondary packaging of axios
step
1. Installation package
yarn add axios
2. Secondary packaging axios
- Create utils / request. In the src directory js
1.introduce axios
import axios from 'axios'

2.Set base address
//Two ways

//The first method is to set the base address
const ajax = axios.create({
  //  baseURL: 'http://api-toutiao-web.itheima.net'
  baseURL: 'http://toutiao-app.itheima.net '/ / base path of the request
})
//The second method is to set the base address
axios2.defaults.baseURL = 'http://toutiao-app.itheima.net'


3.Export request
export default (url, method = 'GET', data = {}, params = {}, headers) => ajax({
    url,
    method,
    data,
    params,
    headers
})
Create an arrow function
Formal parameters are the data that needs to be requested
 Function body call axios
amount to ajax({url,method,data,params,headers})
The arrow function does not need a line of code{} And return

// In the future, if you change the library requested by the network, directly change the code in this file to ensure the reusability and independence of the code (high cohesion and low coupling)
3.await error handling
reason:
Await is an operator used to form an expression. The operation result of await expression depends on things such as it.
If it doesn't wait for a Promise object, the operation result of await expression is what it waits for.
If it waits for a Promise object, await will be busy. It will block the following code, wait for the Promise object to resolve, and then get the value of resolve as the operation result of await expression.
So await can only get promise Then, you can't get promise Catch results
Extended review: asynchronous tasks should be put in Promise
Solution awaitTo
Promise introduction
- Either then() or catch() will return a new promise object in place
- The return in the then and catch function bodies will return the value to the then function of promise generated in situ
export default ({ url, method = 'GET', params, data, headers }) => {
  const pA = axios({
    url: url,
    method: method,
    params: params,
    data: data,
    headers: headers
  })
  const pB = pA.then((res) => {
    // Error object
    return [null, res]
  }).catch((err) => {
    return [err, null]
  })
  return pB
}
Explanation:
- Initiate the axios request and leave a promise object pA in place
- pA.then and catch() will leave a promise object pB in place
- Then of pA and return of catch will pass the value to then of pB
3.vant components
be careful:
-
When using the vant component, don't forget to introduce its css style
import 'vant/lib/index.css'
-
When using custom themes 2 and 3
import 'vant/lib/index.less'
vant custom theme mode
Method 1
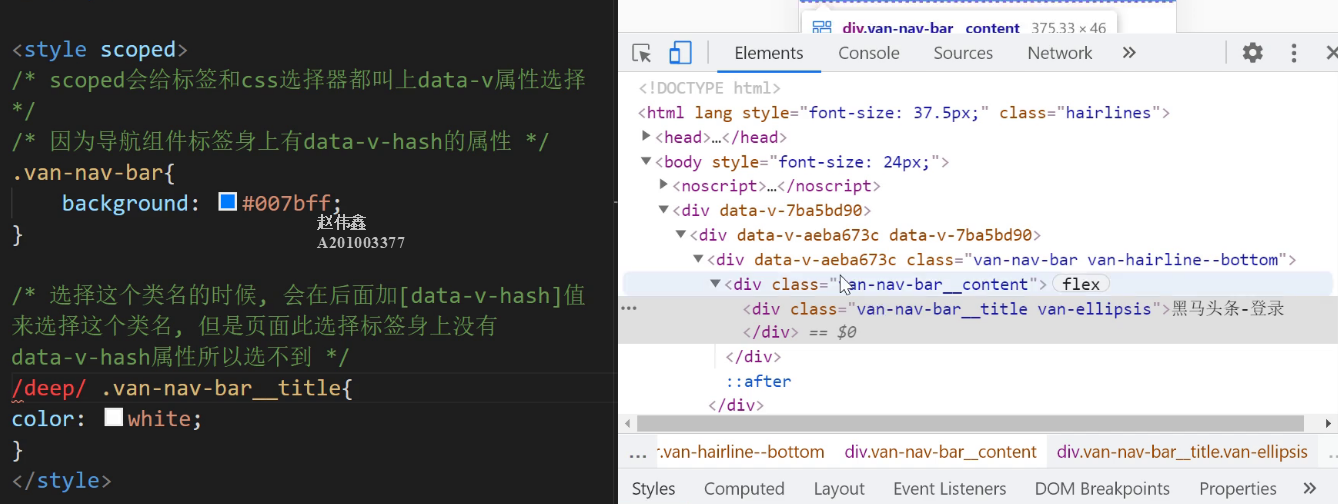
Review the method of the element, view the class name of the corresponding style, overwrite the style, and add / deep before the class name/
Figure - customized theme mode I
Method 2:
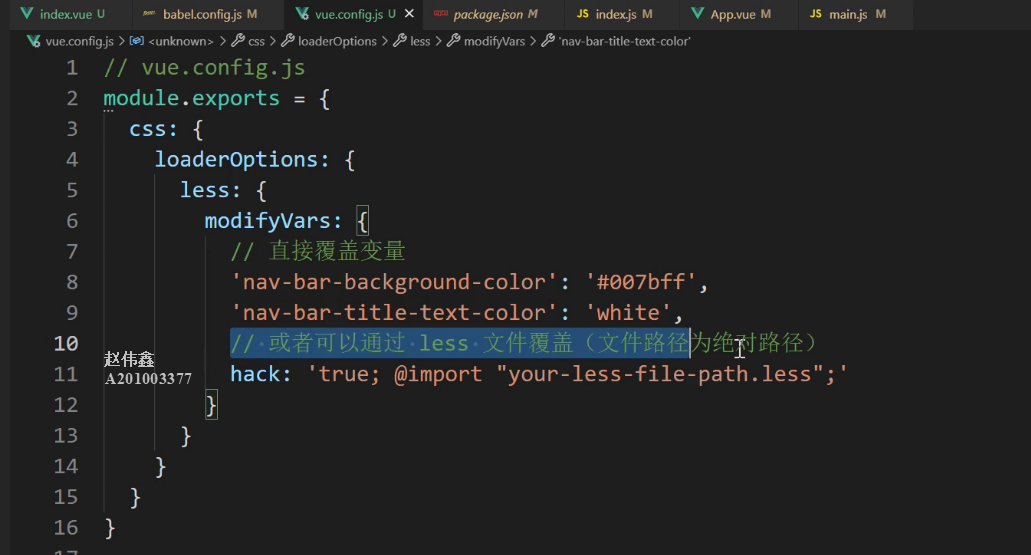
The less variable in the vant component library can be directly overridden by customizing the theme according to the official document
// Here's the Change the css suffix to less
import 'vant/lib/index.less'
Otherwise, the style is invalid,
Method 3
Customize the less theme file by customizing the theme, and overwrite the default less variable based on the file
Create a less file under the styles file to overwrite variables
@blue: #007bff;
@white: white;
@font-14: 14px;

// NavBar
@nav-bar-background-color: @blue;
@nav-bar-title-text-color: @white;
@nav-bar-title-font-size: @font-14;
In Vue config. JS add the following configuration
const path = require('path')

// File path for custom theme
const coverPath = path.join(__dirname, './src/styles/cover.less')

module.exports = {
  css: {
    loaderOptions: {
      less: {
        modifyVars: {
          // Overwrite with less file (the file path is an absolute path)
          hack: `true; @import "${coverPath}";`
        }
      }
    }
  }
}
4.ESlint closing rules
//Do not let variables have_ Underline
step
- ESlint official website query
- At eslint JS file
5.Token
1. Store Token
Under vuex folder
import Vue from 'vue'
import Vuex from 'vuex'

Vue.use(Vuex)

export default new Vuex.Store({
  state: {
    Token: null//Define data
  },
  mutations: {
      //Method of modifying data
      //Parameter 1: state
      //Parameter 2: receive the transmitted data
    tonkenFN (state, Token) {
      state.Token = Token
    }
  },
  actions: {
  },
  modules: {
  }
})
Interface debugging
<script>
import { mapMutations } from 'vuex'
//Methods under map transformations
// from vuex
export default {
  data () {
    return {
      token: 'asdfadsfasdfwer'
    }
  },
  methods: {
      //Expand note that [] and '' packages must be written
    ...mapMutations(['tonkenFN']),
    buFn () {
      this.tonkenFN(this.token)
    }
  }
}
</script>
2. Persistent storage Token
reason:
When the web page is refreshed and all variables are initialized, the value of vuex disappears and the user has to log in again
solve:
Save the token data locally
step
import Vue from 'vue'
import Vuex from 'vuex'

Vue.use(Vuex)

export default new Vuex.Store({
  state: {
      //2. The value of token depends on whether the local storage is empty
    Token: localStorage.getItem('token') || null
  },
  mutations: {
    tonkenFN (state, Token) {
      state.Token = Token
        //1. Pass the token data into vuex and store it in localStorage
        //Note: localstorage Setitem is followed by (), isn't it=
        //Parameter 1: key name
        //Parameter 2: value
      localStorage.setItem('token', Token)

    }
  },
  actions: {
  },
  modules: {
  }
})
6. Route guard
Requirements:
- If you have logged in, don't jump to the login page (click exit if you want to log in again)
- Pages involving user operations need to log in (edit, like, comment)
7. Switch the routing page
code implementation
<van-tabbar v-model="active" router>
  <van-tabbar-item icon="home-o" to="/home">home page</van-tabbar-item>
  <van-tabbar-item icon="setting-o" to="/user">my</van-tabbar-item>
</van-tabbar>
Steps:
- Add van tabbar to router attribute

V-built-in attributes
- Van tabbar item added to="/home"
Native implementation
<router-link  to="/home">home page</router-link>
//Router link is equivalent to an a tag
8. Home page - channel list
Display diagram
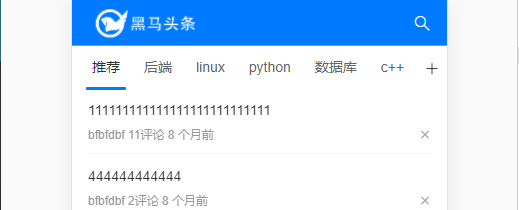
Interface diagram
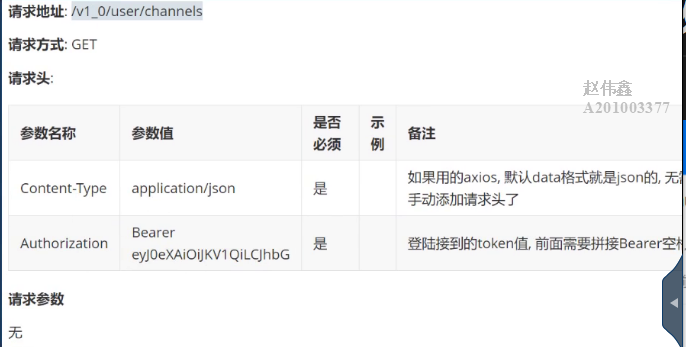
code
/api/index.js Under file
import store from '@/store'
//Before the introduction of vuex, map mapping was used, which was the vue page
//js page directly introduces the index file under the store folder
export const UserListAPI = () => {
  return request({
    url: '/v1_0/search',
    headers:{
Authorization = 'Bearer ' + store.state.token
        //Note: 'Bearer' plus spaces plus spaces
    }
  })
}
9. Home page - article list
Requirement 1 package components
Display diagram
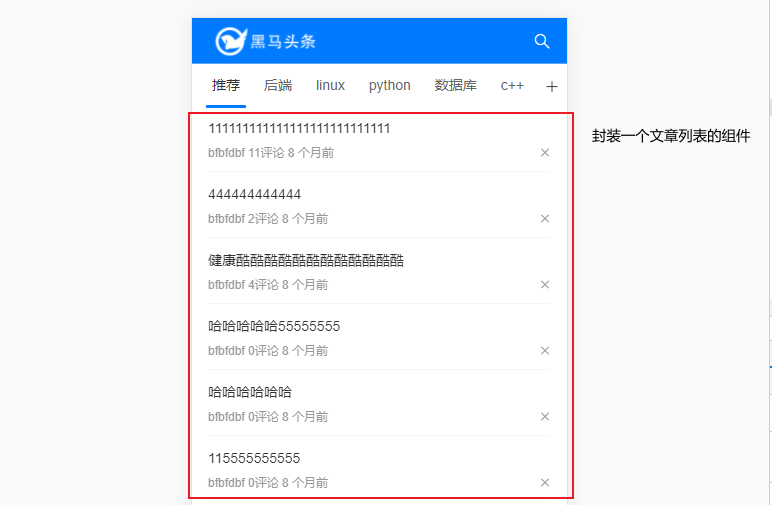
Encapsulate the list of articles into a single component
step
- At home / components / articlelist Vue / / article list component - only responsible for circular display of data
- Home page - introduce the article list component to replace the middle of the Tab as a slot
Demand 2 Lay the static page first (do not consider the problem of three pictures)
Display diagram
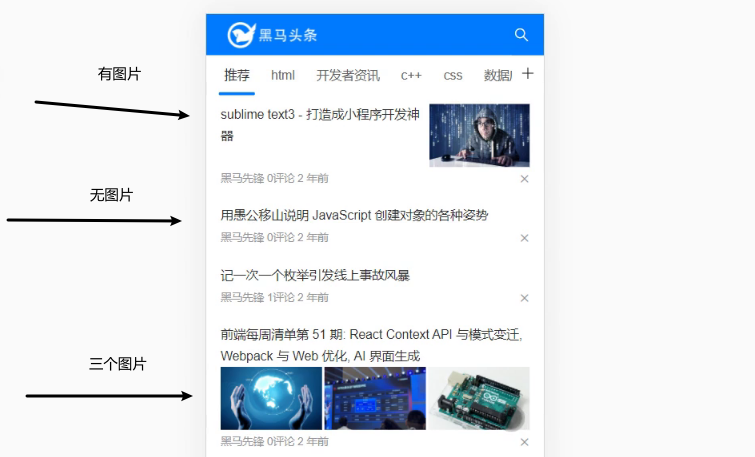
step
- Simple article list laying (regardless of pictures)
- Encapsulate network requests
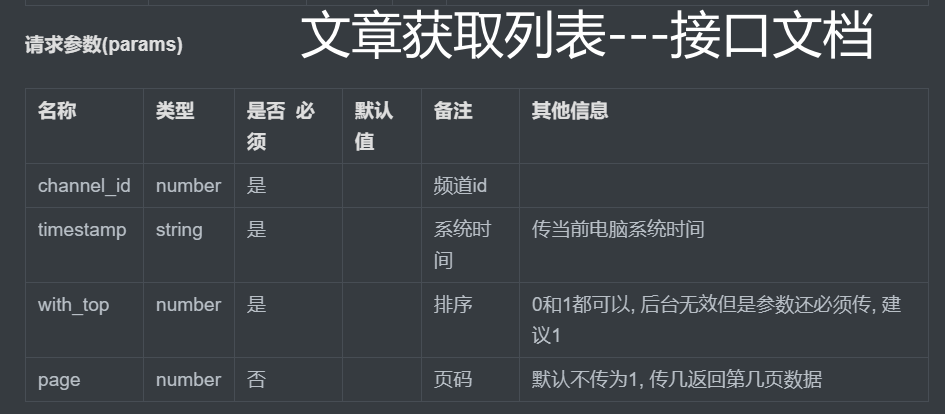
Current system time: new date() Gettime() millisecond value
Page returns the page data
-
(encapsulated presentation components / vant components - they are only responsible for displaying your incoming data, and the interactive actions are returned to the page - Specification)
-
Import request - > create array - > store data
-
Pass parent to child - > pass array data to - > Article List component
Demand 3 Implementation picture (1 ~ 3)
- First realize the display of a picture (observation data)
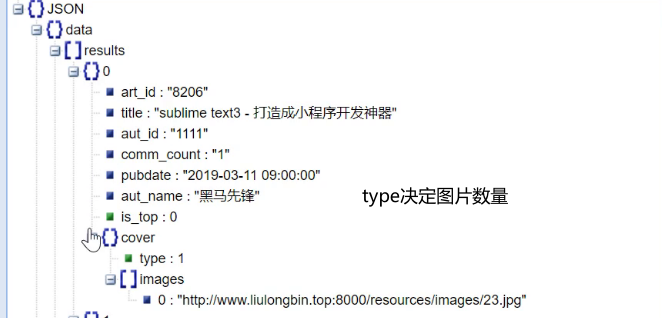
- According to the back-end data, the type in cover is the number of pictures, and images [] stores the picture address
- Render picture data (realize a picture display) - v-if judge whether cover is equal to 1
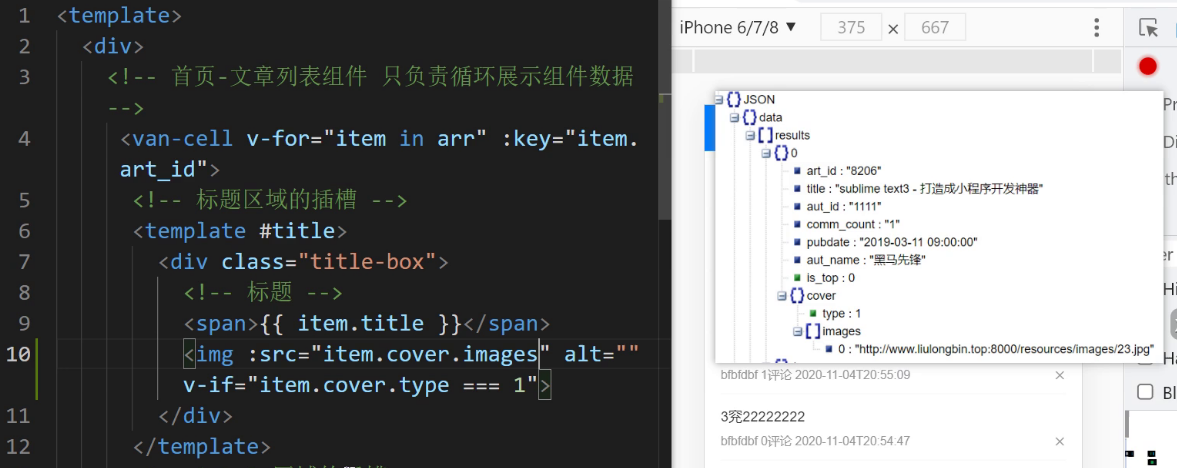
- Considering the position of three pictures, render the page (multiple pictures v-for rendering)
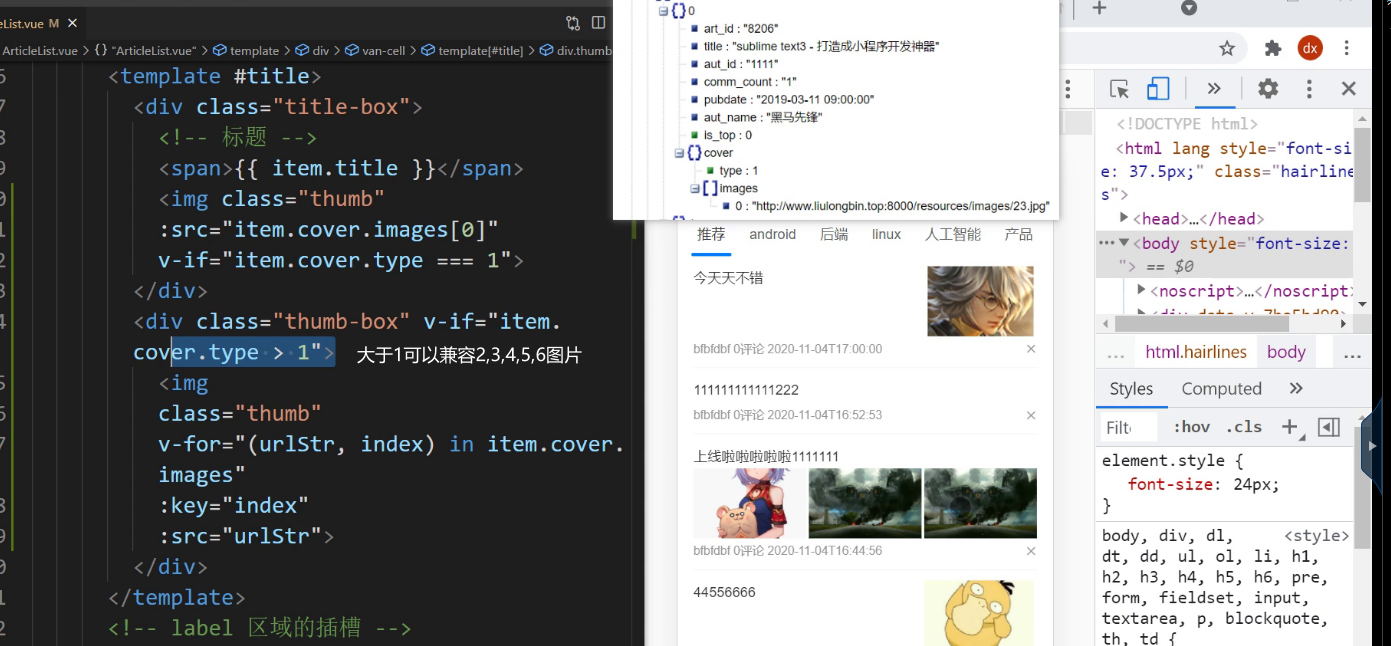
10. Home page - drop-down refresh
Steps:
-
Find the component van pull refresh, main JS Import Registration
-
Wrap the ArticleList component (content list)
-
Get new data, getArticleList method - send a request to get new data
-
Change isLoading to false (close the top loading status - ensure that the pull-down refresh can continue next time)
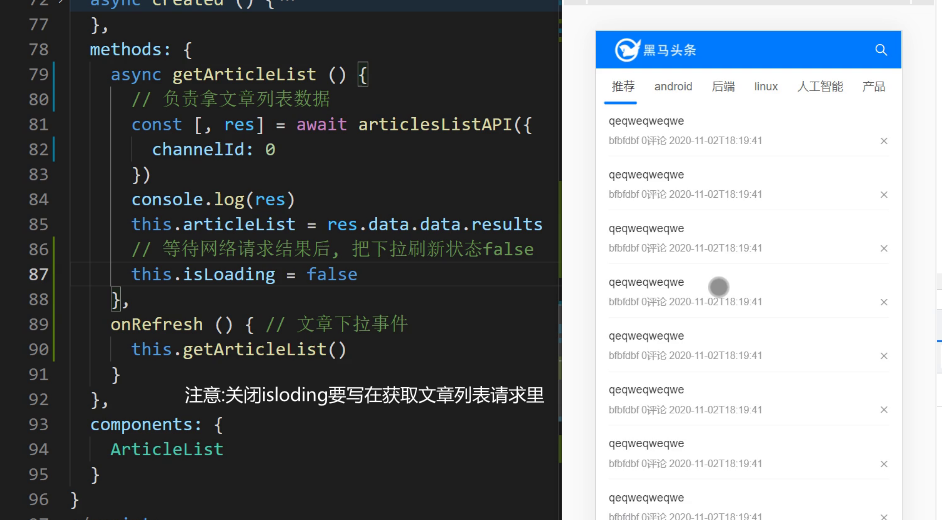
Login page
Landing page
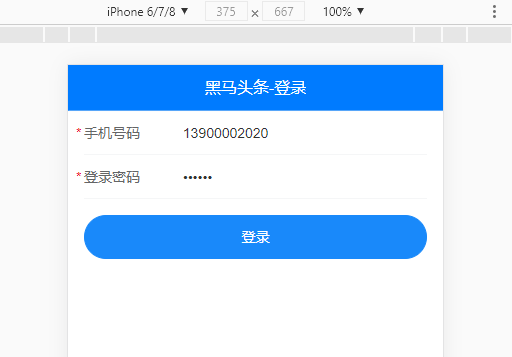
step
V -: represents the components in vant
- Static page
- Form and page - form verification (V-form)
- Click submit to initiate the request (the name of the form is the submitted parameter)
- Login success and failure prompt (V-notify)
- Animate the login button to disable and load (V-button)
- Save the token value in vuex
- token persistence
- Log in successfully, route and jump to the home page
home page
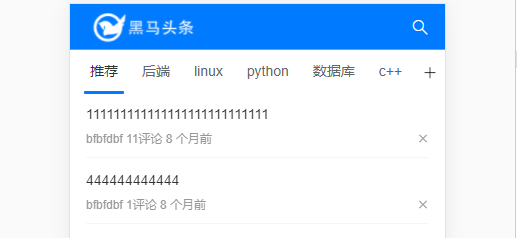
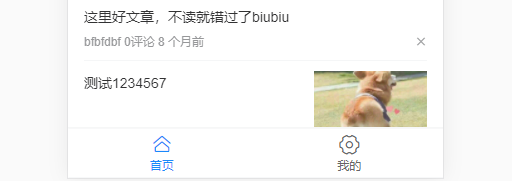
Bottom of step 1
- Bottom - Import tabbar assembly (V-tabbar)
- Bottom - create secondary pages Home and user / index vue
- Bottom - router / index JS - introducing secondary page components - configuring secondary routing
- Bottom - home page set mount point
- At the bottom - set the router and to properties on the tabbar, and click home and my to switch routes
Step 2 top
- Top - index Vue uses NavBar(V-NavBar)
- Top - NavBar slot technology - custom left picture
- Top right icon import, modify color (V-Icon)
Step 3 intermediate content
- Middle - navigation bar switch - Tabs tab component - register copy (V-Tabs)
- Intermediate - defines the interface method to request channel data
- Middle - get the page of data laying by using the interface on the current page
- Middle - encapsulates the display article cell list component
- The registration component is introduced and replaced in the middle of the Tab as a slot
Within the article cell list component
-
Simple article list laying (regardless of pictures)
-
title and label areas - label + css
-
Back to index Vue - request data - (encapsulated presentation components / vant components are only responsible for displaying your incoming data, and the interactive actions are returned to the page - Specification)
-
Encapsulate the article list data API interface and introduce
-
To define a method, first request the default recommendation data
-
Create an array to receive the requested data
-
Pass in array to sub component article list component - > lay list cell (pass parent to child)
Skills and knowledge points
Quickly create multiple folders
mkdir is followed by the folder name with multiple spaces
mkdir api styles utils
Absolute path
1. Do not write the absolute path manually
const path = require('path')

// File path for custom theme
const coverPath = path.join(__dirname, './src/styles/cover.less'
3. Route jump
this.$router.push({ path:'/layout'})
4. Transmission parameters
It is best to use objects when passing parameters
Objects are unordered, as long as the names match
5. Get familiar with the project structure as soon as possible
Draw a tree to show
Write out what each folder does
6. Specifications
Encapsulated components / vant components - are only responsible for displaying your incoming data, and the interactive actions are returned to the page for completion
7. Get the current system time
- new Date( )
- new Date( ).getTime() millisecond value
8. Handling css with postcss
Note: postcss only deals with css code. You need to write rem for the inline style unit in the tag