What is a Jcenter warehouse?
- Personally, I think Jcenter is similar to git/svn, and it is a project management tool. We can use it to store some common components, class libraries, plug-ins, etc. to realize the sharing function. At the same time, we can control its version. In the process of project development, when we need a component or library, we can rely on it directly, without duplicating the code or relying on a module. It is basically a sentence of code that can be worked out.
How did we publish our project to JCenter for sharing?
- Publish the project to JCenter using Bintray
How to configure it?
-
To upload the project to Jcenter, we need to configure some plug-ins. There are two common ones.
-
gradle-bintray-plugin
-
bintray-release (recommended configuration is simple, but now supports gradle below 5.0, it seems that it does not support gradle above 5.0, there will be errors)
-
How to use bintray-release to publish a project to Jcenter?
-
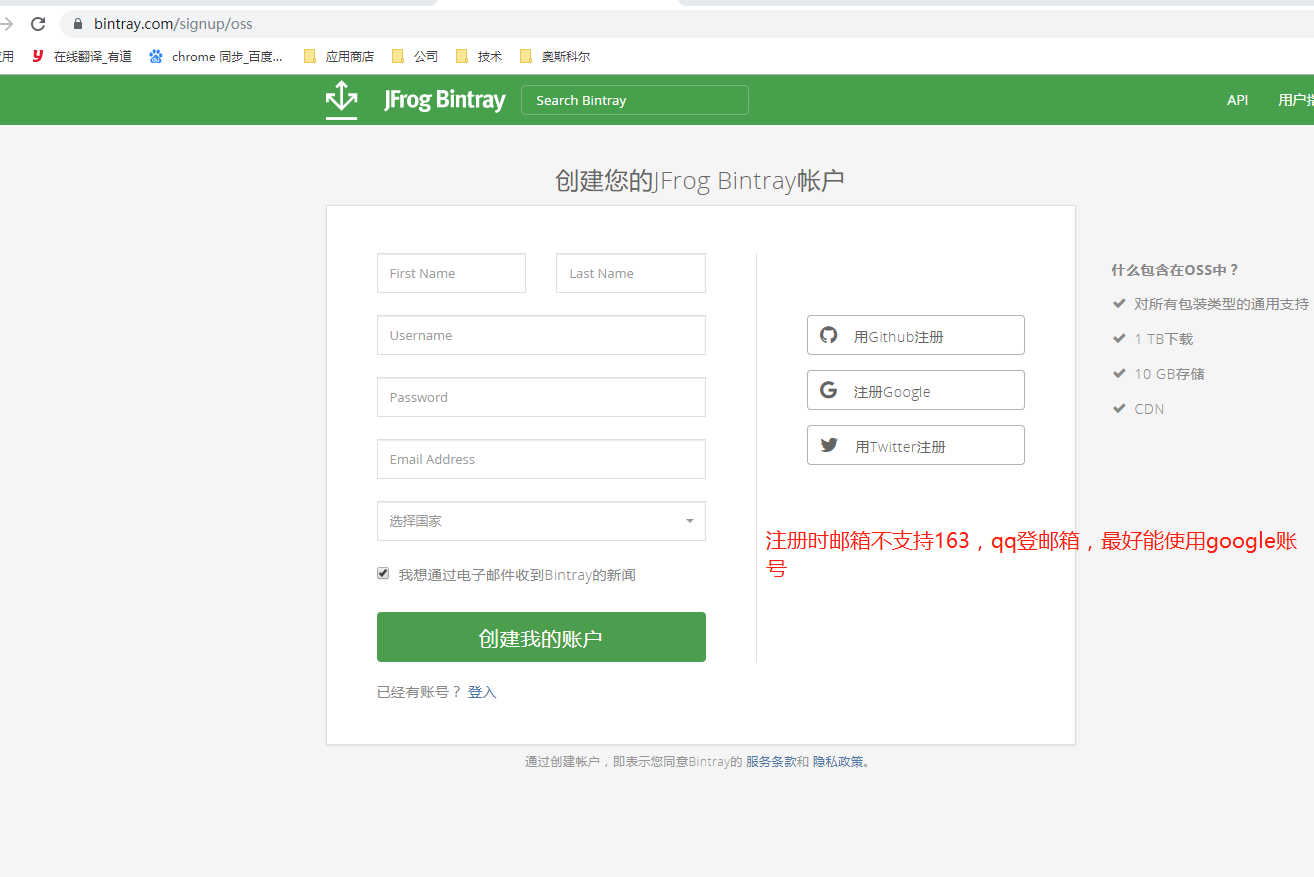
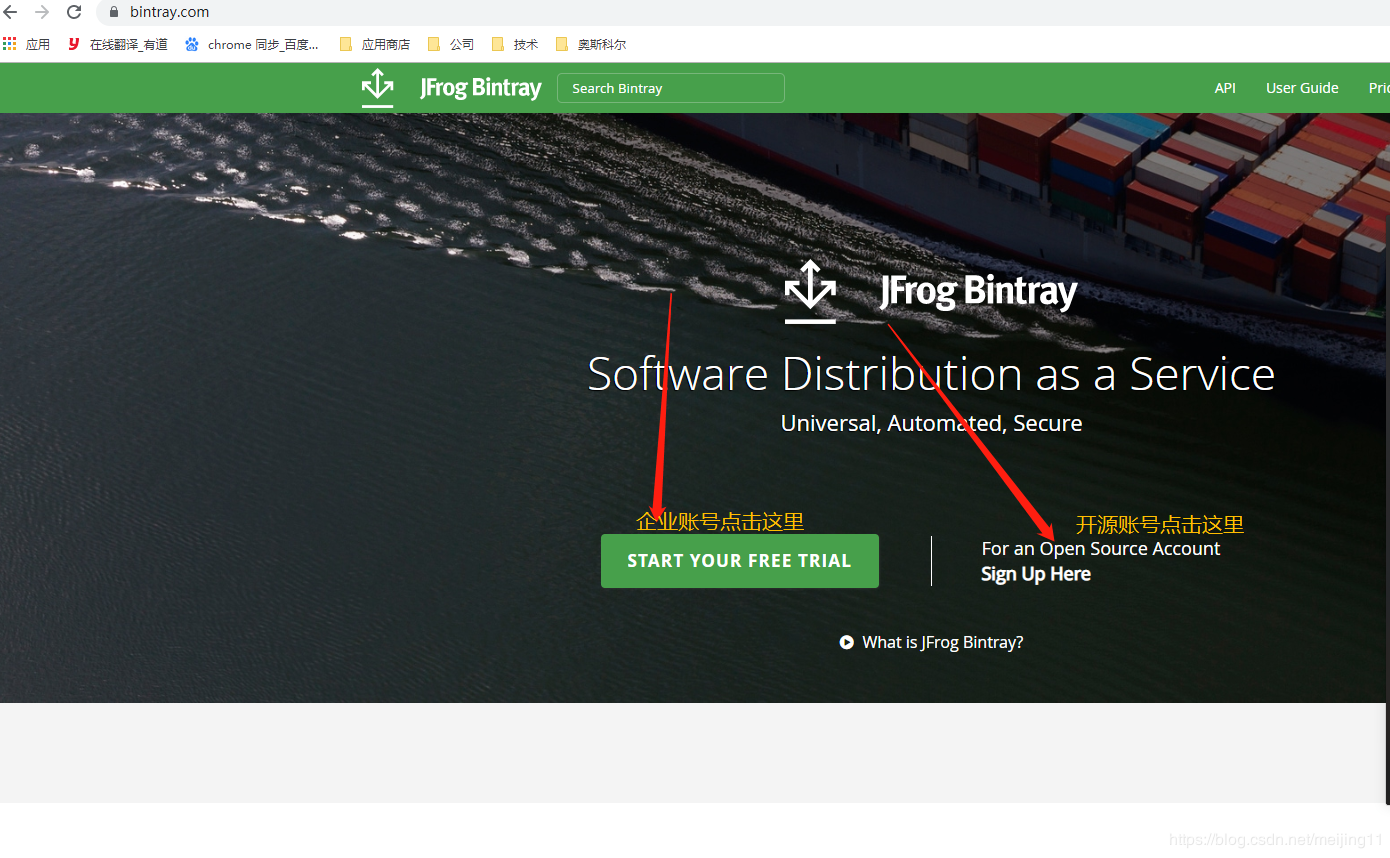
1. Registered developer account, here we should pay attention to the account system is divided into enterprise account and ordinary developer account. Enterprise account has a one-month trial period. In the first month of registration, it is impossible to publish the project to Jcenter (no add to Jcenter button is provided), so we need to pay attention to it when we register.
- Official website links: https://bintray.com/

- Official website links: https://bintray.com/
-
2. Get the version of bintray-release from github
- github address: https://github.com/novoda/bintray-release
-
3. Configuration in Android Studio
-
Configuration in build.gradle of the project
dependencies { classpath 'com.novoda:bintray-release:0.9.1' } -
In the development process, we will write some annotations, and when publishing and compiling, we need to generate corresponding JavaDoc documents, which may have coding problems, so we need to set up coding problems, or there will be coding warnings.
buildscript { dependencies { classpath 'com.novoda:bintray-release:0.9.1' } //There are Chinese characters in the notes, which need to be dealt with here. tasks.withType(Javadoc) { options.encoding = "UTF-8" } } -
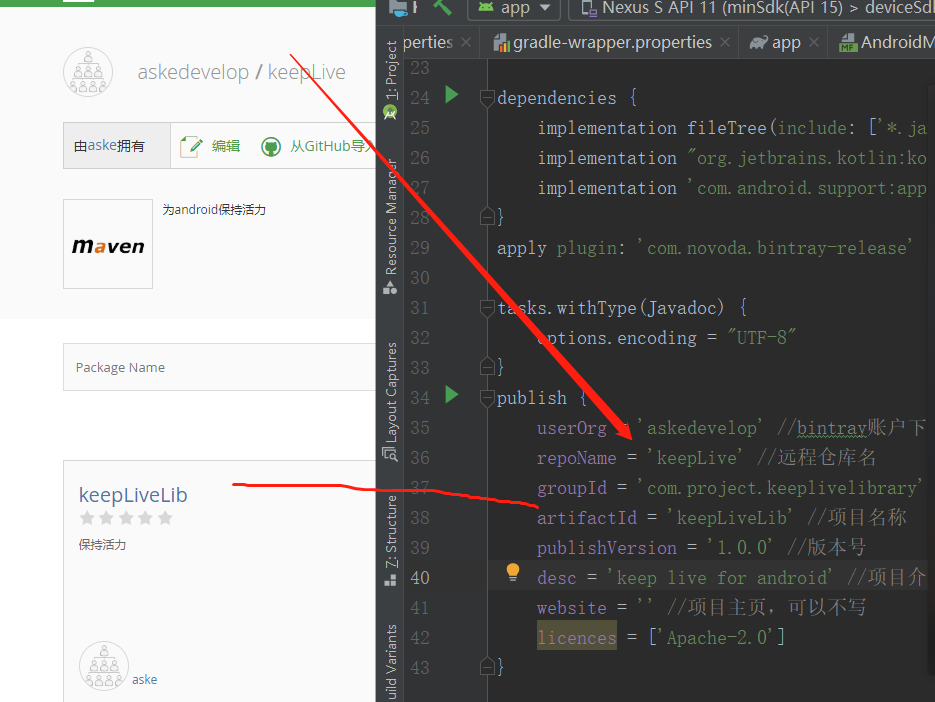
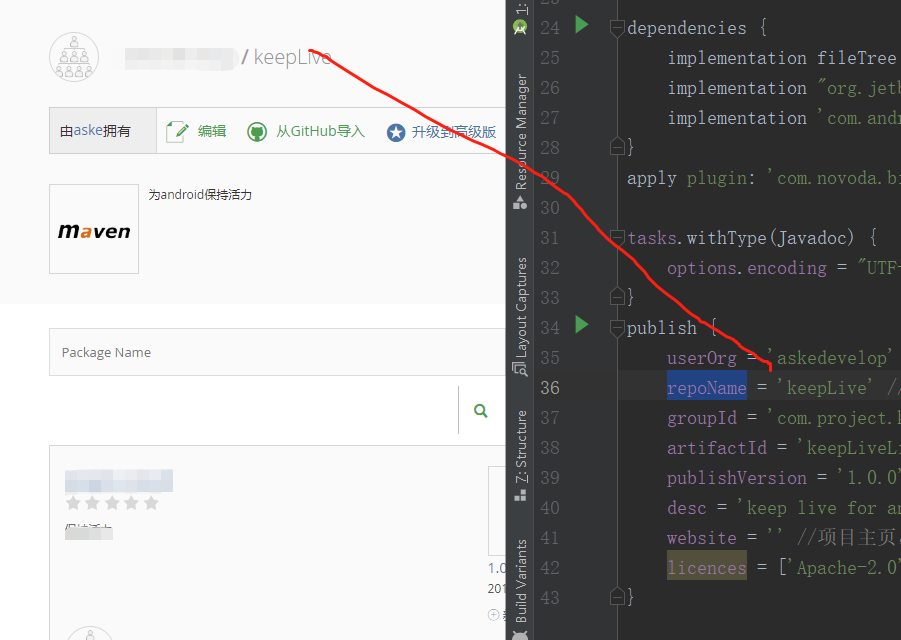
The following configuration is made at the end of the build.gradle file of the module we are going to publish
   	apply plugin: 'com.novoda.bintray-release'

   	tasks.withType(Javadoc) {
   	    options.encoding = "UTF-8"
   	}
   	publish {
   	    userOrg = 'askedevelop' //An organization id under a bintray account
   	    repoName = 'keepLive' //The remote warehouse name can be customized without setting the default name maven
   	    groupId = 'com.project.keeplivelibrary' //The package name of the lower repository of the maven repository, usually the module package name
   	    artifactId = 'keepLiveLib' //entry name
   	    publishVersion = '1.0.0' //version number
   	    desc = 'keep live for android' //Project introduction, can not be written
   	    website = '' //Project home page, can not write
   	    licences = ['Apache-2.0']
   	}
-
-
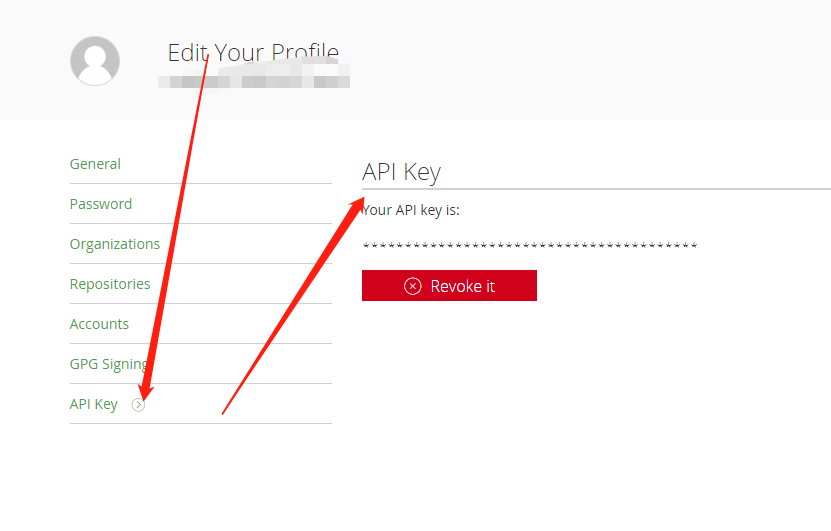
Execute the following command in the Terminal panel of Android Studio, where BINTRAY_USERNAME is replaced by your binatray username, BINTRAY_KEY is replaced by the API Key obtained above, and - PdryRun=false is uploaded to the warehouse. If true, only the gradle task will be performed, but not uploaded. Return after replacement is completed
gradlew clean build bintrayUpload -PbintrayUser=BINTRAY_USERNAME -PbintrayKey=BINTRAY_KEY -PdryRun=false
- Final results after success
-
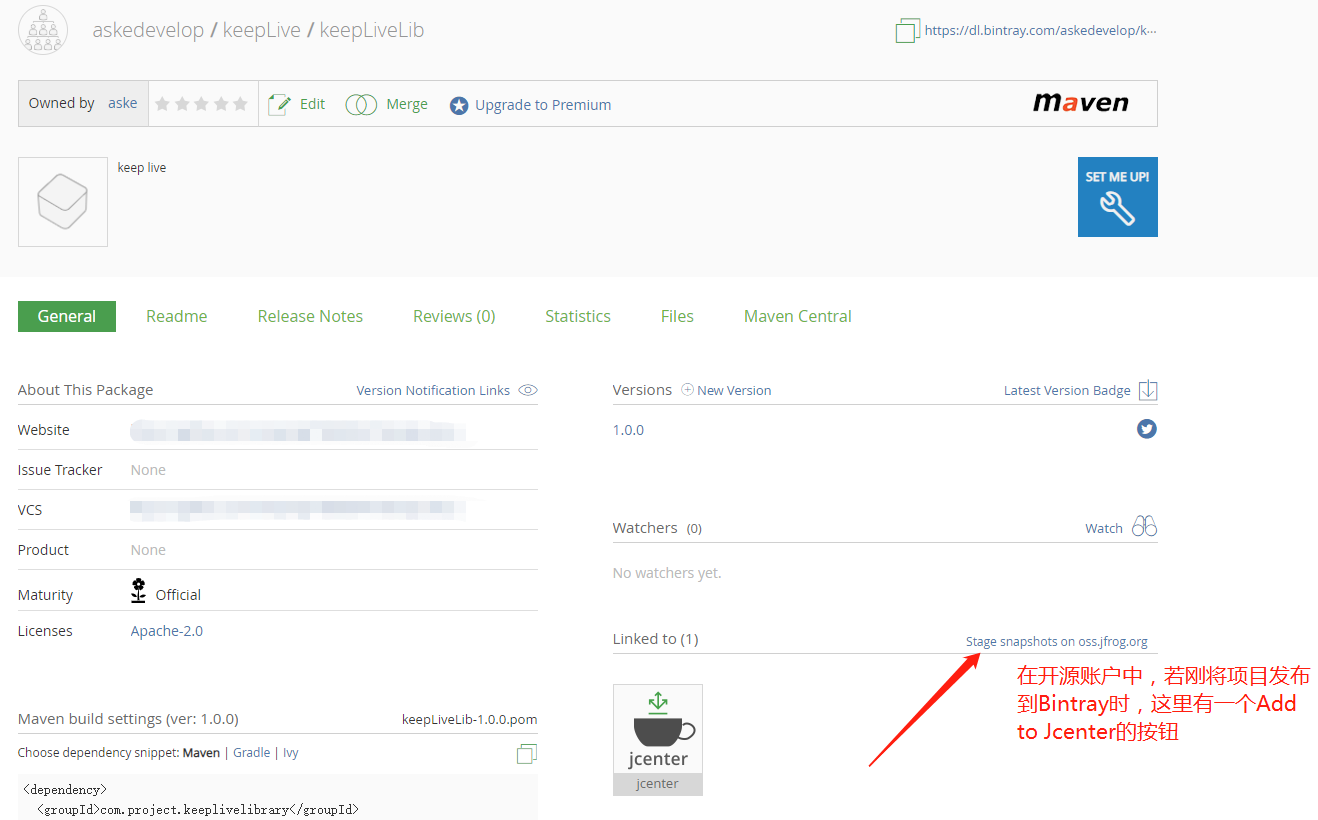
At this time, we did not publish the project to Jcenter completely. We need to be audited before we can, but we can make Maven achieve remote dependency.
//1. Configure Maven in build.gradle throughout the project allprojects { repositories { google() jcenter() maven { url 'https://www.jitpack.io' } //Add our maven address maven { url 'https://dl.bintray.com/askedevelop/keepLive' } } } //2. Adding dependencies to module s that need to add dependency Libraries implementation 'com.project.keeplivelibrary:keepLiveLib:1.0.0' -
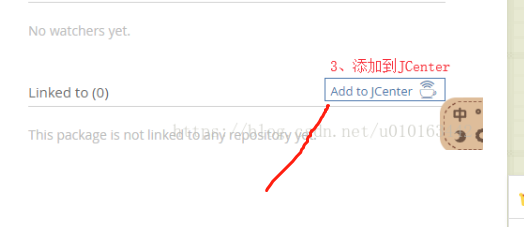
When our dependency libraries are approved by Jcenter, we can remove maven {url'https://dl.bintray.com/askedevelopment/keepLive'} because Android Studio defaults to Jcenter as the default central repository, so we need to click Add To Jcenter to submit Jcetner audit.

There will be those pits.
-
Question 1
The current version of Android Studio has reached 3.5, and the version of gradle has reached 5.4.1. When compiling and uploading, the following errors will be reported
  					WARNING: API 'variantOutput.getPackageLibrary()' is obsolete and has been replaced with 'variant.getPackageLibraryProvider()'.
  					It will be removed at the end of 2019.
  					For more information, see https://d.android.com/r/tools/task-configuration-avoidance.
Solution: Reduce the version of gradle to 4+

- Question 2
When uploading a project to Jcenter, the upload fails and the following error is reported
HTTP/1.1 404 Not Found [message:Repo 'maven' was not found]
Solution: Because bintrary defaults to set the remote warehouse name for the project as maven, but when we create the project, the remote warehouse name is not maven, so we need to set it according to the actual situation.
- Question 3
-
When registering an account, it becomes an enterprise account. When uploading the project to bintrary, it is found that there is no Add To Jcenter button.
-
Solution: Use normal registration and login mode, if it has been registered as an enterprise account, you can cancel the enterprise account and change it to an ordinary account, but the created project may be cancelled.
-
Question 4
GBK coding problem, javadoc coding problem

Solution: Set up encoding under build.gradle of the project, or add this annotation in build.gradle under module
  //1. Under the project build.gradle
	buildscript {
	  .....
	    //There are Chinese characters in the notes, which need to be dealt with here.
	    tasks.withType(Javadoc) {
	        options.encoding = "UTF-8"
	    }

	}

     //2. Level with Android and dependencies under project build.gradle
  tasks.withType(Javadoc) {
   options.encoding = "UTF-8"
 }