1. Main points of contents:
Deploy PXE Remote Installation Service
Set up PXE remote installation server
Verify PXE Network Installation
Implement kickstart unattended installation
Preparing to install the answer file
Automatic Loading in Batches
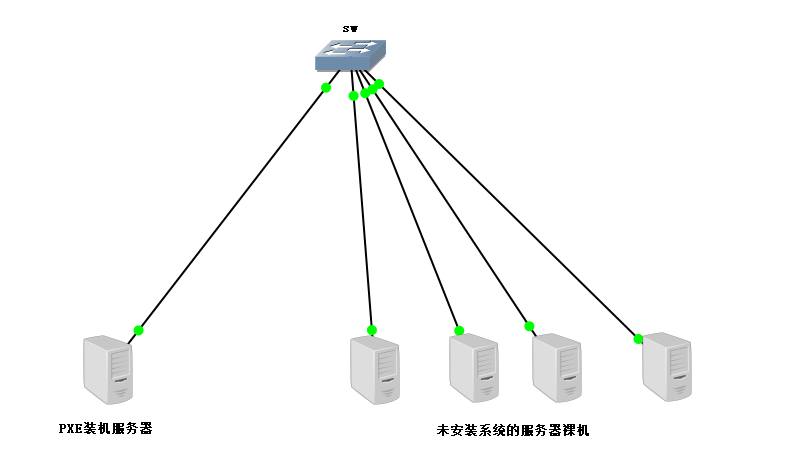
2. Batch deployment of servers
Scaling: assembling multiple servers at the same time
Automation: Install systems, configure services
Remote implementation: no installation media such as CD, U disk, etc.
3. About PXE Network
PXE,Pre-boot eXcution Environment
Pre-boot the execution environment to run before the operating system
Controlled for remote installation and construction of diskless workstations
Server
Run the DHCP service to assign addresses, locate bootstrappers
< Run TFTP server and provide bootstrapper Download
Client
Network Card Supports PXE Protocol
Motherboard Support Network Startup
4. Configure PXE Installation Server
1. Basic deployment process
Prepare the CentOS 7 installation source (YUM repository)
Enable TFTP services and provide a kernel, bootstrapper
Enable the DHCP service to assign addresses and indicate bootstrapper locations
Controlling the Startup Menu
2. TFTP services and boot files
Enable ttp service by installing ftp-server package
Prepare the kernel file vmlinuz, initialize the mirror initrd.img
Prepare bootstrapper file pxelinux.0
[root@localhost ~]# yum -y install tftp-sever
[root@localhost ~]# vi /etc/xinetd.d/tftp
                      server_ args = -s /var/lib/tftpboot
                              disable= no
[root@localhost ~]# systemtl start tftp
[root@localhost -1# systemctt enable tftp
[root@localhost ~]# cd /media/cdrom/images/pxeboot
[root@localhost pxeboofl# cp vmlinuz nitrd.img /var/lib/tftpboot
[root@localhost ~]# yum -y install syslinux
[root@localhost ~]# cp /usr/share/syslinux/pxelinux.0 /varli/ftpboot
3. PXE settings for DHCP services
[root@localhost ~]# yum -y install dhcp
[root@localhost ~]# vi /etc/dhcp/dhcpd.conf
subnet 192.168.100.0 netmask 255.255 255.0 {
......
option routers 192. 168.100.100;
option domain-name-servers 192.168.100.100
range 192.168.100.100 192.168.100.200;
next-server 192.168.100.100;
filename "pxelinux.0";
}
[root@localhost ~]# systemctl start dhcpd
[root@localhost ~]# systemct enable dhcpd
4. Default Startup Menu File
Create/var/lib/tftpboot/pxelinux.cfg/default
[roo@localhost ~]# mkdir /var/lib/tftpboot/pxelinux.cfg
[root@localhost -1# vi /var/lib/tftpboot/pxelinux.cfg/default
default auto
prompt 1
label auto
kemel vmlinuz
append initrd=initrd.img method=ftp://192.168.100.100/centos7
label linux text
kernel vmlinuz
append text initrd=initrd.img method=ftp://192..168.100.100/centos7
label linux rescue
kernel vmlinuz
append rescue initrd=initrd.img method=ftp://192.168.100.100/centos7
5. The experimental steps are as follows
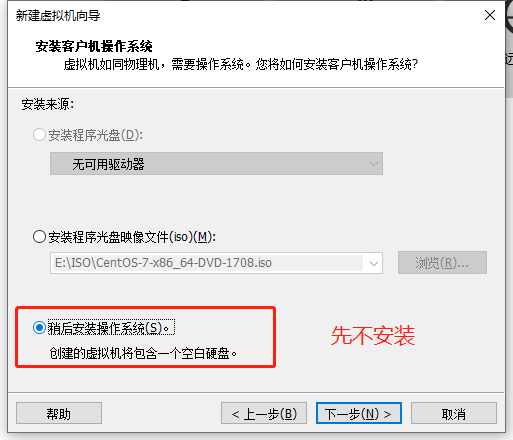
1. Experimental environment: a Linux server to install PXE services
A bare machine with no server installed
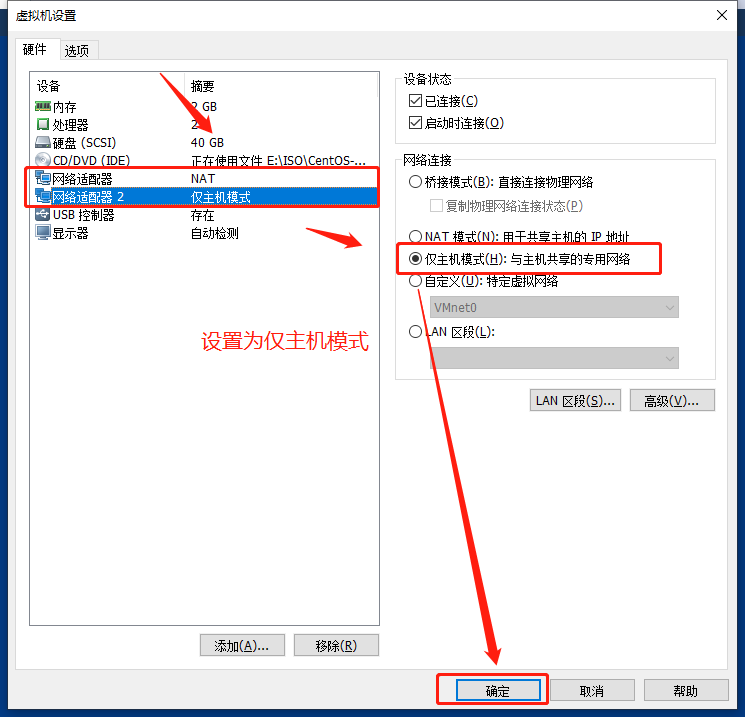
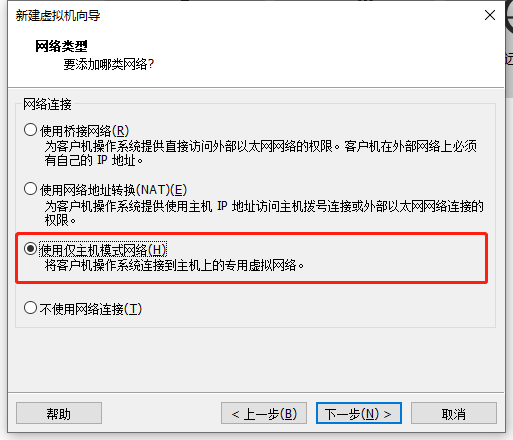
2. In order to make the NET services work properly, add a new network card to the server in host-only mode and configure static IP for DHCP address assignment
A. Add a network card, set to host-only mode,
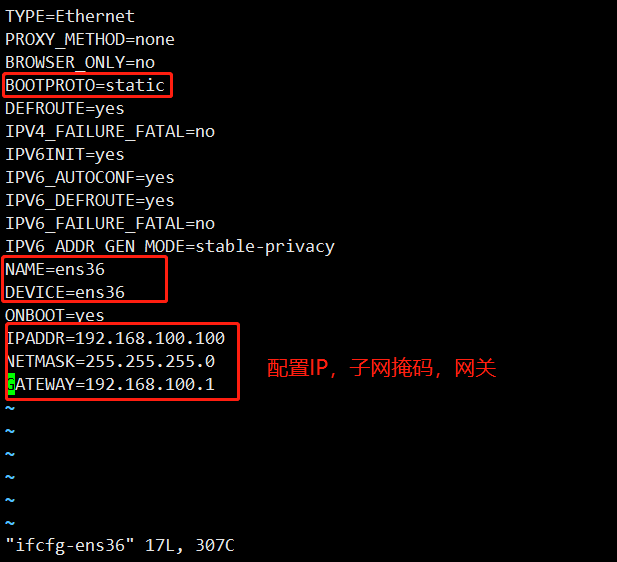
b. Configure new network card ifcfg-ens36
[root@localhost ~]#cd/etc/sysconf ig/network-scripts/
[root@loca lhost network scripts]#cp ifcfg-ens33 ifcfg-ens36 Copy the configuration file data of ifcfg-ens33 to ifcfg-ens36
[root@localhost network-scripts ]#Configure Network Card Data Information
[root@localhost network-scripts ]#systemctl restart network
[root@localhost network-scripts ]#View network card information
3. Install DHCP service, edit configuration file/etc/dhcp/dhcpd.conf
[root@localhost network-scripts]#yum install dhcp-y * install DHCP service
[root@localhost network scripts]#cp/usr/share/doc/dhcp-4.2.5/dhcpd.conf.example/etc/dhcp/dhcpd.conf Copy the profile template to the target profile
[root@localhost network scripts]#vim/etc/dhcp/ dhcpd. conf * Edit the target profile
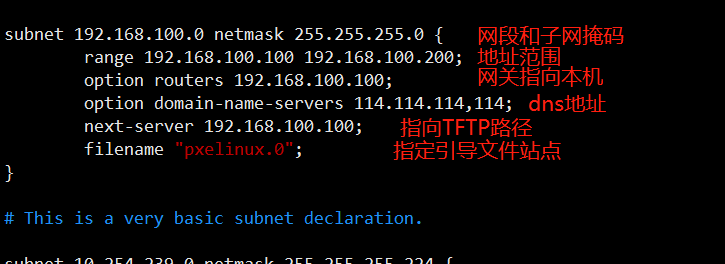
subnet 192. 168.100.0 netmask 255. 255.255.0 {
          range 192. 168.100.100 192.168.100.200;
          option routers 192.168.100.100;
          option domain-name-servers 114.114.114, 114;
          next-server 192.168. 100.100 ;
          filename" pxe linux.0" ;
}
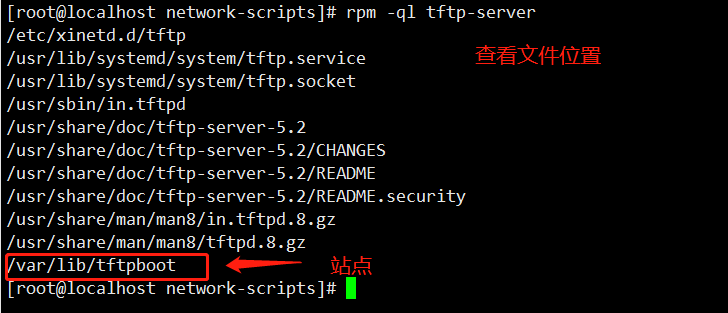
4. Install the bootstrapper file syslinux and view the location of the bootstrapper file pxelinux.0
[ root@localhost network-scripts]#yum install syslinux-y Install syslinux
[ root@localhost network - scripts]#rpm-ql syslinux | grep pxe linux View the path to the boot file

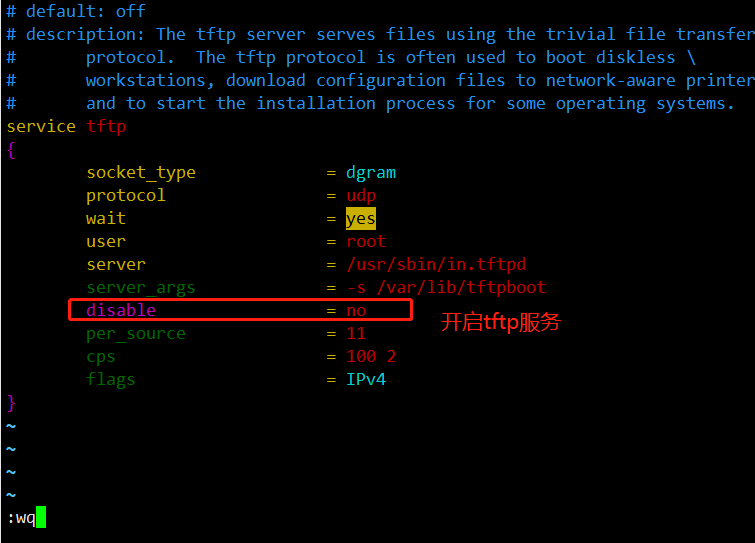
5. Install the TFTP service, open the configuration file, and put the bootstrapper on the site
a. Install the TFTP service and open the configuration file
[root@localhost network-scripts]#yum install tftp-server-y Install tftp-server
[root@localhost network-scripts]#rpm-ql tftp-server View file location
[root@localhost network-scripts]#vim/etc/xinetd.d/tftp Edit/etc/xinetd.d/tftp Open TFTP Service

b. Copy boot file pxelinux.0 to TFTP site in var/lib/tftpboot
[root@localhost network-scripts]#cp/usr/share/syslinux/pxelinux.0/var/lib/tftpboot/ Copy boot file to tftp site
[root@localhost network scripts]#cd/var/lib/tftpboot/ Switch to View in Site
[root@localhost tftpboot]#ls) Copy successful
pxel inux.0

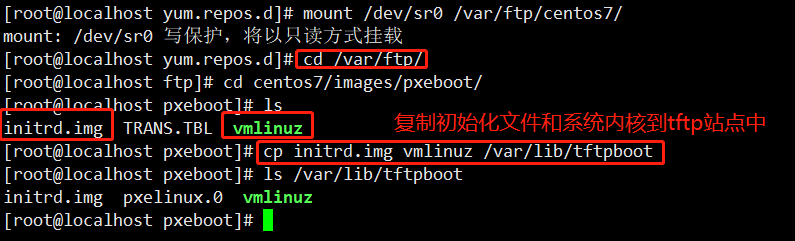
6. Install the vsftpd service, mount the mirror file into the new directory centos7, and copy the file compression kernel and initialization file into the TFTP site
[root@localhost tftpboot]#yum install vsftpd-y install vstfpd service
[root@localhost tftpboot]#Switch to vstfpd profile
[root@localhost ftp]#Create a new directory
[root@localhost ftp]#mount/dev/sr0 centos7/ mount the image file to a new directory
[root@localhost ftp]#cd centos7/images/pxeboot/ switch to centos7/images/pxeboot/
[root@localhost pxeboot]#cp initrd.img vmlinuz/var/lib/tftpboot/ Copy initialization files and compress cores to TFTP sites
[root@localhost pxeboot]# ls /var/lib/tftpboot/


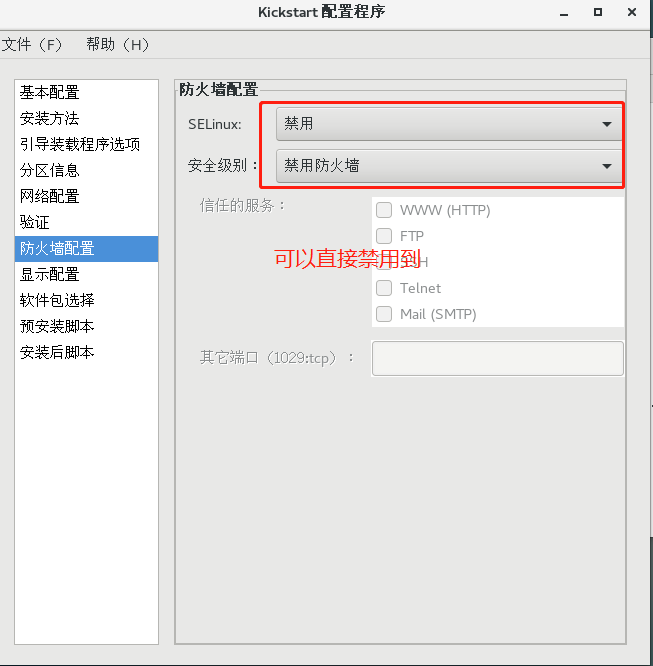
7. Edit the default configuration file of the startup menu, open three services, close firewalls, and turn off security enhancements
[root@localhost pxeboot]#cd/var/lib/tftpboot/ Switch to tftp site
[root@localhost tftpboot]#mkdir pxelinux.cfg Create profile directory
[root@localhost tftpboot]# ls
initrd.img  pxelinux.0  pxelinux.cfg  vmlinuz
[root@localhost tftpboot]#cd pxelinux.cfg/ Switch to configuration file
[root@localhost pxelinux.cfg]#vim default edit configuration file
[root@localhost pxelinux.cfg]#systemctl stop firewalld.service Close the firewall
[root@localhost pxelinux.cfg]#setenforce 0 Turn off security enhancements
[root@localhost pxelinux.cfg]#systemctl start dhcpd Start three services
[root@localhost pxelinux.cfg]# systemctl start tftp
[root@localhost pxelinux.cfg]# systemctl start vsftpd

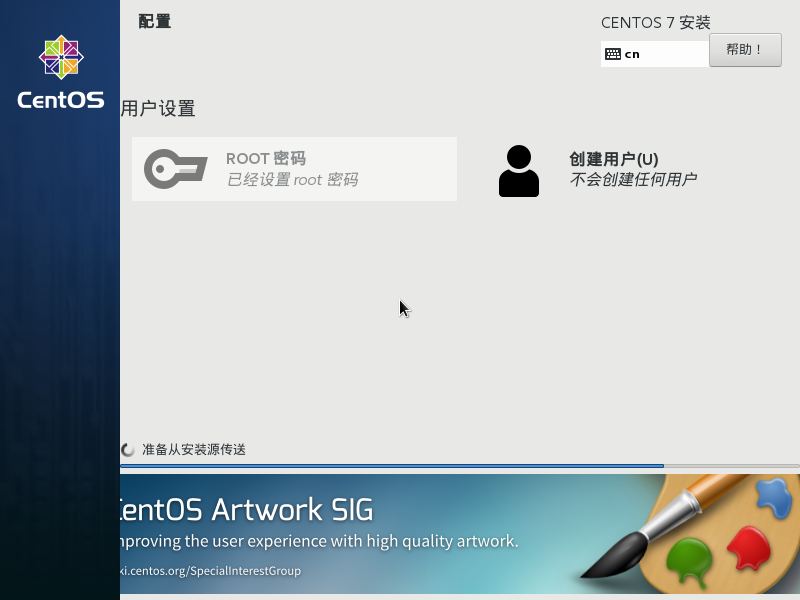
8. Create and turn on the logic of the uninstalled system, select the network installer, install the system, and test the results of the experiment
The pxe bulk loading service was successfully deployed!
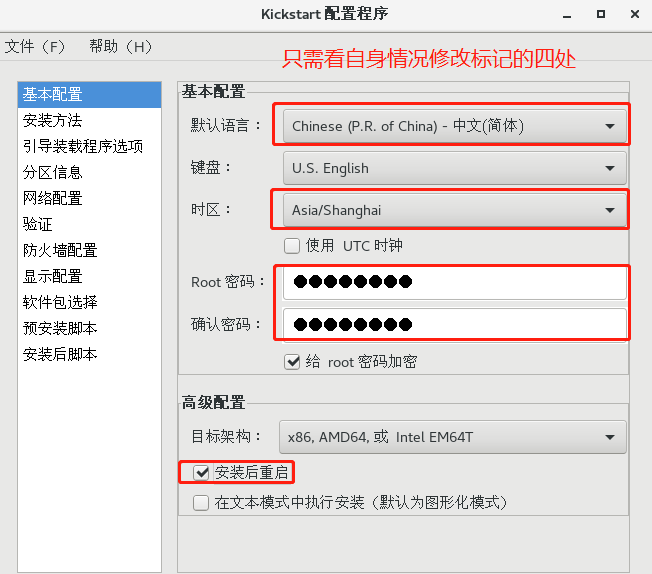
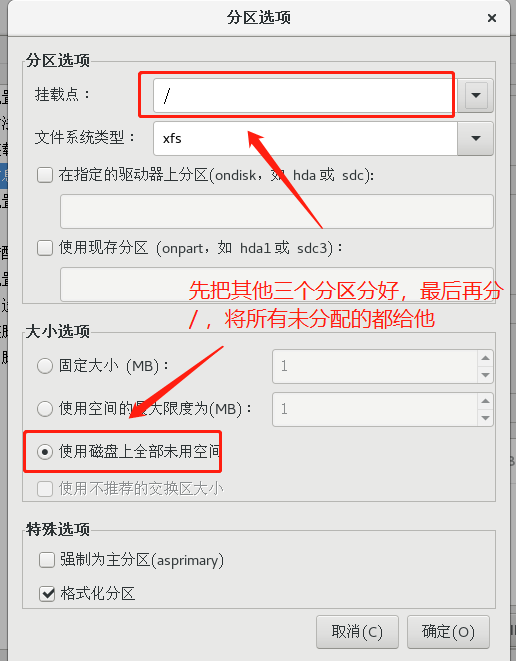
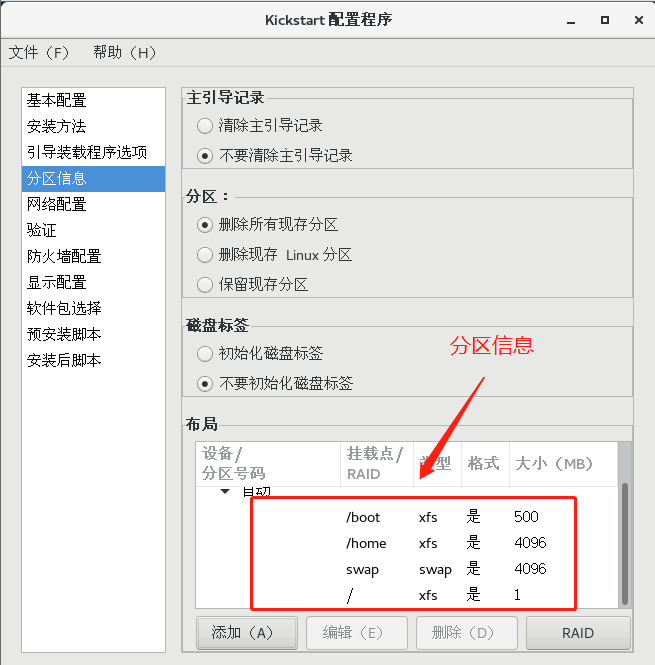
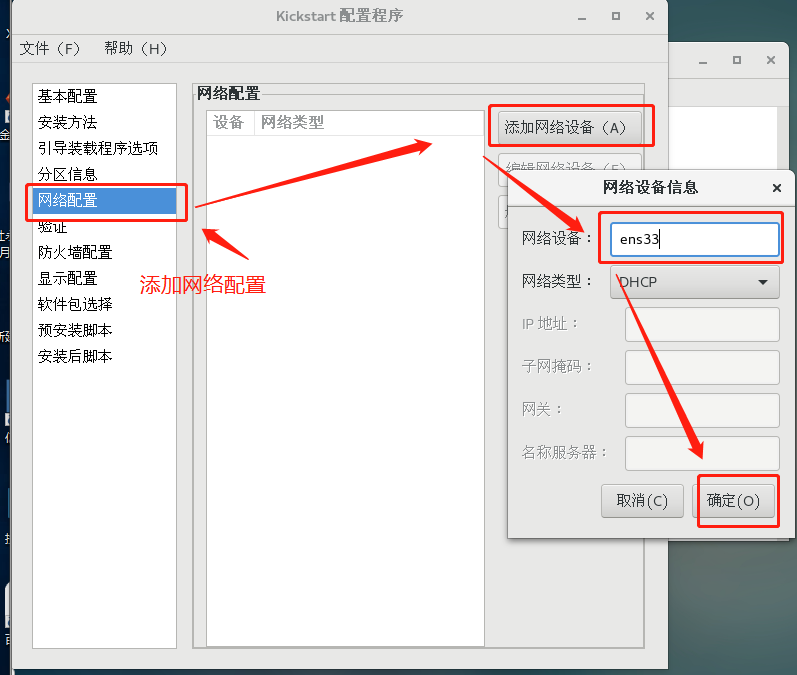
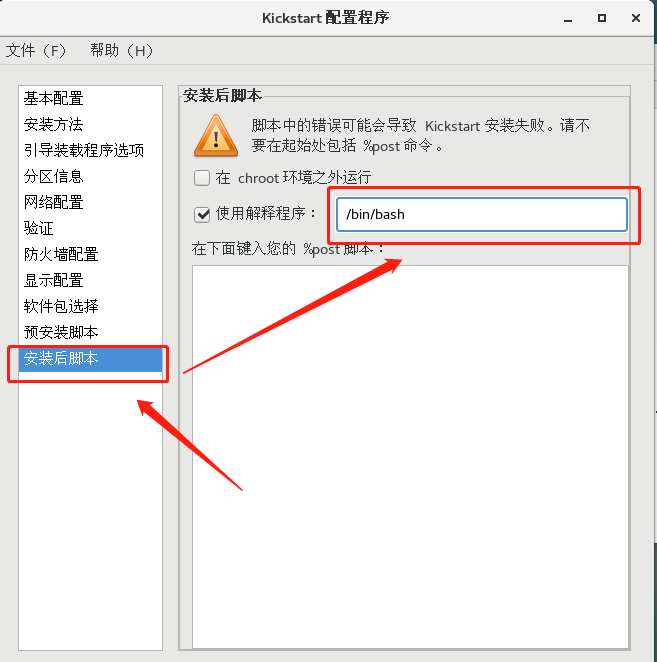
6. Unattended installation kickstart
1. kickstart unattended Technology
Create an answer file, predefine various installation settings
Reduce the interactive setup process to achieve full automated installation
Complete various post-installation configuration operations by adding the%post script
2. Source of Answer File
Edit the existing answer file in the CentOS 7 system
. /root/anaconda-ks.cfg
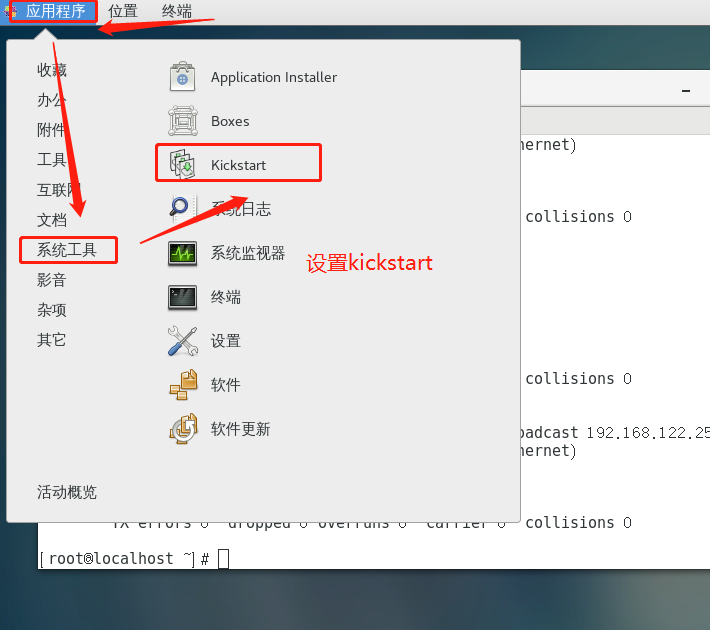
Create a new answer file using the system-config-kickstart tool
.system-config-kickstart package needs to be installed
3. Experimental steps
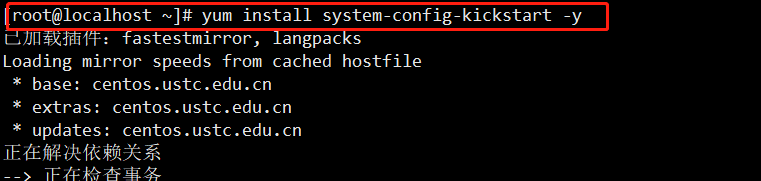
a. Install kickstart package and open Settings
[root@localhost ~]#yum install system-config-kickstart-y install kickstart package
b. Open the server for setup
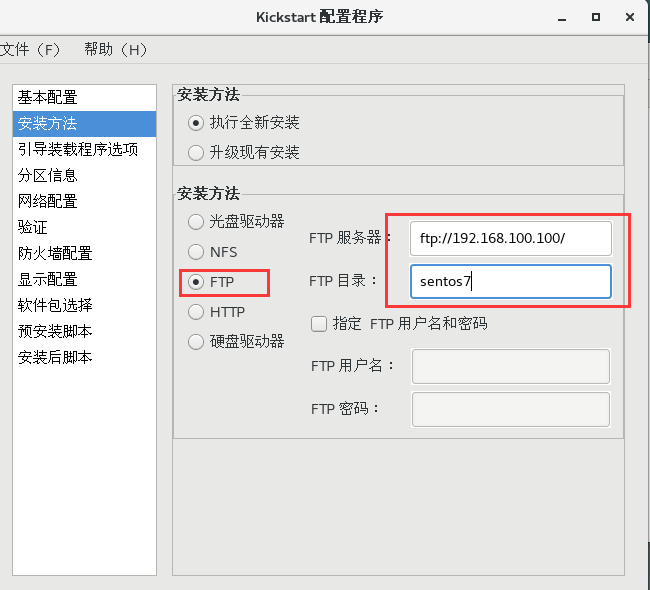

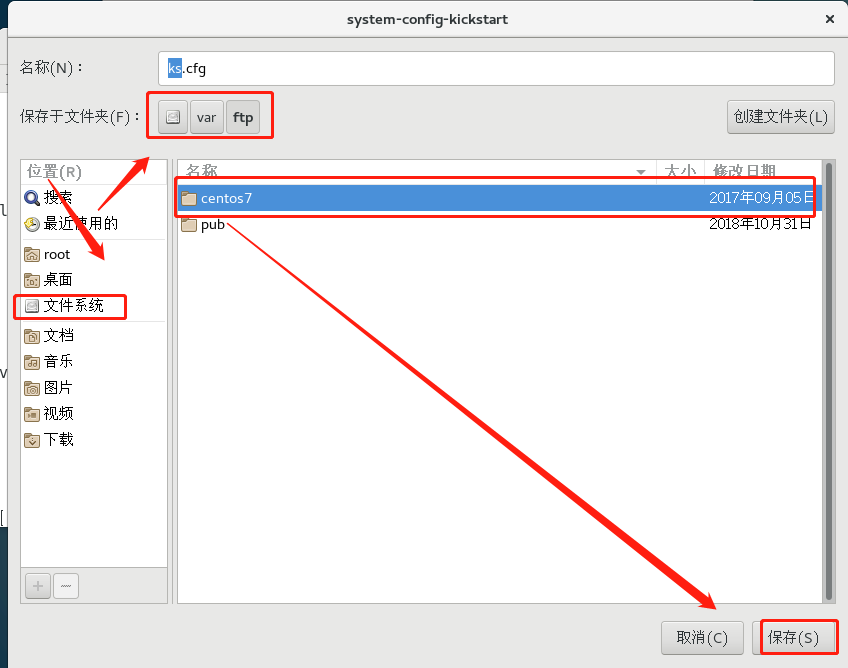
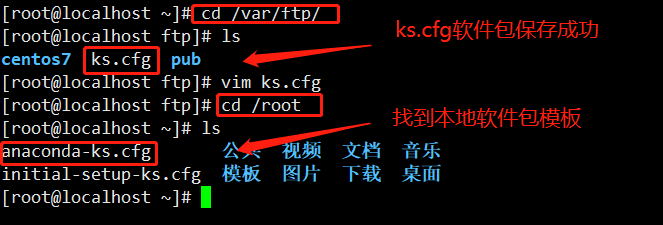
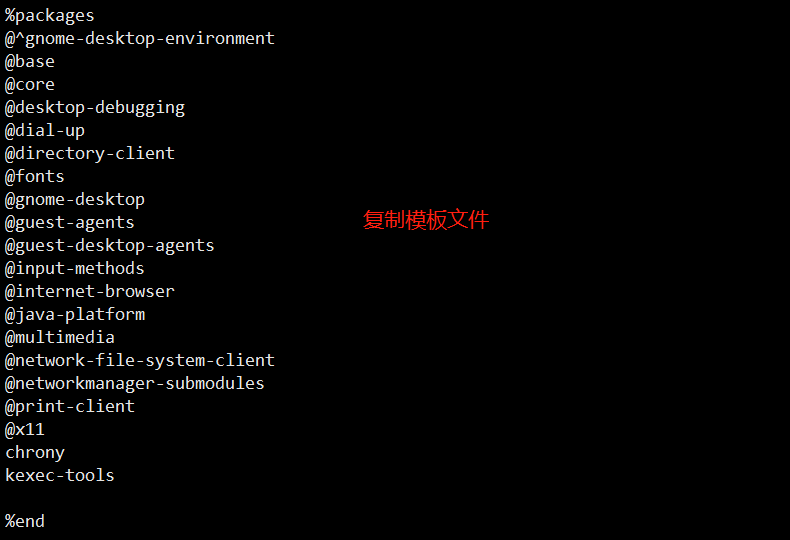
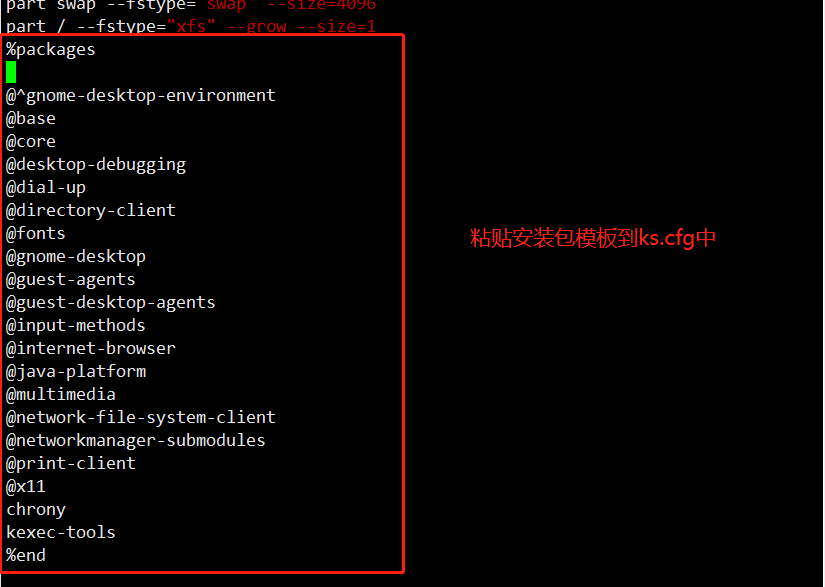
c. Copy the template for installing the package into ks.cfg and import the loading template into / var/lib/tftproot to make it work.View ks.conf and copy the packages package template from the local anaconda-ks.cfg to ks.cfg
[root@localhost ~]#cd/var/ftp/ Switch to/var/ftp to view the configuration file you just saved
[root@localhost ftp]# ls
centos7  ks.cfg  pub
[root@localhost pxelinux.cfg]#cd/root Switch to local/root
[root@localhost ~]# ls
anaconda-ks.cfg  initial-setup-ks.cfg  public  Template  video  picture  File  download  Music  desktop
[root@localhost ~]#vim anaconda-ks.cfg Copies the installation package module from anaconda-ks.cfg to ks.cfg under/var/ftp/
[root@localhost ~]#vim/var/ftp/ks.cfg Edit ks.cfg
d. Boot loading ks.cfg template into default profile under / var/lib/tftproot/pxelinux.cfg/
[root@localhost ftp]#Switch to default path cd/var/lib/tftpboot/pxelinux.cfg/
[root@localhost pxelinux.cfg]# ls
default
[root@localhost pxelinux.cfg]#vim default edit profile default


e. Turn on the bare machine without the system installed to see the experimental results
Installation successful, experiment successful