1. Download and install
This can be understood as an environment management tool, that is, running different projects requires different environments, that is, libraries, but some libraries will conflict with each other. It can create a virtual environment and give each project a separate virtual environment, which is more convenient to manage its own environment, especially when running in-depth learning.If you install it, just go to the official website directly. There is no card. The download speed is OK.

Official website link
https://www.anaconda.com/products/individual#macos
- It's just an exe installation. There seems to be nothing special to pay attention to. It seems that there is the step of adding environment variables. Feel free to add them later
After installing the computer, there will be one under anaconda, which is mainly used. It seems that there is also a graphical tool, which is not easy to use. It is mainly this, which is closer to linux

Check the following version. Double click to open the command line. Generally, his commands start with conda. Enter:
conda --version

Updated version
conda update conda
2. Basic use
Sometimes you need to download several g packages when you are equipped with an in-depth learning environment. A very large download is easy to fail. At this time, it's best to change the source and refer to the blogger's source changing tutorial
https://blog.csdn.net/Kudou_Shin1chi/article/details/106083386?utm_medium=distribute.pc_relevant.none-task-blog-baidujs_title-0&spm=1001.2101.3001.4242
The source used is added as follows:
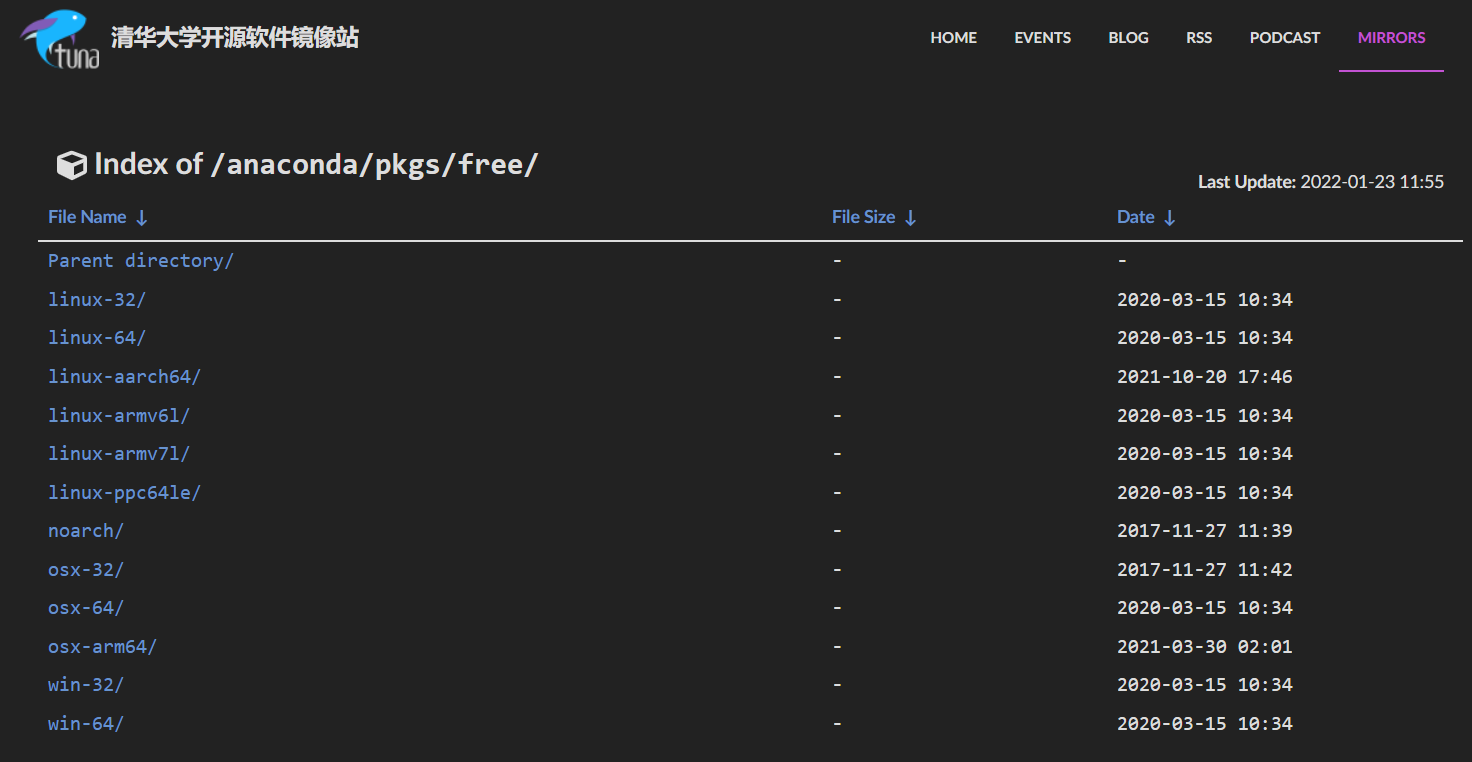
# Tsinghua anaconda image
conda config --add channels https://mirrors.tuna.tsinghua.edu.cn/anaconda/pkgs/free/
conda config --add channels https://mirrors.tuna.tsinghua.edu.cn/anaconda/pkgs/main/
# conda additional libraries are provided by third parties and are not official. It is recommended to use stable official libraries without special needs.
conda config --add channels https://mirrors.tuna.tsinghua.edu.cn/anaconda/cloud/pytorch/
# When installing PyTorch, you need to remove the last - c pytorch from the installation command given on the official website before using Tsinghua source
conda config --add channels https://mirrors.tuna.tsinghua.edu.cn/anaconda/cloud/conda-forge/
conda config --add channels https://mirrors.tuna.tsinghua.edu.cn/anaconda/cloud/msys2/
conda config --add channels https://mirrors.tuna.tsinghua.edu.cn/anaconda/cloud/bioconda/
conda config --add channels https://mirrors.tuna.tsinghua.edu.cn/anaconda/cloud/menpo/
# Set the channel address to be displayed when searching
conda config --set show_channel_urls yes
When you open it, you can see the mirror station of Tsinghua University
Acceleration for a single download only:
When using pip, add parameters to the last side
-i https://pypi.tuna.tsinghua.edu.cn/simple
for example
pip install pandas -i https://pypi.tuna.tsinghua.edu.cn/simple
3. Viewing and creating environments
Create an environment
conda create --name lx2035 python=3.7
It's best to specify the python version here, and then enter the page
[external chain picture transfer failed. The source station may have anti-theft chain mechanism. It is recommended to save the picture and upload it directly (img-0wt6l2fk-1642917431208)( https://i.bmp.ovh/imgs/2022/01/d0fea9ee953a431a.png )]
Take a look at the environment we created:
conda env list
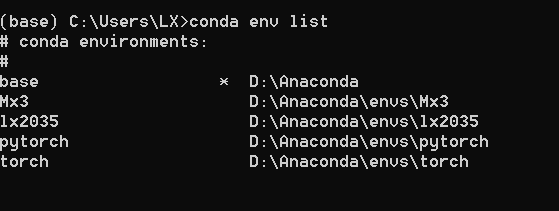
Don't enter it wrong here. If it is recorded as conda list, it is to output the package installed in the current environment
Enter the environment
conda activate lx2035

Exit environment
conda deactivate
[external chain picture transfer failed. The source station may have anti-theft chain mechanism. It is recommended to save the picture and upload it directly (img-4qyvpzrm-1642917431210)( https://i.bmp.ovh/imgs/2022/01/bdccf9a7ea07d327.png )]
Note that you should not add any parameters to exit here. Just exit directly
If this environment is only temporary and runs out of memory, it is suspected that it takes up memory and wants to delete it
conda remove --name lx2035 --all
If you delete them all, you will be prompted to select yes
4. Package management
Download package
conda install pandas
The installation is OK. Of course, his dependencies will be automatically installed when he installs. Don't care
The other is to use pip. Because pip is conda's package management tool, you can certainly use pip to install it. For example, here I install a crawler toolkit
pip install oss2
Generally, you can use the conda command to install it first. If you can't use pip, you can directly download it locally. Sometimes the installation fails, which is likely to be a conflict between packages. At this time, copy the error information and check the data
When uninstalling a package, the package version does not match. You need to reinstall a matching package
conda remove pandas
Update package
conda update --all
5. pycharm usage
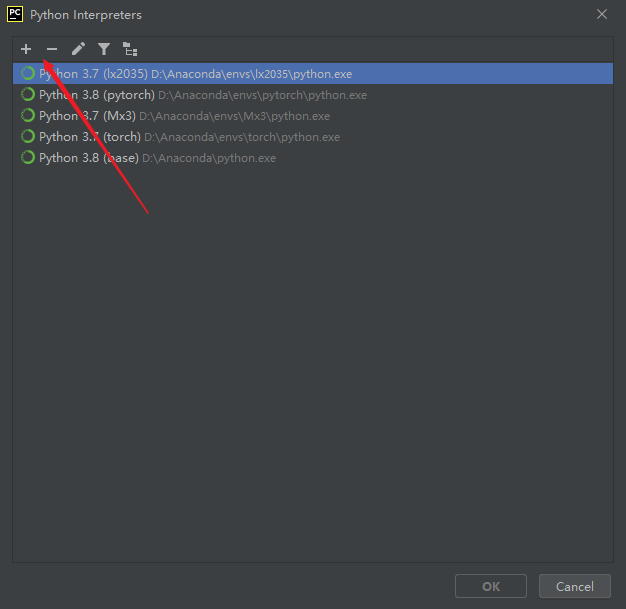
Enter the setting page of pycharm, select interpreter and show all

Click Add. If it has been added, you do not need to add it
Select conda, and then select the existing environment
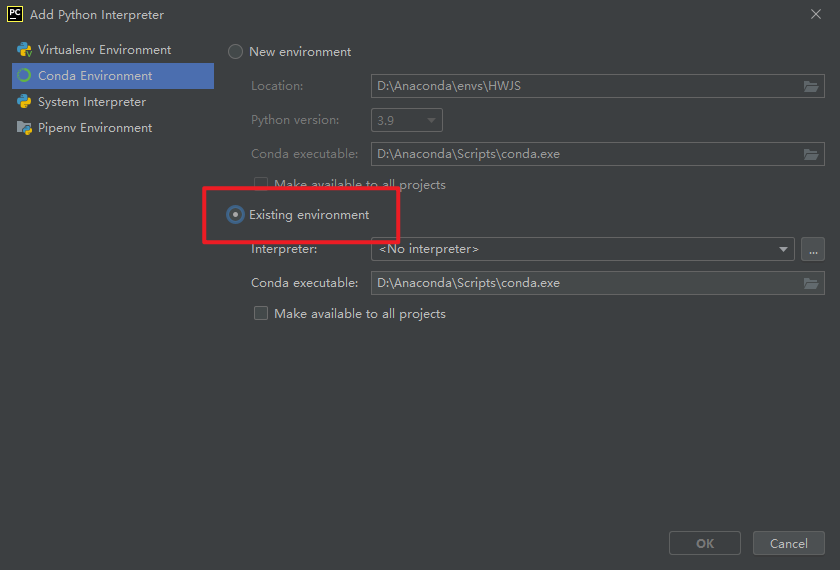
Select the path in the interpreter column, that is, python under the environment name folder under the env folder exe
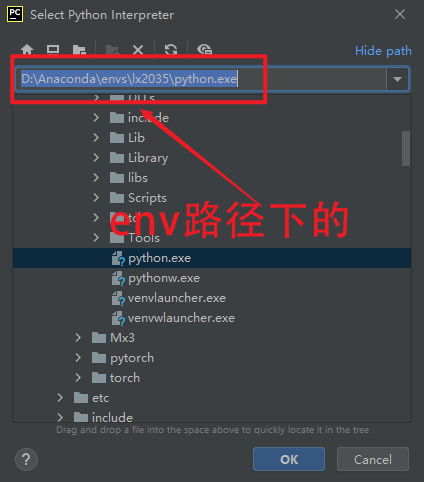
After that, the application will be OK!