In this article, we will complete a home page.
Register APP
When a Django project is large enough, we can divide the project into several apps and develop them separately. If the project is XX University, then APP is XX college.
-Python learning network
Open CMD and create an article management APP:
PYTHON manage.py startapp article
Open hzhbbs \ settings Py, register APP:
...

INSTALLED_APPS = [
    ...
    'article',  # New code for registering article s
]

...
url configuration
Hzbs directory configuration
The article has been created, and then the url configuration.
Empty hzhbbs \ URLs Py, overwrite with the following code:
HZHBBS\urls.py

from django.urls import path, include
from django.contrib import admin

urlpatterns = [
    path('admin/', admin.site.urls),
    path('', include('article.urls', namespace='article')),
]
- urlpatterns - stores a list of URLs.
- include('article.urls', namespace = 'article') - contains the url of the article and sets the namespace to article.
article directory configuration
New article / URLs Py, enter:
article/urls.py

from django.urls import path

app_name = 'article'  # Must be written as the name of the app

urlpatterns = [

]
Template directory configuration
When the user sends a request, the view will return a response, which can be a redirect, a 404 error, an XML document, a picture or a web page with HTML content. The information returned by the previous few is relatively limited. We focus more on the web pages with HTML content. We write such pages according to the specifications, and then put them in the templates folder under the project root directory. Such pages are called "template" pages.
-Django Chinese website
Modify hzhbbs \ settings py:
HZHBBS\settings.py

...

from pathlib import Path

import os

...
TEMPLATES = [
    {
        'BACKEND': 'django.template.backends.django.DjangoTemplates',
        'DIRS': [os.path.join(BASE_DIR, 'templates')],  # Modify this line
        'APP_DIRS': True,
        'OPTIONS': {
            'context_processors': [
                ...
            ],
        },
    },
]

...
Model
- Usually, a model corresponds to a table in the database.
- In Django, the model appears as a Class.
- The model contains some fields and some behaviors of data.
- You only need to operate in the class to operate the database and tables without using database statements directly.
- We create data tables by creating classes, so the operation on the database is to operate on classes and objects of classes without using database statements.
-CSDN
Open Article / models Py, create an Article model:
article/models.py

from django.contrib.auth.models import User
from django.utils import timezone
from django.db import models

class Article(models.Model):
	title = models.CharField(max_length=80)  # Article title, the maximum number of words is 80
	description = models.CharField(max_length=150)  # Article introduction
	content = models.TextField()  # Article body
	author = models.ForeignKey(User, on_delete=models.CASACDE)  # Article author: one user corresponds to multiple articles. If the user deletes, the article will be deleted
	looks = models.PositiveIntegerField(default=0)  # Viewing volume, the default is 0
	created = models.DateTimeField(default=timezone.now) # Creation time
	updated = models.DateTimeField(auto_now=True)  # Update time

	def __str__(self):
		return self.title  # Set the display information as the article title
Update database
After updating models Py, update the database, and Django will detect your changes to the model.
Open CMD and enter the following two commands:
PYTHON manage.py makemigrations
PYTHON manage.py migrate
view
A view function, called view for short, is a simple Python function that accepts a web request and returns a Web response.
The response can be an HTML page, a 404 error page, a redirect page, an XML document, or a picture
No matter what logic the view itself contains, a response is returned. The code can be written anywhere. As long as it is under the Python directory, it is generally placed in the views of the project Py file.
-Runoob
Open article / views Py, enter the following code:
article/views.py

from django.shortcuts import render

from .models import Article

def index(request):
	articles = Article.objects.all().order_by('-created')  # Get all articles and sort them upside down by creation time

	context = {'articles': articles}
	return render(request, 'article/index.html', context)  # Use article / index HTML template and pass articles into the template
Template
Create a new file / folder based on the following directory:
.
│  manage.py
│
│  ...
│
└─templates
    └─article
            index.html
Edit templates / article / index html:
templates/article/index.html

{% for article in articles %}
	<h3>{{ article.title }}</h3>
{% endfor %}
- {% for...%} - for loop syntax of Django template.
- {{article.title}} - get article title.
- {% endfor%} - used to mark the end of a for loop.
Exciting moment
It's time to run the project! First configure the following url:
article\urls.py

...

from . import views

...

urlpatterns = [
	path('', views.index, name='index'),
]
Run project!
Open CMD and enter the code to run the project:
PYTHON manage.py runserver
If the following words appear, it will be successful:
Watching for file changes with StatReloader
Performing system checks...

System check identified no issues (0 silenced).
December 11, 2021 - 20:38:48
Django version 4.0, using settings 'HZHBBS.settings'
Starting development server at http://127.0.0.1:8000/
Quit the server with CTRL-BREAK.
Open the browser and enter in the address bar http://127.0.0.1:8000/ (web address on the penultimate line).
Why is the page blank? We haven't written an article yet!
admin background configuration
Open article \ admin Py, enter:
article\admin.py

from django.contrib import admin

from . import models

admin.site.register(models.Article)  # Register the article model with admin
Open CMD and create a superuser:
PYTHON manage.py createsuperuser
Follow the prompts and the user will be created successfully!
Continue running the project and visit http://127.0.0.1:8000/admin/ , log in, select Articles, click add ARTICLE in the upper right corner, and fill in the form.
Fill in a few more pieces of data for testing.
George wrote TEST #1, TEST #2 and TEST #3.
Run again
After running, the title of the article should be on the browser.
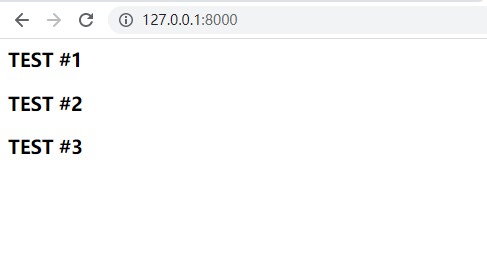
succeed! But the interface is too ugly. The next article will beautify the page.
summary
In this article, we made the home page.
If you have any questions, please Email me: h18989847468@163.com