Using Python to automate email delivery can save you a lot of time by freeing you from tedious, repetitive business.
Python has two built-in libraries: smtplib and email, which enable mail, smtplib which sends mail, and email which constructs the format and content of mail.
Mail delivery is subject to the SMTP protocol. Python has built-in support for SMTP and can send plain text, HTML, and attachments.
1. Import related libraries and methods first
import smtplib
import email
# Responsible for constructing text
from email.mime.text import MIMEText
# Responsible for constructing pictures
from email.mime.image import MIMEImage
# Responsible for collecting multiple objects
from email.mime.multipart import MIMEMultipart
from email.header import Header
2. Set up mailbox domain name, sender mailbox, mailbox authorization number, recipient mailbox
# SMTP server, using 163 mailbox here
mail_host = "smtp.163.com"
# Sender Mailbox
mail_sender = "******@163.com"
# Mailbox Authorization Code. Note that this is not a mailbox password. See the last tutorial on how to get a mailbox authorization code
mail_license = "********"
# Recipient mailbox, which can be multiple recipients
mail_receivers = ["******@qq.com","******@outlook.com"]
3. Build a MIMEMultipart object to represent the mail itself, which can add text, pictures, attachments, etc.
mm = MIMEMultipart('related')4. Set up header content
# Mail Subject
subject_content = """Python Mail Test"""
# Set sender, pay attention to strict format, inside mailbox is sender mailbox
mm["From"] = "sender_name<******@163.com>"
# Set up recipients, pay attention to strict format, inside mailbox is recipient mailbox
mm["To"] = "receiver_1_name<******@qq.com>,receiver_2_name<******@outlook.com>"
# Set Mail Subject
mm["Subject"] = Header(subject_content,'utf-8')
5. Add body text
# Mail body content
body_content = """Hello, this is a test message!"""
# Construct text, parameter 1: body content, parameter 2: text format, parameter 3: encoding
message_text = MIMEText(body_content,"plain","utf-8")
# Add a text object to the MIMEMultipart object
mm.attach(message_text)
6. Add Pictures
# Binary Read Picture
image_data = open('a.jpg','rb')
# Set Read Get Binary Data
message_image = MIMEImage(image_data.read())
# Close the file you just opened
image_data.close()
# Add picture files to your email message
mm.attach(message_image)
7. Add Attachments (excel table)
# Construction accessories
atta = MIMEText(open('sample.xlsx', 'rb').read(), 'base64', 'utf-8')
# Set attachment information
atta["Content-Disposition"] = 'attachment; filename="sample.xlsx"'
# Add attachments to your email message
mm.attach(atta)
8. Send Mail
# Create SMTP Object
stp = smtplib.SMTP()
# Set the domain name and port of the sender's mailbox with a port address of 25
stp.connect(mail_host, 25)
# set_debuglevel(1) prints out all the information that the SMTP server interacts with
stp.set_debuglevel(1)
# Log in to the mailbox, pass parameter 1: mailbox address, parameter 2: mailbox authorization number
stp.login(mail_sender,mail_license)
# Send mail, pass parameter 1: Sender mailbox address, parameter 2: Recipient mailbox address, parameter 3: Change message content format to str
stp.sendmail(mail_sender, mail_receivers, mm.as_string())
print("Mail sent successfully")
# Close SMTP Object
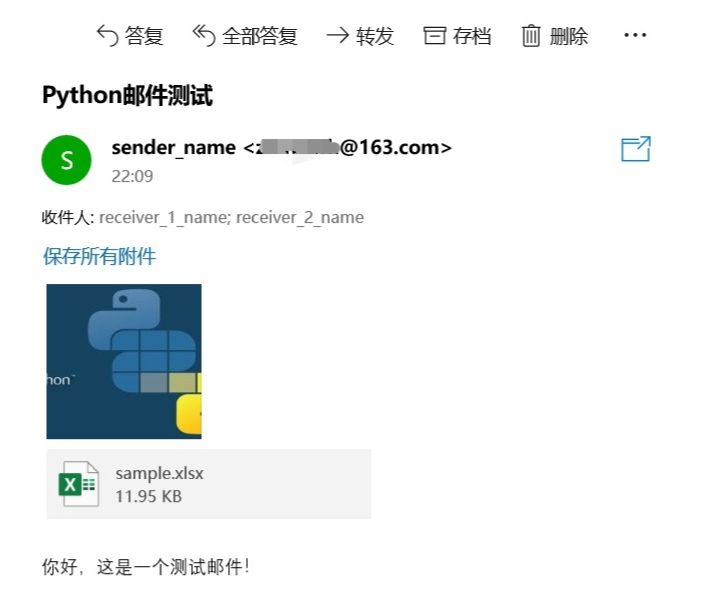
stp.quit()Result
See how mail from python looks in your mailbox:
Attachment: How to set mailbox authorization number
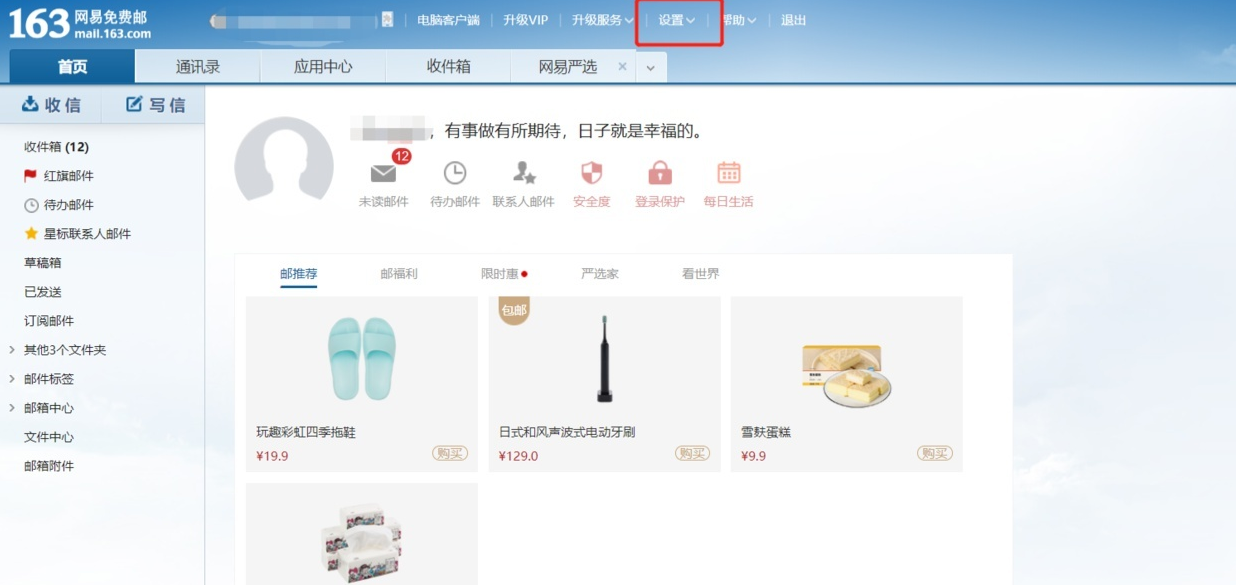
For this test, the outgoing mailbox is 163. You can obtain the mailbox authorization number as follows
Step 1: Log in to webpage 163 mailbox, find the settings and open
Step 2: Click on the Client Authorization Password in Settings
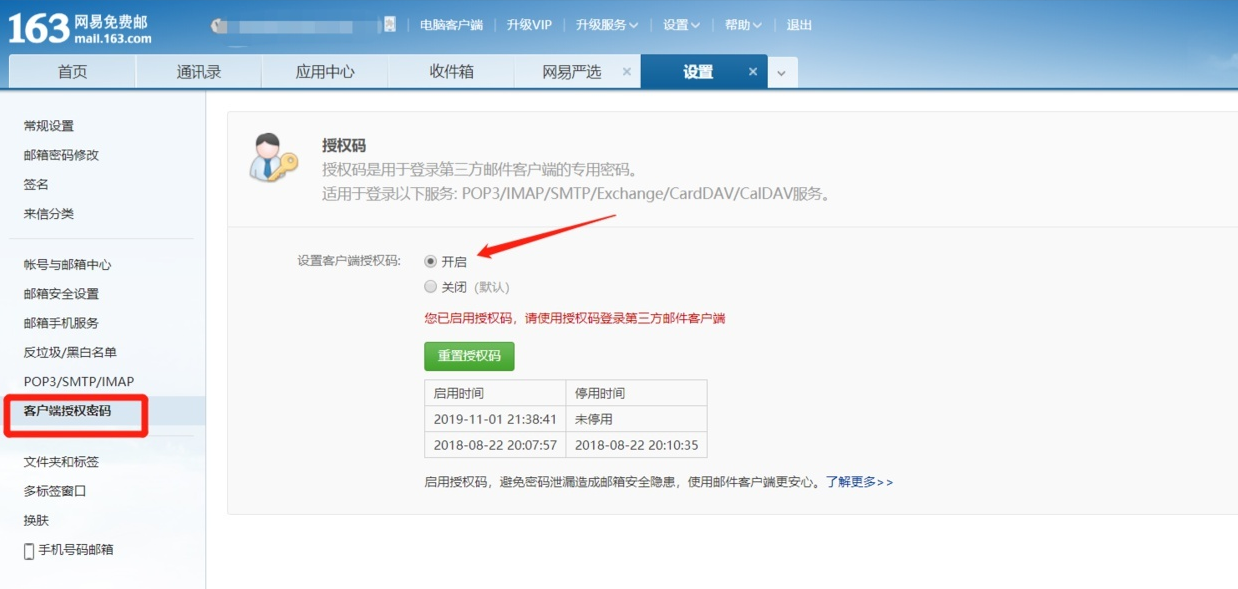
Step 3: Click on Open and set your authorization password as prompted


