📢📢📢📣📣📣
🌻🌻🌻 Hello, everyone. My name is Dream. I'm an interesting Python blogger. I have a small white one. Please take care of it 😜😜😜
🏅🏅🏅 CSDN is a new star creator in Python field. I'm a sophomore. Welcome to cooperate with me
💕 Introduction note: this paradise is never short of genius, and hard work is your final admission ticket! 🚀🚀🚀
💓 Finally, may we all shine where we can't see and make progress together 🍺🍺🍺
🍉🍉🍉 "Ten thousand times sad, there will still be Dream, I have been waiting for you in the warmest place", singing is me! Ha ha ha~ 🌈🌈🌈
🌟🌟🌟✨✨✨
preface:
After learning Python OpenCV for so long, let's see something interesting ❤️❤️❤️
1, Change color space
1. Get color conversion type
There are more than 150 color space conversion methods in OpenCV. But we will study only the two most widely used, BGR ↔ Grey and BGR ↔ HSV.
For color conversion, we use the cv function. cvtColor(input_image, flag), where flag determines the type of conversion.
For BGR → grayscale conversion, we use the flag cv.COLOR_BGR2GRAY. Similarly, for BGR → HSV, we use the flag cv.COLOR_BGR2HSV. To get other tags, simply run the following command in the Python terminal:
import cv2 as cv
flags = [i for i in dir(cv) if i.startswith('COLOR_')]
print(flags)
###1.1 dir(cv) function
dir syntax:
dir([object])
Parameter Description: object – object, variable and type.
Return value: returns the attribute list of the module.
That is, all attribute lists of the cv module are returned

1.2 startswitch() function
The startswitch () function is a string function of Python. startswitch() is used to detect whether the string starts with the specified string. Returns True if yes, False otherwise
Syntax and parameters:
str.startswith(str2)
str string to be detected
str2 detects whether the str2 string is a parameter that cannot be omitted at the beginning of the str string
For example:
>>> pro.startswith("Chi")
True
>>> pro.startswith("hi")
False

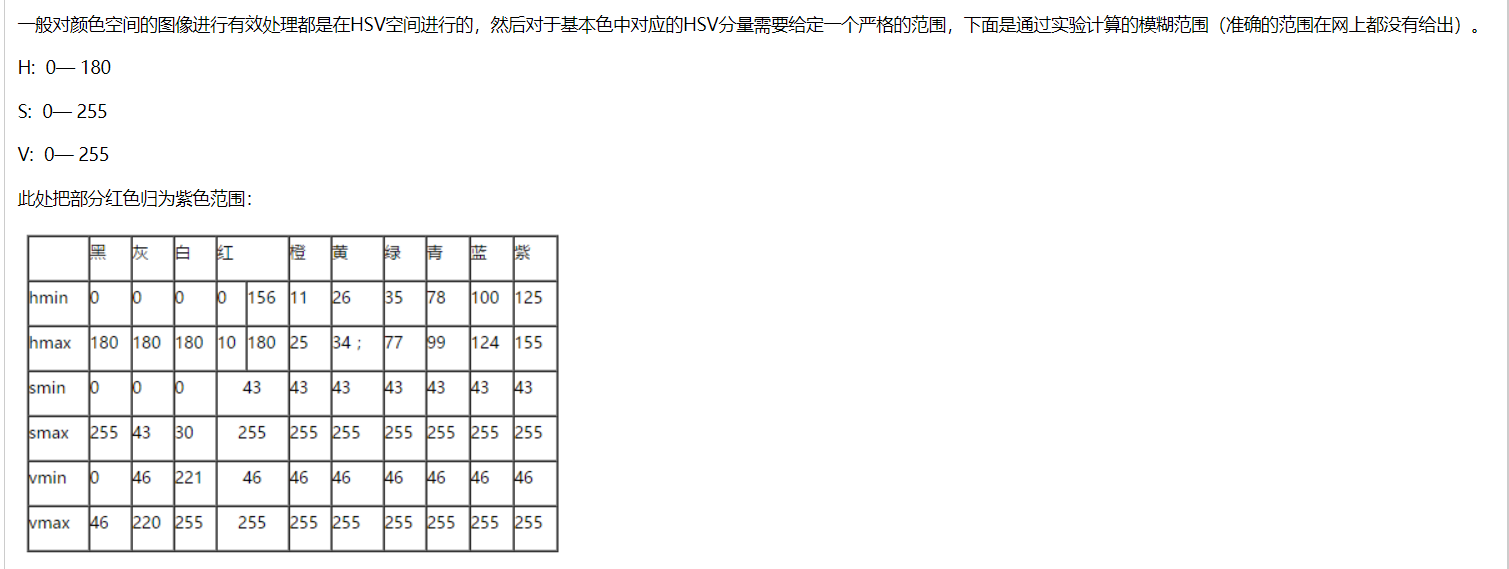
- Note: the hue range of HSV is [0179], the saturation range is [0255], and the value range is [0255]. Different software uses different scales. Therefore, if you want to compare OpenCV values with them, you need to standardize these ranges.
2. Object tracking
Now that we know how to convert BGR image into HSV, we can use it to extract a colored object. It is easier to represent colors in HSV than in BGR color space. In our application, we will try to extract a blue object. The methods are as follows: - take each frame of the video - convert from BGR to HSV color space - we set the threshold of the blue range for the HSV image - now extract the blue object separately, and we can do anything we want to do with the image.

blue
lower_blue = np.array([110,50,50])
upper_blue = np.array([130,255,255])
Or blue
low_blue = np.array([94, 80, 2])
high_blue = np.array([126, 255, 255])
gules
low_red = np.array([161, 155, 84])
high_red = np.array([179, 255, 255])
green
low_green = np.array([25, 52, 72])
high_green = np.array([102, 255, 255])
Colors other than white
low = np.array([0, 42, 0])
high = np.array([179, 255, 255])

2.1 take only the blue area:
import cv2 as cv
import numpy as np
cap = cv.VideoCapture(0)
while(1):
    # Read frame
    ret, frame = cap.read()
    # Convert color space BGR to HSV
    hsv = cv.cvtColor(frame, cv.COLOR_BGR2HSV)
    # Define the blue range in the HSV
    lower_blue = np.array([110,50,50])
    upper_blue = np.array([130,255,255])
    # Set the HSV threshold so that only blue is taken
    mask = cv.inRange(hsv, lower_blue, upper_blue)
    mask_inv = cv.bitwise_not(mask)

    # Add the mask and image pixel by pixel
    res = cv.bitwise_and(frame,frame, mask= mask)
    cv.imshow('frame',frame)
    cv.imshow('mask',mask)
    cv.imshow('res',res)
    k = cv.waitKey(5) & 0xFF
    if k == 27:
        break
cv.destroyAllWindows()

2.2 do not take the blue area:
import cv2 as cv
import numpy as np
cap = cv.VideoCapture(0)
while(1):
    # Read frame
    ret, frame = cap.read()
    # Convert color space BGR to HSV
    hsv = cv.cvtColor(frame, cv.COLOR_BGR2HSV)
    # Define the blue range in the HSV
    lower_blue = np.array([110,50,50])
    upper_blue = np.array([130,255,255])
    # Set the HSV threshold so that only blue is taken
    mask = cv.inRange(hsv, lower_blue, upper_blue)
    mask_inv = cv.bitwise_not(mask)

    # Add the mask and image pixel by pixel
    res = cv.bitwise_and(frame,frame, mask= mask_inv)
    cv.imshow('frame',frame)
    cv.imshow('mask',mask)
    cv.imshow('res',res)
    k = cv.waitKey(5) & 0xFF
    if k == 27:
        break
cv.destroyAllWindows()

2, Geometric transformation of image
1. Image rotation transformation
import numpy as np
import cv2 as cv
import matplotlib.pyplot as plt
img = cv.imread('haojin.jpg',0)
rows,cols = img.shape
print(rows,cols)
# cols-1 and rows-1 are coordinate constraints
M = cv.getRotationMatrix2D(((cols-1)/2.0,(rows-1)/2.0),-60,1)
dst = cv.warpAffine(img,M,(cols,rows))
plt.subplot(122),plt.imshow(dst),plt.title('Output')
plt.show()
1.1 image translation cv.warpAffine() function usage:
Radiation transformation function, which can realize rotation, translation and scaling; The transformed parallel lines are still parallel
dst = cv.warpAffine(img,M,(cols,rows)), img is the image to be transformed, M is the position to be translated, and (cols,rows) is the image size after translation.
1.2 cv2.getRotationMatrix2D() to realize image rotation
M=cv2.getRotationMatrix2D(center, angle, scale):
- Center: the rotation center of the picture
- Angle: rotation angle
- Scale: the scale of the rotated image compared to the original
- M: Calculated rotation matrix
Effect display:

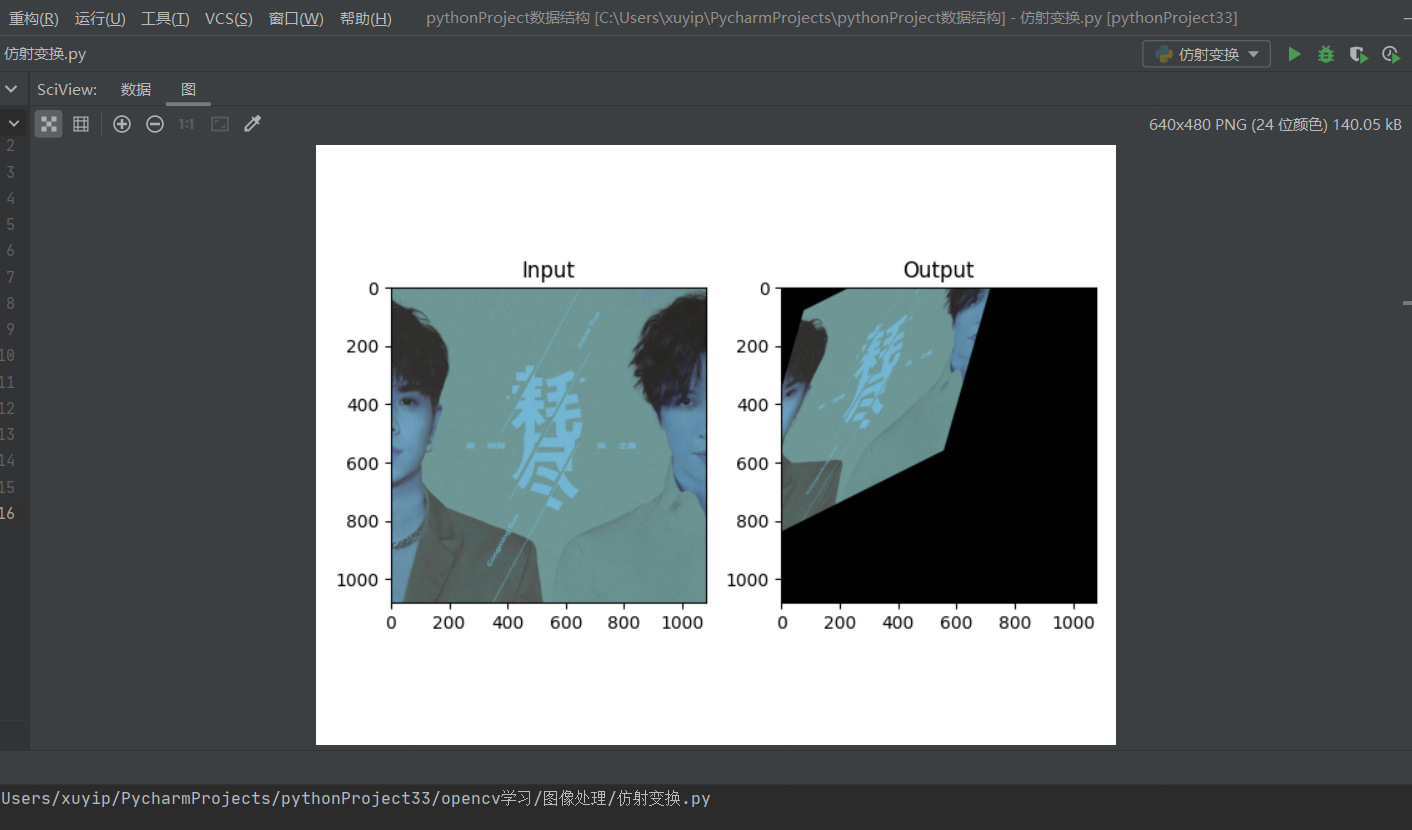
2. Affine transformation of image
The rotation and lifting of the image is the image affine transformation, and the affine transformation also needs an M matrix. However, due to the complexity of the affine transformation, it is difficult to find this matrix directly. OpenCV provides the dynamic solution of m according to the corresponding relationship of the three points before and after the transformation. This function is
M=cv2.getAffineTransform(pos1,pos2), where the two positions are the corresponding position relationship before and after the transformation. The output is affine matrix M. Then use the function cv2.warpAffine().
import cv2 as cv
import numpy as np
import matplotlib.pyplot as plt
img = cv.imread('haojin.jpg')
rows,cols,ch = img.shape  # Number of rows, columns and channels
print(rows,cols,ch)
pts1 = np.float32([[50,50],[200,50],[100,200]])
pts2 = np.float32([[100,100],[200,50],[100,200]])
M = cv.getAffineTransform(pts1,pts2)  # pts1 original image, three points, pts2 target image, three points
dst = cv.warpAffine(img,M,(cols,rows))
plt.subplot(121),plt.imshow(img),plt.title('Input')
plt.subplot(122),plt.imshow(dst),plt.title('Output')
plt.show()
2.1 function analysis
rows,cols,ch = img.shape rows, columns, channels
M = cv.getAffineTransform(pts1,pts2) pts1: original image, three points; pts2: target image, three points.
Effect display:

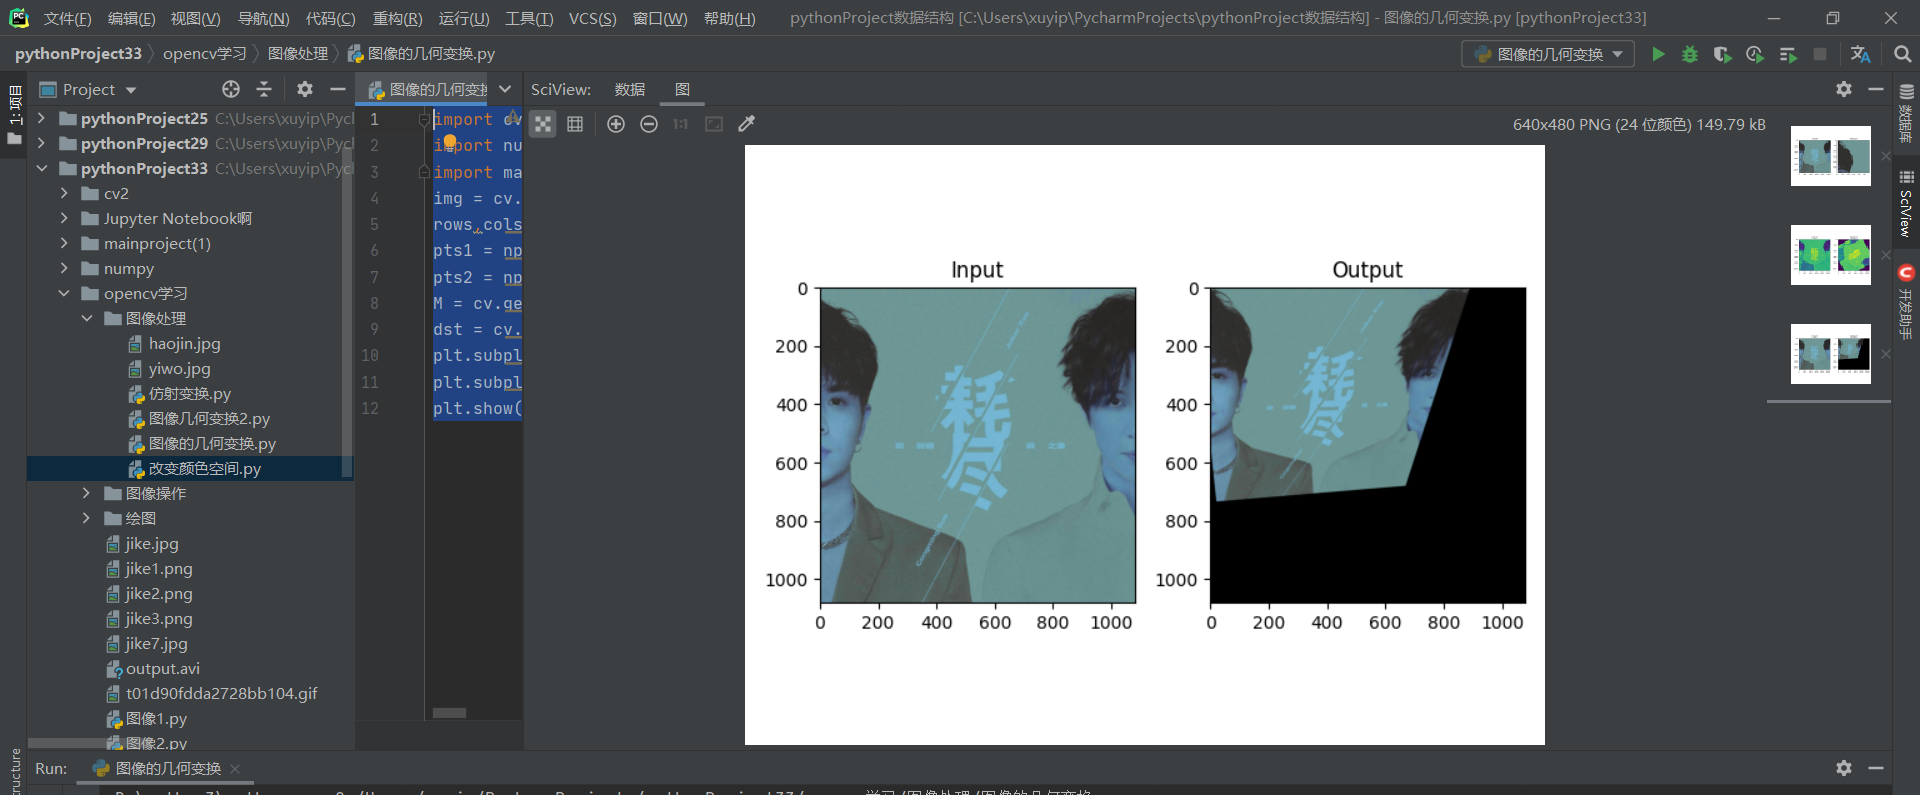
3. Perspective transformation of image
Perspective requires a 3 * 3 matrix. Similarly, when constructing this matrix, opencv uses a point correspondence relationship to find it by ourselves through the function, because it is difficult for us to calculate it ourselves. This function is m = cv2.getperspective transform (pts1, pts2), where pts needs the corresponding positions of the four points before and after transformation. After M is obtained, it is carried out through the function CV2. Warpperspective (IMG, m, (200200)).
import cv2 as cv
import numpy as np
import matplotlib.pyplot as plt
img = cv.imread('haojin.jpg')
rows,cols,ch = img.shape
pts1 = np.float32([[56,65],[368,52],[28,387],[389,390]])
pts2 = np.float32([[0,0],[300,0],[0,300],[300,300]])
M = cv.getPerspectiveTransform(pts1,pts2)  # pts1 original image, four points, pts2 target image, four points
dst = cv.warpPerspective(img,M,(1080,1080))
plt.subplot(121),plt.imshow(img),plt.title('Input')
plt.subplot(122),plt.imshow(dst),plt.title('Output')
plt.show()
3.1 cv.warpPerspective() function
Perspective transformation function can keep the straight line from deformation, but the parallel lines may no longer be parallel
The related parameters are similar to those of the cv2.warpAffine function, so I won't introduce them
Effect display:

📢📢📢 Final benefits
☀️☀️☀️ The last little benefit: if you want to get started with python quickly, this detailed PPT can quickly help you lay a solid foundation for python. If you need it, you can download it A complete set of Python introductory basic tutorials + Xiaobai quick success + learning won't come to me! 🍻🍻🍻
There are also self-made confession artifacts, which need to be taken by yourself:
Python confession artifact, source code + analysis + various perfect configurations + romantic and novel 🍻🍻🍻

🌲🌲🌲 Well, that's all I want to share with you today
❤️❤️❤️ If you like, don't save your one button three connections~

