When the program is running, the data is in memory. When the program terminates, it is usually necessary to save the data on disk. We learned earlier that writing data to a file is a way to save it to disk.
However, when facing a large number of data, in order to facilitate us to save and find data or find specific data, the database needs to be used. In actual project development. We also deal with databases every day. The database we need to use in this tutorial is Mysql. Today, let's take a look at how to install Mysql.
1. Download:
Click the following link to enter the official Mysql website and select the latest version to download.
https://dev.mysql.com/downloads/mysql/8.0.html
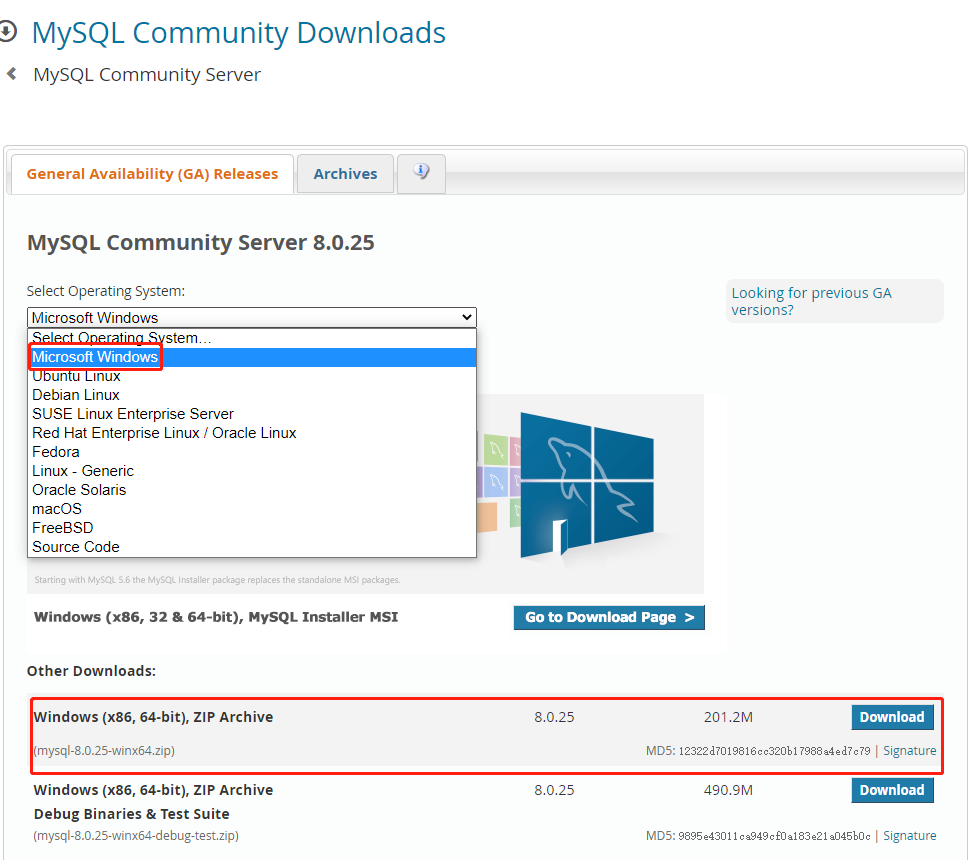
Directly select 'No thanks, just start my download.'

2. Installation
First, determine the installation directory of MySQL 8. You can decide by yourself. I install it in E:\Mysql directory, and then unzip the installation package to the installation directory.

3. Configuration file
Create a new configuration file my. In the installation directory Ini, write in the configuration file:
[mysqld]
port=3306
basedir =E:\Dade\mysql-8.0.25-winx64
max_allowed_packet = 20M
Save it. datadir is the data storage directory. My storage path is under E:\Dade directory. You can modify it accordingly.
4. Initialize MySQL 8
Open the command line, enter the bin directory of MySQL, and then initialize. The command is:
mysqld --initialize --consol
After successful initialization, the command line will print the initial password of root user (remember to save), as shown in the following figure:

5. Start MySQL service.
Before starting the service, first install MySQL 8 as a Windows system service, and execute the following command in MySQL's bin directory:
mysqld --install mysql8
mysql8 is the service name, which you can modify to the desired name.

Note that if 'Install/Remove of the Service Denied!' is displayed, Select to open as administrator!
After the service is registered successfully, you can start the MySQL service and execute the command:
net start mysql8
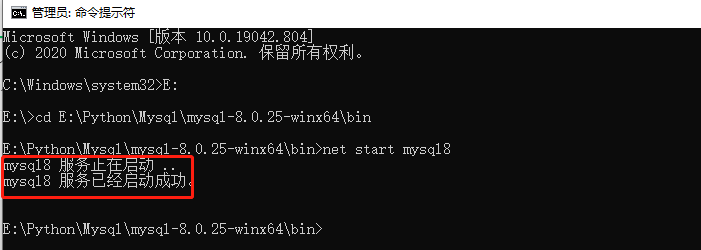
Key: if the error 'service does not have corresponding control function' is displayed here, try to solve it: visit the following website:
https://cn.dll-files.com/vcruntime140_1.dll.html
Download vcruntime140_ 1. The latest version of DLL. After downloading, put this file directly into the bin subdirectory of MySQL.

6. Log in to MySQL
After the service is started successfully, you can log in to the MySQL server and execute it in the bin directory
mysql -uroot -p
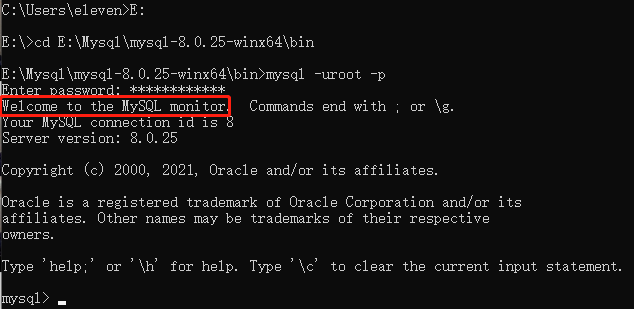
Just enter the password you just saved. If 'Welcome to the MySQL monitor' is displayed, the login is successful.
Next, you need to modify the root password of Mysql, otherwise you cannot operate. The commands to modify the root user password are as follows:
ALTER USER 'root'@'localhost' IDENTIFI WITH mysql_native_password BY 'Your six digit password'; FLUSH PRIVILEGES;

7. Test connection
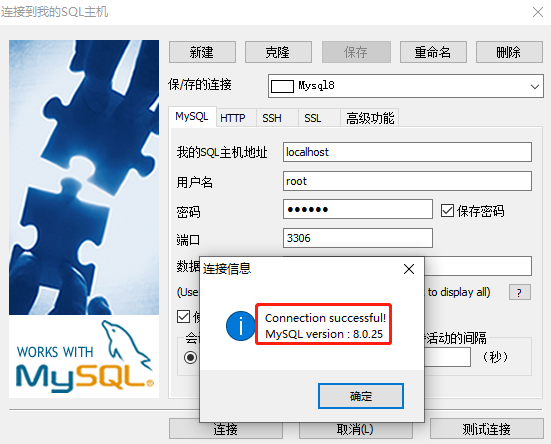
Then use Sqlyog to test the connection. The following proves that Mysql has been successfully installed:
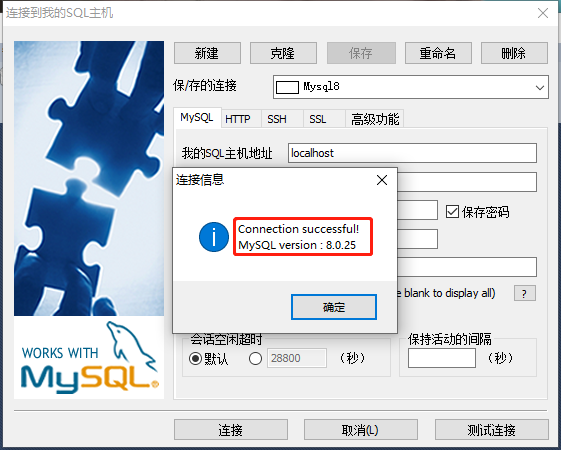
The Mysql server runs as an independent process and serves externally through the network. Therefore, we need a Mysql driver that supports Python to connect to the Mysql server. There are many database modules supporting Mysql in Python. We choose PyMySql.
Pymysql installation
PyMysql is easy to install. The installation commands are as follows:
pip install pymysql
The following represents normal success.

Connect to database
The first step in using the database is to connect to the database. Next, let's see how to connect to the database using PyMysql.
1: Connect to database
2: Create cursor object
3: Add, delete, modify and query the database
4: Close cursor
5: Close connection
import pymysql

#Open database connection
try:
    db = pymysql.connect(host='localhost', user='root', passwd='666666', port=3306)
    print('Connection succeeded!')
except:
    print('something wrong!')

#Create a cursor object using the cursor() method
cursor = db.cursor()

#Execute the SQL query using the execute() method
cursor.execute("SELECT VERSION()")

#Use the {fetchone() method to get a single piece of data
data = cursor.fetchone()

print("Database version : %s " % data)

#Close database connection
db.close()

'''
Connection succeeded!
Database version : 8.0.25
'''
Operation results:
Connection succeeded!
Database version : 8.0.25
Create database tables
If the database connection exists, we can use the execute() method to create a table for the database, as shown in the following table EMPLOYEE:
import pymysql

#Open database connection
try:
    db = pymysql.connect(host='localhost', user='root', passwd='666666', port=3306, db='Mysql8')
    print('Connection succeeded!')
except:
    print('something wrong!')

#Create a cursor object using the cursor() method
cursor = db.cursor()

#Use the execute() method to execute SQL. If the table exists, delete it
cursor.execute("DROP TABLE IF EXISTS EMPLOYEE")

#Creating tables using preprocessing statements
sql = """CREATE TABLE EMPLOYEE (
         FIRST_NAME  CHAR(20) NOT NULL,
         LAST_NAME  CHAR(20),
         AGE INT,
         SEX CHAR(1),
         INCOME FLOAT )"""

cursor.execute(sql)
print('Table creation succeeded!')

#Close database connection
db.close()

'''
Connection succeeded!
Table creation succeeded!
'''
Operation results:
Connection succeeded!
Table creation succeeded!
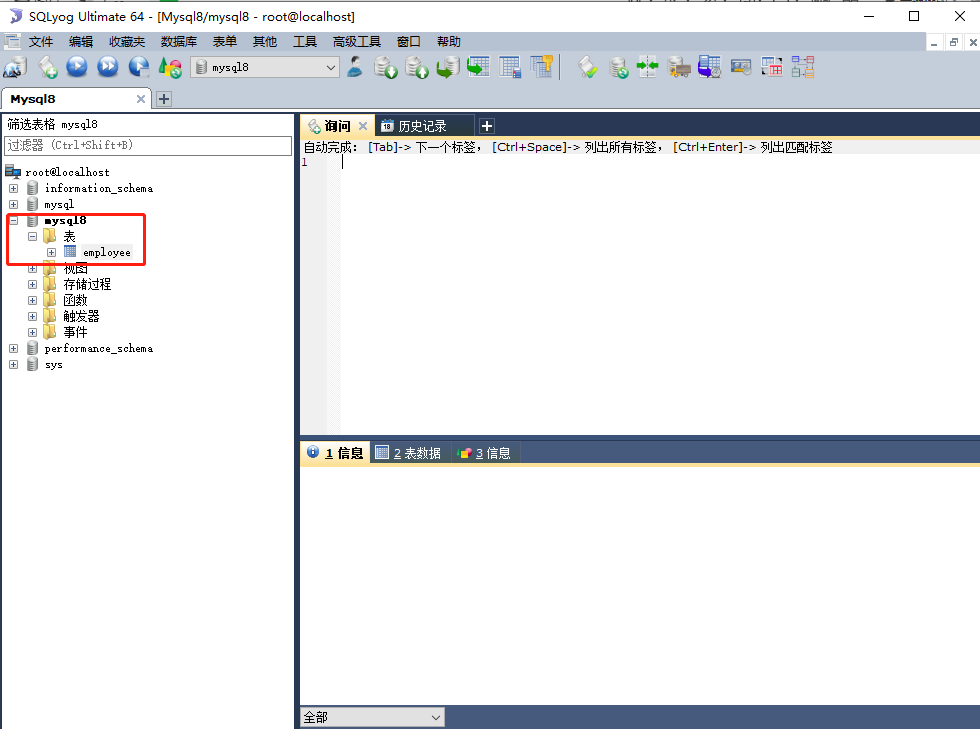
We can open Sqlyog and find an EMPLOYEE Table under the database named Mysql8. As shown below:
insert data
Let's see how to use the INSERT statement to INSERT data into the table EMPLOYEE.
import pymysql

#Open database connection
try:
    db = pymysql.connect(host='localhost', user='root', passwd='666666', port=3306, db='Mysql8')
    print('Connection succeeded!')
except:
    print('something wrong!')

#Create a cursor object using the cursor() method
cursor = db.cursor()

#SQL} insert statement
sql = """INSERT INTO EMPLOYEE(FIRST_NAME,
         LAST_NAME, AGE, SEX, INCOME)
         VALUES ('Mac', 'Mohan', 20, 'M', 2000)"""
try:
    #Execute sql statement
    cursor.execute(sql)
    #Commit to database for execution
    db.commit()
    print('Data insertion succeeded!')
except:
    #Rollback if an error occurs
    db.rollback()
    print('Data insertion error!')

#Close database connection
db.close()

'''
Connection succeeded!
Data insertion succeeded!
'''
Operation results:
Connection succeeded!
Data insertion succeeded!

Database query operation
Python queries Mysql, uses the fetchone() method to obtain a single piece of data, and uses the fetchall() method to obtain multiple pieces of data.
fetchone(): this method gets the next query result set. The result set is an object
fetchall(): receive all returned result rows
rowcount: This is a read-only property and returns the number of rows affected after executing the execute() method.
Query all data with salary field greater than 1000 in EMPLOYEE table:
import pymysql

#Open database connection
try:
    db = pymysql.connect(host='localhost', user='root', passwd='666666', port=3306, db='Mysql8')
    print('Connection succeeded!')
except:
    print('something wrong!')

#Create a cursor object using the cursor() method
cursor = db.cursor()

#SQL} query statement
sql = "SELECT * FROM EMPLOYEE \
       WHERE INCOME > %s" % (1000)
try:
    #Execute SQL statement
    cursor.execute(sql)
    #Get a list of all records
    results = cursor.fetchall()
    for row in results:
        fname = row[0]
        lname = row[1]
        age = row[2]
        sex = row[3]
        income = row[4]
        #Print results
        print('Data query succeeded!')
        print("fname=%s,lname=%s,age=%s,sex=%s,income=%s" % \
              (fname, lname, age, sex, income))
except:
    print("Error: unable to fetch data")

#Close database connection
db.close()
'''
Connection succeeded!
Data query succeeded!
fname=Mac,lname=Mohan,age=20,sex=M,income=2000.0
'''
Operation results:
Connection succeeded!
Data query succeeded!
fname=Mac,lname=Mohan,age=20,sex=M,income=2000.0
Database update operation
The update operation is used to update the data of the data table. The following example increments the AGE field with SEX'M 'in the TESTDB table by 1:
import pymysql

#Open database connection
try:
    db = pymysql.connect(host='localhost', user='root', passwd='666666', port=3306, db='Mysql8')
    print('Connection succeeded!')
except:
    print('something wrong!')

#Create a cursor object using the cursor() method
cursor = db.cursor()

#SQL UPDATE statement
sql = "UPDATE EMPLOYEE SET AGE = AGE + 1 WHERE SEX = '%c'" % ('M')
try:
    #Execute SQL statement
    cursor.execute(sql)
    #Commit to database for execution
    db.commit()
    print('Data update succeeded!')
except:
    #Rollback on error
    db.rollback()

#Close database connection
db.close()

'''
Connection succeeded!
Data update succeeded!
'''
Operation results:
Connection succeeded!
Data update succeeded!
Delete operation
Delete is used to delete data in the data table. The following example demonstrates deleting all data with an AGE greater than 20 in the data table EMPLOYEE:
import pymysql

#Open database connection
try:
    db = pymysql.connect(host='localhost', user='root', passwd='666666', port=3306, db='Mysql8')
    print('Connection succeeded!')
except:
    print('something wrong!')

#Create a cursor object using the cursor() method
cursor = db.cursor()

#SQL} delete statement
sql = "DELETE FROM EMPLOYEE WHERE AGE > %s" % (20)
try:
    #Execute SQL statement
    cursor.execute(sql)
    #Submit modification
    db.commit()
    print('Data deleted successfully')
except:
    #Rollback on error
    db.rollback()

#Close connection
db.close()
'''
Connection succeeded!
Data deleted successfully
'''
Operation results:
Connection succeeded!
Data deleted successfully
Execute transaction
What is a transaction?
Transfer is A common operation in life, such as transferring 100 yuan from account A to account B. From the perspective of users, this is A logical single operation. However, in the database system, it will be completed in at least two steps:
1. Reduce the amount of account A by 100 yuan
2. Increase the amount of account B by 100 yuan.

During this process, the following problems may occur:
1. The first step of the transfer operation was successful. The money in account A was reduced by 100 yuan, but the second step failed or the system crashed, resulting in no corresponding increase of 100 yuan in account B.
2. The system crashes as soon as the transfer operation is completed. When the system restarts and recovers, the transfer records before the crash are lost.
3. At the same time, another user transferred to account B. the amount of account B was abnormal due to the simultaneous operation on account B.
In order to solve these problems, the concept of database transaction needs to be introduced.
A transaction should have four attributes: atomicity, consistency, isolation, and persistence. These four attributes are commonly referred to as ACID properties.
Atomicity: all operations in a transaction as a whole are as inseparable as atoms, either all succeed or all fail.
Consistency: the execution result of the transaction must make the database from one consistency state to another. Consistency status refers to: 1 The system status meets the data integrity constraints (master code, reference integrity, check constraints, etc.) 2 The state of the system reflects the real state of the real world that the database should describe. For example, the sum of the two accounts before and after the transfer should remain unchanged.
Isolation: transactions executed concurrently will not affect each other, and their impact on the database is the same as when they are executed serially. For example, if multiple users transfer money to one account at the same time, the result of the final account should be the same as that of their transfer in order.
Durability: once a transaction is committed, its updates to the database are persistent. No transaction or system failure will result in data loss.
In the ACID characteristics of transactions, C, that is, consistency, is the fundamental pursuit of transactions, and the destruction of data consistency mainly comes from two aspects
#SQL delete record statement
sql = "DELETE FROM EMPLOYEE WHERE AGE > %s" % (20)
try:
   #Execute SQL statement
   cursor.execute(sql)
   #Submit to database
   db.commit()
except:
   #Rollback on error
   db.rollback()
For databases that support transactions, in Python database programming, when the cursor is established, an invisible database transaction is automatically started.
The commit() method all update operations of the cursor, and the rollback() method rolls back all operations of the current cursor. Each method starts a new transaction.