Catalog
1. Basic structure of main program
2. Create Flask objects (an important step, don't forget)
3. Defining the Split-mirror Correlation Function
1. Define a frame-cutting function and call it
4. Modify, perfect and present
1. Basic structure of main program
1. Install and import Flask
Installation: pip3 install flask
Import:
from flask import Flask
(The following 2-5 sections of the text are quoted from Python Learning | 2021-10-22 Flask Web Development_ Xuan Pao Er's Blog - CSDN Blog , the blogger has a very concise summary)
2. Create Flask objects (an important step, don't forget)
- The flask program needs to create a Flask class object to configure and run the application
- Name is a special variable in Python. If the file is executed as the main program, u Name_u The value of a variable is u Main_u, If introduced by other modules, then u Name_u The value of is the module name
app = Flask(__name__)
3. Write the main program
- In the main program, execute run() to start the application
- Rename to start a local server whose address is localhost:5000 by default, and you can use the keyword parameter port to modify the listening port
if __name__ =="__main__":
app.run(debug=True, port=5008)
4. Routing
- Use the route() decorator of the app variable to tell the Flask framework URL how to trigger the view function
- A program that handles the relationship between URL s and functions is called routing
- Functions such as index() are called view function s, and the return value of a function is called a response and is what the client receives.
- The request for path'/'will become a call to the index() function
@app.route('/')
def index():
return 'Hello World!'
- Content in angle brackets is a dynamic part
@app.route('/user/<name>')
def user(name):
return '<h1>Hello, %s!</h1>' % name
5. Complete Code
from flask import Flask
app = Flask(__name__)

@app.route('/')
def index():
    return 'Hello, World!'

if __name__ == '__main__':
    app.run(port="5008")
2. Rendering Web Pages
Create a folder templates (fixed, unchangeable) and create an index under the folder. HTML file
In main. The modified return code in py is:
def index():
return render_template('index.html')
Complete modification code:
from flask import Flask,render_template

app = Flask(__name__)

@app.route('/')

def index():
    return render_template('index.html')
if "__main__"==__name__:
    app.run(port="5008")
3. Defining the Split-mirror Correlation Function
(See previous period for details Python Video Processing (1) - Video Lens Extraction + Video Processing_ maplelistener's blog - CSDN blog)
1. Define a frame-cutting function and call it
from flask import Flask,render_template
app = Flask(__name__)
def genFrame():
v_path="static/ghz.mp4"
image_save="static/pic"
cap=cv2.VideoCapture(v_path)
frame_count=cap.get(cv2.CAP_PROP_FRAME_COUNT)
for i in range(int(frame_count)):
_,img=cap.read()
img=cv2.cvtColor(img,cv2.COLOR_BGR2GRAY)
cv2.imwrite("static/pic/image{}.jpg".format(i),img)
@app.route('/')
def index():
genFrame()
pic="static/pic/image"
framecount=249
return render_template('index.html',pic1=pic,framecount=framecount)
if "__main__"==__name__:
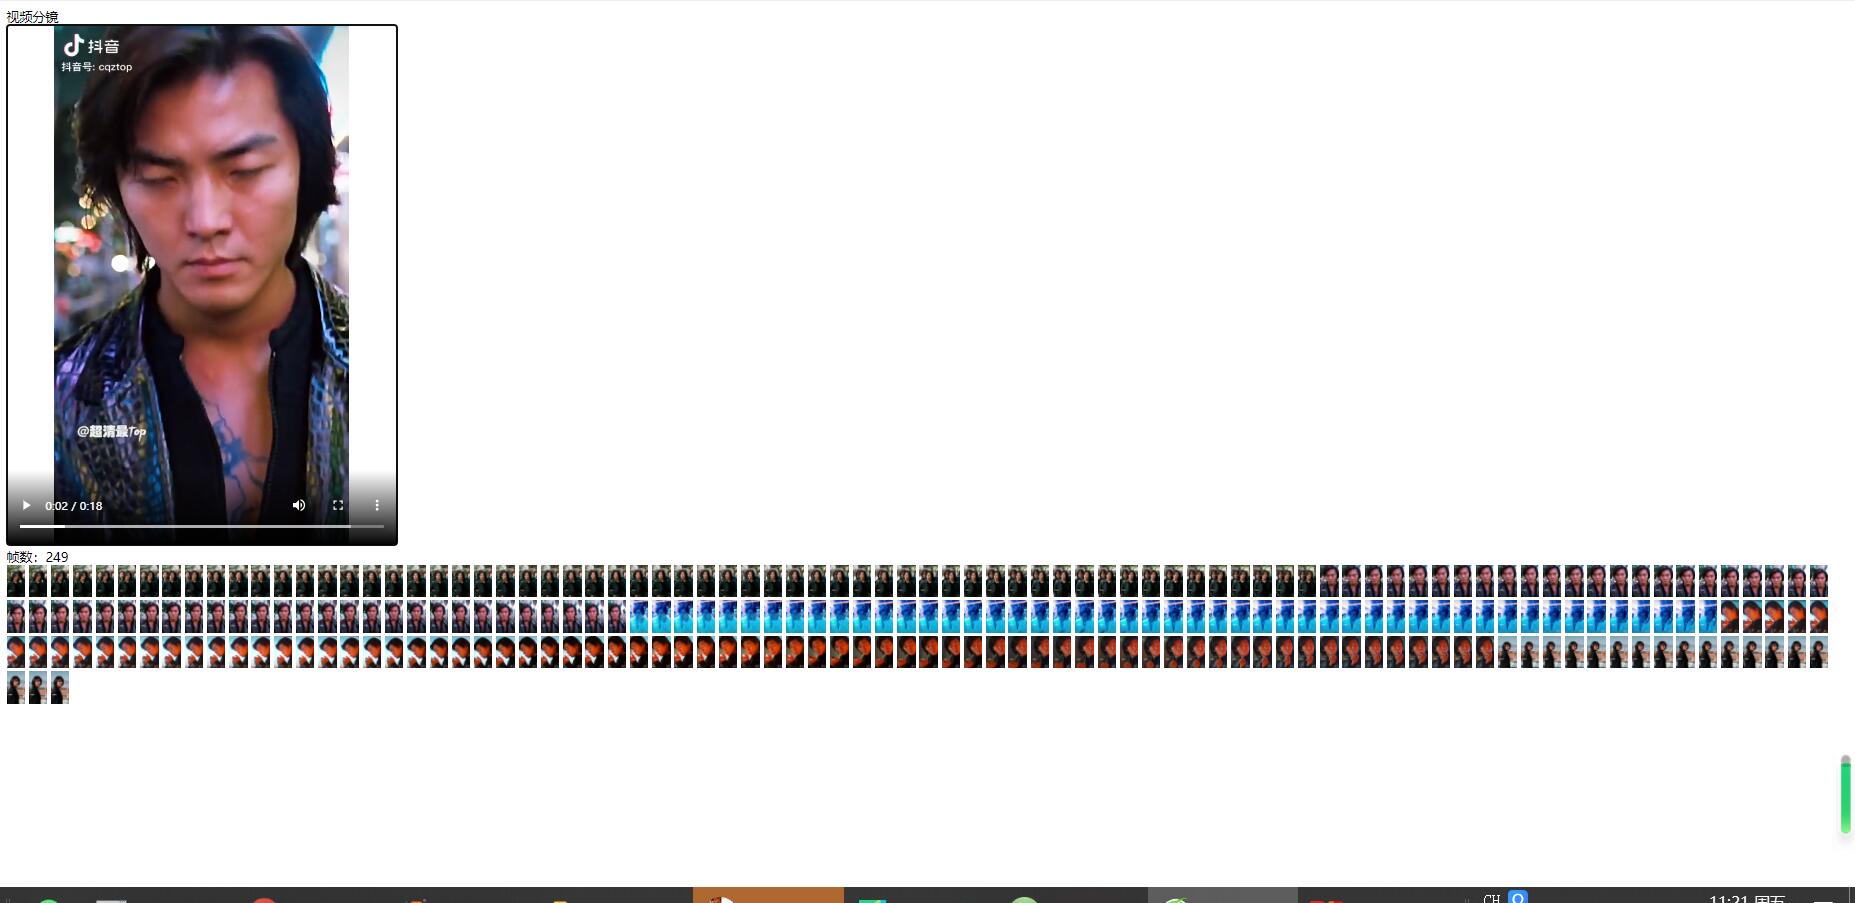
app.run(port="5008")Frame-cutting results can be displayed on the front end:
<!DOCTYPE html>
<html lang="en">
<head>
    <meta charset="UTF-8">
    <title>Flask</title>
</head>
<body>
Video Splitter
<br>
<video width="640" height="480" controls autoplay>
  <source src="static/ghz.mp4" type="video/mp4">
  <object data="static/ghz.mp4" width="640" height="480">
    <embed width="640" height="480" src="static/ghz.mp4">
  </object>
</video>
<br>
Number of frames:{{framecount}}<br>
{% for i in range(framecount) %}
    <img height="20" src="{{pic1}}{{i}}.jpg" />
{% endfor %}
</body>
</html>
Run result:
Matters needing attention:
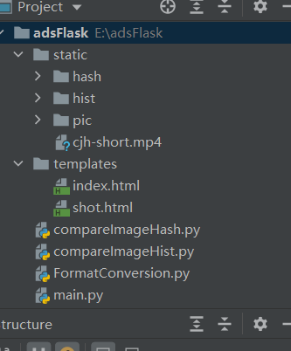
An important prerequisite for the success of the above code is to remember that the relevant files (videos, pictures) to be processed all exist in a static document.
2. Hash Mean Scanning
You can create a new compareImageHash by importing packages. Py (see previous issue for code details) Python Video Processing (1) - Video Lens Extraction + Video Processing_ maplelistener's blog - CSDN blog)
This allows you to compute all the results offline before presenting them through html
Modify function genFrame()
def genFrame():
    v_path='static/ghz.mp4'
    image_save='static/hash'

    if not(os.path.exists(image_save)):
        print(image_save)
        os.mkdir(image_save)

    cap=cv2.VideoCapture(v_path)
    fc=cap.get(cv2.CAP_PROP_FRAME_COUNT)
    print(fc)
    _, img1 = cap.read()
    cv2.imwrite('static/hash/image{}.jpg'.format(0), img1)
    print(int(fc))
    for i in range(248):
        _, img2 = cap.read()
        hash1 = aHash(img1)
        hash2 = aHash(img2)
        n = cmpHash(hash1, hash2)
        #print('mean hash algorithm similarity:', n)
        if (n<0.6):
            cv2.imwrite('static/hash/image{}.jpg'.format(i),img2)
            img1=img2
3. Histogram Mean Splitting
compareImageHist.py
(See previous period for details Python Video Processing (1) - Video Lens Extraction + Video Processing_ maplelistener's blog - CSDN blog)
Modify function genFrame()
def genFrame():
    v_path='static/ghz.mp4'
    image_save='static/hash'

    if not(os.path.exists(image_save)):
        print(image_save)
        os.mkdir(image_save)

    cap=cv2.VideoCapture(v_path)
    fc=cap.get(cv2.CAP_PROP_FRAME_COUNT)
    print(fc)
    _, img1 = cap.read()
    cv2.imwrite('static/hash/image{}.jpg'.format(0), img1)
    print(int(fc))
    for i in range(248):
        _, img2 = cap.read()
        n = classify_hist_with_split(img1, img2)
        #print('mean hash algorithm similarity:', n)
        if (n<0.6):
            cv2.imwrite('static/hash/image{}.jpg'.format(i),img2)
            img1=img2
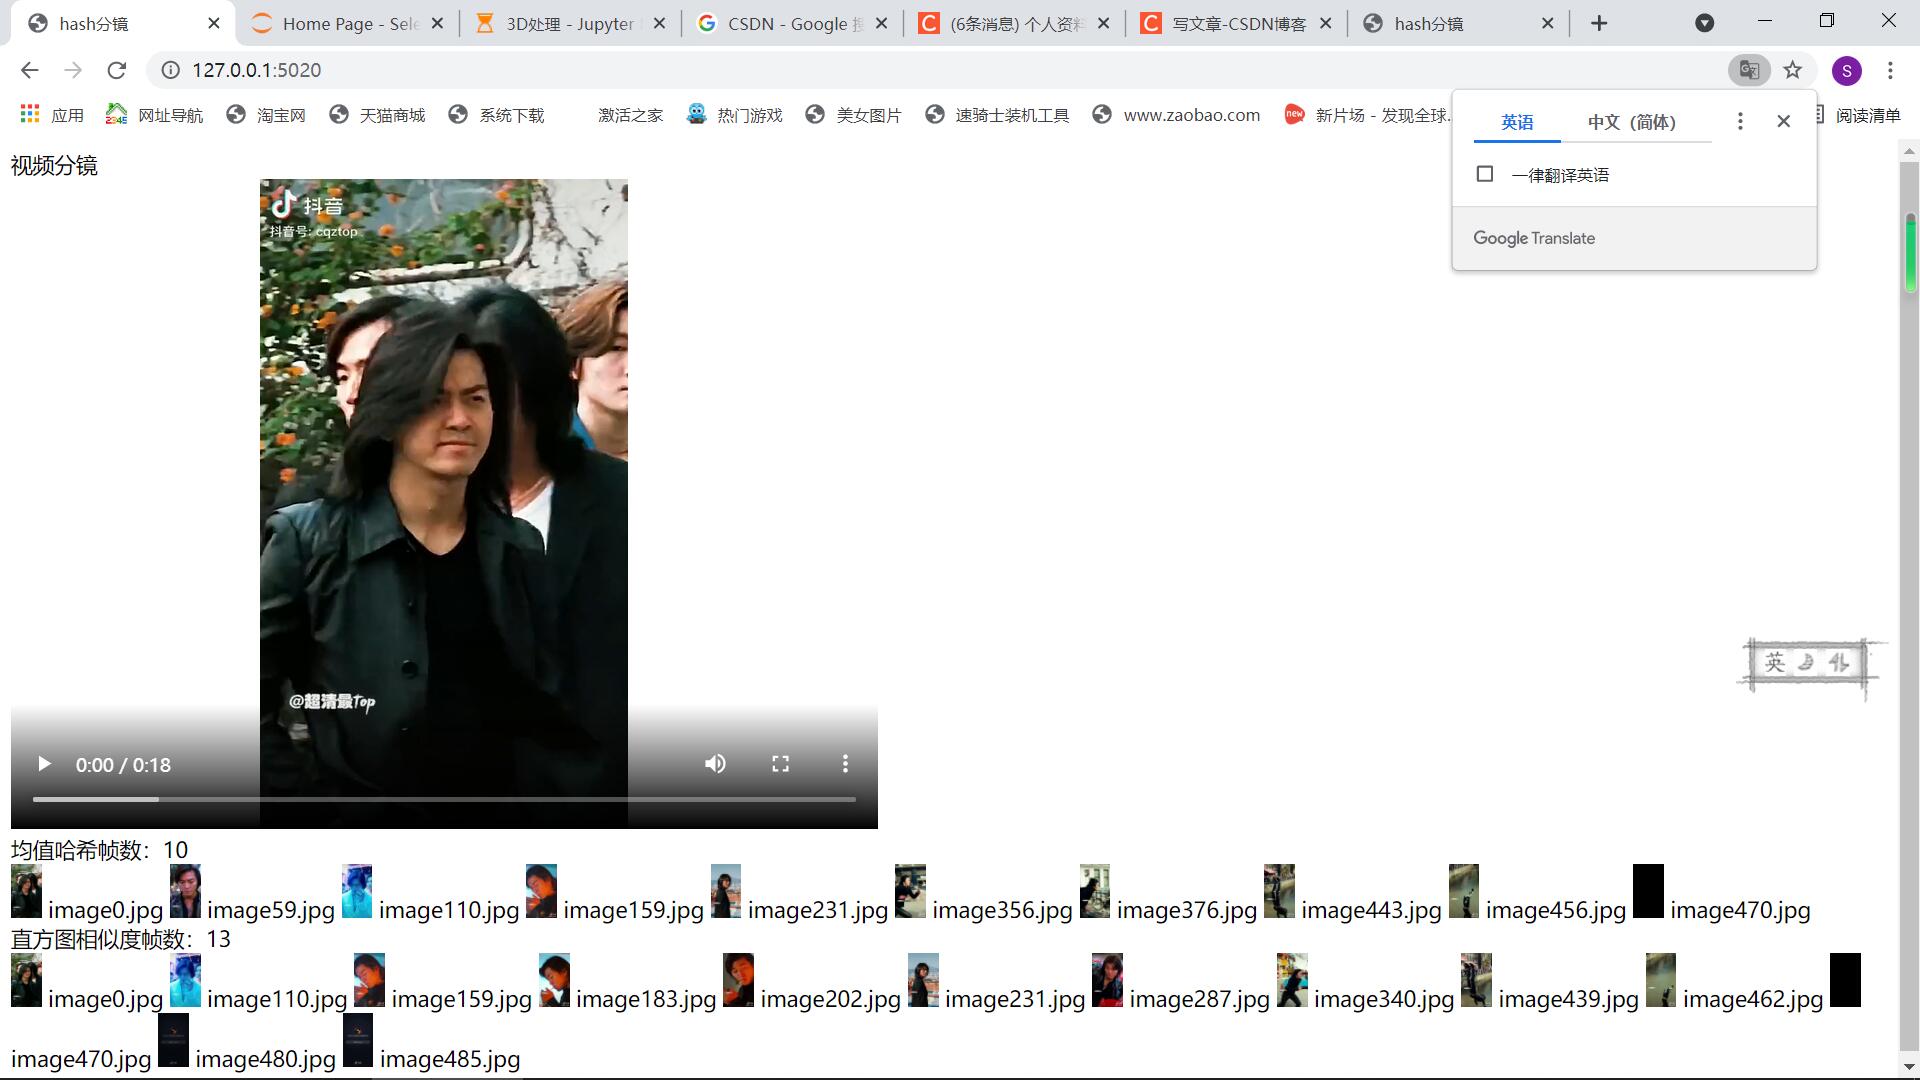
4. Modify, perfect and present
Modify and perfect main.py:
@app.route('/shot')
def shot():
    path='static/hash'
    filename = os.listdir(path)
    framecount=len(filename)
    filename.sort(key= lambda x:int(x[5:-4]))
    print(filename)
    print(type(filename))

    print(filename)

    path='static/hist'
    histfile = os.listdir(path)
    histcount=len(histfile)
histfile.sort(key= lambda x:int(x[5:-4]))   #Sort List Elements
return render_template('shot.html',filename=filename,framecount=framecount,histfile=histfile,histcount=histcount)
Modify the page side:
<!DOCTYPE html>
<html lang="en">
<head>
    <meta charset="UTF-8">
    <title>Flask</title>
</head>
<body>
Video Splitter
<br>
<video width="640" height="480" controls autoplay>
  <source src="static/ghz.mp4" type="video/mp4">
  <object data="static/ghz.mp4" width="640" height="480">
    <embed width="640" height="480" src="static/ghz.mp4">
  </object>
</video>
<br>
Mean hash frames:{{framecount}}<br>
{% for i in range(framecount) %}
    <img height="20" src="static/hash/{{filename[i]}}.jpg" />
{{filename[i]}}
{% endfor %}
<br>
Histogram Similarity Frames:{{histcount}}<br>
{% for i in range(histcount) %}
    <img height="20" src="static/hist/{{histfile[i]}}.jpg" />
{{histfile[i]}}
{% endfor %}
</body>
</html>
Run result: