Writing this chat robot is purely fun, it is not practical!!!
Realization idea
In the past, many wechat robots relied on the itchat in python to write, because at that time, the wechat web page was still developed for most users, and the itchat module operated on the wechat web page (it felt like a crawler). But now many people's wechat can't log on to the wechat web page, which makes the wechat robot relying on itchat unusable. I want to be a wechat robot. After looking for a method that does not rely on itchat for a long time, I see two more appropriate methods. One is Reverse Hook analysis of PC wechat client (there is source code on github), the other is the method used in this article( 👉 Method source)
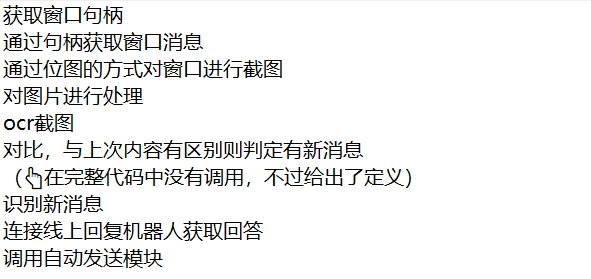
The realization idea is as follows:
Complete code
import pyautogui
pyautogui.FAILSAFE = False #Prevent failSafeCheck() from reporting errors
from ctypes import windll
import win32api,win32con,pyperclip
import win32gui
import win32ui
import ocr
from PIL import Image
import time


'''Get window handle'''
def gethandle(Class,Caption):
    return win32gui.FindWindow(Class,Caption)

'''Get the coordinates of the upper left and lower right corners of the window'''
def getposition(handle):
    if handle==0:
        return None
    else:
        return win32gui.GetWindowRect(handle)

'''Take a screenshot of the window and save it'''
def Screenshot(hWnd,file_path):
    #Gets the size information of the handle window
    left, top, right, bot = win32gui.GetWindowRect(hWnd)
    width = right - left
    height = bot - top
    #Returns the device environment of the handle window, covering the whole window, including non client area, title bar, menu and border
    hWndDC = win32gui.GetWindowDC(hWnd)
    #Create device description table
    mfcDC = win32ui.CreateDCFromHandle(hWndDC)
    #Create memory device description table
    saveDC = mfcDC.CreateCompatibleDC()
    #Create a bitmap object and prepare to save the picture
    saveBitMap = win32ui.CreateBitmap()
    #Open up storage space for bitmap
    saveBitMap.CreateCompatibleBitmap(mfcDC,width,height)
    #Save the screenshot to saveBitMap
    saveDC.SelectObject(saveBitMap)
    #Save bitmap to memory device description table
    saveDC.BitBlt((0,0), (width,height), mfcDC, (0, 0), win32con.SRCCOPY)
    #If you want to take a screenshot to a printing device:
    ###The last int parameter: 0 - save the whole window, 1 - save only the client area. If PrintWindow succeeds, the return value of the function is 1
    result = windll.user32.PrintWindow(hWnd,saveDC.GetSafeHdc(),0)
    #Save image
    ##Method 1: windows api save
    ###Save bitmap to file
    saveBitMap.SaveBitmapFile(saveDC,file_path)
    #print(result) #If PrintWindow succeeds, output 1
    return result
    '''
    ##Method 2 (Part I): PIL preservation
    ###Get bitmap information
    bmpinfo = saveBitMap.GetInfo()
    bmpstr = saveBitMap.GetBitmapBits(True)
    ###Generate image
    im_PIL = Image.frombuffer('RGB',(bmpinfo['bmWidth'],bmpinfo['bmHeight']),bmpstr,'raw','BGRX',0,1)
    ##Method II (follow up to part II)

    ##Method 3 (Part 1): opencv+numpy save
    ###Get bitmap information
    signedIntsArray = saveBitMap.GetBitmapBits(True)
    ##Method III (follow up to part II)

    #Memory release
    win32gui.DeleteObject(saveBitMap.GetHandle())
    saveDC.DeleteDC()
    mfcDC.DeleteDC()
    win32gui.ReleaseDC(hWnd,hWndDC)

    ##Method 2 (Part II): PIL preservation
    ###PrintWindow is successfully saved to a file and displayed on the screen
    im_PIL.save("im_PIL.png") #preservation
    im_PIL.show() #display

    ##Method 3 (Part 2): opencv+numpy save
    ###PrintWindow is successfully saved to a file and displayed on the screen
    im_opencv = numpy.frombuffer(signedIntsArray, dtype = 'uint8')
    im_opencv.shape = (height, width, 4)
    cv2.cvtColor(im_opencv, cv2.COLOR_BGRA2RGB)
    cv2.imwrite("im_opencv.jpg",im_opencv,[int(cv2.IMWRITE_JPEG_QUALITY), 100]) #preservation
    cv2.namedWindow('im_opencv') #name window
    cv2.imshow("im_opencv",im_opencv) #display
    cv2.waitKey(0)
    cv2.destroyAllWindows()
    '''


'''Process (crop) pictures'''
def cropimg(inimg,outimg):
    #Open picture
    im = Image.open(inimg)
    # The width and height of the picture
    img_size = im.size
    print("The width and height of the picture are{}".format(img_size))
    '''
    Clipping: pass in a tuple as a parameter
    The elements in the tuple are: (distance from the left boundary of the picture) x, Distance from the upper boundary of the picture y,Distance from left edge of picture+Crop box width x+w,Distance from the upper boundary of the picture+Clipping box Height y+h)
    '''
    x = 465
    y = 535
    w = 270
    h = 70
    region = im.crop((x, y, x + w, y + h))

    #Save picture
    region.save(outimg)

'''Call Baidu ocr Recognition text'''
def Getmsg(file_path):
    # Get access token
    token = ocr.fetch_token()

    # Splicing universal character recognition high precision url
    image_url = ocr.OCR_URL + "?access_token=" + token

    text = ""

    # Read test picture
    file_content = ocr.read_file(file_path)

    # Call character recognition service
    result = ocr.request(image_url, ocr.urlencode({'image': ocr.base64.b64encode(file_content)}))
    #print(result)

    # Parsing returned results
    result_json = ocr.json.loads(result)
    for words_result in result_json["words_result"]:
        text = text + words_result["words"]

    # Print text
    print('Character recognition results:')
    print(text)
    return text

'''Compare pictures, similar return True,Otherwise return False'''
def Compare(img1,img2):
    #Open two pictures
    image1=Image.open(img1)
    image3=Image.open(img2)

    #The image object is converted into histogram data and stored in lists H1 and h2
    h1=image1.histogram()
    h2=image3.histogram()
    L1=len(h1)
    L2=len(h2)
    if L1>=L2:
        n=L2
    else:
        n=L1
    sum=0
    for i in range(n):
        sum=sum+abs(h1[i]-h2[i])
    print(sum)
    result=sum/(len(h1)+len(h2)/2)
    print(result)
    if result<=1:
        return True
    else:
        return False

'''Used to access the smart answer website for answers'''
import requests #Import the requests package and use the crawler

def get_remsg(text):
    #Disguised as a browser
    User_Agent='Mozilla/5.0 (Windows NT 10.0; Win64; x64) AppleWebKit/537.36 (KHTML, like Gecko) Chrome/93.0.4577.63 Safari/537.36 Edg/93.0.961.47'
    #Online robot
    Furl="https://api.ownthink.com/bot?appid=9ffcb5785ad9617bf4e64178ac64f7b1&spoken="
    url=Furl+text
    req=requests.get(url,User_Agent) #Ask questions to online robots
    req.encoding='utf-8' #Define the encoding format as utf-8
    re=eval(req.text) #Convert the returned content to dictionary type

    return re['data']['info']['text'] #Return answer

'''send message'''
def send(msg_to_sent,handle,rightx,topy):
    #Position the mouse over the input box
    win32api.SetCursorPos([rightx-400,topy+720])
    # Forced display interface
    win32gui.ShowWindow(handle, win32con.SW_RESTORE)
    # Bring the window to the front
    win32gui.SetForegroundWindow(handle)
    time.sleep(0.5)
    pyperclip.copy(msg_to_sent) # Content to send
    time.sleep(0.5)
    pyautogui.hotkey('ctrl', 'v') # Press ctrl + v to paste the content
    time.sleep(0.5)
    pyautogui.hotkey('enter')
    return 1


if __name__=='__main__':
    #Get window handle
    handle=gethandle('WeChatMainWndForPC','WeChat')

    #Get window size information
    left, top, right, bot=getposition(handle)

    #Take a screenshot of the screen
    Screenshot(handle,'my.bmp')

    #Process pictures
    cropimg('my.bmp','my.bmp')

    #Character recognition of pictures
    text=Getmsg('my.bmp')

    #According to the identified content, the reply content is obtained from the online chat robot by using the crawler method
    r=get_remsg(text)
    print('Answer of online robot:')
    print(r)

    #send message
    send(r,handle,right,top)
code analysis
Import the module to use
import pyautogui
pyautogui.FAILSAFE = False #Prevent failSafeCheck() from reporting errors
from ctypes import windll
import win32api,win32con,pyperclip
import win32gui
import win32ui
import ocr
from PIL import Image
import time
If you don't have the above library, you can download it yourself. Download method:
Open cmd or PowerShell and enter the pip install library name
For example, import win32gui
pip install win32gui
The import of win32gui, win32con and win32ui is likely to fail (the import of high version is very easy to fail. Don't ask, just try). It is recommended to find a solution by yourself.
In addition, ocr is a local file and cannot be imported through pip. Next, call Baidu ocr to explain the text recognition part.
Get window handle
'''Get window handle'''
def gethandle(Class,Caption):
    return win32gui.FindWindow(Class,Caption)
Use the function FindWindow() in win32gui to obtain the window handle. Class is the class name of the window and Caption is the title of the window. I don't know how to obtain the window class name and title (usually the word in the upper left corner of the window) with code. I view it through spy + + tools in Visual Studio (wechat class name is WeChatMainWndForPC and the title is wechat).
Get the coordinates of the upper left and lower right corners of the window
'''Get the coordinates of the upper left and lower right corners of the window'''
def getposition(handle):
    if handle==0:
        return None
    else:
        return win32gui.GetWindowRect(handle)
Simply call GetWindowRect() in win32gui. This function returns the coordinates of the upper left corner and lower right corner of the window (in the form of tuples)
Take a screenshot of the window and save it
'''Take a screenshot of the window and save it'''
def Screenshot(hWnd,file_path):
    #Gets the size information of the handle window
    left, top, right, bot = win32gui.GetWindowRect(hWnd)
    width = right - left
    height = bot - top
    #Returns the device environment of the handle window, covering the whole window, including non client area, title bar, menu and border
    hWndDC = win32gui.GetWindowDC(hWnd)
    #Create device description table
    mfcDC = win32ui.CreateDCFromHandle(hWndDC)
    #Create memory device description table
    saveDC = mfcDC.CreateCompatibleDC()
    #Create a bitmap object and prepare to save the picture
    saveBitMap = win32ui.CreateBitmap()
    #Open up storage space for bitmap
    saveBitMap.CreateCompatibleBitmap(mfcDC,width,height)
    #Save the screenshot to saveBitMap
    saveDC.SelectObject(saveBitMap)
    #Save bitmap to memory device description table
    saveDC.BitBlt((0,0), (width,height), mfcDC, (0, 0), win32con.SRCCOPY)
    #If you want to take a screenshot to a printing device:
    ###The last int parameter: 0 - save the whole window, 1 - save only the client area. If PrintWindow succeeds, the return value of the function is 1
    result = windll.user32.PrintWindow(hWnd,saveDC.GetSafeHdc(),0)
    #Save image
    ##Method 1: windows api save
    ###Save bitmap to file
    saveBitMap.SaveBitmapFile(saveDC,file_path)
    #print(result) #If PrintWindow succeeds, output 1
    return result
    '''
    ##Method 2 (Part I): PIL preservation
    ###Get bitmap information
    bmpinfo = saveBitMap.GetInfo()
    bmpstr = saveBitMap.GetBitmapBits(True)
    ###Generate image
    im_PIL = Image.frombuffer('RGB',(bmpinfo['bmWidth'],bmpinfo['bmHeight']),bmpstr,'raw','BGRX',0,1)
    ##Method II (follow up to part II)

    ##Method 3 (Part 1): opencv+numpy save
    ###Get bitmap information
    signedIntsArray = saveBitMap.GetBitmapBits(True)
    ##Method III (follow up to part II)

    #Memory release
    win32gui.DeleteObject(saveBitMap.GetHandle())
    saveDC.DeleteDC()
    mfcDC.DeleteDC()
    win32gui.ReleaseDC(hWnd,hWndDC)

    ##Method 2 (Part II): PIL preservation
    ###PrintWindow is successfully saved to a file and displayed on the screen
    im_PIL.save("im_PIL.png") #preservation
    im_PIL.show() #display

    ##Method 3 (Part 2): opencv+numpy save
    ###PrintWindow is successfully saved to a file and displayed on the screen
    im_opencv = numpy.frombuffer(signedIntsArray, dtype = 'uint8')
    im_opencv.shape = (height, width, 4)
    cv2.cvtColor(im_opencv, cv2.COLOR_BGRA2RGB)
    cv2.imwrite("im_opencv.jpg",im_opencv,[int(cv2.IMWRITE_JPEG_QUALITY), 100]) #preservation
    cv2.namedWindow('im_opencv') #name window
    cv2.imshow("im_opencv",im_opencv) #display
    cv2.waitKey(0)
    cv2.destroyAllWindows()
    '''
I'm a code Porter, and I didn't look at the content specifically. In a word, it can be used (I'm too lazy to write it, but it's available online Ready made)
Process (crop) pictures
'''Process (crop) pictures'''
def cropimg(inimg,outimg):
    #Open picture
    im = Image.open(inimg)
    # The width and height of the picture
    img_size = im.size
    print("The width and height of the picture are{}".format(img_size))
    '''
    Clipping: pass in a tuple as a parameter
    The elements in the tuple are: (distance from the left boundary of the picture) x, Distance from the upper boundary of the picture y,Distance from left edge of picture+Crop box width x+w,Distance from the upper boundary of the picture+Clipping box Height y+h)
    '''
    x = 465
    y = 535
    w = 270
    h = 70
    region = im.crop((x, y, x + w, y + h))

    #Save picture
    region.save(outimg)
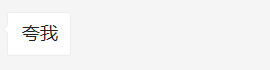
This function cuts the latest screenshot message from the complete screenshot of the chat interface. The effect is similar:
The x, y, w and h parameters in the function should be adjusted according to their own wechat window, and the size can be measured through the wechat screenshot tool. This method is not intelligent, but there is no way. My original idea was to use the wechat window handle as the parent handle to obtain the child handles of the child windows and controls, but I didn't find it when I used the relevant functions in win32gui. I searched the Internet for a long time. Are there any other methods until I saw:


I don't know whether it's right or not, but I changed my mind at that time. If I can get the sub handle, I hope someone can give me some advice
Call Baidu ocr to recognize text
def Getmsg(file_path):
    # Get access token
    token = ocr.fetch_token()

    # Splicing universal character recognition high precision url
    image_url = ocr.OCR_URL + "?access_token=" + token

    text = ""

    # Read test picture
    file_content = ocr.read_file(file_path)

    # Call character recognition service
    result = ocr.request(image_url, ocr.urlencode({'image': ocr.base64.b64encode(file_content)}))
    #print(result)

    # Parsing returned results
    result_json = ocr.json.loads(result)
    for words_result in result_json["words_result"]:
        text = text + words_result["words"]

    # Print text
    print('Character recognition results:')
    print(text)
    return text
This is to call the ocr recognition text on Baidu online. You should open the service on Baidu AI open platform (you can whore for nothing, and there are tutorials in station B). The technical documents have standard interface Codes:
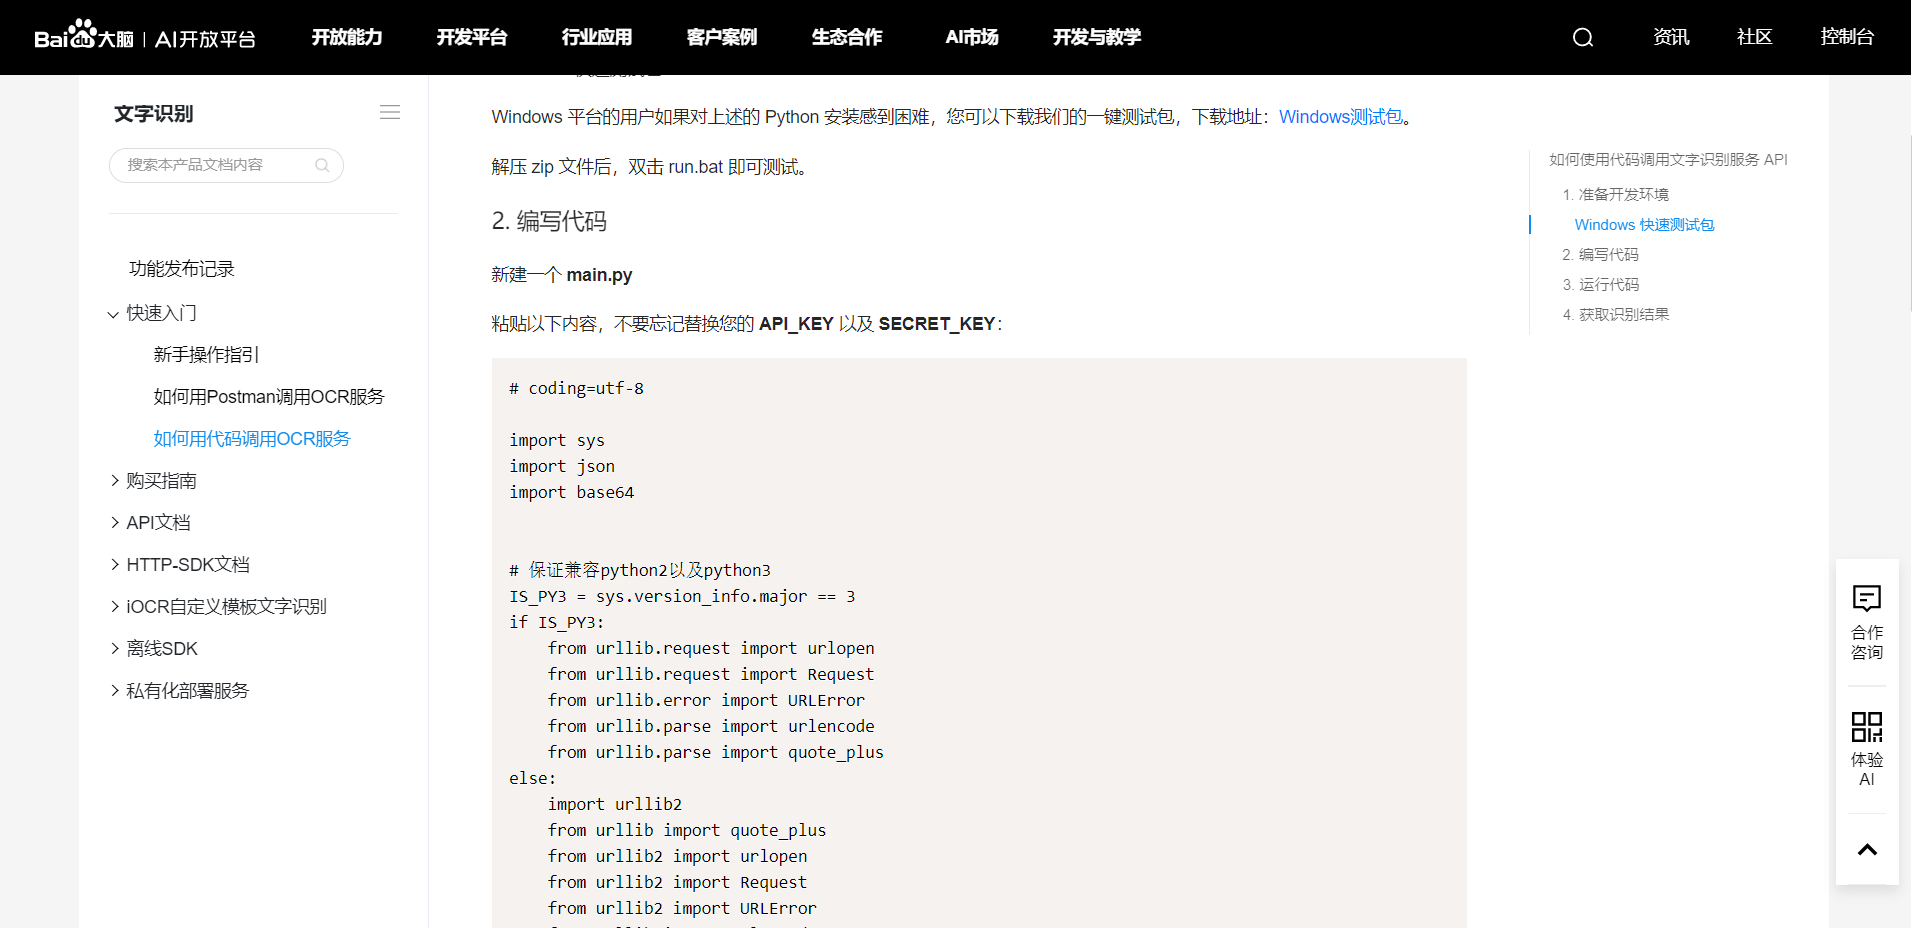
You can copy it directly and modify it based on it.
Used to access the smart answer website for answers
'''Used to access the smart answer website for answers'''
import requests #Import the requests package and use the crawler

def get_remsg(text):
    #Disguised as a browser
    User_Agent='Mozilla/5.0 (Windows NT 10.0; Win64; x64) AppleWebKit/537.36 (KHTML, like Gecko) Chrome/93.0.4577.63 Safari/537.36 Edg/93.0.961.47'
    #Online robot
    Furl="https://api.ownthink.com/bot?appid=9ffcb5785ad9617bf4e64178ac64f7b1&spoken="
    url=Furl+text
    req=requests.get(url,User_Agent) #Ask questions to online robots
    req.encoding='utf-8' #Define the encoding format as utf-8
    re=eval(req.text) #Convert the returned content to dictionary type

    return re['data']['info']['text'] #Return answer
Visit an online chat robot through a crawler and get a reasonable answer 😏
send message
'''send message'''
def send(msg_to_sent,handle,rightx,topy):
    #Position the mouse over the input box
    win32api.SetCursorPos([rightx-400,topy+720])
    # Forced display interface
    win32gui.ShowWindow(handle, win32con.SW_RESTORE)
    # Bring the window to the front
    win32gui.SetForegroundWindow(handle)
    time.sleep(0.5)
    pyperclip.copy(msg_to_sent) # Content to send
    time.sleep(0.5)
    pyautogui.hotkey('ctrl', 'v') # Press ctrl + v to paste the content
    time.sleep(0.5)
    pyautogui.hotkey('enter')
    return 1
This code first uses the right edge coordinate rightx and the top edge coordinate topy of the window to position the mouse to the position of the input box. The offset may be different in different computers. Measure by yourself. The measurement method refers to picture processing (you can't get the sub handle, so you can only use this method). The code then wakes up the minimized window and simulates keyboard and mouse operations through functions in pyperclip and pyautogui. (it seems that win32gui.SendMessage() can also be used, but I didn't achieve the desired effect during operation, so I changed to this method)
Main function
if __name__=='__main__':
    #Get window handle
    handle=gethandle('WeChatMainWndForPC','WeChat')

    #Get window size information
    print(getposition(handle))
    left, top, right, bot=getposition(handle)

    #Take a screenshot of the screen
    Screenshot(handle,'my.bmp')

    #Process pictures
    cropimg('my.bmp','my.bmp')

    #Character recognition of pictures
    text=Getmsg('my.bmp')

    #According to the identified content, the reply content is obtained from the online chat robot by using the crawler method
    r=get_remsg(text)
    print('Answer of online robot:')
    print(r)

    #send message
    send(r,handle,right,top)
Additional code (comparison picture)
'''Compare pictures, similar return True,Otherwise return False'''
def Compare(img1,img2):
    #Open two pictures
    image1=Image.open(img1)
    image3=Image.open(img2)

    #The image object is converted into histogram data and stored in lists H1 and h2
    h1=image1.histogram()
    h2=image3.histogram()
    L1=len(h1)
    L2=len(h2)
    if L1>=L2:
        n=L2
    else:
        n=L1
    sum=0
    for i in range(n):
        sum=sum+abs(h1[i]-h2[i])
    print(sum)
    result=sum/(len(h1)+len(h2)/2)
    print(result)
    if result<=1:
        return True
    else:
        return False
In my complete code, I also have the above function to judge whether the two images are the same, but it is not called in my main function, because the program runs continuously when the actual automatic reply message is positive, and replies only when a new message is detected. When I check the idea of new messages: when I take a screenshot of the chat interface, keep the last screenshot, and use the above function to compare the last and current chat screenshots. If there is a difference, it is judged that there is a message.
summary
I learned a lot from Baidu OCR interface to win32 automatic operation, and then to python crawler and image processing. I read a lot of articles and videos, and there were many bug s during this period.
My implementation idea must be relatively primary, and I can make better in the future!