Source: PyTorch deep learning quick start tutorial (absolutely easy to understand!) [small mound]
1, Environment configuration
- Installing anaconda: software that integrates various package s
Install anacodna3 five point two Mirror image of Tsinghua University - Create environment
In Anaconda Prompt:
conda create -n pytorch python=3.6 #Create an environment with Python packages called pytorch
conda activate pytorch#Enter this environment
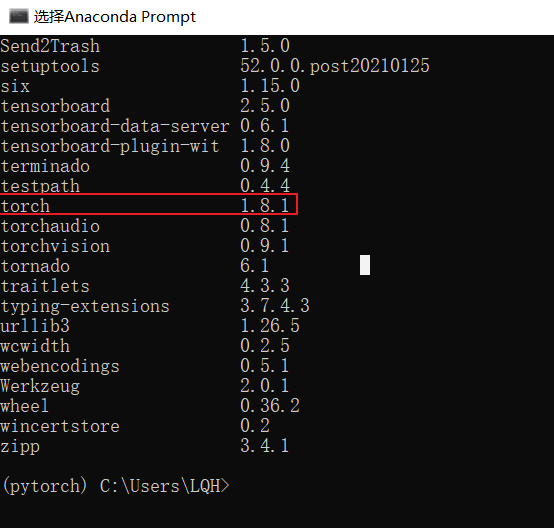
pip list #List the package s already installed in this environment

- Install the CPU version of pytorch
conda install pytorch torchvision torchaudio cpuonly -c pytorch
- PyCharm editor
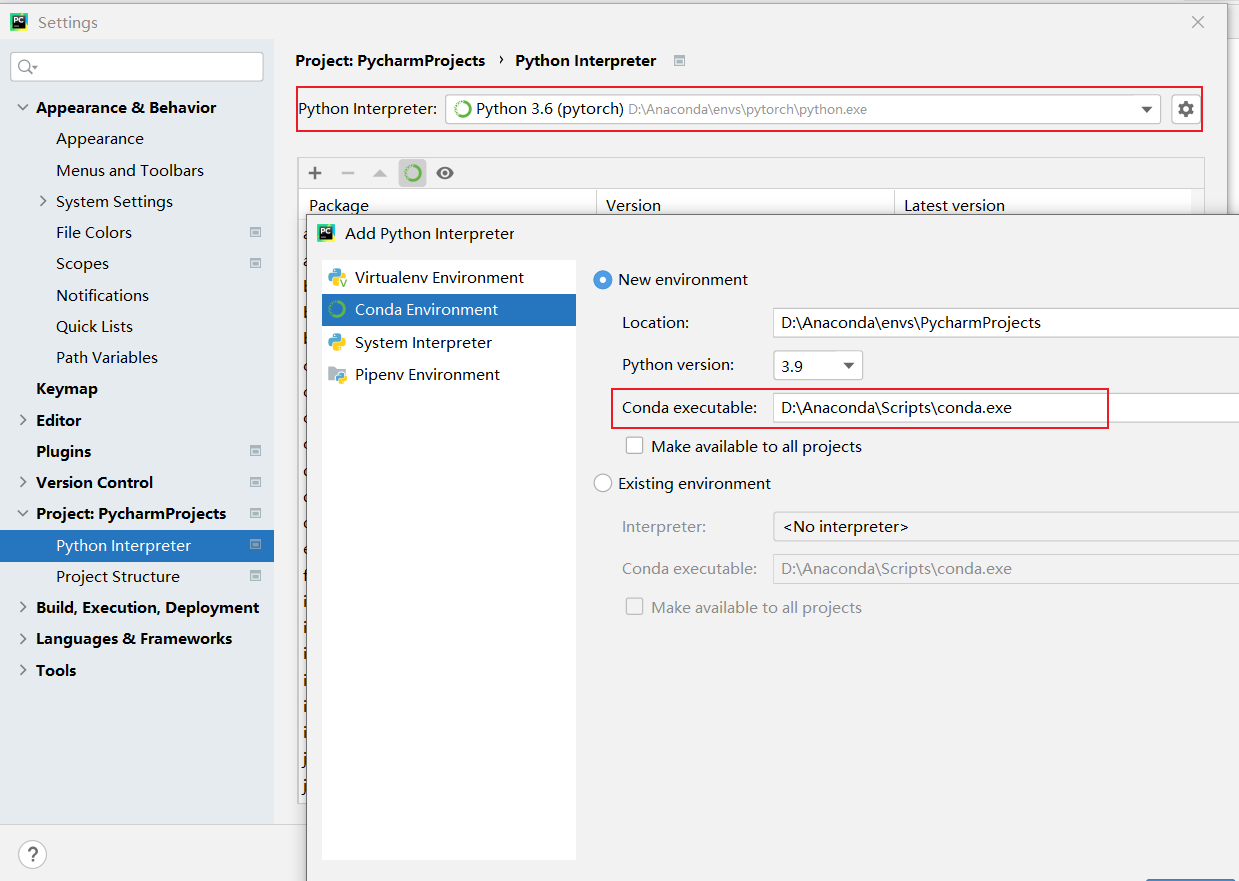
Create a pycharm project, import the pytroch environment created before, select conda environment in Python interpreter, and select the installation path of anaconda before
- Jupyter installation
In the command line interface, enter the pytorch environment
conda install nb_conda
jupyter notebook

2, Two magic functions in Python learning
import torch
dir(torch)
dir(torch.cuda) #Get the tool catalog in this toolbox
help(torch.cuda.is_available) #To get the function, remove the parentheses
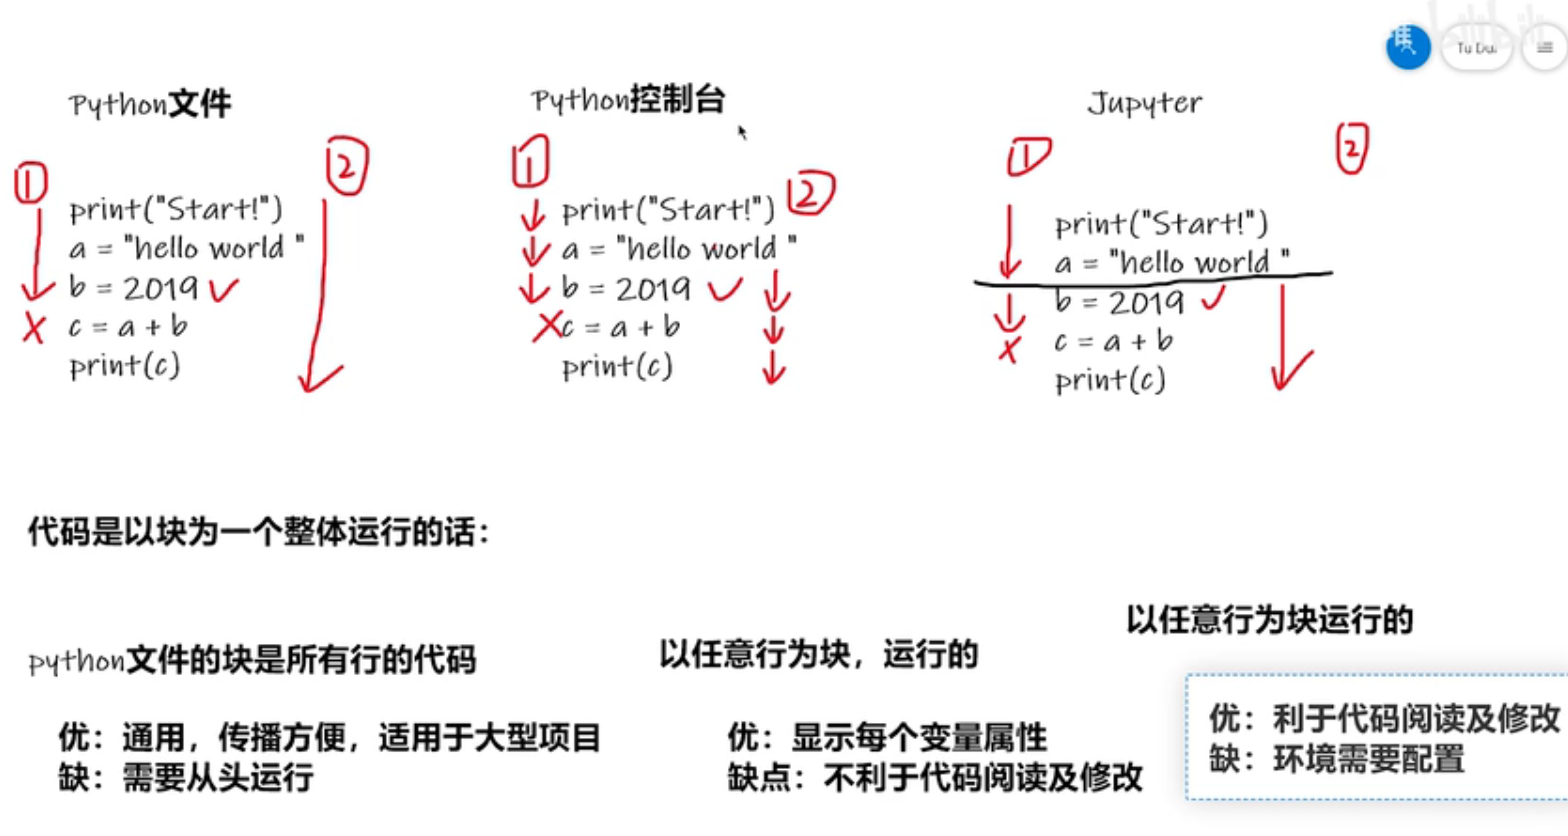
3, Use and comparison of PyCharm and Jupyter
4, Preliminary understanding of PyTorch loading data
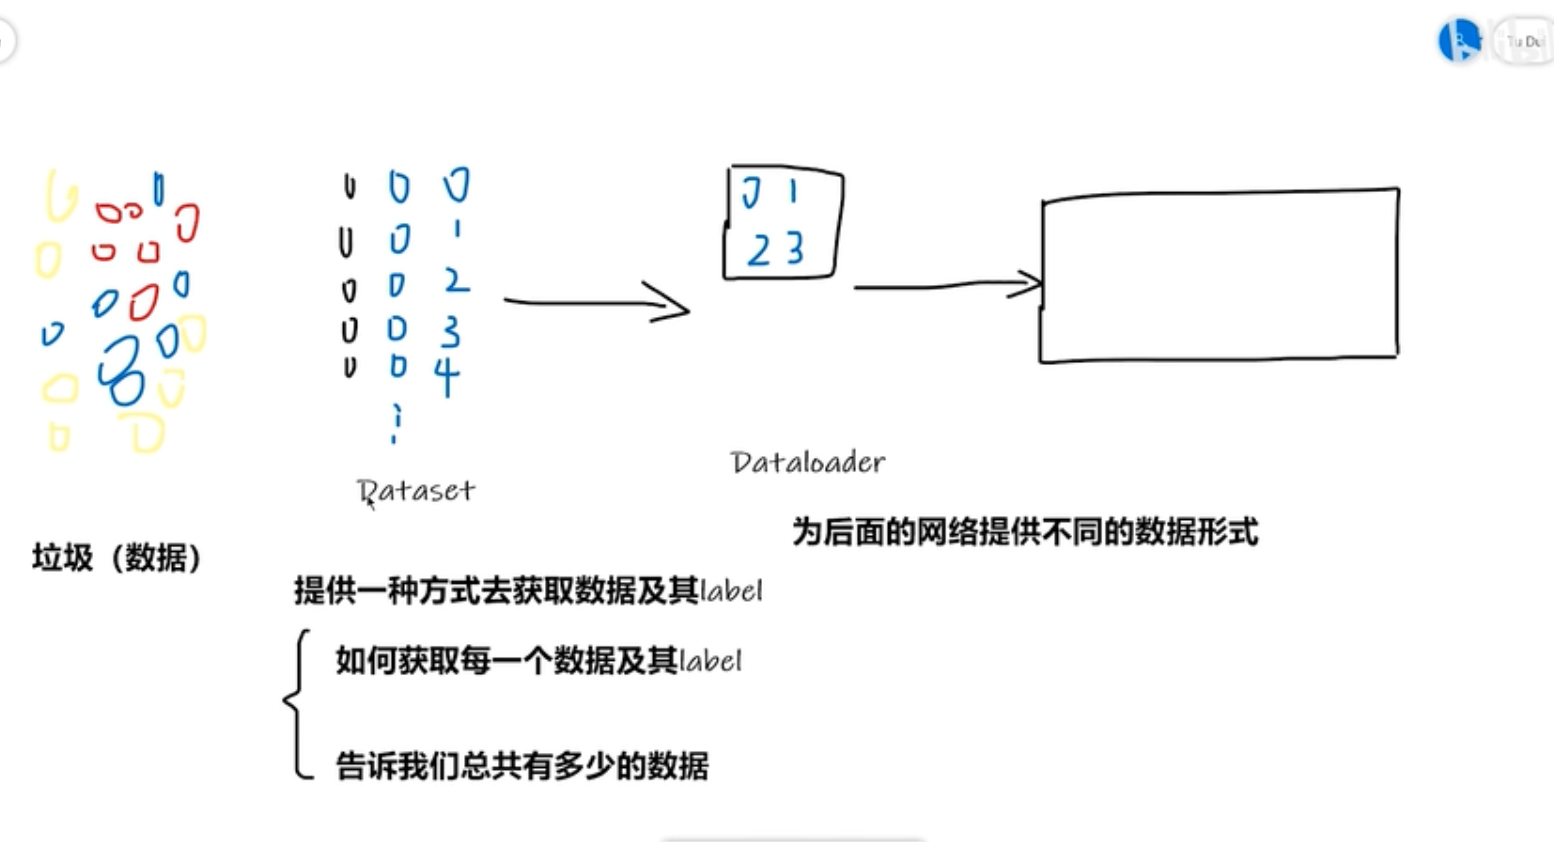
4.1 form of data set:
- The name of the folder corresponds to label;
- The pictures are in one folder, and the label is in another folder. Each picture is a txt file. txt stores the location and information of the objects in the picture;
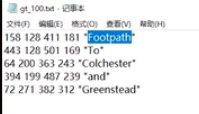
- Name the picture with label
4.2 DataSet class code practice
- All data classes of dataset class must be subclasses of dataset class and must be overridden__ getitem__, To get the label corresponding to each dataset.
At the same time, it can be selectively rewritten__ len__, Length of returned data - Read picture
from PIL import Image
img_path="E:\\PycharmProjects\\dataset\\hymenoptera_data\\train\\ants\\0013035.jpg"
img=Image.open(img_path)
img.size
img.show()
- Get a list of picture file names
import  os
dir_path="dataset/hymenoptera_data/train/ants"
img_name_list=os.listdir(dir_path)
img_name_list[0]
- Write DataSet class
#From the torch toolkit, there is a common tool area utils, which is the data area
from torch.utils.data import Dataset
from PIL import Image
import os

class MyData(Dataset):#Define your own class, inherit and Dataset

    def __init__(self,root_dir,label_dir): #Initializing a class is a function that runs when creating a class instance. Generally, it writes the global variables of the class
        self.root_dir=root_dir #Function variables cannot be passed directly, but they can be passed through the global structure of self, which defines the root directory
        self.label_dir=label_dir #Define label directory
        self.path=os.path.join(root_dir,label_dir) #Get the path under label
        self.name_list=os.listdir(self.path) #Get a list of all file names under this path

    def __getitem__(self, idx):
        img_name=self.name_list[idx] #Get the name of a single picture through the name list
        img_item_path=os.path.join(self.root_dir,self.label_dir,img_name) #Path of a single picture
        img=Image.open(img_item_path)
        label=self.label_dir
        return img,label

    def __len__(self):
        return len(self.img_path)
- Generate dataset
root_dir="dataset/hymenoptera_data/train"
ants_label_dir="ants"
bees_label_dir="bees"
ants_dataset=MyData(root_dir,ants_label_dir)
bees_dataset=MyData(root_dir,bees_label_dir)
img,label=ants_dataset[0]
img.show()

tran_dataset=ants_dataset+bees_dataset #Splice the two data sets
5, Use of Tensorboard
- Tensorboard is a tool for visualizing training results, while suammarywriter writes information to log files, which can be parsed by tensorboard
- Create an instance of summarywriter and write to the log file
from torch.utils.tensorboard import SummaryWriter
writer = SummaryWriter()
x = range(100)
for i in x:
   writer.add_scalar('y=2x', i * 2, i)
writer.close()
def add_scalar(self, tag, scalar_value, global_step=None, walltime=None):
  tag (string)#title
  scalar_value (float or string/blobname)#y value
  global_step (int)#Steps of x value
- Install tensorboard with pycharm terminal, open the log file in the event folder directory, and the specified output window is 6007
pip install tensorboard
tensorboard --logdir==logs --port=6007

- Image write log
def add_image(self, tag, img_tensor, global_step=None, walltime=None, dataformats='CHW'):
 	#Write image to summary
    tag (string): title
    img_tensor (torch.Tensor, numpy.array, or string/blobname): image type
    global_step (int): Steps of training
from torch.utils.tensorboard import SummaryWriter
import numpy as np
from PIL import Image

writer=SummaryWriter("logs") #Create an instance

#Create a log file for writing images
imagepath="dataset/hymenoptera_data/train/ants/0013035.jpg"
img_pil=Image.open(imagepath)
img_array=np.array(img_pil)#The file format is changed from original PIL to ndarray
print(type(img_pil))
print(type(img_array))
print(img_array.shape)#The picture format is HWC, but the default picture format for adding picture functions is CHW
writer.add_image("train",img_array,2,dataformats="HWC")#Title, picture, number of times, picture format (width, height, channel)

writer.close()
6, Transforms
6.1 introduction to transform
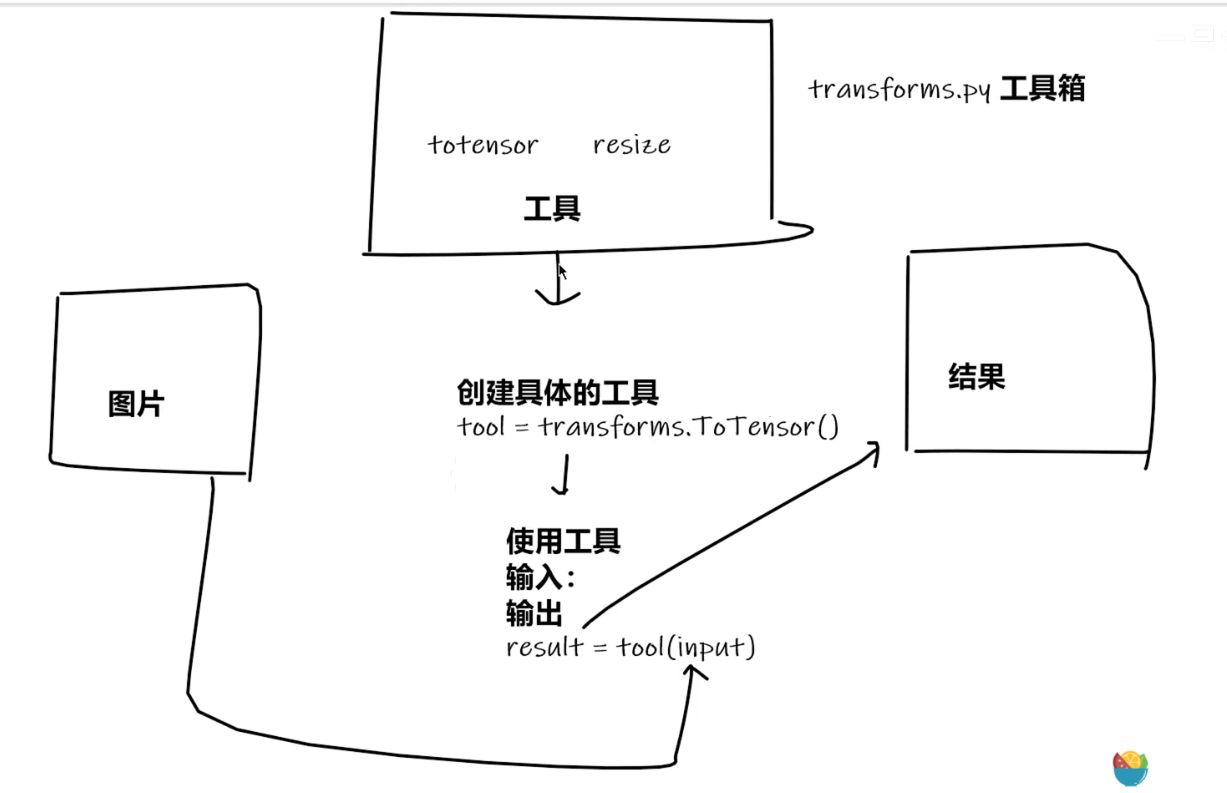
- In transform There are many classes (tools) in the PY file. These tools are used to process images:
class Compose  #Combine several transform s together
class ToTensor #Change to Tensor format
class Normalize#Regularization
class Resize
Example:
       transforms.Compose([
         transforms.CenterCrop(10),#Center clipping
         transforms.ToTensor(),#Become tensor
         ])
- Use of transform
from torchvision import transforms
from PIL import Image

img_path="dataset/hymenoptera_data/train/ants/0013035.jpg"
img=Image.open(img_path)

#totensor is also a class. You need to create an instance of this class before you can use the functions in it
tensor_trans=transforms.ToTensor()
tensor_img=tensor_trans(img)
- The tensor data type is used because it contains the parameters needed to use the neural network
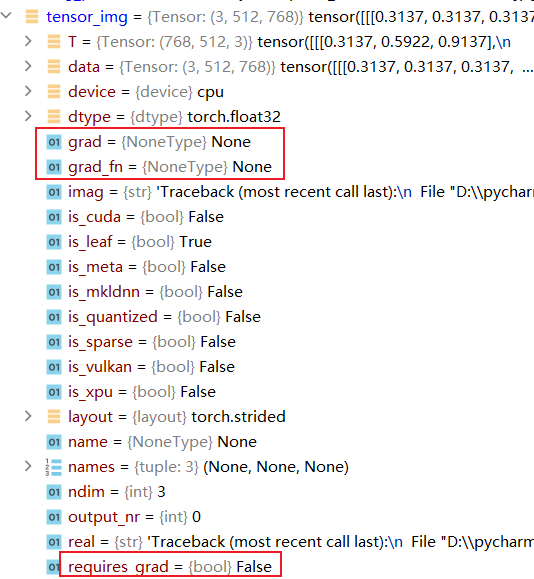
6.2 common Transform
- The image format is different, and the opening method is also different
PIL		--Image.open()
tensor  --ToTensor()
narrays --cv.imread()
- Usage of call function
class person:
	def __call__(self, name):
		print("__call"+name)
	def hello(self,name):
		print(name)

person1=person()
person1("zhangsan")#If built-in call is defined, this function can be called directly with parameters
person1.hello("lisi")#And this method needs to be called with points
- Usage of Totensor
from PIL import Image
from torchvision import  transforms
from torch.utils.tensorboard import SummaryWriter

writer=SummaryWriter("logs")
img=Image.open("image/111.jpg")

tran_tensor=transforms.ToTensor()
img_tensor=tran_tensor(img)
writer.add_image("tensor",img_tensor)
- Normalize usage
class Normalize(torch.nn.Module):
#The input must be a tensor type image with mean and standard deviation
#The standard deviation of the given mean is calculated according to the number of channels (mean[1],...,mean[n]) (std[1],..,std[n])
#Output [channel] = (input [channel] - mean [channel]) / standard deviation [channel]
tran_norm=transforms.Normalize([0.5,0.5,0.5],[0.5,0.5,0.5])
img_norm=tran_norm(img_tensor)
writer.add_image("normalize",img_norm,2)
- Use of resize
The input is in PIL format. If the length and width are given, it will be scaled normally. If one side is given, it will be scaled proportionally according to the shortest side.
The returned is also in PIL format
tran_resize=transforms.Resize((512,512))
#img PIL -> resize -> img_size PIL
img_size=tran_resize(img)
#img_size PIL ->img_size tensor
img_size=tran_tensor(img_size)
writer.add_image("resize",img_size,0)
- Use of compose
Note the format. The input is based on resize, so the input is in PIL format
tran_resize2=transforms.Resize(512)
#PIL -> PIL ->tensor
tran_compose=transforms.Compose([tran_resize2,tran_tensor])
img_size2=tran_compose(img)
writer.add_image("resize2",img_size2,3)
- radomcrop random clipping
tran_radom=transforms.RandomCrop(512)
tran_compose2=transforms.Compose([tran_radom,tran_tensor])
for i in range(10):
    img_crop=tran_compose2(img)
    writer.add_image("random",img_crop,i)