Project background: I mainly want to make an AGV dispatching simulation software. In the first stage, I will complete the movement of the trolley first. Therefore, we need to learn the animation effect of QT to lay a foundation for the whole software,
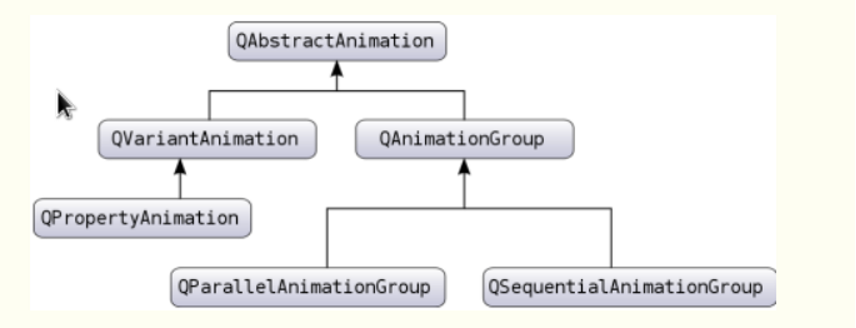
The animation framework is composed of the base class QAbstractAnimation and its two derived classes QVariantAnimation and QAnimaitonGroup. The animation framework further provides QProPertyAnimation class for the change of single control properties, and QAnimationGroup class for multi animation. This article mainly explains the implementation of a single animation.
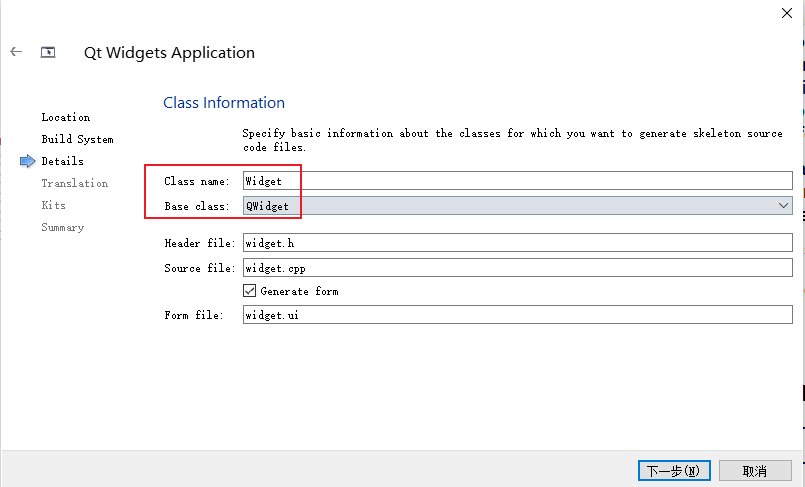
Create a new Qt Widgets Application in Qt Creator, and select the basic class based on qwidgets.
The following code is implemented in the Widget function in widget.cpp.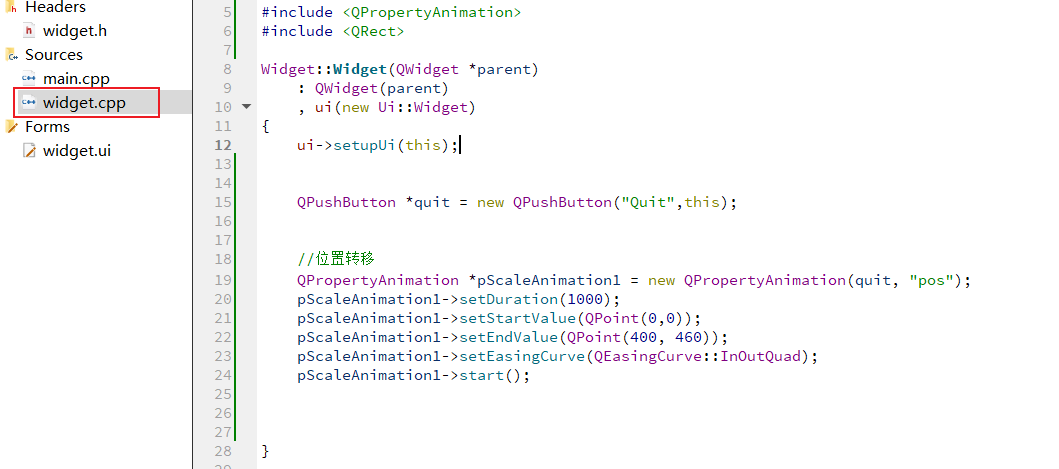
QPropertyAnimation
Property is a property and animation is an animation, so this class is used to control the animation of control properties. QPropertyAnimation class inherits QVariantAnimation class and can modify the attribute value of Qt, such as pos, geometry and other attributes. Animation controls must be derived from QObject class. In fact, most controls are derived from QObject class. We can specify the initial and final values of attributes, such as initial size and end size, initial position and end position, initial color and end color, etc. If no initial value is specified, the property is set to the value at which the control instance was generated.
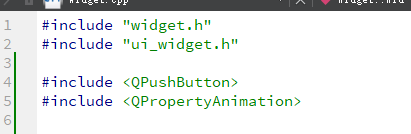
Header file
The first two are built, the third is to create a new button, and the fourth is to create an animation.
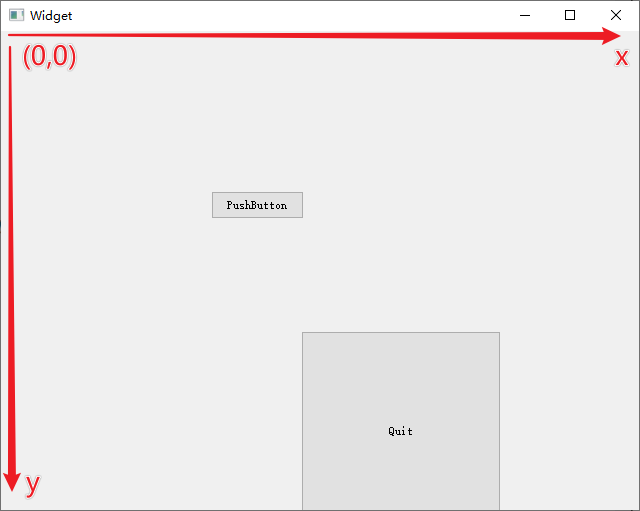
Coordinate system
The following coordinate system definition representing the position is shown in the following figure.
Simple steps to achieve animation
1. Instantiate QPropertyAnimation object.
2. Bind the object to be animated, which should inherit from the QObject parent class.
3. Set the attributes to be changed, such as size, position, color, etc.
4. Set the start value and end value of the attribute.
5. Set the animation run time.
6. Start the animation.
The following examples all have these six steps. There are two ways to operate: instantiate object, bind object and set attribute.
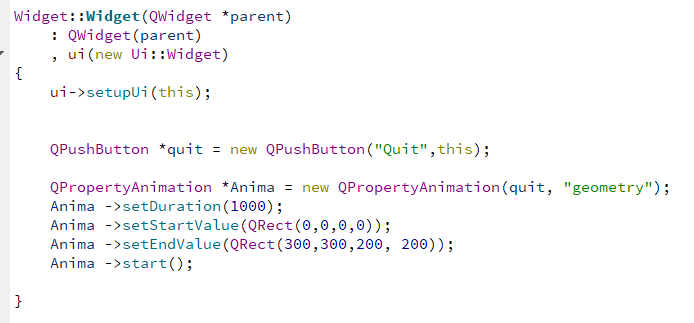
The first way is to directly use the constructor in one step, as shown in the following figure.
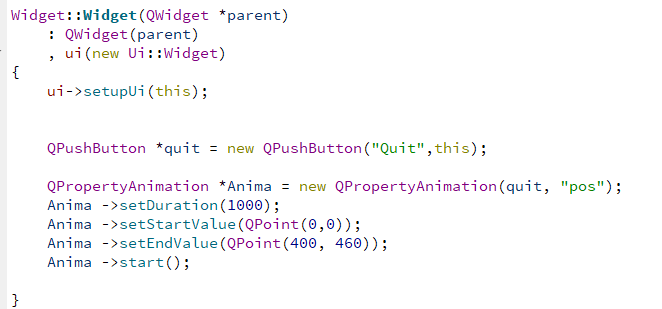
The second method is to do it separately, as shown in the figure below. First instantiate the object and name it Anima, and then perform the next two steps through the setTargetObject function and setPropertyName function. quit is a pointer created to point to a button.

zoom
By modifying the geometry property of the control, you can achieve the scaling effect and the animation of displacement. The first two values of the property determine the position of the upper left corner of the control, and the last two values determine the size of the control. It must be expressed by QRcet, which can be expressed in two ways. We choose the first.

A QPushButton object was created earlier for the demonstration effect of animation. setDuration sets the time of the animation.
displacement
If you only need displacement animation, you can modify the pos property of the control. The pos property is where the upper left corner of the control is located. QPoint represents a point.
Animation speed curve
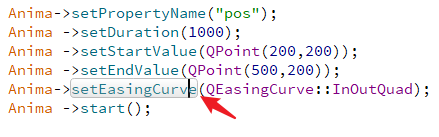
The speed curve of animation motion can be changed, and the default is uniform motion. Through its member function setEasingCurve function, you can change the speed curve. You can see the values of curves in the instruction manual.
Anima->setEasingCurve(QEasingCurve::InOutQuad);
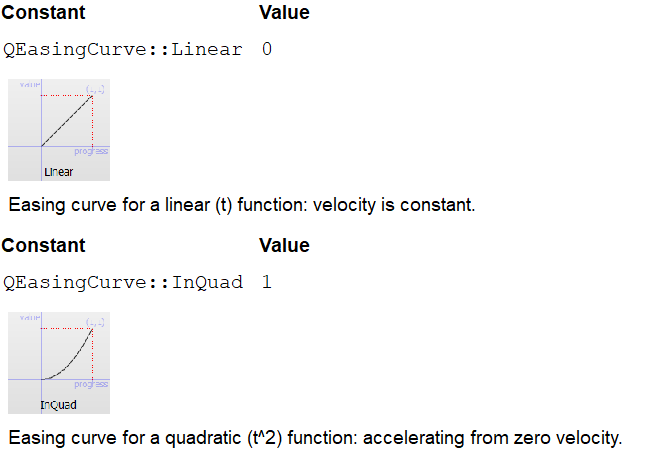
The first Linear motion is the default Linear motion, and the speed is kept constant. The second InQuad curve is a quadratic function curve. There are many more below, I won't list them. You can view the value of the curve in the following ways.
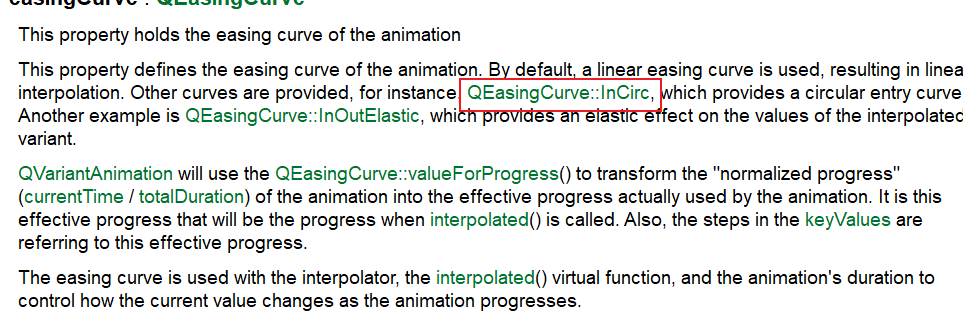
Place the mouse over the function and press F1 on the keyboard;
Click the red box again to jump to the curve introduction.
demonstration
Through the signal and slot mechanism, the linkage relationship between keys and animation is established to achieve the demonstration effect. The code is as follows:
#include "widget.h"
#include "ui_widget.h"

#include <QPushButton>
#include <QPropertyAnimation>
#include <QMessageBox>

 QPropertyAnimation *Anima = new QPropertyAnimation;
Widget::Widget(QWidget *parent)
    : QWidget(parent)
    , ui(new Ui::Widget)
{
    ui->setupUi(this);

    //Define a key
    QPushButton *button1 = new QPushButton("zoom",this);
    //Associate the click signal to the slot function
    connect(button1,SIGNAL(pressed()),this,SLOT(suofang()));
    button1->setGeometry(20,20,100,40);

    QPushButton *button2 = new QPushButton("displacement(Default curve)",this);
    connect(button2,SIGNAL(pressed()),this,SLOT(ChangePos()));
    button2->setGeometry(130,20,100,40);

    QPushButton *button3 = new QPushButton("displacement(Cubic curve)",this);
    connect(button3,SIGNAL(pressed()),this,SLOT(ChangePos2()));
    button3->setGeometry(240,20,100,40);

    QPushButton *quit= new QPushButton("A",this);
    quit->setGeometry(10,200,30,30);
    Anima->setTargetObject(quit);


}

Widget::~Widget()
{
    delete ui;
}


void Widget::suofang()
{
    Anima->setPropertyName("geometry");
    Anima ->setDuration(1000);
    Anima ->setStartValue(QRect(10,200,10,10));
    Anima ->setEndValue(QRect(10,200,200, 200));
    Anima ->start();
}

void Widget::ChangePos()
{
    Anima->setPropertyName("pos");
    Anima ->setDuration(1000);
    Anima ->setStartValue(QPoint(10,200));
    Anima ->setEndValue(QPoint(500,200));
    Anima ->start();
}

void Widget::ChangePos2()
{
    Anima->setPropertyName("pos");
    Anima ->setDuration(1000);
    Anima ->setStartValue(QPoint(10,200));
    Anima ->setEndValue(QPoint(500,200));
    Anima->setEasingCurve(QEasingCurve::InOutCubic);
    Anima ->start();
}
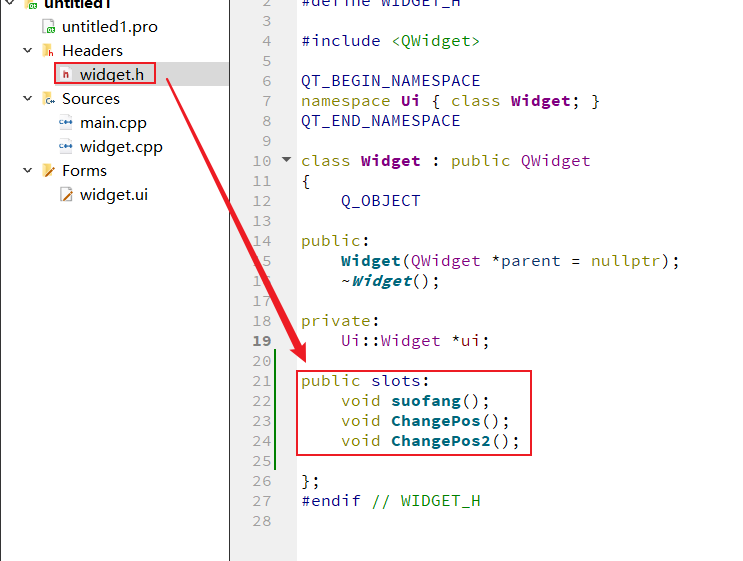
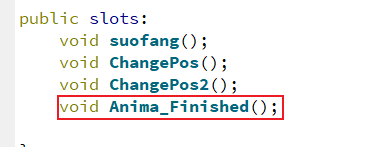
Slot function must be declared in widget.h.
Through the demonstration, you can clearly see the difference between the motion of the default speed curve and Cubic curve.
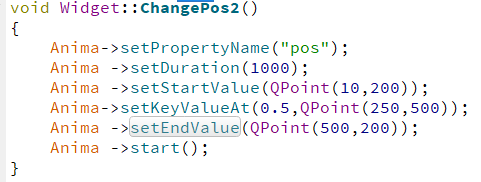
Interpolation motion
What I mentioned earlier is moving from point A to point B, and the route is straight, one step in place. If we need it to pass through point C halfway, we will need the key point interpolation function. The range of A given frame must be 0-1, that is, the whole motion process should be regarded as 1. If you need to insert A key frame halfway, it is 0.5
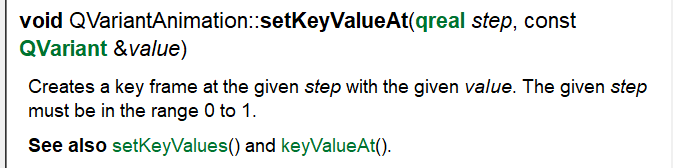
An example is as follows: a keyframe is inserted at 0.5, that is, half the distance.
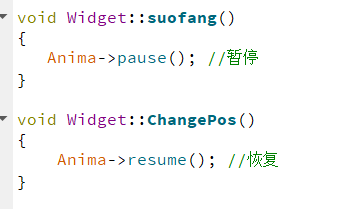
Pause and resume of animation
Change the above demonstration program and add pause and resume functions. This function can be used in the parking, loading and unloading steps of agv.
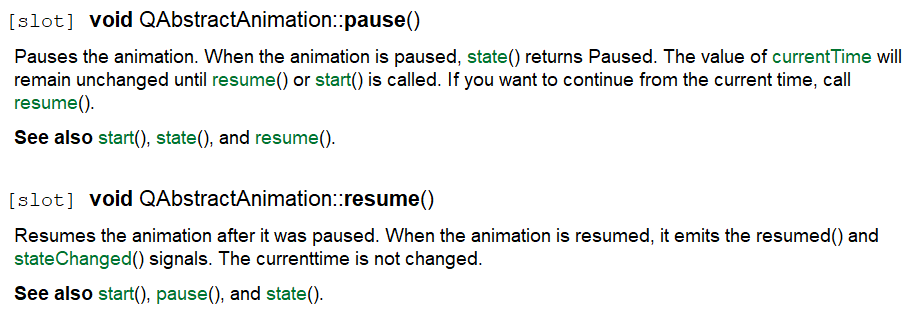
These two functions are actually member functions of their parent class QAbstactAnimation.
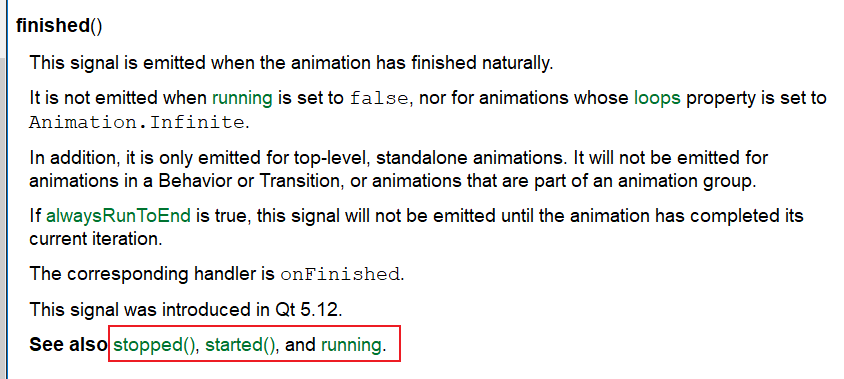
Animation end signal
We want to send a signal after the animation execution, which allows me to do other things. In fact, QT has built this signal. Let's see how to use it? Set the signal and slot and connect them with the connect function. The first function parameter is the animation object Anima, and the second is the end signal specified by QT.
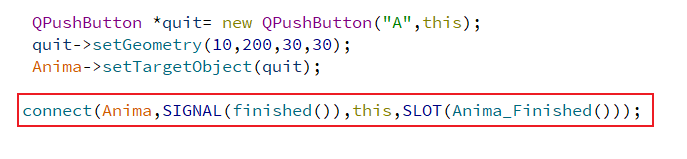
Anima_ The finished function is my custom slot function. You can take any name.
It can be seen from the manual that this signal will be sent when the animation ends naturally (the relative concept is forced stop). There are several other signals in this animation, indicating stop, start and running.
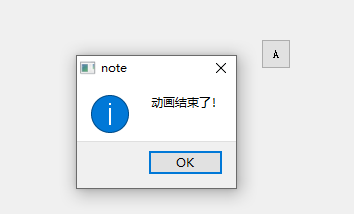
experiment:
After receiving the end signal, a simple dialog box is displayed.

Validation succeeded.