What is the effect of hollowing, the following figure is a text with the effect of hollowing out:

As can be seen from the figure, the text is transparent, and you can see the following picture content, while other parts of the UILabel have a white background.
Using Quartz 2D to draw the hollowing effect, the general idea is as follows:
- Implement a subclass of UILabel (this is not necessary. The purpose of this is to use the text drawing function of UILabel to draw text conveniently. You can also use CoreText to draw text)
- When initializing the current view, make sure that the backgroundColor = Clear (this is the key to realizing the failed text, because the text part must be transparent)
- Use the drawing method of UILabel to draw a text mask (Note: the original drawing must be transparent with white text (ensure textColor is. White). In this way, we can correctly create a text mask we need)
- Call clip(to rect: CGRect, mask: CGImage) to clip the context of the current view. The mask is the mask created in 3 (the coordinate system of the context needs to be converted before that)
- Fill context background color
Attach Code:
class PiercedLabel: UILabel {

    override var textColor: UIColor!{
        didSet {
            if textColor != .white {
                textColor = .white // To achieve a hollowed out text, the color here must be set to white
            }
        }
    }

    override var backgroundColor: UIColor?{
        didSet {
            // backgroundColor Be sure to always.clear(Transparent color), so as to achieve a hollowed out effect
            guard let color = backgroundColor else {
                backgroundColor = .clear
                // When set backgroundColor == nil When, our default background is white
                bgColor = .white
                return
            }
            if color != .clear {
                bgColor = color // Keep the background color set so that you can draw the background later
                backgroundColor = .clear
            }
        }
    }

    // Used to draw the background color
    private var bgColor: UIColor!

    init() {
        super.init(frame: .zero)
        config()
    }

    override init(frame: CGRect) {
        super.init(frame: frame)
        config()
    }

    required init?(coder: NSCoder) {
        super.init(coder: coder)
        config()
    }

    private func config(){
        textColor = .white
        bgColor = .white
        backgroundColor = .clear
    }

    override func draw(_ rect: CGRect) {

        // Create a graphic context for drawing pictures, which must be transparent in order to create a text mask
        UIGraphicsBeginImageContextWithOptions(rect.size, false, 0)
        guard let maskContext = UIGraphicsGetCurrentContext() else {
            return
        }
        // Note: at this time maskContext Not currently draw Method, but we call UIGraphicsBeginImageContextWithOptions
        //      Build a new graphic context in which we draw a text mask
        // Draw text to maskContext In context
        super.draw(rect)
        // obtain maskContext Contextual bitmap picture
        guard let textImg = maskContext.makeImage() else {
            UIGraphicsEndImageContext() // end maskContext context
            return
        }
        UIGraphicsEndImageContext() // end maskContext context
        // Note: at this time textImg It cannot be used as a text mask. We need to create a mask image by the following methods
        // Create mask layout
        guard let maskImg = CGImage(maskWidth: textImg.width,
                                    height: textImg.height,
                                    bitsPerComponent: textImg.bitsPerComponent,
                                    bitsPerPixel: textImg.bitsPerPixel,
                                    bytesPerRow: textImg.bytesPerRow,
                                    provider: textImg.dataProvider!,
                                    decode: textImg.decode,
                                    shouldInterpolate: textImg.shouldInterpolate) else {
            return
        }

        // Get current draw Method, we need to draw the content here
        guard let ctx = UIGraphicsGetCurrentContext() else {
            return
        }
        // Save the current context state first
        ctx.saveGState()
        ctx.clear(rect)
        // Adjust the coordinate system of the current context because ctx.draw The coordinate system is drawn according to the origin in the lower left corner
        // Therefore, we need to change the coordinate system to the upper left corner, so that the drawing result is correct, otherwise the text is reversed
        ctx.translateBy(x: 0, y: rect.height)
        ctx.scaleBy(x: 1, y: -1)

        // Using a mask for clipping, it will ctx context rect The text part of the area is cut off
        ctx.clip(to: rect, mask: maskImg)

        // Draw the background color (Note: the cut part will not be filled, which will form a hollow effect)
        // because ctx The context is based on the current view backgroundColor Created, and backgroundColor == .clear,Is a transparent
        // therefore ctx It is a context with a transparent layer, and the cropped text is transparent
        // That's why make sure backgroundColor == .clear Yes
        bgColor.setFill()
        ctx.fill(rect)
    }
}
The comments in the code have been written in great detail, and the specific explanation will not be described in detail
The following is a comparison between the original and the mask:
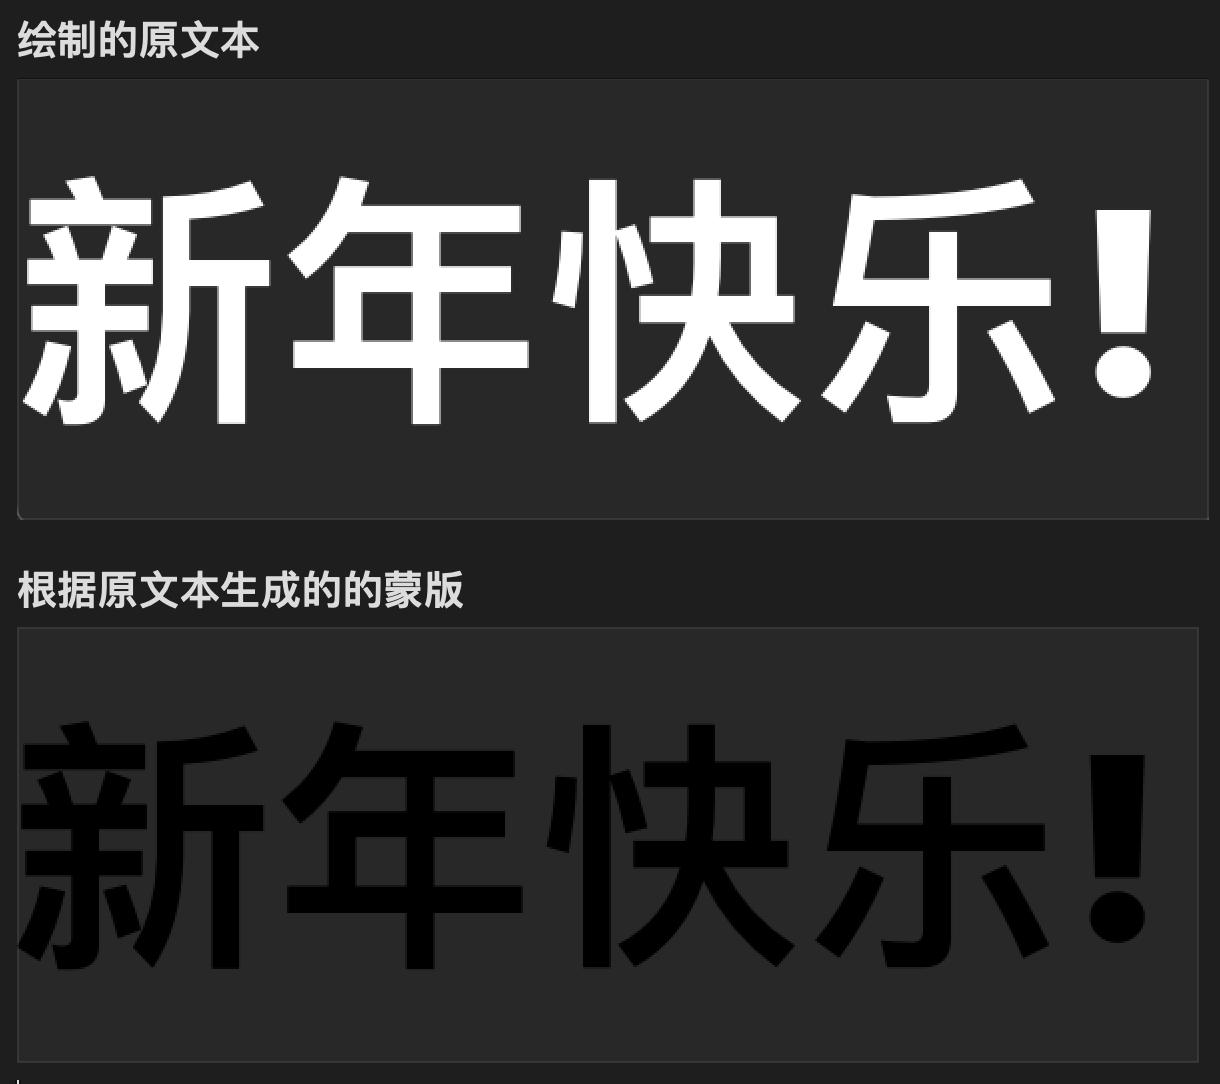
Original text: it is a transparent background with white text
Mask: it is a transparent background with black text
Some people will think, can we directly use the original picture as a mask? Yes, but that will not be the effect we want. It will be the following effect:

The background color becomes the color of the text, while the background color becomes transparent. This is the opposite of what we want.
Therefore, we must create a mask image through CGImageMaskCreate.
For an explanation of ImageMask, see Apple Official documents
Description of interception part:
Image masks must be 1, 2, 4, or 8 bits per component. For a 1-bit mask, a sample value of 1 specifies sections of the mask that are masked out; these sections block the current fill color. A sample value of 0 specifies sections of the mask that are not masked out; these sections show the current fill color of the graphics state when the mask is painted. You can think of the sample values as an inverse alpha. That is, a value of 1 is transparent and 0 is opaque.