During RabbitMQ installation, you should pay attention to:
1. RabbitMQ depends on Erlang. Erlang needs to be installed first
2. Erlang and RabbitMQ versions correspond
https://www.rabbitmq.com/which-erlang.html
1, Install Erlang
1. Install some required dependencies first:
yum -y install gcc glibc-devel make ncurses-devel openssl-devel xmlto perl wget
2. Download the corresponding version of Erlang
Download the corresponding version of Erlang by referring to the version relationship above
wget http://erlang.org/download/otp_src_24.0.tar.gz2
If the online download is too slow, you can also paste the address into Xunlei, download it in advance, and then upload it to the server, http://erlang.org/download/ ;
3. Decompress, compile and install
cd /usr/local
mkdir erlang
tar -zxvf otp_src_24.0.tar.gz
cd otp_src_21.3
./configure --prefix=/usr/local/erlang
This process may take a long time. If there is an err in the process of configure, the problem of dependency should be solved. info and warn have no impact.
If there are APPLICATIONS INFORMATION and DOCUMENTATION INFORMATION, it has no impact.
make && make install
This process may take a long time. If there is a prompt that other dependent packages are missing, install them according to the prompt
yum install -y Missing dependencies xxx
4. Configure environment variables and compile them to take effect
Configure the environment variable / etc/profile after installation
vim /etc/profile
Add a line at the end
#erlang
export PATH=$PATH:/usr/local/erlang/bin
wq save exit
Compilation takes effect
source /etc/profile
5. Verify that Erlang was successfully installed
Enter erl, and the version information will appear, that is, the installation is successful

2, Installing RabbitMQ 3.8.16
1. Download RabbitMQ
If the online download is too slow, you can also download it in advance and upload it to the server for GitHub download https://github.com/rabbitmq/rabbitmq-server/releases/tag/v3.8.16
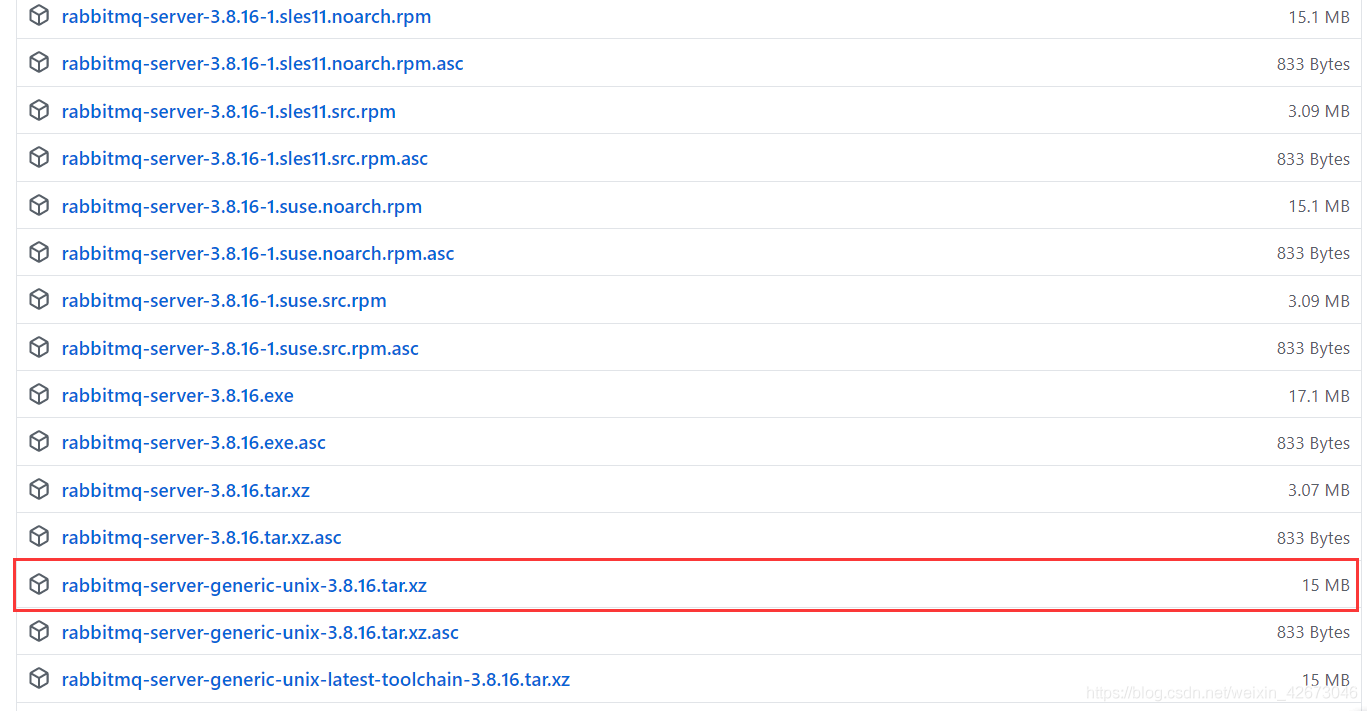
2. Decompression
xz -d rabbitmq-server-generic-unix-3.8.16.tar.xz
tar -xvf rabbitmq-server-generic-unix-3.8.16.ta
3. Configure environment variables
vim /etc/profile
Add last line
#rabbitMQ
export PATH=$PATH:/usr/local/rabbitmq_server-3.8.16/sbin
My download directory is under / usr/local. Please pay attention to modifying the installation path for yourself during installation
wq save exit
Compilation takes effect
source /etc/profile
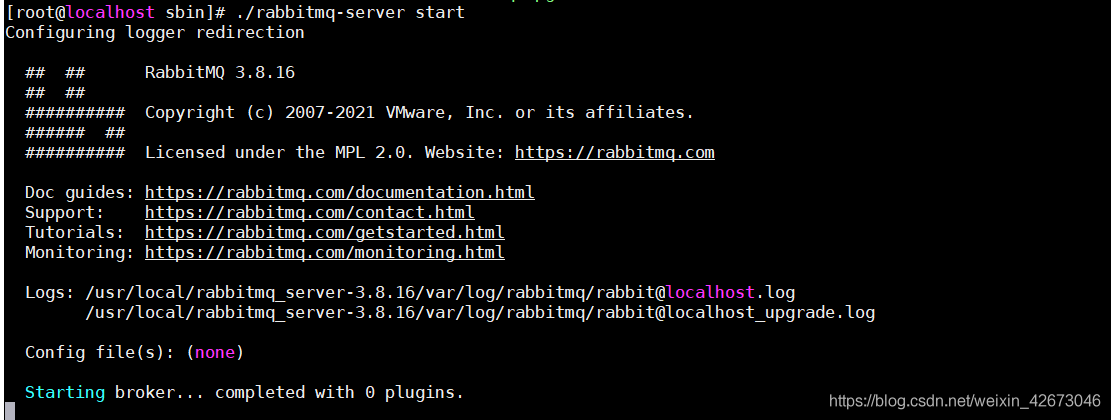
4. Start RabbitMQ
Enter / usr/local/rabbitmq_server-3.8.16/sbin directory
cd /usr/local/rabbitmq_server-3.8.16/sbin
./rabbitmq-server start
The startup succeeded as follows:
Or start rabbitmq service in the background
./rabbitmq-server -detached
If startup fails, the following error is reported: 10:14:40.021 [error] ERROR: distribution port 25672 in use by rabbit@host-117 ERROR: distribution port 25672 in use by rabbit@host -1117
The solution is as follows:
[root@host-11117 ~]# netstat -lnp | grep 25672
tcp 0 0 0.0.0.0:25672 0.0.0.0:* LISTEN 2452/beam.smp
[root@host-1717 ~]# kill -9 2452
[root@host-17117 ~]# rabbitmq-server –detached
5. Add another user & enable administration plug-in
Because the guest user can only be accessed locally, add an admin user with the password of admin
./rabbitmqctl add_user admin admin
./rabbitmqctl set_user_tags admin administrator
./rabbitmqctl set_permissions -p / admin ".*" ".*" ".*"
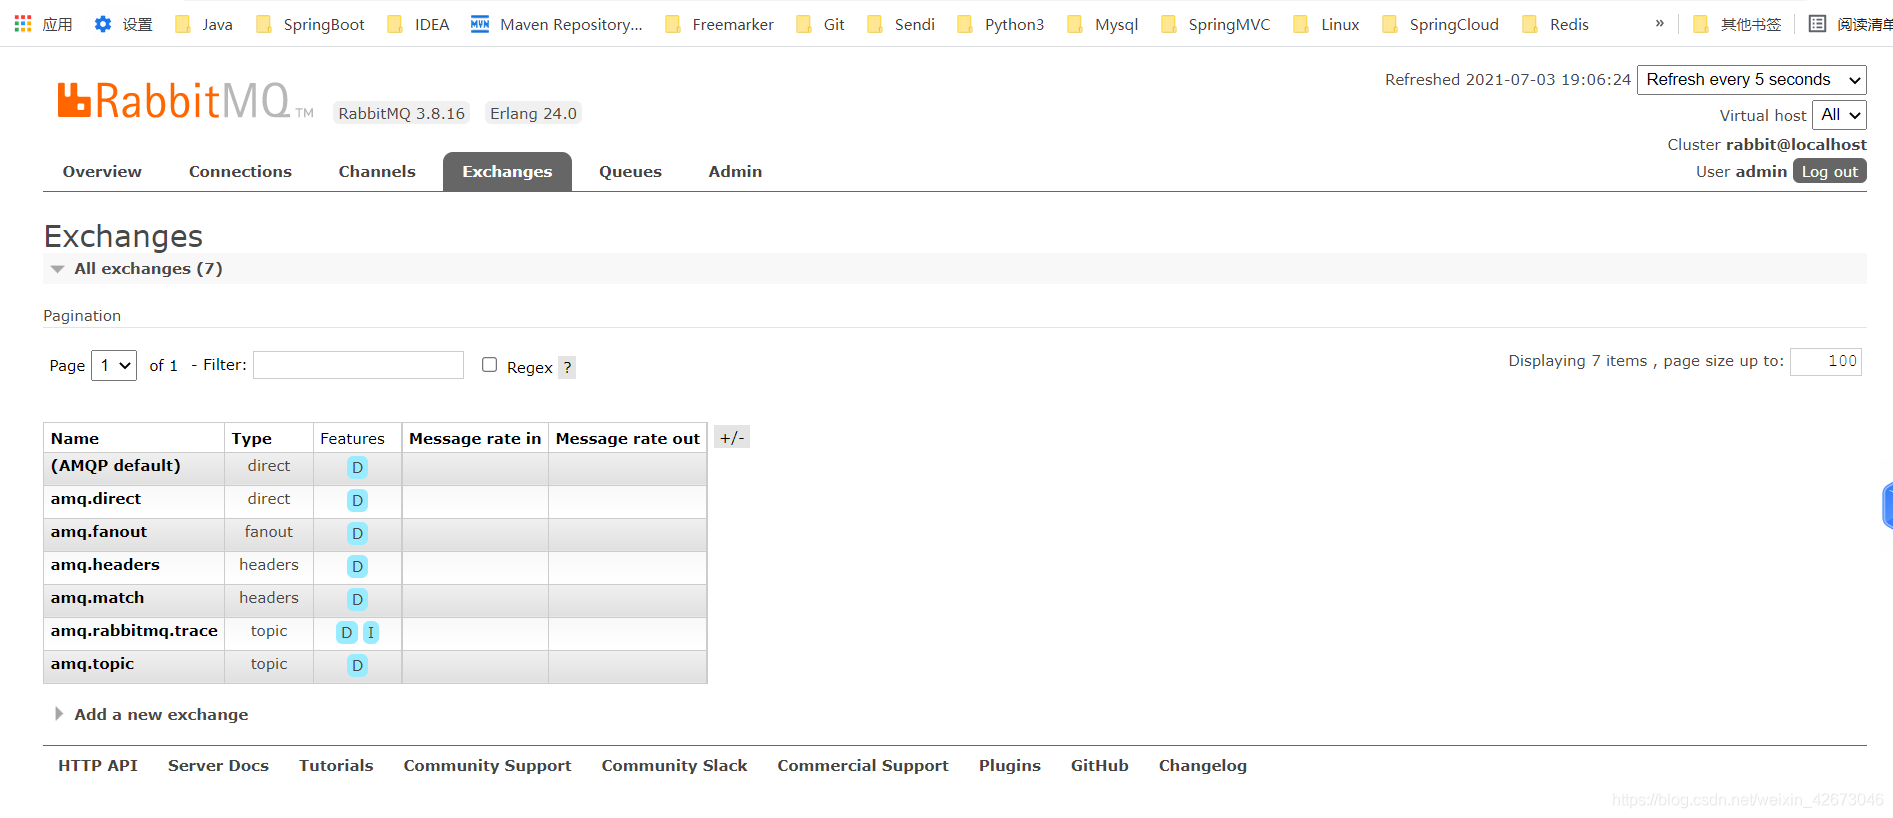
Enable management plug-in
./rabbitmq-plugins enable rabbitmq_management
Access: http: / / virtual machine IP:15672 (remember to configure the firewall to open the port or turn off the firewall)
III. change RabbitMQ port
1. Create a file in rabbitmq under etc
vim /usr/local/rabbitmq/etc/rabbitmq/rabbitmq.conf
2. Add your ip and port, and then restart rabbitmq service
listeners.tcp.default = ip:6573
3. Restart the RabbitMQ service
Reference link: https://blog.csdn.net/weixin_42673046/article/details/118442323