1, Initialize
1.1 function description
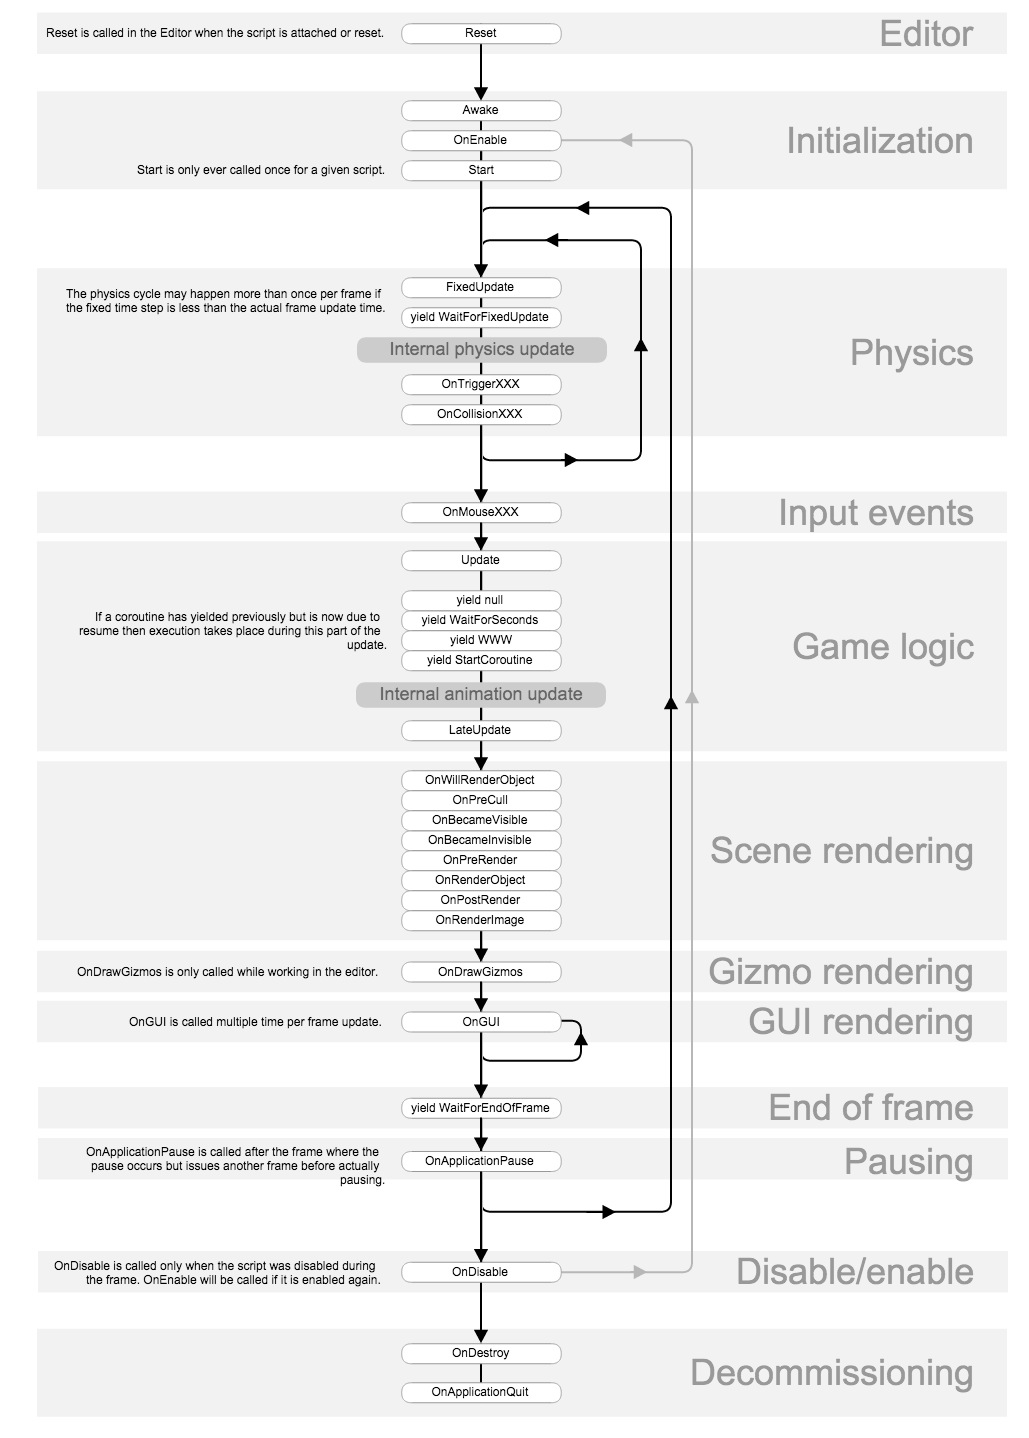
Running state initialization: (also execution sequence)
- Awake: call when initialization, before calling Start function.
- OnEnable: called when the object is enabled
- Start: called at the first frame only when the script instance is enabled
Editor status initialization:
- Reset: called under the editor to initialize the script attribute when the script is attached to the object for the first time or when you click Reset.
Practical application:
- Wake: usually used as logic that needs to be initialized in advance. For example, single instance assignment
private void Awake(){Instance = this;}. - OnEnable: the logic that needs to be initialized when processing each display. It is usually used in combination with OnDisable.
For example: the game logic uses and modifies the variable Number, and the next time it is displayed, it needs Number = 1. At this time, you can write private void wake() {Number = 1;}. - Start: usually use to initialize logic for some variables.
For example: get the specified object: private void Start(){child1 = transform.GetChild(0);} - Reset: usually, initialization under the editor is used during game testing and debugging. Execute a logic by clicking reset.
1.2 example analysis
Running state initialization example:
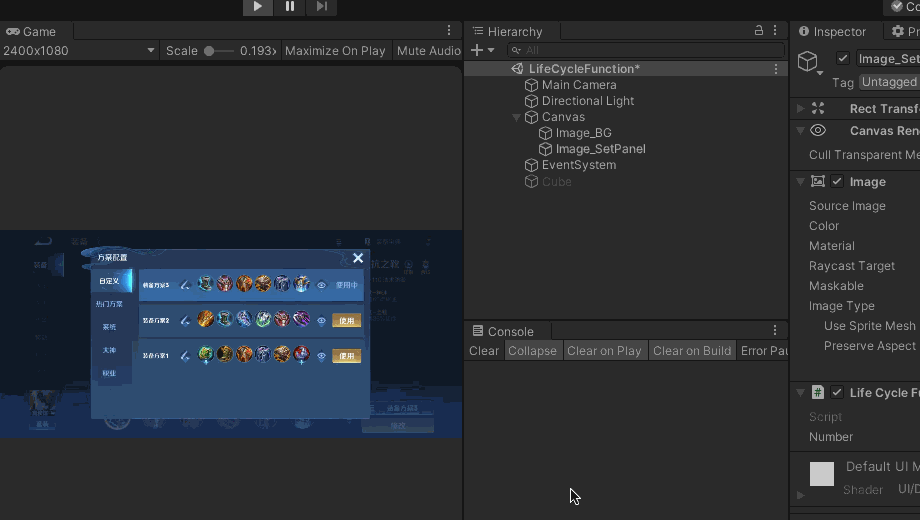
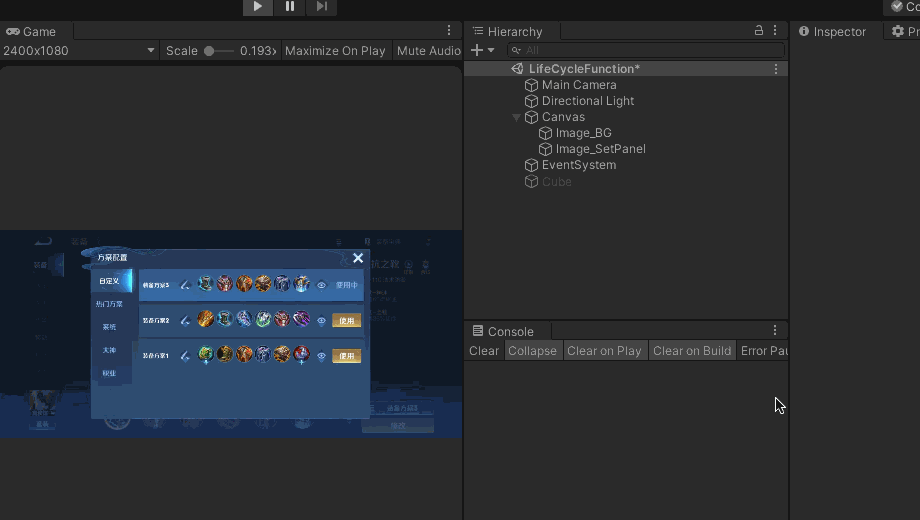
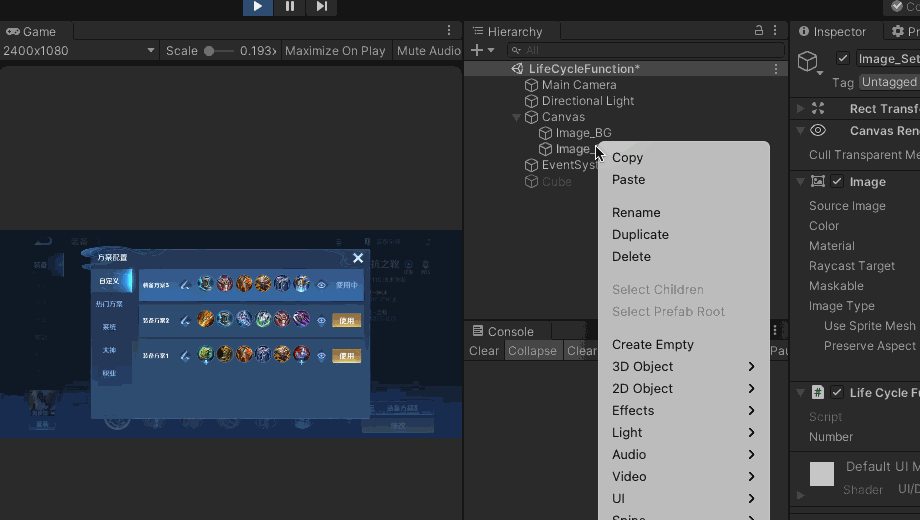
build a scene and create two new UI - > images, one as the background and one as the pop-up window. Create a new script and mount it on the pop-up Image.
The script is as follows:
using UnityEngine;

public class LifeCycleFunction : MonoBehaviour
{
    #region Initialization
    public int Number = 1;

    private void Awake()
    {
        Debug.Log("Awake Called during initialization, in Start Call before function...");
    }
    private void OnEnable()
    {
        Debug.Log("OnEnable Called every time the object is enabled...");
    }
    private void Reset()
    {
        Number = 0;
        Debug.Log("Reset Can only be called in editor mode...Number: " + Number);
    }
    private void Start()
    {
        Debug.Log("Start Called at the first frame only when the script instance is enabled...");
    }

    #endregion
}
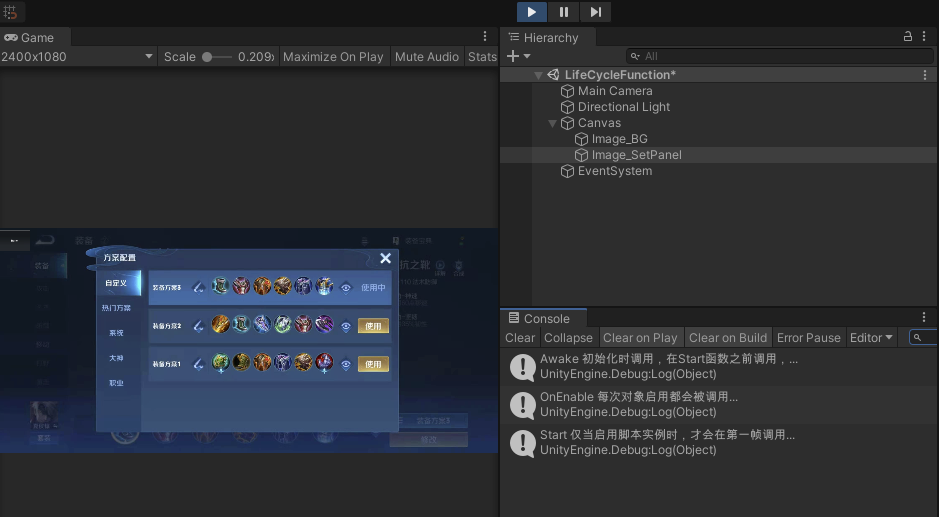
The running results show the execution sequence of wake, onenable and start. The running results are as follows:
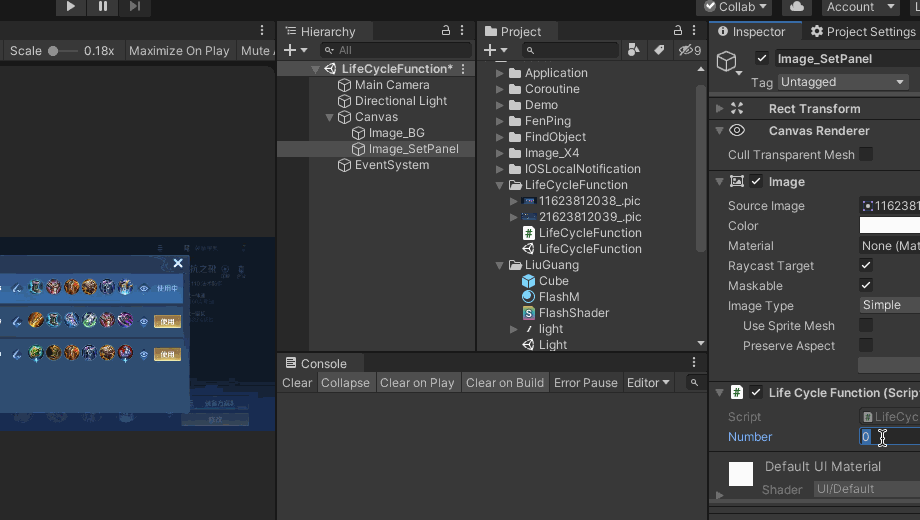
Initialization under editor:
1. The script is automatically executed when dragging and attaching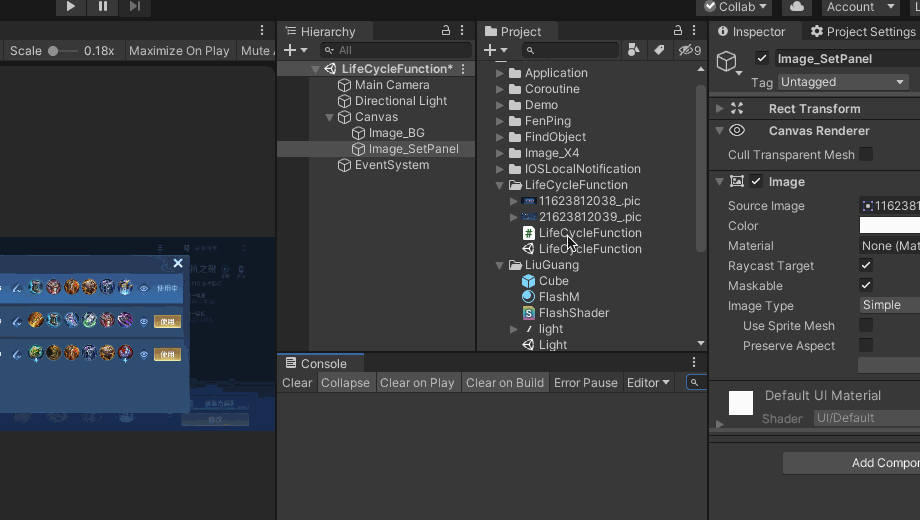
2. Click Reset Call: you can see that I manually set the Number to 2 and reset it to 0 written in the code after reset;
2, Renew
2.1 function description
Three functions:
- FixedUpdate: fixed time call. FixedUpdate is usually called more frequently than Update
- Update: called once per frame
- LateUpdate: called once per frame after Update is completed
Practical application:
- FixedUpdate: all physical calculations and updates are processed in FixedUpdate. It is a fixed time call and will not be affected by the frame rate. For example, some physical attribute update operations, such as Force, Collider, Rigidbody, etc.
- Update: called once per frame, which affects the execution speed according to the speed of the frame rate. The usual game logic is written here, such as: exchange with the player and what operation to perform when the user presses the space.
- LateUpdate: every time Update completes, the call is removed. The common use is that the camera follows the protagonist. For example, if the protagonist moves in update, the camera can be moved in lateupdate, which can ensure that the previous logic is fully executed when the camera follows.
2.2 example analysis
Add the following script to the newly created script above: (for convenience of viewing, comment out the function initialized above first)
#region update

// Fixed time calls, FixedUpdate is usually called more frequently than Update
private void FixedUpdate()
{
    Debug.Log("FixedUpdate Fixed time call...");
}
// Called once per frame
private void Update()
{
    Debug.Log("Update Called once per frame...");
}
// After Update, it is called once per frame
private void LateUpdate()
{
    Debug.Log("LateUpdate stay Update After, it is called once per frame...");
}
#endregion
After running, you can see the following results:
3, Mouse interaction
3.1 function description
Several functions:
- OnMouseEnter: called once when the mouse enters
- OnMouseOver: always called when the mouse hovers (passes)
- OnMouseExit: called once when the mouse exits
- OnMouseDown: called once when the mouse is pressed
- OnMouseDrag: always called when dragging (holding down) the mouse
- OnMouseUp: called once when the mouse is raised
Actual use: it is generally used in pairs
- OnMouseEnter, OnMouseOver, OnMouseExit. For example, simulate the selected state: the object changes color when the mouse enters, and changes back when the mouse exits.
- OnMouseDown, OnMouseDrag, OnMouseUp. For example, shooting games: adjust the direction when the mouse is pressed and dragged, and fire bullets when lifted.
- When the mouse is pressed and hovered over the current game object, OnMouseOver and OnMouseDrag will be triggered at the same time.
Detection principle:
- Only game objects mounted in the current script can be detected.
- The current game object needs to have a collision body.
- No other object (UI) can obscure this GameObject.
- To sum up, the principle of OnMouseXXX is to judge whether the current position of the mouse touches the collision body of the game object of the mounted script through the ray detection of the mouse.
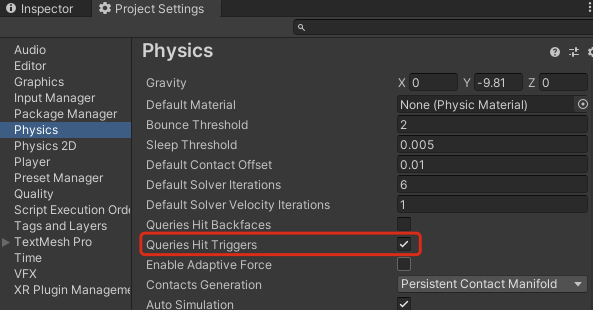
Check IsTrigger:
if it is necessary not to detect the collider with IsTrigger checked, edit = > project settings = > Queries Hit Triggers in physics, set this ✅ If you cancel, you will not trigger the check of IsTrigger. [Note: the default is ✅ Check the status, and uncheck if you don't need to trigger]
3.2 example analysis
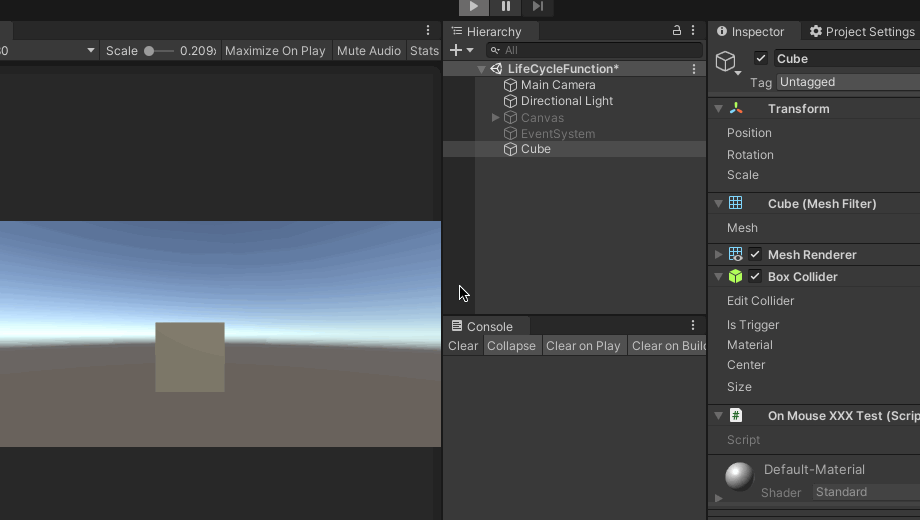
Create a Cube in the scene, adjust it to the camera first, then adjust the position (0,0, -1) and zoom to (3,3,3).
Test function:
- When the mouse enters \ exits, the color change of the Cube is triggered
- Move the mouse over the Cube to trigger rotation
- Press and drag the mouse on the Cube to trigger the Cube to follow and move
- Raise the mouse to return the Cube to its original position
The code for creating and attaching to Cube is as follows:
using UnityEngine;

public class OnMouseXXXTest : MonoBehaviour
{
    #region mouse related

    // Trigger between mouse and Collider

    // Mouse entry
    private void OnMouseEnter()
    {
        Debug.Log("OnMouseEnter Mouse entry...");
        GetComponent<MeshRenderer>().material.color = Color.blue;
    }

    // Mouse pause
    private void OnMouseOver()
    {
        transform.Rotate(Vector3.up * 50 * Time.deltaTime);
    }

    // Mouse exit
    private void OnMouseExit()
    {
        Debug.Log("OnMouseExit Mouse exit...");
        GetComponent<MeshRenderer>().material.color = Color.green;
    }

    // Mouse down
    private void OnMouseDown()
    {
        Debug.Log("OnMouseDown Mouse down...");
    }

    // Mouse drag
    private void OnMouseDrag()
    {
        Vector3 target = Input.mousePosition;
        target.z = Mathf.Abs(Camera.main.transform.position.z);
        transform.localPosition = Camera.main.ScreenToWorldPoint(target);
    }

    // Mouse up
    private void OnMouseUp()
    {
        Debug.Log("OnMouseUp Mouse up...");
        transform.localPosition = new Vector3(0, 0, -1);
    }

    #endregion
}
Test effect:
4, Collision detection
4.1 function description
Collision function:
- OnCollisionEnter: triggered once when entering collision.
- OnCollisionStay: triggered once per frame when staying in the collision body.
- OnCollisionExit: triggered once when leaving the collider.
Trigger function:
- OnTriggerEnter: triggered once when entering the collider.
- OnTriggerStay: triggered once per frame when staying in the collision body.
- OnTriggerExit: leaving the collider is triggered once.
PS: the above six methods, as well as the six methods corresponding to 2D collision body (such as OnCollisionEnter2D), add 2D interface after the function, and the trigger conditions and use methods are consistent with 3D. When using, pay attention to the synchronous interface between the collision body and the detection function, that is, the 2D collision body must use the 2D function.
Function execution conditions:
- Both objects need to have collider components.
- The detector (to mount the script object) needs a rigid body component.
- IsTrigger is not checked on the Collider (if one is checked, the trigger function will be executed).
4.2 example analysis
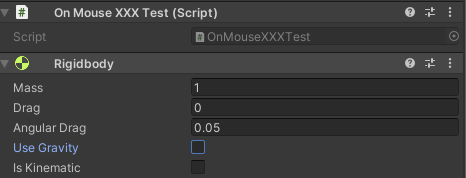
Continue the operation on the three examples, add the Rigidbody component on the Cube, and uncheck the Use Gravity attribute (to prevent it from being affected by gravity).
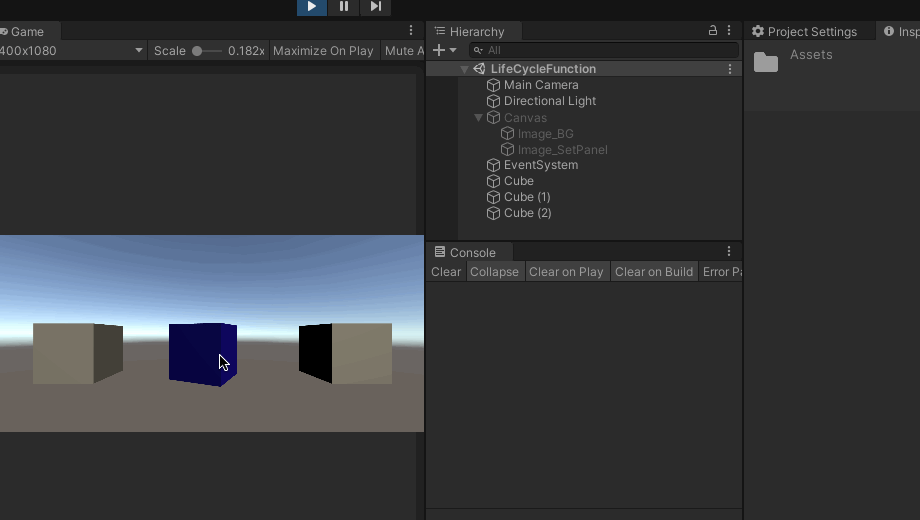
Then create two cubes with arbitrary position and size, which can be seen in the Game view. Tick the IsTrigger attribute of one BoxCollider ✅ Come on. In this way, one can be used to test the collision and the other can be used to test the trigger.
Add the code to the OnMouseXXXTest class as follows:
#region collision, trigger detection

// Add 2D (e.g. OnCollisionEnter2D) after the method name to trigger the corresponding function of 2D collider
// Triggered when entering the collision
private void OnCollisionEnter(Collision other)
{
    Debug.Log("Start collision..." + other.collider.gameObject.name);
    other.collider.GetComponent<MeshRenderer>().material.color = Color.black;
}

// Triggered once per frame when staying in the collision body
private void OnCollisionStay(Collision other)
{
    Debug.Log("Continuous collision..." + other.collider.gameObject.name);
    other.collider.GetComponent<MeshRenderer>().material.color = Color.red;
}

// Triggered when leaving the collider
private void OnCollisionExit(Collision other)
{
    Debug.Log("End of collision..." + other.collider.gameObject.name);
    other.collider.GetComponent<MeshRenderer>().material.color = Color.white;
}

// Collider check the is Trigger option: cancel the collider and start the trigger
// Triggered when entering the collision body
private void OnTriggerEnter(Collider other)
{
    Debug.Log("Trigger start...");
    other.transform.GetComponent<MeshRenderer>().material.color = Color.black;
}

// Trigger in collision body
private void OnTriggerStay(Collider other)
{
    Debug.Log("Continuous triggering...");
    other.transform.GetComponent<MeshRenderer>().material.color = Color.yellow;
}

// Leaving the collider is triggered
private void OnTriggerExit(Collider other)
{
    Debug.Log("Trigger end...");
    other.transform.GetComponent<MeshRenderer>().material.color = Color.white;
}
#endregion
The following results are obtained after operation:
5, Application
5.1 function description
Three functions:
- OnApplicationPause: detected the end of the paused frame -- > called when switching to the background and coming back.
- OnApplicationFocus: called when the screen gets / loses focus
- OnApplicationQuit: called when the program exits.
Practical application:
- OnApplicationPause: the game stops saving data / the game continues data initialization.
- OnApplicationFocus: lose focus, turn off background music / get focus and continue playing music.
- OnApplicationQuit: it will also be called when the mobile terminal returns, but the above two methods will not be triggered.
5.2 example analysis
When using, copy the following code to the part that needs to process the detection logic:
#region Application

// Called when the end of a paused frame is detected, effectively between normal frame updates
private void OnApplicationPause(bool pauseStatus)
{
    Debug.Log("OnApplicationPause ... " + pauseStatus);
    if (pauseStatus) // Execute when switching to background
    {
    }
    else // Switch to the foreground for execution once
    {
    }
}

// Called when the screen gains / loses focus
private void OnApplicationFocus(bool hasFocus)
{
    Debug.Log("OnApplicationFocus ... " + hasFocus);
    if (hasFocus) // Get focus -- switch to the foreground
    {
    }
    else // Lose focus
    {
    }
}

// When the program exits, call -- application Quit(); Trigger, the above two methods will not be triggered
private void OnApplicationQuit()
{
    Debug.Log("OnApplicationQuit ... ");
}
The execution logic can be seen from the following figure: when I click the Hierarchy panel, it triggers the loss of focus, and when I click the Game view again, it triggers the acquisition of focus
6, Disable destroy
6.1 function description
Three functions:
- OnDisable: this function is called when the object is disabled (it will also be triggered when its parent object is disabled).
- OnDestroy: calls this function after all frame updates in the last frame of the object.
Practical application:
- OnDisable: usually used with OnEnable. For example: add listening in OnEnable and remove listening in OnDisable
- OnDestroy: triggered when the object is destroyed or the scene is closed. For example, when a bullet hits a wall, it needs to destroy the bullet and trigger a strike sound effect.
6.2 example analysis
1. Game object disabling triggers OnDisable
2. OnDisable and OnDestroy are triggered when game objects are destroyed
Official illustration of Unity:
What about? Is it a good harvest. If this article is helpful to you, you are welcome to support the third company. If you have any questions, let's see you in the comments~