catalogue
- About redis
- install
- Simple configuration and use of sentry
- Simple cluster configuration and use
1. About Redis
What is Redis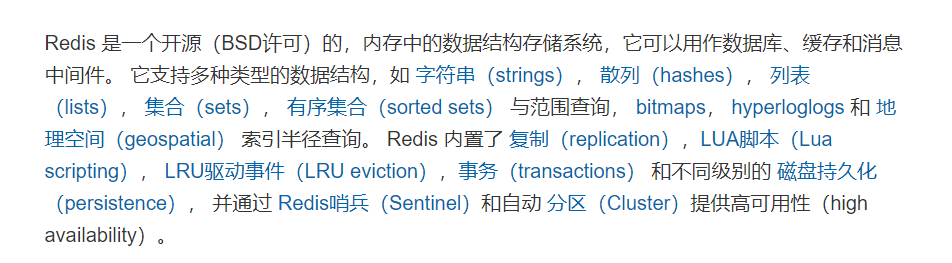
-redis is a key value storage system (NoSQL).
-redis provides five data types:
`string,hash,list,set and zset(sorted set) `.
Advantages of Redis (compared with traditional relational databases)
High performance:
Users access data for the first time and read it from the database, which is inefficient.
The user access data is saved in the cache, and the secondary reading can be directly read from the cache, which is efficient.
If the database data changes, the data in the cache can be updated synchronously (dirty reads will occur if it is not handled properly).
Because reading data from the database is to read data from the hard disk, the efficiency is low. If the data is stored in the cache, the secondary reading is from the cache. Reading data from the cache is a direct operation of memory, so the efficiency is very high.
High concurrency:
The requests that the direct operation cache can withstand are much larger than those that directly access the database, so we can consider transferring some data in the database to the cache, so that some users' requests can not operate the database and improve the high concurrency ability.
Issues needing attention when Redis is used as cache
Cache avalanche:
When a large amount of data expires in the cache, if there are a large number of external query requests and the data cannot be queried in the cache, these requests will be directly transferred to the database, and the database will be shut down if it cannot be processed; Therefore, when storing a large amount of data, the set expiration time should not be clustered in a small time period. Generally, a random value will be added during the setting to avoid the problem of mass expiration of data at the same time.
Cache breakdown:
After the hot data in the high concurrency system (i.e. frequently accessed data) expires, a large number of external access to the hot data will fall on the database, resulting in database downtime. Therefore, hotspot data should be appropriately extended to expire or permanently exist in the cache until updated or deleted.
Cache penetration:
The external query requests an unreasonable value. For example, when the index starts to grow with 0, a large number of external accesses to the data whose index is less than 0 will all fall on the database, resulting in excessive pressure on the database. Generally, the solution is to verify the data at the request interface and intercept unreasonable requests. You can also set the value in the cache to be null and set the expiration time of 30 ~ 60 seconds.
2. Redis installation
Front:
1. Now, ruby is not required to use the cluster, but redis cli is established using the cluster parameter, so there is no need to install ruby
2. When installing gcc, some defaults to the minimum installation, so the command to install gcc is yum -y install gcc automake autoconf libtool make
reference resources redis installation under CtenOS7
linux ip address viewing command: ip a s
Add ports to centos firewall and close the firewall directly if it is troublesome:
Turn off the firewall: systemctl stop firewalld
Add port: firewall CMD -- add port = 6379 / TCP -- zone = public -- permanent
Just restart the firewall after adding the port: systemctl restart firewalld
The simplest sentinel structure consists of three sentinel nodes, one master redis node and two redis slave nodes
to configure
1. The master node is configured as a single machine
2. Search for 'replicaof' from the node configuration file and set it to the format of 'ip port' (for example: replicaof 192.168.234.130 6379) of the master node, with a space in the middle
If the master node has a password, edit the slave node 'masterauth "pass" to set the password. Pass is the master node password
3. Sentry configuration
Edit sentinel In the conf configuration file, the 'sentinel monitor' item is set to 'name ip port count' (for example: sentinel monitor mymaster 192.168.234.130 6379 2)
The meaning is: name, the service name of user-defined monitoring, which can be directly defaulted; ip port is the primary node address; count is to select a new master node when several sentinels think the master node is dead
Set 'daemon' to 'yes' (daemon yes)
If the redis node has a password set, edit the 'sentinel auth pass' parameter to set the password. The format is' name pass'. Name is the custom service name and pass is the password. For example, sentinel auth pass mymaster password
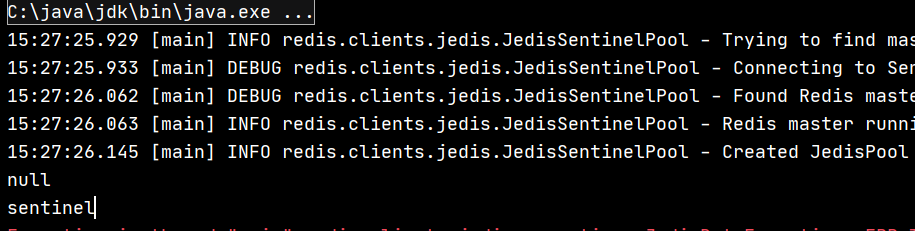
4. Start service
Start the redis node in the order of the master node and then the slave node: after that, you can connect to the master node (` redis cli - H IP - P port - a pass') and view the information with the ` info replication 'command
Then start three sentinel nodes: `/ redis-sentinel ./sentinel.conf ` start
If it is a stand-alone deployment, copy the configuration file and modify the port to prevent conflicts
java use
1. Dependency (maven project)
  <dependency>
     <groupId>redis.clients</groupId>
     <artifactId>jedis</artifactId>
      <version>3.1.0</version>
  </dependency>
Use:
JedisSentinelPool pool = new JedisSentinelPool("mymaster",
                  new HashSet<>(Arrays.asList("192.168.234.130:26379", "192.168.234.130:26380", "192.168.234.130:26381")),
                  "yuxbo");//The parameter is the service name defined by itself, then the sentinel node, and finally the password

          Jedis jedis = pool.getResource();

          System.out.println(jedis.get("test"));

          jedis.set("test", "sentinel");

          System.out.println(jedis.get("test"));
Test:
Spring Boot usage
1. Dependency (maven project)
In addition to normal web project dependencies, redis dependencies are added
<dependency>
              <groupId>org.springframework.boot</groupId>
              <artifactId>spring-boot-starter-redis</artifactId>
              <version>1.4.7.RELEASE</version>
          </dependency>
Configuration (application.yml):
 spring:
    redis:
      password: yuxbo
      sentinel:
        master: mymaster
        nodes: 192.168.234.130:26379,192.168.234.130:26380,192.168.234.130:26381
You can directly inject the redis template provided by spring using:
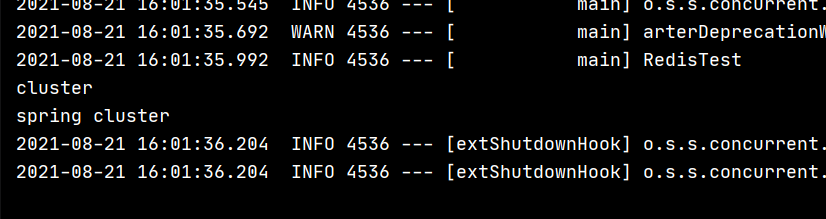
 @RunWith(SpringRunner.class)
  @SpringBootTest(classes = RedisTestApplication.class)
  public class RedisTest {

      @Autowired
      private RedisTemplate<String, String> redisTemplate;

      @Test
      public void sentinel() {

          String s = redisTemplate.opsForValue().get("test");

          System.out.println(s);

          redisTemplate.opsForValue().set("test", "spring sentinel");

          s = redisTemplate.opsForValue().get("test");

          System.out.println(s);
      }
  }
Results:
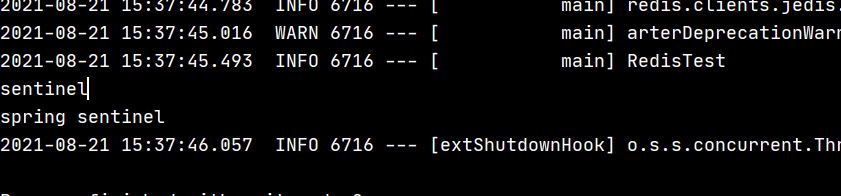
Because it has been tested with native methods above, there are still values
Finally, quickly kill all redis process commands: ` ps aux | grep redis | awk '{print `}' | xargs kill`
4. Simple configuration and use of Redis cluster
to configure
1. Edit 'cluster enable' of redis configuration file to 'yes'`
Set 'master auth' if password is required`
There is no difference between other configurations and stand-alone
Copy several redis configurations, change their port numbers on a single machine, and then start these nodes
2. Cluster creation
Command: `/ redis-cli -a yuxbo --cluster create 192.168.234.130:6379 192.168.234.130:6380 192.168.234.130:6381 192.168.234.130:6382 192.168.234.130:6383 192.168.234.130:6384 --cluster-replicas 1`
Then, when you ask for input, enter 'yes' and wait
Explanation: ` - a yuxbo ` is the password` The 'ip:port' after 'create' is the 'ip:port' of the node, and spaces are used to divide multiple nodes; The last ` -- cluster replica 1 'means that each master node has a slave node
After the cluster is created, use 'redis cli - C - a pass - H IP - P port' to connect the nodes in the cluster mode,
You can use commands such as' cluster info 'and' cluster nodes' to view cluster information. You can also delete and join nodes, change node identity, etc
java use
Use:
public static void cluster() {
JedisCluster cluster = new JedisCluster(
Stream.of("192.168.234.130:6379"
, "192.168.234.130:6380"
, "192.168.234.130:6381"
, "192.168.234.130:6382"
, "192.168.234.130:6383"
, "192.168.234.130:6384")
.map(s -> {
String[] split = s.split(":");
return new HostAndPort(split[0], Integer.parseInt(split[1]));
}).collect(Collectors.toSet())
, 100, 100, 10, PASS, new GenericObjectPoolConfig());
String s = cluster.get("test");
System.out.println(s);
cluster.set("test", "cluster");
System.out.println(cluster.get("test"));
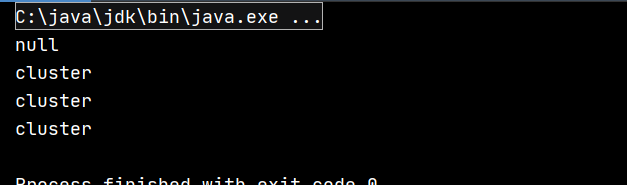
}Results:
Spring Boot usage
Configuration:
spring:
    redis:
      password: yuxbo
      #sentinel:
       # master: mymaster
        #nodes: 192.168.234.130:26379,192.168.234.130:26380,192.168.234.130:26381
      cluster:
        nodes: 192.168.234.130:6379,192.168.234.130:6380,192.168.234.130:6381,192.168.234.130:6382,192.168.234.130:6383,192.168.234.130:6384
Use:
@RunWith(SpringRunner.class)
  @SpringBootTest(classes = RedisTestApplication.class)
  public class RedisTest {

      @Autowired
      private RedisTemplate<String, String> redisTemplate;

      @Test
      public void cluster() {
          String s = redisTemplate.opsForValue().get("test");

          System.out.println(s);

          redisTemplate.opsForValue().set("test", "spring cluster");

          s = redisTemplate.opsForValue().get("test");

          System.out.println(s);
      }
  }
Results: