RH358 configure Web server – configure Web server using Nginx
Introduce the basic application and configuration of Nginx. As a basis for understanding and application.
1. Install Nginx
Nginx is an alternative to Apache HTTP server and one of the most widely used web servers on the Internet. One of its design goals is to provide better performance than Apache and handle more concurrent requests. It is also often used as a reverse caching agent and load balancer. However, it is less flexible in configuration than Apache and in some cases more difficult to extend with new features.
RHEL 8 provides Nginx as application streams. Two versions are available
-
The application flow of Nginx 1.14 is released with RHEL 8.0 and will retire in May 2021 and be set to the default value.
-
The application flow of Nqinx 1.16 will retire in November 2021 with the release of RHEL 8.1.
[root@host ~]# yum module install nginx:1.16
You can use the following command to verify the installation and version of Nginx:
[root@host ~]# nginx -v
nginx version: nginx/1.16.1
2. Configure Nginx
The default configuration root directory of Nginx is / etc/nginx. Its main configuration file is / etc/nginx / Nginx conf. This file contains the global settings for the web server, including the default server block for the main web site. It also loads additional configuration files from / etc/nginx/conf.d.
The configuration file for Nginx contains instructions. An instruction consists of an instruction name, a space delimited parameter list, and a semicolon to end the instruction.
Block instructions are similar to simple instructions, but do not end with a semicolon, but with a set of additional instructions enclosed in braces.
At the top level of the configuration, there are four special block instructions called context, which group instructions together to manage different types of traffic:
-
events: for general connection processing
-
HTTP: used for HTTP traffic
-
Mail: used for e-mail traffic
-
stream: used for TCP and UDP traffic
Top level instructions that are not included in these contexts are called in the main context.
In this course, the most important context is the http context/ In etc/nginx/conf.d The conf file is loaded into this context.
Configure virtual server
In the http context, the server block instruction defines the http virtual server provided by Nginx. The easiest way to create a new virtual server is to place one or more server blocks in / etc/nginx/conf.d Conf file
The following example specifies a basic virtual server with port 80/TCP and hostname example Com or www.example.com Com. The location directive sets its document root directory to / SRV / www / www.example com.
server {
    listen 80;
    server_name example.com www.example.com;
    location / {
        root /srv/www/www.example.com;
    }
}
The server name can be an exact name, contain a wildcard to replace the first or last part of the name, or use a regular expression:
server {
    listen 80;
    server_name www.example.com *.lab.example.com ~^server.?\.example.\com$;
    location / {
        root /srv/www/www.example.com;
    }
}
When searching for a virtual server that matches a name based virtual host, Nginx attempts to find the first matching name, as follows:
-
Use the exact name that matches it.
-
If no match is found, Nginx attempts to match the longest wildcard name that begins with an asterisk.
-
If no match is found, Nginx attempts to match the longest wildcard name ending with an asterisk.
-
Finally, the first regular expression matched in the order of the configuration file.
access_log instruction and error_ The log instruction sets the path, format, and configuration of the log file. The main parameter is the log format to use. (/ etc/nginx/nginx.conf the log_format instruction in the http context in the configuration file defines main.)
server {
    listen 80;
    server_name example.com www.example.com;
    access_log /var/log/nginx/example.com_access.log main;
    error_log /var/log/nginx/example.com_error.log main;
    location / {
        root /srv/www/example.com;
        index index.html index.htm;
    }
}
The contents of the document root directory must be readable by the nginx user running the nginx process. Nginx uses the same SELinux context as Apache HTTP Server.
Configure TLS virtual server
To configure a virtual server that supports HTTPS protocol:
-
Set listen to 443 ssl
-
ssl_certificate is set to the file that contains the TLS server certificate
-
ssl_certificate_key is set to the file containing the TLS server certificate private key
The resulting server block may be as follows:
server {
    listen 443 ssl;
    server_name example.com www.example.com;
    ssl_certificate /etc/pki/tls/certs/example.com.rsa.crt;
    ssl_certificate_key /etc/pki/tls/private/example.com.rsa.key;
    location / {
        root /sites/$domain;
    }
}
If users who want to use HTTP to connect to your site on port 80/TCP are automatically redirected to the secure site, you can add another server block to listen on port 80/TCP. The server block uses the return instruction to send an HTTP 301 Redirect to achieve this purpose. The complete configuration is as follows:
server {
    listen 80;
    server_name example.com www.example.com;
    return 301 https://$host$request_uri;
}
server {
    listen 443 ssl;
    server_name example.com www.example.com;
    ssl_certificate /etc/pki/tls/certs/example.com.rsa.crt;
    ssl_certificate_key /etc/pki/tls/private/example.com.rsa.key;
    location / {
        root /sites/$domain;
    }
}
Check the configuration file for errors
There are two commands that are useful for verifying whether there are errors in the configuration file.
-
nginx -t will check the syntax of your configuration file and try to open any file referenced by the configuration file. It provides a short report when exiting
-
nginx -T will do the same thing, but it will also dump the configuration file to standard output when exiting
When you make changes to the configuration file, you need to reload the nginx service for the changes to take effect.
3. Run Nginx
Start Nginx and use the Nginx service unit:
[root@host ~]# systemctl enable --now nginx
This will start the nginx process as the nginx user.
You also need to ensure that the http and https firewall services are turned on so that the client can communicate with the server.
4. Textbook exercises
[student@workstation ~]$ lab web-nginx start
1. Find out the default installed version of Nginx.
[root@servera ~]# yum module list *nginx*
Last metadata expiration check: 0:02:55 ago on Tue 29 Jun 2021 10:44:45 AM CST.
Red Hat Enterprise Linux 8.1 AppStream (dvd)
Name                      Stream                      Profiles                      Summary
nginx                     1.14 [d]                    common [d]                    nginx webserver
nginx                     1.16                        common [d]                    nginx webserver

Hint: [d]efault, [e]nabled, [x]disabled, [i]nstalled

[root@servera ~]# yum module reset nginx
Last metadata expiration check: 0:03:02 ago on Tue 29 Jun 2021 10:44:45 AM CST.
Dependencies resolved.
Nothing to do.
Complete!

[root@servera ~]# yum module -y install nginx:1.16
2. Create two content directories using the identified content and the appropriate SELinux context.
[root@servera ~]# mkdir -p /srv/nginx/{www-a,servera}/www
3. Create an index with different web content in two content directories HTML file.
[root@servera ~]# echo 'This is the www-a page' > /srv/nginx/www-a/www/index.html
[root@servera ~]# echo 'This is the servera page' > /srv/nginx/servera/www/index.html
4. Re mark the directory / srv/nginx as httpd_sys_content_t to be added to the SELinux policy.
[root@servera ~]# semanage fcontext -a -t httpd_sys_content_t '/srv/nginx(/.*)?'
[root@servera ~]# restorecon -vvFR /srv/nginx
Relabeled /srv/nginx from unconfined_u:object_r:var_t:s0 to system_u:object_r:httpd_sys_content_t:s0
Relabeled /srv/nginx/www-a from unconfined_u:object_r:var_t:s0 to system_u:object_r:httpd_sys_content_t:s0
Relabeled /srv/nginx/www-a/www from unconfined_u:object_r:var_t:s0 to system_u:object_r:httpd_sys_content_t:s0
Relabeled /srv/nginx/www-a/www/index.html from unconfined_u:object_r:var_t:s0 to system_u:object_r:httpd_sys_content_t:s0
Relabeled /srv/nginx/servera from unconfined_u:object_r:var_t:s0 to system_u:object_r:httpd_sys_content_t:s0
Relabeled /srv/nginx/servera/www from unconfined_u:object_r:var_t:s0 to system_u:object_r:httpd_sys_content_t:s0
Relabeled /srv/nginx/servera/www/index.html from unconfined_u:object_r:var_t:s0 to system_u:object_r:httpd_sys_content_t:s0
5. Create TLS virtual server as required
[root@servera ~]# scp workstation:/home/student/*.conf /etc/nginx/conf.d/  #The environment is ready
root@workstation's password: redhat
[root@servera ~]# cat /etc/nginx/conf.d/www-a.lab.example.com.conf
server {
    listen 80 ;
    server_name www-a.lab.example.com;
    return 301 https://$host$request_uri;

}
server {
    listen 443 ssl;
    server_name www-a.lab.example.com;

    ssl_certificate /etc/pki/tls/certs/www-a.lab.example.com.crt;
    ssl_certificate_key /etc/pki/tls/private/www-a.lab.example.com.key;

    location / {
        root /srv/nginx/www-a/www;
        index index.html index.htm;
    }
}
[root@servera ~]# cp /etc/nginx/conf.d/www-a.lab.example.com.conf  /etc/nginx/conf.d/servera.lab.example.com.conf
[root@servera ~]# sed -i 's/www-a/servera/g' /etc/nginx/conf.d/servera.lab.example.com.conf
6. Copy the certificate and key files to the / etc/pki/tls/certs and / etc/pki/tls/private directories of the server.
[root@servera ~]# cd /etc/pki/tls/certs
[root@servera certs]# scp workstation:/home/student/*.crt ./
root@workstation's password: redhat
cacert.crt                                                 100% 1395   683.7KB/s   00:00
servera.lab.example.com.crt                               100% 4583     1.6MB/s   00:00
www-a.lab.example.com.crt                               100% 4577     1.7MB/s   00:00

[root@servera certs]# cd /etc/pki/tls/private
[root@servera private]# scp workstation:/home/student/*.key ./
root@workstation's password: redhat
servera.lab.example.com.key 100% 1708 460.3KB/s 00:00
www-a.lab.example.com.key 100% 1704 561.5KB/s 00:00
7. Start and enable the Nginx service and open the corresponding firewall port.
[root@servera private]# systemctl enable --now nginx Created symlink /etc/systemd/system/multi-user.target.wants/nginx.service → /usr/lib/systemd/system/nginx.service. [root@servera private]# firewall-cmd --permanent --add-service=http --add-service=https success [root@servera private]# firewall-cmd --reload success
8. Test visit.
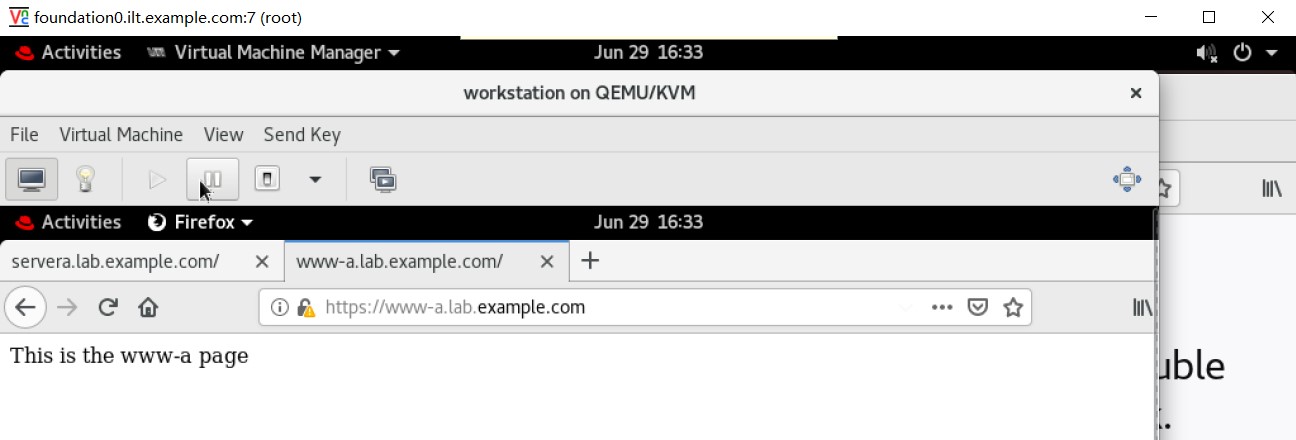
Complete the experiment.
[student@workstation ~]$ lab web-nginx finish
summary
- Install and configure Nginx.
- Configure and demonstrate web services.
- If you like a little girl's article, please give it a compliment. You can also pay attention, because the follow-up will continue to dry goods.