summary
This article briefly introduces the armor recognition of RoboMaster robot. The method is to select the armor plate area by using the lamp column as the identification through the edge detection method. In this blog, coordinate points will be provided for subsequent mecha debugging.
Techniques used: color channel separation, Gaussian filtering, lambda expression, contour detection
Training material & final effect
Training materials
The training materials are placed in the following Baidu online link. If you need them, please mention them yourself.
Link: https://pan.baidu.com/s/17-WpcpQ409eRNsL9pHSrfw
Extraction code: yvi6
Final effect
Key parts
Color channel separation
b, g, r = cv2.split(image)
In OpenCV, the image color channel order is BGR, rather than the familiar RBG, CV2 The return value of split (SRC) is three channels. Like the gray image, 0 ~ 255 is used to represent the depth of color.
Contour detection
The precondition of contour detection is binary image, so we need to binarize the single channel image.
ret, binary = cv2.threshold(src, threshold, maxval, type)
The four parameters of binarization are: input single channel picture src, binarization threshold, assignment maxval exceeding the threshold, and binarization type.
The common types of type are:
- cv2.THRESH_BINARY (black and white binary)
- cv2.THRESH_BINARY_INV (black and white binary inversion)
Gaussian filtering
Gaussian = cv2.GaussianBlur(binary, ksize, 0)
The parameters of Gaussian convolution operation are: binary image input, convolution kernel size ksize (e.g. (5,5)), and the parameters affecting Gaussian distribution are generally set to 0.
Gaussian filtering can reduce the influence of noise in the binary image, because in the process of binarization, due to the specified threshold, black spots may appear in the middle of a piece of white, resulting in CV2 These noise points are marked separately when findcontours() is used. The following figure shows the effect of one frame without Gaussian filtering.

Contour filtering
In CV2 After findcourses(), we need to judge the detected contour and screen out the contour of armor plate light strip.
ontours, hierarchy = cv2.findContours(image=draw_img, mode=cv2.RETR_TREE, method=cv2.CHAIN_APPROX_NONE)
contours = list(contours)
contours.sort(key=lambda c: cv2.contourArea(c), reverse=True)
Here, the selected contours are sorted by area size through lambda expression.
width_array = []
height_array = []
point_array = []
for cont in contours[:5]:
    x, y, w, h = cv2.boundingRect(cont)
    # cv2.rectangle(img, (x,y), (x+w,y+h), (0, 255, 0), 2)
    try:
        if h / w >= 2 and h / whole_h > 0.1:
            # if height / h > 0.05:
            width_array.append(w)
            height_array.append(h)
            point_array.append([x, y])
    except:
        continue
Here, these are extracted into the contour information through the idea of circumscribed rectangle, and then part of the contour is removed through the screening of light bar conditions. The filter conditions here are:
- The height of the circumscribed rectangle is at least twice the width
- The height of the external rectangle shall not be less than 1 / 10 of the picture size
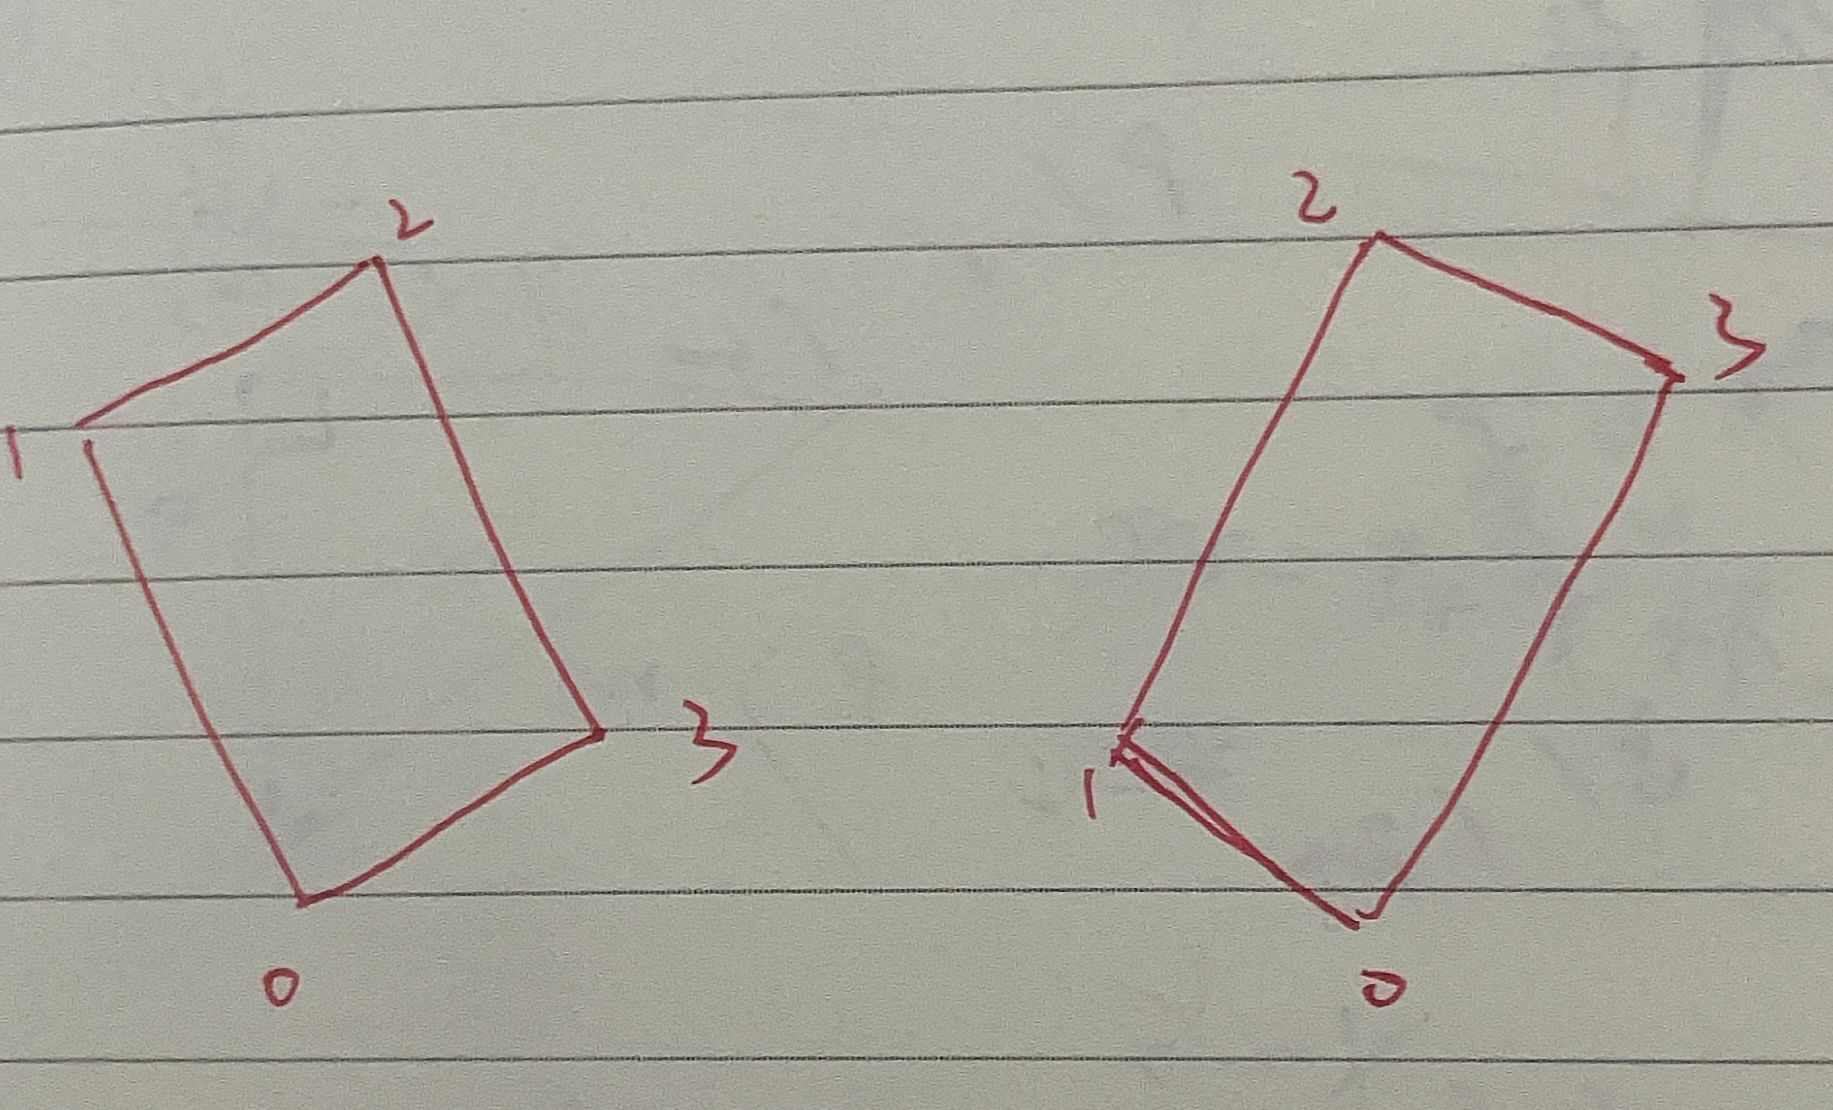
There may be some small partners who have questions about whether the effect is the best through the external minimum rectangle. In fact, the idea of the external minimum rectangle is to find four points through fitting. First, let's look at the code of the smallest rectangle
for cont in contours:
    rect = cv2.minAreaRect(cont)
    # cv2.boxPoints can convert contour points into four corner coordinates
    box = cv2.boxPoints(rect)
    # print(type(box))
    # This step does not affect the subsequent drawing, but it can ensure that the coordinates of the four corners are clockwise
    startidx = box.sum(axis=1).argmin()
    box = np.roll(box, 4 - startidx, 0)
    # Draw the predicted circumscribed rectangle on the original drawing
    box = box.reshape((-1, 1, 2)).astype(np.int32)
    cv2.polylines(img, [box], True, (0, 255, 0), 2)
This is a section of code that you can find more common on the Internet. In these codes, the four points defined by it rotate clockwise, and the lowest point is always point 0, which means that it is difficult for us to find the length and width of the smallest rectangle. This is because different angles will lead to different points of length and width composition. Therefore, it will be simpler and more convenient to select the external rectangle.
Skip the episode above. After we get so many contours, we need to frame the whole armor plate with two separate light bar contours. At this time, the method I use is to find the two closest contours.
point_near = [0, 0]
min = 10000
for i in range(len(width_array) - 1):
    for j in range(i + 1, len(width_array)):
        value = abs(width_array[i] * height_array[i] - width_array[j] * height_array[j])
        if value < min:
            min = value
            point_near[0] = i
            point_near[1] = j
try:
    rectangle1 = point_array[point_near[0]]
    rectangle2 = point_array[point_near[1]]
    point1 = [rectangle1[0] + width_array[point_near[0]] / 2, rectangle1[1]]
    point2 = [rectangle1[0] + width_array[point_near[0]] / 2, rectangle1[1] + height_array[point_near[0]]]
    point3 = [rectangle2[0] + width_array[point_near[1]] / 2, rectangle2[1]]
    point4 = [rectangle2[0] + width_array[point_near[1]] / 2, rectangle2[1] + height_array[point_near[1]]]
    print(point1, point2, point3, point4)
    x = np.array([point1, point2, point4, point3], np.int32)
    box = x.reshape((-1, 1, 2)).astype(np.int32)
    cv2.polylines(img, [box], True, (0, 255, 0), 2)
point_ The near array stores the index values of the two closest contours in the array. The min variable holds the lowest difference of the contour area.
Complete code
# Developed by: Tian Z.L
# Development time: 2022 / 2 / 17 18:11
# File name: assignment3 PY
# Development tool: PyCharm
import cv2
import numpy as np
import math

video = cv2.VideoCapture(r'C:\Users\TianZhonglin\Documents\Tencent Files\765808965\FileRecv\MobileFile\1234567.mp4')


# video = cv2.VideoCapture(r'C:\Users\TianZhonglin\Documents\Tencent Files\765808965\FileRecv\23456789.avi')


def img_show(name, src):
    cv2.imshow(name, src)
    cv2.waitKey(0)
    cv2.destroyAllWindows()


while True:
    ret, img = video.read()
    blue, g, r = cv2.split(img)  # Separate channels. In opencv, the storage channel of pictures is BGR non RBG
    # Drawing outline is to draw outline on the original image
    ret2, binary = cv2.threshold(blue, 220, 255, 0)
    Gaussian = cv2.GaussianBlur(binary, (5, 5), 0)  # Gaussian filtering
    # edge = cv2.Canny(binary, 50, 150)  # edge detection
    draw_img = Gaussian.copy()
    whole_h, whole_w = binary.shape[:2]
    # The first output value is the image, the second value is the contour information, and the third value is the level information
    contours, hierarchy = cv2.findContours(image=draw_img, mode=cv2.RETR_TREE, method=cv2.CHAIN_APPROX_NONE)
    contours = list(contours)
    contours.sort(key=lambda c: cv2.contourArea(c), reverse=True)
    width_array = []
    height_array = []
    point_array = []
    for cont in contours[:5]:
        x, y, w, h = cv2.boundingRect(cont)
        try:
            if h / w >= 2 and h / whole_h > 0.1 and h > w:
                # if height / h > 0.05:
                width_array.append(w)
                height_array.append(h)
                point_array.append([x, y])
        except:
            continue
    point_near = [0, 0]
    min = 10000
    for i in range(len(width_array) - 1):
        for j in range(i + 1, len(width_array)):
            value = abs(width_array[i] * height_array[i] - width_array[j] * height_array[j])
            if value < min:
                min = value
                point_near[0] = i
                point_near[1] = j
    try:
        rectangle1 = point_array[point_near[0]]
        rectangle2 = point_array[point_near[1]]
        point1 = [rectangle1[0] + width_array[point_near[0]] / 2, rectangle1[1]]
        point2 = [rectangle1[0] + width_array[point_near[0]] / 2, rectangle1[1] + height_array[point_near[0]]]
        point3 = [rectangle2[0] + width_array[point_near[1]] / 2, rectangle2[1]]
        point4 = [rectangle2[0] + width_array[point_near[1]] / 2, rectangle2[1] + height_array[point_near[1]]]
        print(point1, point2, point3, point4)
        x = np.array([point1, point2, point4, point3], np.int32)
        box = x.reshape((-1, 1, 2)).astype(np.int32)
        cv2.polylines(img, [box], True, (0, 255, 0), 2)
    except:
        continue
    cv2.imshow('name', img)
    if cv2.waitKey(1) & 0xFF == ord('q'):
        break
# Release resources
video.release()
cv2.destroyAllWindows()