1. General
NXP officially provides AUTOSAR OS code and can be configured with EB, but the official routine can not be directly applicable to Keil. This article introduces how to compile the official AUTOSAR OS source code on Keil.
Previously, we have introduced how to compile S32 series MCAL on Keil. If you need it, you can turn to my previous articles. By default, S32 MCAL can be compiled and debugged on Keil (only the basic modules Port and Dio are required).
2. AUTOSAR OS installation
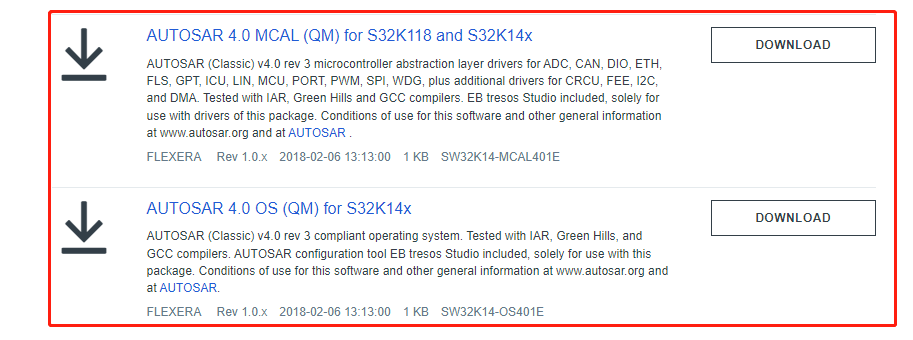
You can download the AUTOSAR OS provided by NXP from the following connection. If you want to use it together with MCAL, you should also download the same AUTOSAR version of MCAL at the same time. When downloading, pay attention to downloading the license file at the same time. The installation process is relatively simple. I won't expand it.
3. Generate configuration code with EB
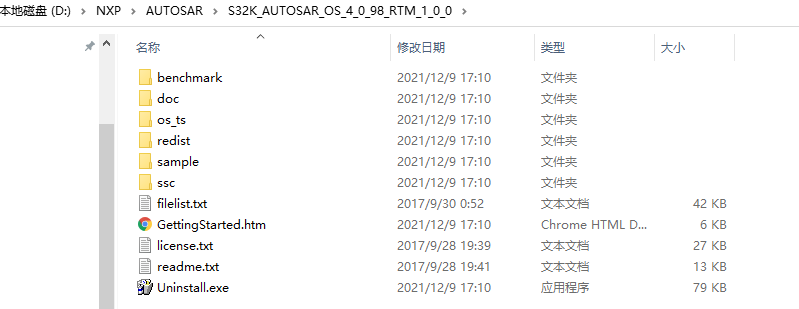
After installation, you can see the following folders under the installation path. There are various user manuals in doc, sample is the test routine, and ssc is the source code:
There are two EB test demo projects under the following path:

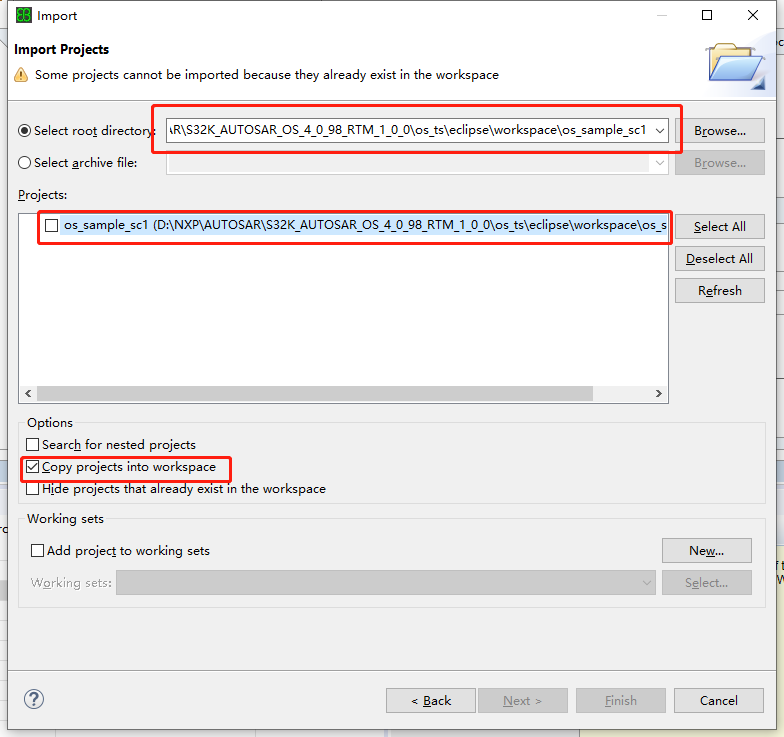
Open EB, click Import, and select one of the project folders above (I use the one below) to import the test project:
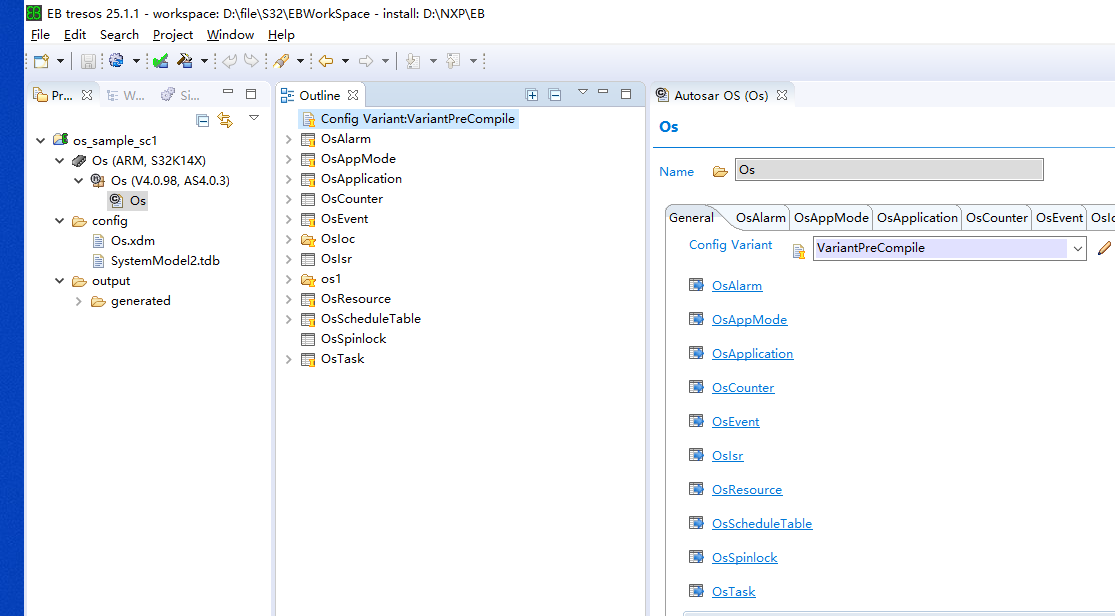
After importing the test project, as shown in the figure below, we can see that some tasks, alarms, counters, etc. have been configured in the project:
Without modifying any configuration, click generate configuration code directly to generate the code. The generated code is under EB project folder:
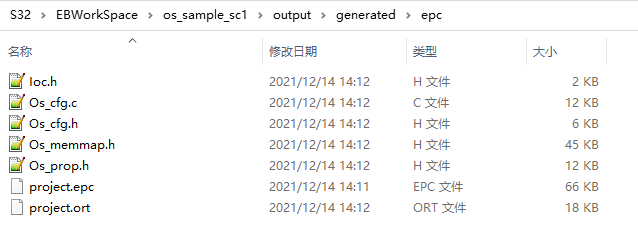
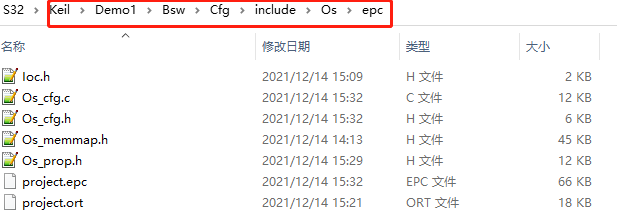
Copy the generated configuration code to the Keil project folder and put it anywhere. Here is my path:
4. Copy the source code
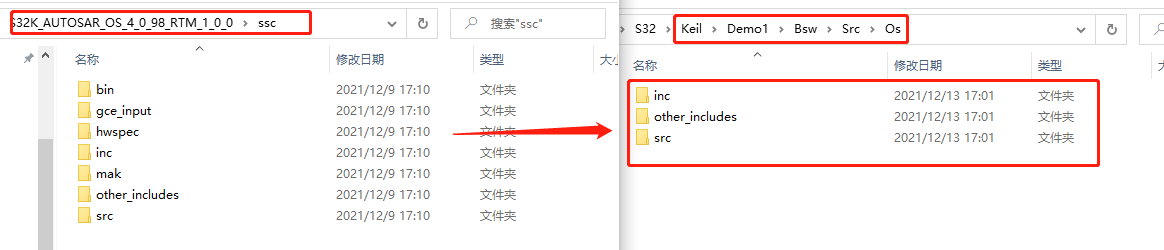
First, copy the OS source code to Keil's project folder:
Then copy the code of the test routine. Note that there is a header file in another include folder of the sample:

5. Add source code and header file path in Keil project
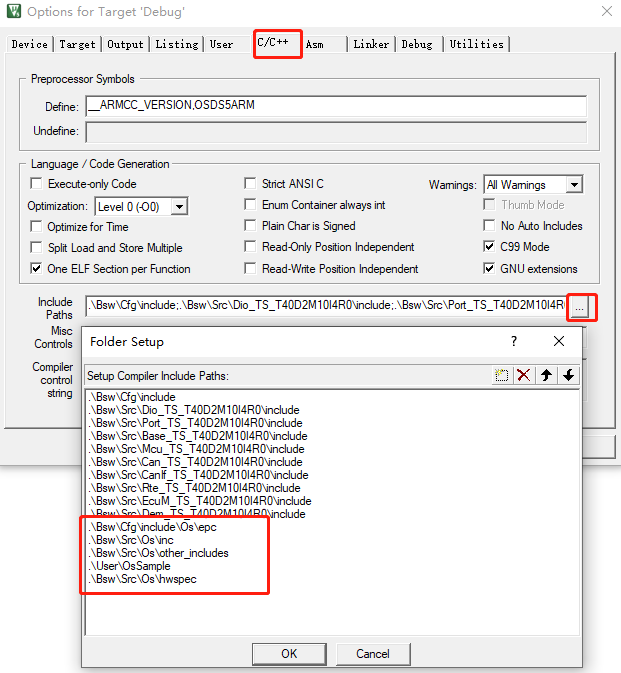
In Keil's project, add all header file paths in the configuration code, source code and test routine to the following locations:
Then configure the Keil source file and put all the c files are added to the project:
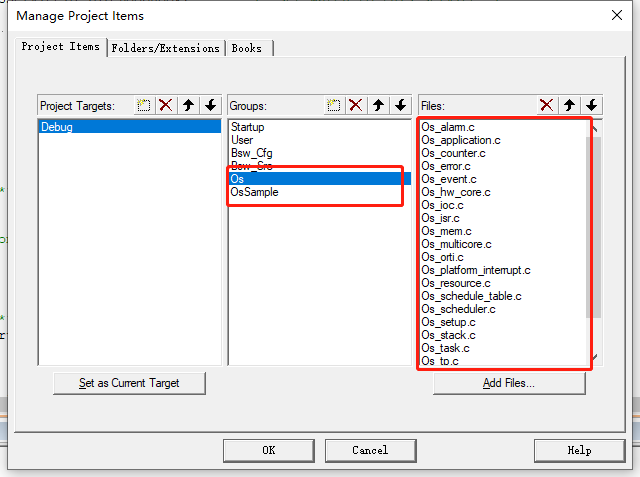
It should be noted that the main function is included in the test routine, so we need to replace the previous main C) remove documents from the project.
6. Keil engineering configuration
If it is used, we tested the Keil project of MCAL, and there is a definition in the configuration that controls the use of AUTOSAR OS, as shown in the following figure:
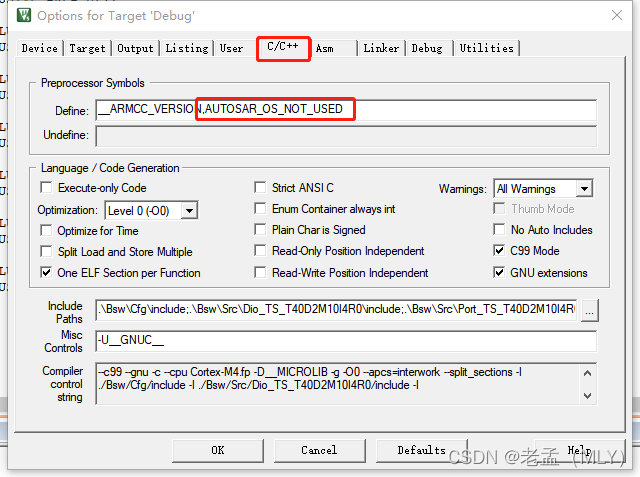
Now we will remove this and add another configuration definition:
OSDS5ARM
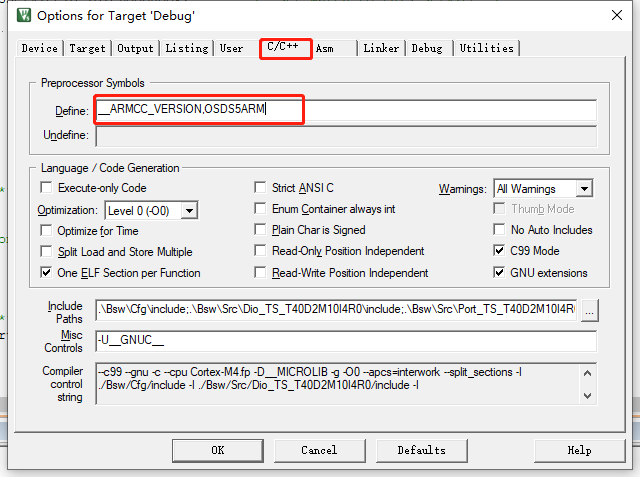
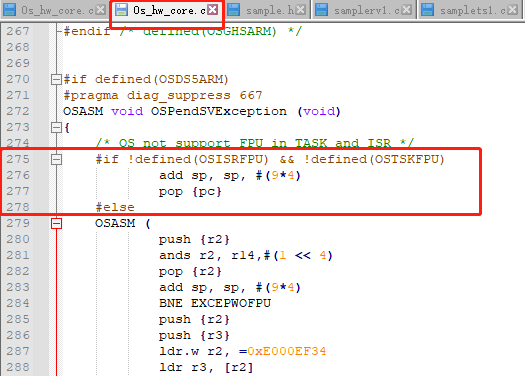
This definition is to choose which compiler to use. Because Keil's MDK compiler is not defined in the source code, let's choose this option first. There are not many places that need to be modified in the actual measurement. Only the following assembly needs to be modified:
Position in the figure below:
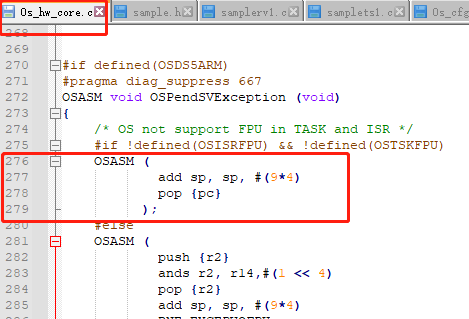
Remove OSASM and parentheses and amend to read:
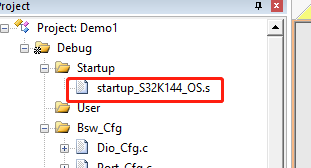
7. Modify startup file
The official does not provide the startup code (. s) of the MDK compiler. We previously tested that the startup code of MCAL can not run the OS normally. We need to replace it with the startup code in the following link:
Link: https://pan.baidu.com/s/1v5BTNVH7_ZxKSye2zfB0eQ
Extraction code: y8bi
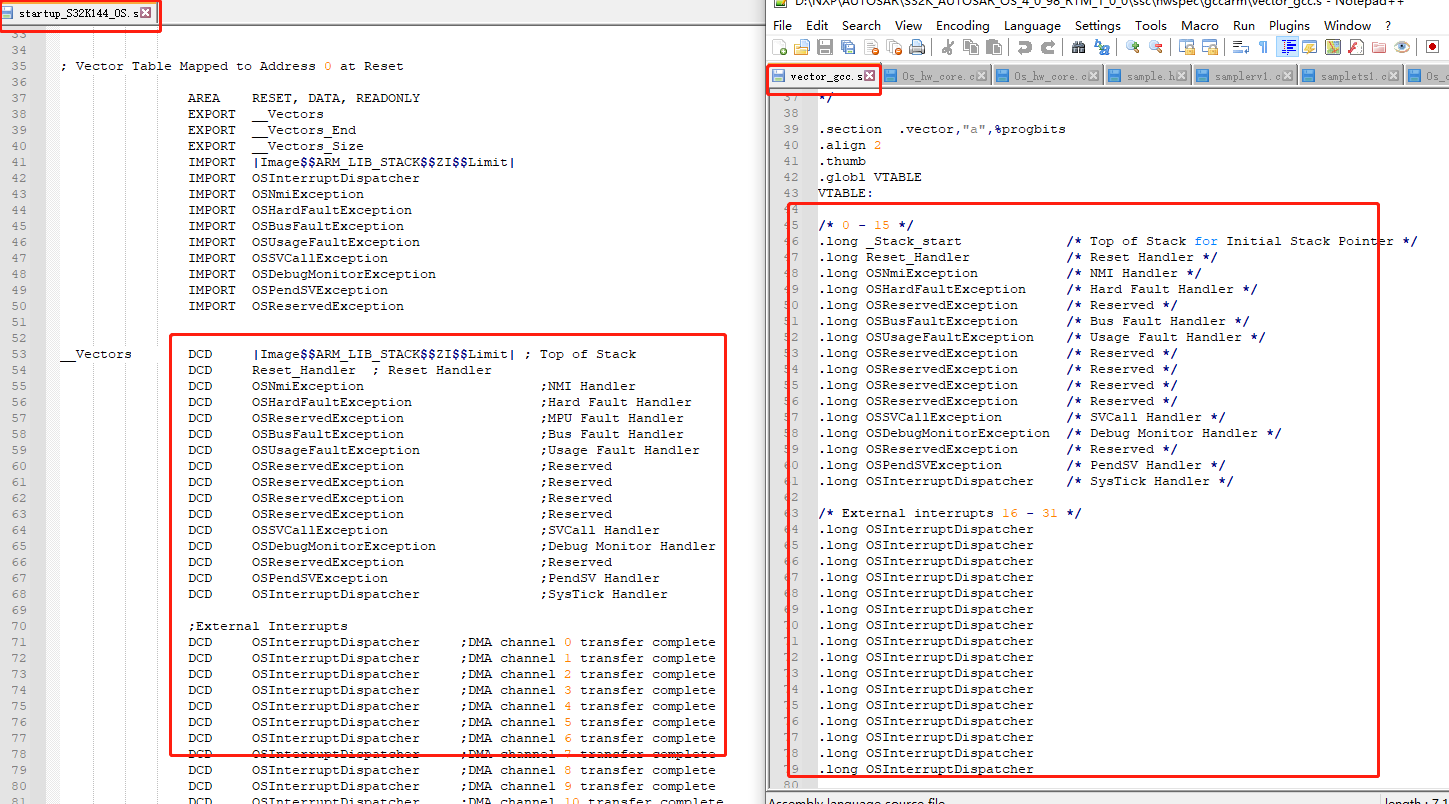
The interrupt vector table is modified in the startup code. The interrupt vector tables of other compilers officially provided are in the following path:
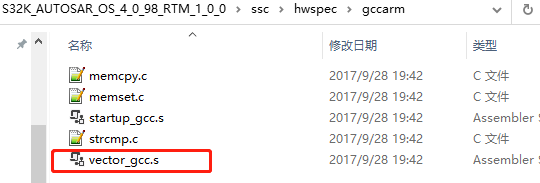
I modified the interrupt vector table of the previous startup file against this:
8. Configure test routine code
The main function of the test routine is in samplerv1 C, we add some initialization of MCAL in the main function:
/***************************************************************************
 * Function:    main
 *
 * Description: inits variables and starts OS
 *
 **************************************************************************/
int main( void )
{
#if defined(OSIARARM)
    extern void SystemInit(void);
    SystemInit();
#endif

    /* Initialize the Mcu driver */
    Mcu_Init(&McuModuleConfiguration_0);

    Mcu_InitClock(McuClockSettingConfig_0);
#if (MCU_NO_PLL == STD_OFF)
    while ( MCU_PLL_LOCKED != Mcu_GetPllStatus() )
    {
        /* Busy wait until the System PLL is locked */
    }

    Mcu_DistributePllClock();
#endif
    Mcu_SetMode(McuModeSettingConf_0);

    /* Initialize all pins using the Port driver */
    Port_Init(&PortConfigSet_0);


    ind = 0;
    repeatCnt = 0;
    repeatCnt1 = 0;
#if defined(OSTSKFPU)
    taskRcv1 = 0.5;
    taskRcv2 = 0.5;
#else
    taskRcv1 = 0;
    taskRcv2 = 0;
#endif
    taskStop = 0;
#if defined(OSTSKFPU)
    taskSnd1 = 0.5;
    taskSnd2 = 0.5;
#else
    taskSnd1 = 0;
    taskSnd2 = 0;
#endif
    taskCnt  = 0;


    StartOS( Mode01 );                            /* jump to OS startup */

    return 0;
}
In sample_hw.h, some hardware interfaces need to be configured:
#include "Dio.h"

#define SetGPIO(n)      Dio_WriteChannel(DioConf_DioChannel_DioChannel_LED_GREEN, STD_LOW)
#define ClrGPIO(n)      Dio_WriteChannel(DioConf_DioChannel_DioChannel_LED_GREEN, STD_HIGH)
#define ToogleGPIO(n)   Dio_FlipChannel(DioConf_DioChannel_DioChannel_LED_GREEN);
9. Compile and test
After completing the above work, you can compile the project. After the compilation is successful, burn it into the development board, and you can see that the LED light configured above flashes.