sagemaker is a hosted machine learning service of aws. For details, please see
 https://docs.aws.amazon.com/zh_cn/sagemaker/latest/dg/whatis.html
Use tf2.0 locally A CNN model is written in the version above 0. What I test is the cat and dog recognition model.
Finally, save the model after fit. Among them, 1 is the version number, which is mainly used for multi model deployment. The name export can be changed at will, but / Servo seems to be specified by sagemaker. Anyway, I can't deploy successfully without this path. You can try.
model.save('export/Servo/1/')After saving the model, the directory structure is like this.
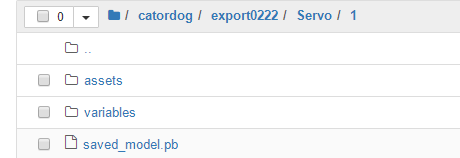
Then compress the directory into tar.gz format, which is the format specified by sagemaker.
import tarfile
model_archive = 'model.tar.gz'
with tarfile.open(model_archive, mode='w:gz') as archive:
    archive.add('export', recursive=True)
There will be one locally

Then upload the compressed file to s3.
from sagemaker import get_execution_role
from sagemaker import Session
role = get_execution_role()
sess = Session()
model_data = sess.upload_data(path=model_archive, key_prefix='model_dc_new')
Let's start the deployment:
Create a new notebook instance in sagemaker notebook instance. After creation, open Jupiter
Here we need to emphasize the role user permission. When you create a notebook instance and select the IAM role, you must make sure that the user has permissions such as sagemaker's read-write deployment.


Then create a notebook instance. My choice is CONDA tensorflow2_ p36
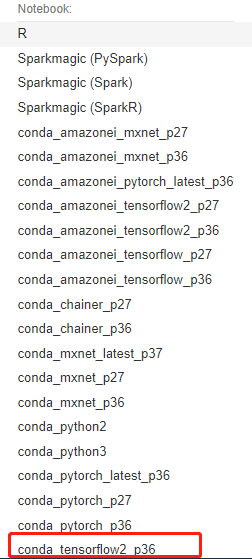
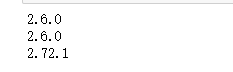
Create a new jupyter and import the necessary packages. Print the versions of tf, keras and sagemaker in this way. Because my model is written in tf and kears to ensure that the versions of the two packages are consistent. I use 2.6 and sagemaker must be more than 2.0.
from sagemaker import get_execution_role
from sagemaker import Session
import tensorflow as tf
import keras,sagemaker
from sagemaker.tensorflow.model import TensorFlowModel ###Version above 2.0
role = get_execution_role()
sess = Session()
tf_framework_version = tf.__version__
print(tf.__version__)
print(keras.__version__)
print(sagemaker.__version__)
Building a model: what we need to pay attention to here is the framework_version must be an integer. If the error is reported during deployment such as 2.3.4, I forget the screenshot of the error. I use 2.6, model_data is the model location.
sm_model = TensorFlowModel(model_data='s3://sagemaker-ap-northeast-1-499396867125/local_model2/model.tar.gz',
framework_version='2.6.0',role=role)
Deployment model: instance_type is the model of EC2, which can be set as required. initial_instance_count number.
Normally, it will be finished in about 10-15 minutes. endpoint_name can specify the node name. If you don't write it, you will be given a random one.
%%time
instance_type = 'ml.c5.xlarge'
uncompiled_predictor = sm_model.deploy(initial_instance_count=1,instance_type=instance_type)
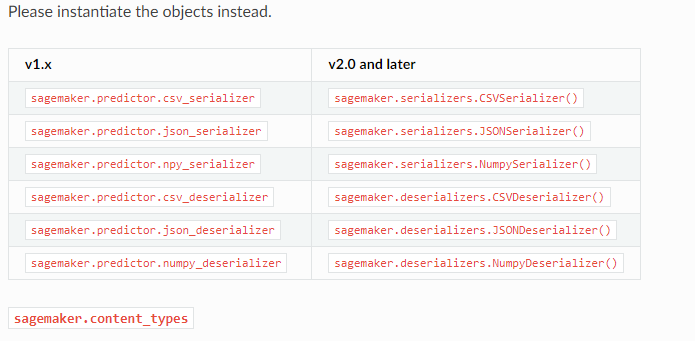
TIP: there are serialization and deserialization configurations in deploy. serializer and deserializer can be configured on demand. The details can be viewed in the api
Use Version 2.x of the SageMaker Python SDK — sagemaker 2.77.0 documentation
Print when finished
uncompiled_predictor.endpoint_name can view the node name.
Call:
The first is data processing, how to process the model when it is written, and how to process the call. For example, here I am:
test_path ="test.jpg"
image = cv2.imread(test_path)
image = cv2.resize(image,(image_size,image_size),0,0,cv2.INTER_LINEAR)
image = image.astype(np.float32)
image_array = np.multiply(image,1./255.)
x_batch = image_array.reshape(1,image_size,image_size,3)
x_batch.shape
(1, 64, 64, 3)
First, after the deployment is completed, uncompiled_ The predictor can directly pass the parameter array and return the result.
res=uncompiled_predictor.predict(x_batch)
print(res)

##Results: {'predictions': [[0.94271487, 0.0572850853]]}
Then open the terminal node:
You can see the terminal node just deployed

We can directly call the terminal node, which is strange to call the terminal node to pass parameters, because we can't directly pass in the array
An error will be reported when it is passed in: "{" error ":" unsupported media type: application / x-npy "}". I don't know how to solve it at present. It may be a serialization problem. If you know, please let me know. Thank you.
So I can only pass it in the form of json.
As for the json format of the returned results, you can modify it to be customized, or you can change it to be non json.
The result is different because I changed the picture to a cat.
runtime = boto3.Session().client(service_name="runtime.sagemaker")
image = Image.open(test_path)
image = image.resize([image_size, image_size])
image = np.multiply(image,1./255.)
x_train = image.reshape(1,image_size,image_size,3)
input1 = {'instances': x_train.tolist()}
response = runtime.invoke_endpoint(EndpointName=uncompiled_predictor.endpoint_name,
                               ContentType='application/json', Body=json.dumps(input1))
result = response["Body"].read()
result = json.loads(result)
print(result)
###Result {'predictions': [[0.0799172819, 0.920082748]]}
So far, sagemaker has basically finished deploying the node and calling it, but there are many problems, such as:
1.invoke_ The parameter passing problem of endpoint function call, although the result is correct, is very awkward
2. Serialization problem
3. It seems that the size of the picture can't exceed 5M. I saw it on a foreign blog. I don't know if it's true.
4. And information py:
5. There are also various pits.
We'll study it later.
I recommend a website for you. It says a part of the content. It's very good. There's also #799 Serving a Tensorflow model fails with ConnectionClosedError · Issue #831 · aws/sagemaker-python-sdk · GitHub