Tip: after the article is written, the directory can be generated automatically. Please refer to the help document on the right for how to generate it
preface
Scrapy crawler's website image crawling
- Scripy crawls the link to the website's training pictures
Tip: the following is the main content of this article. The following cases can be used for reference
1. Task description
This off task: use scripy to crawl the picture links of a given website and save them locally.
2. Relevant knowledge
In order to complete the task of this level, you need to master:
- Basic operation of Scrapy;
- xpath matching;
- File operation.
Generate Scrapy crawler
-
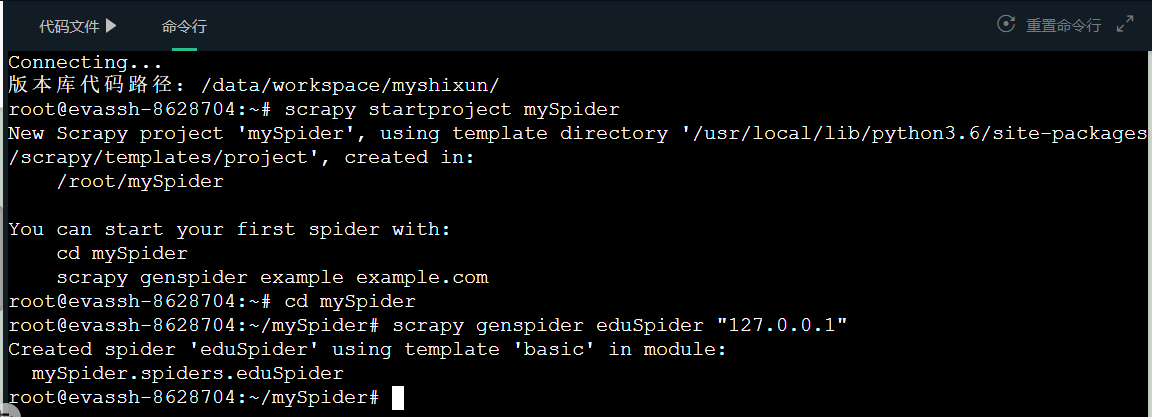
New scripy project - mySpider;
In the directory where you want to put the project file, open the cmd command window and enter the command "scratch startproject myspider", and the project folder can be successfully generated in this directory.
-
Generate master crawler;
Enter the / mySpider/mySpider/spiders directory, open the cmd command window here, and enter the command "sweep genspider eduSpider" 127.0.0.1 ". eduSpider is the name of the crawler, followed by the range of the domain crawled by the crawler.
After this step, the Scrapy crawler framework will be built, and then you can start coding and customizing your own crawler.
Tips for quickly opening cmd window in directory:
- Press Shift + right mouse button and click [open command window here] (or [open PowerShell window here]) to open it quickly;
- In the path at the top of the folder, select the path and directly enter cmd.
Making a Scrapy crawler
- Reading and writing of documents;
The following code is the most common IO operation in Python - reading and writing files. Open the file images in w (write) mode Txt (it will be created automatically if there is no), and the string abc is written into it.
 with open('images.txt','w') as f:
      img = abc
      f.write("{}\n".format(img))
- xpath matching;
Before matching, the crawled web page should be analyzed. I use 360 browser. Right click the image to be crawled and select the review element (other browsers have similar functions, and the specific operation can be searched online). As shown in the figure below, locate the image in the web source code.
images = response.xpath("//div[@class='box']/div/a/img/@src ") # get links to pictures
index.html
<!DOCTYPE html>
<html lang="en">
<head>
    <meta charset="UTF-8">
    <title>flower</title>
</head>
<body>
    <div class="box">

        <div>
            <a href="/static/app1/imgs/1.png" target="_blank">
                <img src="/static/app1/imgs/1.png" alt="Not shown">
            </a>
        </div>

        <div>
            <a href="/static/app1/imgs/10.png" target="_blank">
                <img src="/static/app1/imgs/10.png" alt="Not shown">
            </a>
        </div>

        <div>
            <a href="/static/app1/imgs/11.png" target="_blank">
                <img src="/static/app1/imgs/11.png" alt="Not shown">
            </a>
        </div>

        <div>
            <a href="/static/app1/imgs/12.png" target="_blank">
                <img src="/static/app1/imgs/12.png" alt="Not shown">
            </a>
        </div>

        <div>
            <a href="/static/app1/imgs/13.png" target="_blank">
                <img src="/static/app1/imgs/13.png" alt="Not shown">
            </a>
        </div>

        <div>
            <a href="/static/app1/imgs/14.png" target="_blank">
                <img src="/static/app1/imgs/14.png" alt="Not shown">
            </a>
        </div>

        <div>
            <a href="/static/app1/imgs/15.png" target="_blank">
                <img src="/static/app1/imgs/15.png" alt="Not shown">
            </a>
        </div>

        <div>
            <a href="/static/app1/imgs/16.png" target="_blank">
                <img src="/static/app1/imgs/16.png" alt="Not shown">
            </a>
        </div>

        <div>
            <a href="/static/app1/imgs/17.png" target="_blank">
                <img src="/static/app1/imgs/17.png" alt="Not shown">
            </a>
        </div>

        <div>
            <a href="/static/app1/imgs/18.png" target="_blank">
                <img src="/static/app1/imgs/18.png" alt="Not shown">
            </a>
        </div>

        <div>
            <a href="/static/app1/imgs/19.png" target="_blank">
                <img src="/static/app1/imgs/19.png" alt="Not shown">
            </a>
        </div>

        <div>
            <a href="/static/app1/imgs/2.png" target="_blank">
                <img src="/static/app1/imgs/2.png" alt="Not shown">
            </a>
        </div>

        <div>
            <a href="/static/app1/imgs/20.png" target="_blank">
                <img src="/static/app1/imgs/20.png" alt="Not shown">
            </a>
        </div>

        <div>
            <a href="/static/app1/imgs/21.png" target="_blank">
                <img src="/static/app1/imgs/21.png" alt="Not shown">
            </a>
        </div>

        <div>
            <a href="/static/app1/imgs/22.png" target="_blank">
                <img src="/static/app1/imgs/22.png" alt="Not shown">
            </a>
        </div>

        <div>
            <a href="/static/app1/imgs/23.png" target="_blank">
                <img src="/static/app1/imgs/23.png" alt="Not shown">
            </a>
        </div>

        <div>
            <a href="/static/app1/imgs/24.png" target="_blank">
                <img src="/static/app1/imgs/24.png" alt="Not shown">
            </a>
        </div>

        <div>
            <a href="/static/app1/imgs/25.png" target="_blank">
                <img src="/static/app1/imgs/25.png" alt="Not shown">
            </a>
        </div>

        <div>
            <a href="/static/app1/imgs/3.png" target="_blank">
                <img src="/static/app1/imgs/3.png" alt="Not shown">
            </a>
        </div>

        <div>
            <a href="/static/app1/imgs/4.png" target="_blank">
                <img src="/static/app1/imgs/4.png" alt="Not shown">
            </a>
        </div>

        <div>
            <a href="/static/app1/imgs/5.png" target="_blank">
                <img src="/static/app1/imgs/5.png" alt="Not shown">
            </a>
        </div>

        <div>
            <a href="/static/app1/imgs/6.png" target="_blank">
                <img src="/static/app1/imgs/6.png" alt="Not shown">
            </a>
        </div>

        <div>
            <a href="/static/app1/imgs/7.png" target="_blank">
                <img src="/static/app1/imgs/7.png" alt="Not shown">
            </a>
        </div>

        <div>
            <a href="/static/app1/imgs/8.png" target="_blank">
                <img src="/static/app1/imgs/8.png" alt="Not shown">
            </a>
        </div>

        <div>
            <a href="/static/app1/imgs/9.png" target="_blank">
                <img src="/static/app1/imgs/9.png" alt="Not shown">
            </a>
        </div>

    </div>
</body>
</html>
After mastering the above two knowledge, we can start to write our main crawler file eduspider Py, the steps are as follows:
- Open the file images. Net as a write Txt (this file will be automatically generated if there is no in the directory);
- xpath matches picture links;
- Write the matching link to images Txt.
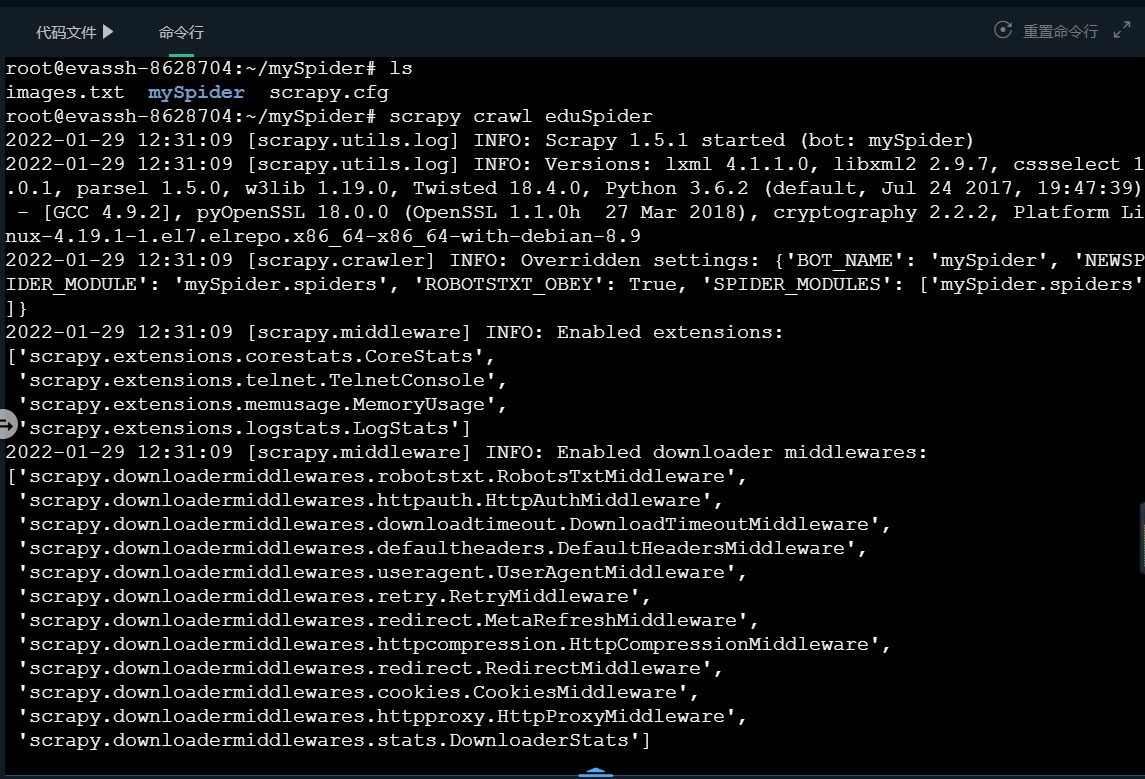
Run the Scrapy crawler
In the main crawler file eduspider Py defines the name of the crawler, which we need when running.
When running the crawler, you must enter the project file / mySpider, where there is a scene generated automatically when the crawler is generated CFG configuration file. You can enter a command to start the crawler only at the location where this file is located. Crawler: crawler name.
Note: I have written the crawler running command into the script program. After you complete the code, you only need to click the evaluation, and the platform will automatically start the crawler. The following levels are the same. This introduction is for your needs of practicing on Windows platform after class.
3. Programming requirements
First, observe the code rules of picture links by reviewing the elements; Then, click the triangle next to the code file and select the file eduspider Py, as shown in the figure below. Add code in the begin end section to enable the parse function to crawl image links and save them to the local file images Txt.
4. Test description
The platform will test the code you write (no input in this test):
Expected output:
Crawl successful
5. The author's answer
# -*- coding: utf-8 -*-
import scrapy


class EduspiderSpider(scrapy.Spider):
   name = 'eduSpider'
   allowed_domains = ['127.0.0.1']
   start_urls = ['http://127.0.0.1:8080/imgs/']

   def parse(self, response):
       #********** Begin **********#
        with open('images.txt','w') as f:
           img = response.xpath("//div[@class='box']/div/a/img/@src")
           f.write("{}\n".format(img))
       #********** End **********#
Through screenshot

summary
- Scripy crawls the link to the website's training pictures