Vue project basic configuration: secondary encapsulation Axios whole process analysis
sketch 📖, I'm a little unfamiliar with axios and the secondary packaging process, so let's sort it out 💻 . arrangement 🖊 Be more detailed, which is convenient for your current study and later review 📘 .
Overview: this chapter mainly includes the basic concepts of axios and the process of secondary packaging axios
-
What is Axios?
- Axios is a promise based HTTP library that can be used in browsers and node JS.
-
install
- npm install axios
- Or npm install axios --S
- Or npm install axios --save
- [note] the above three expressions have the same meaning. Do not add -- save or -- S, which is installed in the dependencies production dependency by default
-
How to introduce axios into the project
-
First:
-
In main JS
-
1. //Introducing axios
    import axios from 'axios';
    //Register axios with the prototype object of vue
    Vue.prototype.$axios = axios;
    //Why not use Vue Use(), because the developer of axios did not write the install step


2.  //Use method -- > in the called component
    this.$axios('route','parameter').then().catch()
-
-
-
Second:
- Create a utils – > utils JS file
- Specific reference ⏬ The following is the secondary packaging of axios
-
-
request basic use case (based on cnode community) 🏠 Interface as an example - a good community 😆 )
-
post request
-
axios.post("https://cnodejs.org/api/v1/topics", {
        accesstoken: "45e7e524-2f99-4e2e-be68-f9c66401a2f1",
        title: "Late night test axios Secondary packaging-wcc",
        tab: "dev",
        content: "I hope we can go further and further on the road of technology!!!",
      }).then(res => {
        console.log(res);
      })
      .catch(function (error) {
    	console.log(error);
  	  });
-
-
get request
-
In the first way, the input parameter is spliced in the form of query string
-
axios.get("https://cnodejs.org/api/v1/topics?page=1&tab=ask&limit=10&mdrender=false")
      .then(res =>{
        // Execute on success
        console.log(res);
      })
      .catch(error => {
        // Execute on error
        console.log(error);
      });
-
-
The second method is to pass in {params: {}} as an object
-
axios.get("https://cnodejs.org/api/v1/topics",{
        params:{
          page:1,
          tab:'ask',
          limit:10,
          mdrender:false
        }
      })
      .then(res =>{
        // Execute on success
        console.log(res);
      })
      .catch(error => {
        // Execute on error
        console.log(error);
      });
-
-
-
-
Secondary packaging axios
-
New folder utils -- > utils js
-
Step 1: introduce the required configuration
import axios from 'axios'; //Introducing axios import { Message,Loading} from 'element-ui' //Introduce message prompt / load on demand --- use it as a service (service: refer to the element UI official website) import qs from 'qs'; //Parameter serialization, convert the data format to x-www-form-urlencoded (the default format of post) /* qs It is a package managed by npm warehouse, which can be installed by npm install qs command qs.parse()Parse the URL into the form of an object -- a key value pair qs.stringify()Serialize objects into URL s to & splice -- query strings */ -
Step 2: judge the current running environment - this piece of content is linked with * * * proxyTable * * *
let BASE_URL = '',loadingInstance; let HOST = process.env.NODE_ENV; console.log(HOST); switch (HOST) { //Development represents the local development environment case 'development': BASE_URL = '/api'; break; //Production stands for online environment (including dat, uat and production environment) case 'production': BASE_URL = '/'; break; default: BASE_URL = '/api'; } /* In node, the global variable process represents the current node process process.env Contains variables about the system environment, but process Node does not exist in Env_ Env this thing. NODE_ENV Is a user-defined variable. In webpack, it is used to judge the production environment or development environment. [Note] process env. NODE_ Env is a global environment variable added when we execute script commands. */ -
Step 3: configure the default value of * * * axios * * * (in two cases, refer to the official document)
-
Global axios default value (the method used in this example)
-
Custom instance defaults
// Global axios defaults -- more than that
axios.defaults.timeout = 5000;//Timeout setting
axios.defaults.baseURL = BASE_URL ;//Request root path
axios.defaults.headers.post['content-type']='application/x-www-form-urlencoded';//Custom request header
-
-
Step 4: request interceptor
-
Do something before sending the request,
- Add unified cookie
- Request body plus verification
- Set request header
- Or jump to the login page without a token
- It is equivalent to a package for the same operation in each interface;
axios.interceptors.request.use((config) => {
  console.log(config);
  config.data = qs.stringify(config.data);
  // let token=localStorage.getItem('token');
  // token && (config.headers.Authorization=token);// Request to carry token
  //  token &&Object. assign(config.headers,{Authorization:token});  Another way of writing
  // config.headers = {
  //     'content type': 'application / x-www-form-urlencoded' / / convert data format
  // }
  // Calling loading as a service -- > returns an instance of loading
  loadingInstance = Loading.service({
    lock: true,
    text: 'Content loading', //The load document displayed below the load icon
  });
  return config;
}, error => {
  // Do something wrong with the request
  return Promise.reject(error);
})
-
-
Step 5: response interceptor
- After the request is responded to, some processing of the response body, such as unified data processing, is often used to judge the login failure, etc
xios.interceptors.response.use(response => { // Do something with the response data setTimeout(() => { // Service mode: method of turning off mask layer loadingInstance.close(); }, 300) return response; }, error => { setTimeout(() => { loadingInstance.close(); }, 300) let { response } = error; if (response) { // The server has returned content let errormsg = ''; switch (response.status) { case 400: errormsg = 'Error request' break; case 401: errormsg = 'Not logged in,Please log in again' break; case 403: errormsg = 'Refuse to visit' break; case 404: errormsg = 'Request error, the resource was not found' break; case 405: errormsg = 'Request method not allowed' break; case 408: errormsg = 'request timeout' break; case 500: errormsg = 'Server error' break; case 501: errormsg = 'Network not implemented' break; case 502: errormsg = 'network error' break; case 503: errormsg = 'Service Unavailable' break; case 504: errormsg = 'Network Timeout ' break; case 505: errormsg = 'http The request is not supported by version' break; default: errormsg = 'Connection error' } // Message global method Message({ type: 'error', message: errormsg }); return false; } else { //The server didn't even return the results. It may be disconnected or the server crashed // window.navigator contains some information such as browser manufacturer and version if (!window.navigator.online) { //Network disconnection treatment Message('Network interruption'); return; } else { //The server crashed Message('The server crashed'); return Promise.reject(error);//Promise pending - > rejected } } }) -
Step 6: GET and POST request encapsulation
-
GET request
/* *GET Method, corresponding to get request *@param {String} url [Requested url address] *@param {Object} params[Parameters carried by the request]] */ export function get(url,params){ return new Promise((resolve,reject) => { axios.get(url,{ params:params }).then(res => { resolve(res.data); }).catch(err =>{ reject(err.data) }) }) } -
POST request
/*
*post Method, corresponding to the post request
*@param {String} url [Requested url address]
*@param {Object} params[Parameters carried by the request]]
*/


export function post(url, params) {
    return new Promise((resolve, reject) => {
        axios.post(url, params)
            .then(res => {
                resolve(res.data);
            }).catch(err => {
                reject(err.data);
            })
    });
}
-
-
Step 7: unified processing interface
-
New api – > index JS file
import {
  get,
  post
} from '@/utils/utils.js';
// New theme
// export const newTheme =  params =>post('/api/v1/topics',params);
// export const getTopics =  params =>get('/api/v1/topics',params);
const $CNodeApi = {
  // New theme
  newTheme: params =>post('/api/v1/topics',params),
  // Get topic
  getTopics:params =>get('/api/v1/topics',params),
}
export default $CNodeApi;
-
-
Step 8: use interface
-
At HelloWorld Vue is introduced in different ways
// import { newTheme,getTopics } from "@/api/index";
import $CNodeApi from "@/api/index";

//Call in method
submit() {
      $CNodeApi.newTheme({
        accesstoken:'45e7e524-2f99-4e2e-be68-f9c66401a2f1',
        title:'Late night test axios Secondary packaging-wcc',
        tab:'dev',
        content:'I hope we can go further and further on the road of technology!!!'
      }).then(res => {
        console.log(res);
        // this.$message({
        //   message: 'Congratulations, the new theme is successful',
        //   type: 'success'
        // });
      })
-
-
Step 9: call succeeded
- 😆 Finish
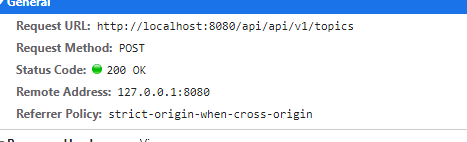
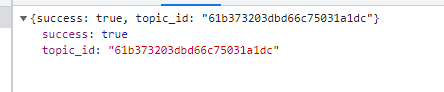
- 😆 Finish
-
-
It's not the mountain we conquer, but ourselves.
What we want to overcome is not mountains, but ourselves.