Send mail automatically
After we make the report, we generally need to send it to others for viewing. For some reports that need to be sent every day or multiple reports that need to be sent at one time, we can consider sending mail automatically with Python at this time.
The first step in using mailboxes
Generally, when we use QQ mailbox, 163 mailbox, 126 mailbox and other commonly used mailboxes, we only need to enter the account and password. However, when using the enterprise mailbox on the mobile terminal, you generally need to configure it. The general configuration interface is as follows:
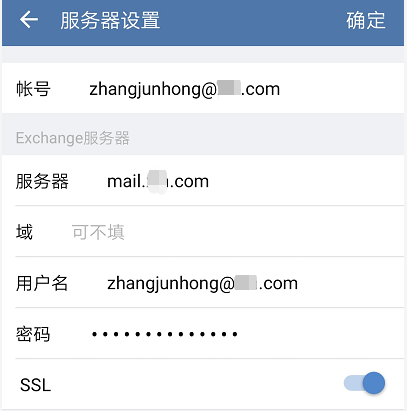
In addition to entering the account and password, you also need to enter a server link address, which will be different for each company.
Composition of an email
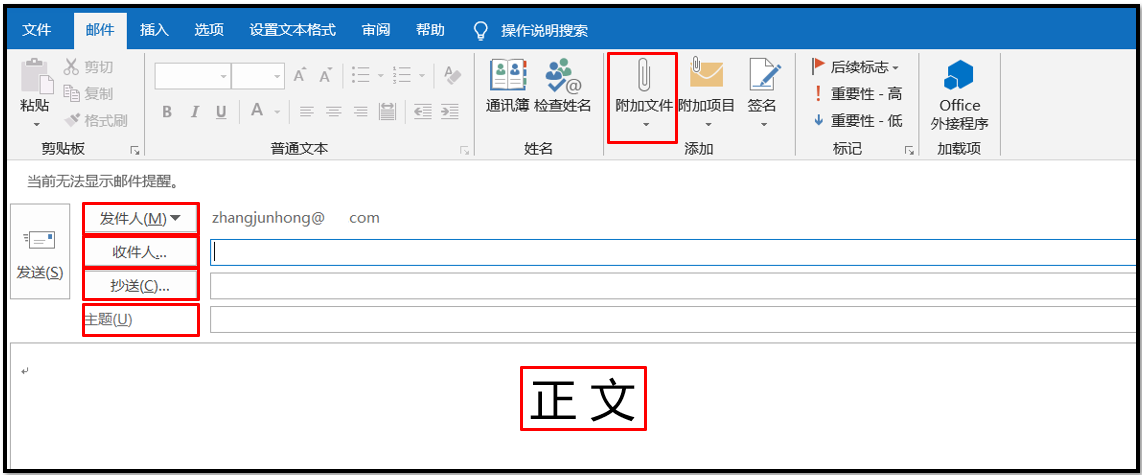
The following figure is the interface for sending an email in outlook, which mainly includes sender, recipient, CC, subject, body and attachment. This is also a common part of general mail.
How to send mail
Before sending mail, you need to connect to the server. In Python, you mainly use the SMTP lib module to establish server connection and server disconnection.
The server link addresses of different mailboxes are different. We set the corresponding server link according to the mailbox we use. The following table shows the server links corresponding to common mailboxes:
| mailbox | server address |
|---|---|
| Sina email | smtp.sina.com |
| Sohu mailbox | smtp.sohu.com |
| Mailbox 126 | smtp.126.com |
| Mailbox 139 | smtp.139.com |
| 163 Netease email | smtp.163.com |
Before connecting to the 163 mailbox server, you need to log in to your 163 mailbox to set the authorization code as follows:
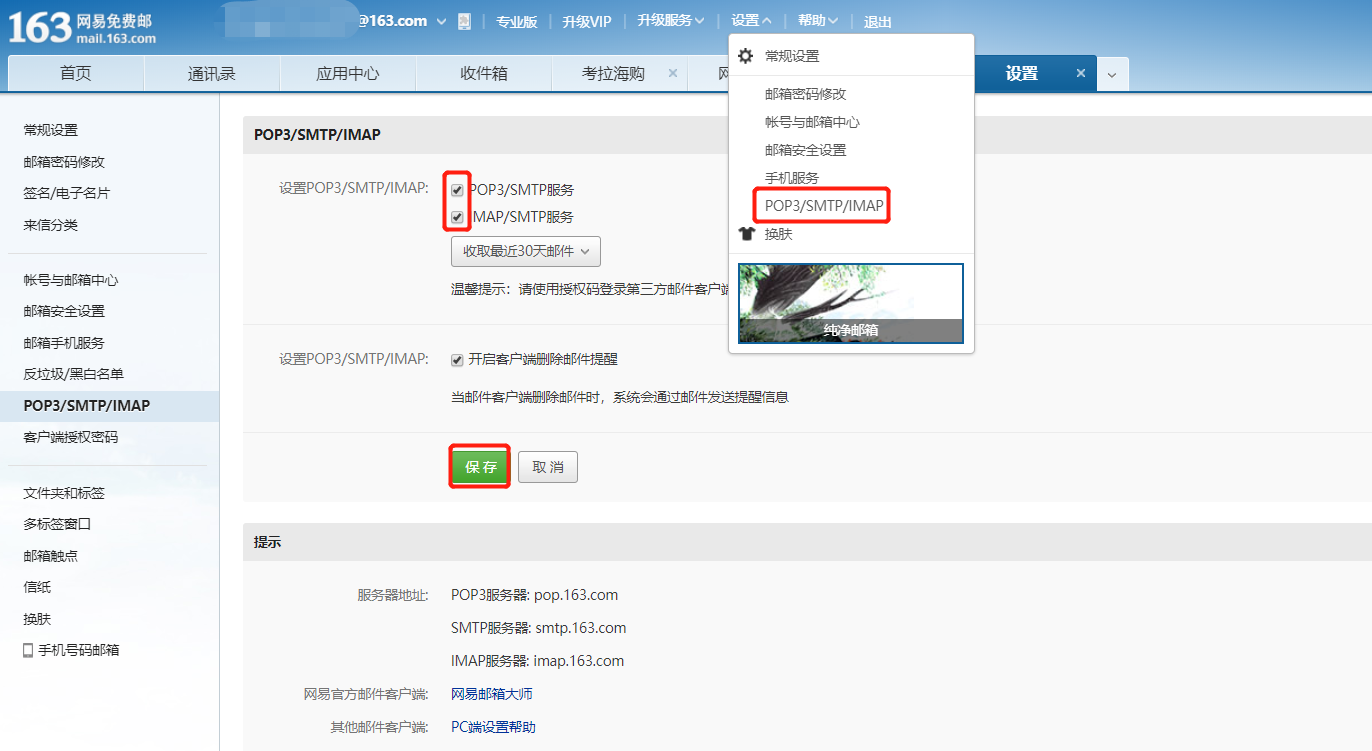
Click POP3/SMTP/IMAP in the settings, check the SMTP service, and set the authorization code according to the request. After the authorization is set successfully, log in with the authorization code in Python instead of your original mailbox password. If you log in with your original mailbox password, an error will be reported.
After the connection is set, you can log in with the account password. After successful login, you can edit the email content. After editing, you can click send. After sending, disconnect the server link.
A short process code for sending an email is shown below:
import smtplib

smtp = smtplib.SMTP()
smtp.connect(host, port)  # Connect to the server
smtp.set_debuglevel(1) #Display interactive information
smtp.login(username, password)  # Login email
smtp.sendmail(sender, receiver, msg.as_string())  # Send mail
smtp.quit()  # Disconnect
Send an official email
Taking mailbox 163 as an example, the following shows the complete Python code for sending an email:
import smtplib
from email.mime.multipart import MIMEMultipart
from email import encoders
from email.header import Header
from email.mime.text import MIMEText
from email.utils import parseaddr, formataddr
from email.mime.application import MIMEApplication

#Sender mailbox
asender="zhangjunhongdata@163.com"
#Recipient mailbox
areceiver="zhangjunhong@163.com"
#CC email
acc = 'zhangjunhong@qq.com'
#Mail subject
asubject = 'This is a test email'

#sender address
from_addr = "zhangjunhongdata@163.com"
#Mailbox password (authorization code)
password="123data"

#Mail Settings
msg = MIMEMultipart()
msg['Subject'] = asubject
msg['to'] = areceiver
msg['Cc'] = acc
msg['from'] =  "Zhang Junhong"

#Message body
body = "Hello, this is a test email"

#Add message body:
msg.attach(MIMEText(body, 'plain', 'utf-8'))

#Add attachment
#Note that the file path here is a slash
xlsxpart = MIMEApplication(open('C:/Users/zhangjunhong/Desktop/This is an attachment.xlsx', 'rb').read())
xlsxpart.add_header('Content-Disposition', 'attachment', filename='This is an attachment.xlsx')
msg.attach(xlsxpart)

#Set mailbox server address and port
smtp_server ="smtp.163.com"
server = smtplib.SMTP(smtp_server, 25)
server.set_debuglevel(1)

#Login email
server.login(from_addr, password)

#Send mail
server.sendmail(from_addr, areceiver.split(',')+acc.split(','), msg.as_string())

#Disconnect server link
server.quit()
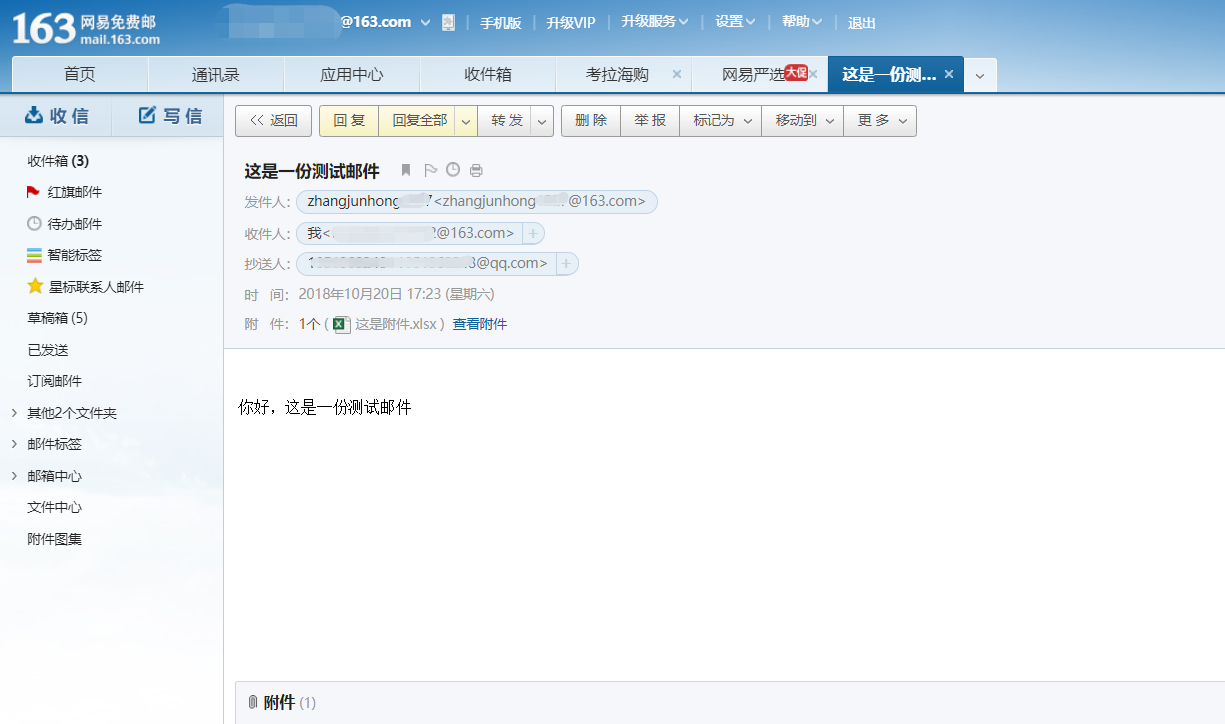
The final results are as follows:
There are some advanced contents about automatic mail sending, such as regular sending, body displaying html content, etc. if you are interested, you can search and learn on the Internet by yourself.
Bulk send mail
If you need to send multiple emails at the same time, you can organize the recipients into a table for circular traversal and send them one by one.
For example, we now need to send hundreds of salespeople in the sales department their respective sales tasks of this month. When sending the e-mail, the subject needs to be named xxx task details, the title in the body needs to be changed to the corresponding recipient, and their respective task details need to be added in the attachment and copied to their immediate superior.
According to the above needs, we have sorted out the following forms related to recipient information df:
| full name | addressee | CC |
|---|---|---|
| Zhang Junhong 1 | zhangjunhong11@163.com | zhangjunhong@163.com |
| Zhang Junhong 2 | zhangjunhong22@163.com | zhangjunhong@163.com |
You only need to write a for loop to traverse the information in the df table, and then you can send it separately. The specific implementation code is as follows:
import smtplib
from email.mime.multipart import MIMEMultipart
from email.mime.text import MIMEText
from email.mime.image import MIMEImage
from email.mime.application import MIMEApplication

host = "smtp.163.com"
port = 25
username = "zhangjunhong1227@163.com"
password = "123zjh"

smtp = smtplib.SMTP() #Declare a linked object
smtp.connect(host, port)  # Connect to the server
smtp.set_debuglevel(1) #Display interactive information
smtp.login(username, password)  # Login email

sender = username

for i in zip(df["full name"],df["addressee"],df["CC"]):

    receiver = i[1] #addressee
    acc = i[2] #CC


    msg = MIMEMultipart() #Declare a mail object
    msg['from'] = username #Sender
    msg['to'] = receiver#addressee
    msg['Cc'] = acc #CC
    msg['Subject'] = i[0] + "Task details" #theme

    # Write text
    text = MIMEText(i[0]+"Hello, here is your task details for this month",'plain', 'utf-8')
    msg.attach(text)

    # Add form attachment
    f = open('C:/Users/zhangjunhong/Desktop/Task details/'+ i[0] + '.xlsx', 'rb').read()
    filepart = MIMEApplication(f)
    filepart.add_header('Content-Disposition','attachment',filename=i[0] + 'Task details.xlsx') #Add a title to the attachment
    msg.attach(filepart)

    smtp.sendmail(sender, receiver.split(',') + acc.split(','), msg.as_string())  # Send mail
smtp.quit()  # Disconnect
By running the above code, you can meet the need to send mail to everyone in the form df at one time.