1, Background & & role
- Abnormal monitoring system
- Collection exception
- Collect log information; Interface duration information
- Timely warning; Send mail
- Display statistics
- High cost of code review; Sometimes only syntax or code style problems can be found; There is not much time for deep reading of logical business problems
- Compatibility problems are not easy to test. The process is long and the logic is complex, which cannot be covered by 100%
Inaccurate user feedback; Do not know some professional terms; High communication cost leads to low efficiency in solving problems
2, Server installation Sentry
2.1 server environment requirements
- Docker 19.03.6+
- Compose 1.28.1+
- 4 CPU Cores
- 8 GB RAM
- 20 GB Free Disk Space
- Python 3
docker Installation process https://docs.docker.com/engine/install/centos/
Compose Installation process https://docs.docker.com/compose/install / (choose linux environment to install)
1. sudo yum install -y yum-utils
2. sudo yum-config-manager \
    --add-repo \
    https://download.docker.com/linux/centos/docker-ce.repo
3. sudo yum install docker-ce docker-ce-cli containerd.io
4. systemctl enable docker && systemctl start docker (start-up docker)
5. sudo curl -L "https://github.com/docker/compose/releases/download/1.29.2/docker-compose-$(uname -s)-$(uname -m)" -o /usr/local/bin/docker-compose
6. sudo chmod +x /usr/local/bin/docker-compose
7. docker info (Successfully viewed information)
2.2 sentry deployment
Get the latest code of Sentry from github
git clone https://github.com/getsentry/onpremise.git
 In case of timeout; You can pull the package locally first; Then copy it to the server scp -r onpremise songxianling@182.92.84.242:/tmp
Enter/tmp Copy file found under folder
- Enter onpremise and run install SH script.
`cd onpremise
./install.sh` Manually run docker compose up - D to start Sentry.
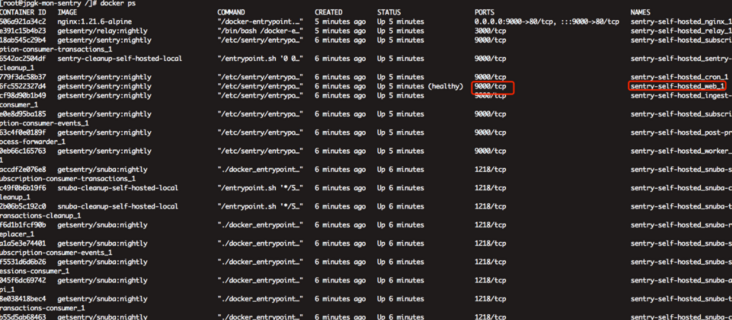
When you see that all services are up; The web is also normal; At this time, you can see the basic page by visiting the 9000 port corresponding to the domain name 🎉2.3 configure email sending
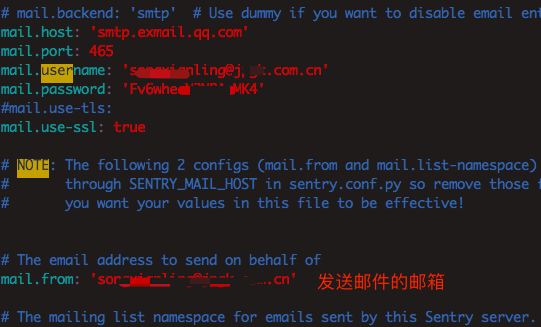
- Modify sentry / config YML file configuration
3, Start using
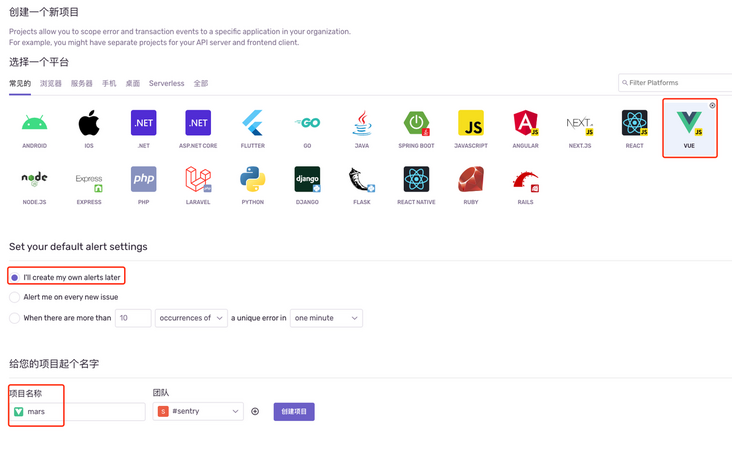
3.1 create project

Open the error console; Because it took 1h +; Related to version; Other people on the Internet didn't set this, and they didn't encounter my problem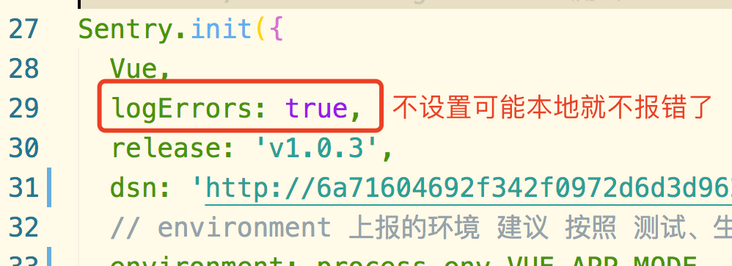
3.2 editing configuration files
Create under the project root directory sentryclirc file
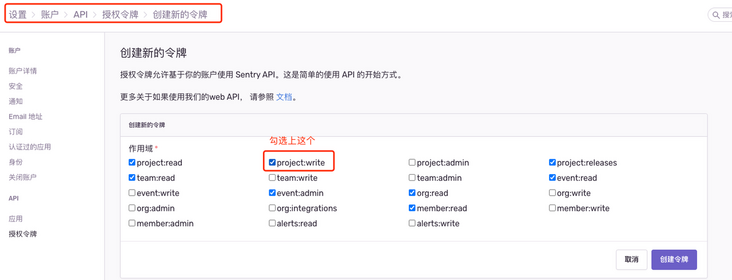
[defaults]
project=mars # Project name created
org=sentry # Group name
url=http://sentry.jpgk.com.cn/ # sentry service url

[auth]
token=8e8eea22357843ac9480a2e3ed373ae01659315567914de4b62442d9041287c7 #Manually generated token; See the following figure for details
3.3 run up test error
🔨 Randomly create an error message in a code; Then you can see; A request was sent from the network of the console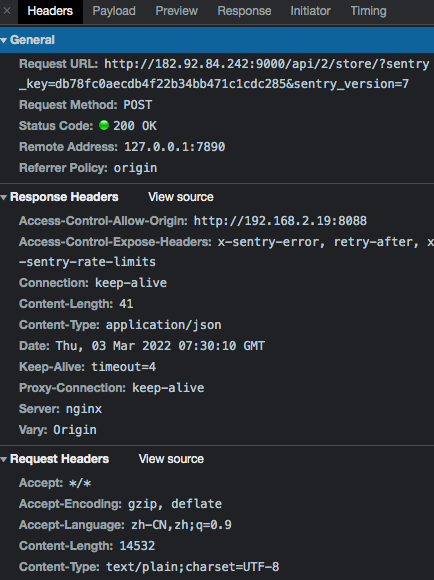
🥚 In sentry, you can see the corresponding error collection, such as bread crumbs, ajax requests, previous error messages, etc; These information can provide context information for the current error and reproduce the steps of the error; It can also provide effective information for reproducing and debugging bugs
At the same time, the context information that can be customized includes user information, tags event tag information, level event severity error, fingerprint event grouping rules, and extra data additional data.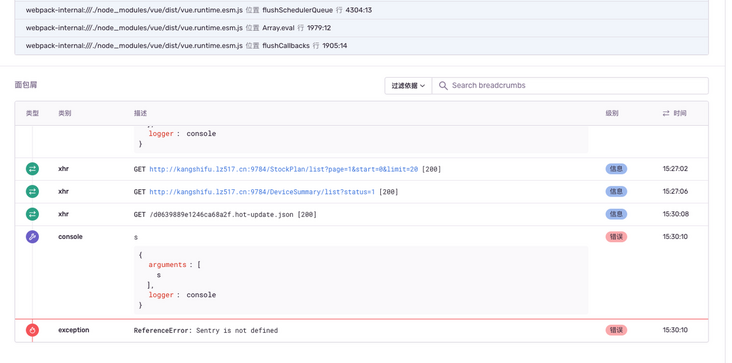

3.4 upload source map
- Webpack manual upload sentry / webpack plugin (webpack plug-in)
- Sentry cli server installation
Most of the Internet is uploaded by webpack plug-in; I won't narrate this place
Execute the script after installing sentry cli on the server or Jenkins (current scheme)
Jenkins configuring sentry cli
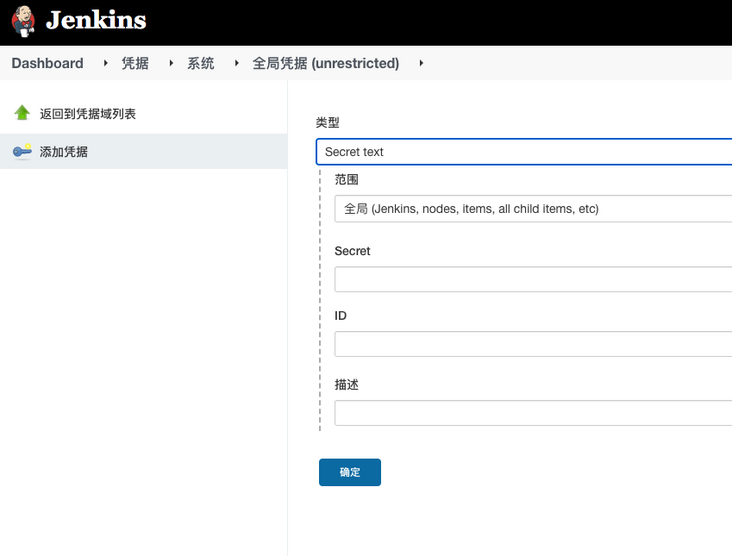
First, create a * variable * under Jenkins for cli to use when executing commands; Prevent critical information of token from being leaked
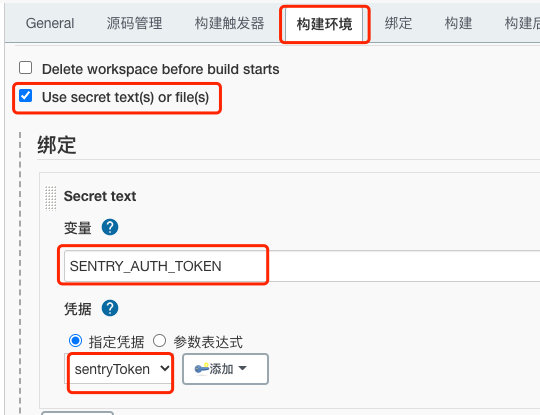
Add the execution script after build packaging; Upload to sentry server
# file https://docs.sentry.io/product/cli/releases/

curl -sL http://sentry.jpgk.com.cn/get-cli/ | bash || true

export SENTRY_ORG=sentry
export SENTRY_PROJECT=mars
export SENTRY_ENVIRONMENT=test # env environment variable
export SENTRY_RELEASE=v1.0.3 # And main The version number in init in JS should be consistent and corresponding
# Update version information
/usr/local/bin/sentry-cli releases new -p $SENTRY_PROJECT $SENTRY_RELEASE
# Set submission information
/usr/local/bin/sentry-cli releases set-commits $SENTRY_RELEASE --auto --ignore-empty
# Delete all uploaded files
/usr/local/bin/sentry-cli releases files $SENTRY_RELEASE delete --all
# Upload sourceMap and packaged project file
/usr/local/bin/sentry-cli releases files $SENTRY_RELEASE upload-sourcemaps ./dist --ignore ./dist/node_modules ./dist/vue.config.js
# Set Publishing
/usr/local/bin/sentry-cli releases finalize $SENTRY_RELEASE
# Setting environment information
/usr/local/bin/sentry-cli releases deploys $SENTRY_RELEASE new -e $SENTRY_ENVIRONMENT
The error of not uploading sourceMap is as follows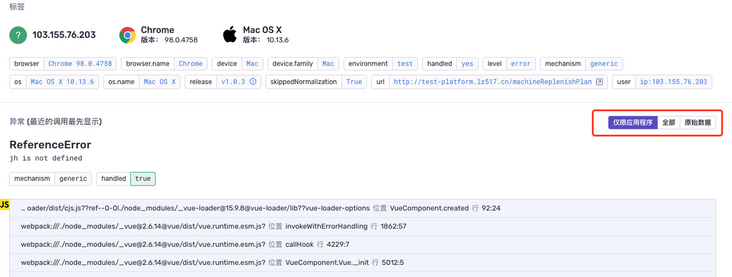
After uploading sourceMap, you can see two more "original and minimized" tags; At the same time, it can also locate the specific code location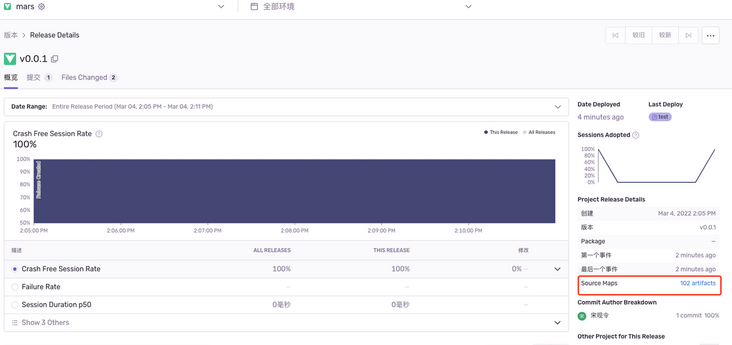
So far; Sentry deployment is basically completed; Sentry is an out of the box monitoring tool with good compatibility, powerful functions and perfect ecosystem. You deserve it!! 🐂🍺
Tips
- When docker compose fails to start; Check whether the version is the latest; sentry requires version 1.28 or above; When I installed, the command was 1.29 +; But installed a version of 1.18 +
- When encountering self execution. / install. When it is not possible; The operation and maintenance department can help implement it; Because of environmental variables; And it cannot be configured temporarily; The whole installation process may take about 20min; It is also possible to encounter unsuccessful installation; Look at luck; After all, there are walls
- Encountered sourcemap upload successfully; Warning: could not determine a source map reference (could not auto detect referenced sourcemap); You can change the devtool of vue to open 'source map'; The longest troubled problem
- There is no "test mail" for reference [Sentry operation and maintenance] configure mailbox based on Sentry installed by Docker_ Macwin blog - CSDN blog