1. Replicate one more database locally (ignored if you have multiple servers conditionally)
1) Find the mysql instance folder and data folder (usually under C:\Program Files and C:\ProgramData)
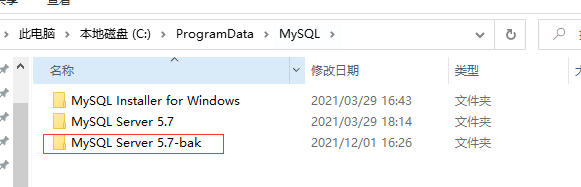
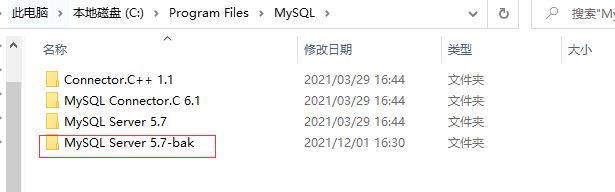
Directly copy a copy from the library
2) Modify slave library configuration my ini
[client]
port=3307
[mysqld]
port=3307
basedir="C:/Program Files/MySQL/MySQL Server 5.7-bak"
datadir="C:/Program Files/MySQL/MySQL Server 5.7-bak/Data"
secure-file-priv="C:/ProgramData/MySQL/MySQL Server 5.7-bak/Uploads"
In any case, the MySQL Server 5.7 with the master database should be replaced with the slave database MySQL Server 5.7-bak
Then open it as an administrator and enter the bin directory of the library to enter the command
C:\Program Files\MySQL\MySQL Server 5.7-bak\bin> mysqld-nt install MySQL2 --defaults-file="C:\ProgramData\MySQL\MySQL Server 5.7-bak\my.ini"
Join the window service so that you can
Before starting the slave library, be sure to put auto. In the data directory If the CNF file is deleted, start the slave library. Otherwise, the server UUID of the slave library is the same as the server UUID of the master library. There will be problems during master-slave replication. After deletion, start it again, and it will automatically generate a new auto CNF file, server UUID will also be new
2. Configure mysql master-slave synchronization
1) Note:
The versions of the master DB server and the slave DB server databases are consistent
The data of the master DB server is consistent with that of the slave DB server [here, the backup of the master can be restored on the slave, or the data directory of the master can be directly copied to the corresponding data directory of the slave]
The master DB server starts the binary log. The master DB server and the slave DB server_id must be unique
2) The main library is configured in my Ini modification:
#Enable master-slave replication and configure the master database
log-bin= mysql3306-bin
#Specify the primary library serverid
server-id=101
#Specify the database to be synchronized. If not specified, all databases will be synchronized
Binlog do DB = name of database to be synchronized
#If you need to synchronize multiple databases, you can configure multiple databases
Binlog do DB = database name to be synchronized 1
Binlog do DB = database name to be synchronized 2
3) The # authorized user slave01 logs in to the main mysql with the 123456 password, which is used to access the main database from the database
grant replication slave on . to 'slave01'@'127.0.0.1'identified by '123456';
flush privileges;
4) Configure from the library in my Ini modification is only one
#Specify the serverid, as long as it is not repeated
server-id=102
5) Open the service of window, find the service of master library and slave library, and restart the two services respectively

6) Execute query statements in the main library
SHOW MASTER STATUS
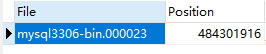
Then execute the following sql from the library, master_log_file and master_log_pos corresponds to the two data found in the main database above
CHANGE MASTER TO
master_host='127.0.0.1',
master_user='slave01',
master_password='123456',
master_port=3306,
master_log_file='mysql3306-bin.000023',
master_log_pos=484301916;
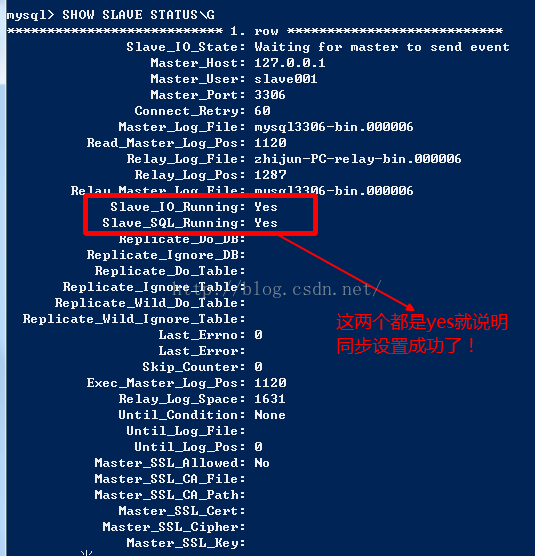
#Start slave synchronization
START SLAVE;
3. Separation of reading and writing using mycat
1) Download mycat https://github.com/MyCATApache/Mycat-Server
decompression
Enter the conf directory
Modify the two configuration files schema XML and server XML, back up first
server.xml (if it only corresponds to a database, write a fragment)
<?xml version="1.0" encoding="UTF-8"?>
<!DOCTYPE mycat:server SYSTEM "server.dtd">
<mycat:server xmlns:mycat="http://io.mycat/">
        <system>
        <property name="defaultSqlParser">druidparser</property>
        </system>
         <!--The following settings are the application access account permissions -->
        <user name="root">
                <property name="password">root</property>
                <!--Segment name, corresponding schema.xml Slice of id(Usually, it can be changed directly to the name of the database to be synchronized)-->
                <property name="schemas">test1,test2</property>
        </user>
         <!--The following settings apply read-only account permissions -->
        <user name="user">
                <property name="password">user</property>
                <property name="schemas">test1,test2</property>
                <property name="readOnly">true</property>
        </user>
</mycat:server>
schema.xml (if it only corresponds to a database, write one)
<?xml version="1.0"?>
<!DOCTYPE mycat:schema SYSTEM "schema.dtd">
<mycat:schema xmlns:mycat="http://io.mycat/">
        <schema name="test1" checkSQLschema="ture" sqlMaxLimit="100" dataNode='dn1'></schema>
		<schema name="test2" checkSQLschema="ture" sqlMaxLimit="100" dataNode='dn2'></schema>

        <dataNode name="dn1" dataHost="dthost1" database="Database name 1"/>
        <dataNode name="dn2" dataHost="dthost2" database="Database name 2"/>

		<dataHost name="dthost1" maxCon="500" minCon="10" balance="1" writeType="0" dbType="mysql" dbDriver="native" switchType="-1" slaveThreshold="100">
        <heartbeat>select user()</heartbeat>
        <writeHost host="wh1" url="localhost:3306" user="root" password="root">
			<readHost host="rh1" url="localhost:3307" user="root" password="root"/>
		</writeHost>
        </dataHost>

        <dataHost name="dthost2" maxCon="500" minCon="10" balance="1" writeType="0" dbType="mysql" dbDriver="native" switchType="-1" slaveThreshold="100">
        <heartbeat>select user()</heartbeat>
        <writeHost host="wh2" url="localhost:3306" user="root" password="root">
			<readHost host="rh2" url="localhost:3307" user="root" password="root"/>
		</writeHost>
        </dataHost>
</mycat:schema>
The configuration of mycat is completed. Open mycat and execute it as an administrator
cd to the bin directory of mycat and execute mycat Bat start is enabled. After successful startup, you can use the linked database software to link mycat, which is the same as linking mysql. The default port is 8066, and the account password is the above server XML configured root/root.
Then, in the jdbc link configuration of the project, the url port 3306 is changed to 8066 and handed over to mycatl management to realize the separation of reading and writing, which is very convenient.
mycat's schema XML and server The configuration attribute description of XML can be found in
https://blog.csdn.net/weixin_41843699/article/details/92029826
View on this blog
Because this is sorted out according to my memory after I finish it. There may be omissions. If there are any problems in the process, I can make a comment