1. Build Ftp server on Ubuntu
1.1 install vsftpd server
sudo apt-get install vsftpd
1.2 configure vsftpd Conf file
Profile:
sudo vi /etc/vsftpd.conf
# Example config file /etc/vsftpd.conf
#
# The default compiled in settings are fairly paranoid. This sample file
# loosens things up a bit, to make the ftp daemon more usable.
# Please see vsftpd.conf.5 for all compiled in defaults.
#
# READ THIS: This example file is NOT an exhaustive list of vsftpd options.
# Please read the vsftpd.conf.5 manual page to get a full idea of vsftpd's
# capabilities.
#
#
# Run standalone?  vsftpd can run either from an inetd or as a standalone
# daemon started from an initscript.
listen=NO
#
# This directive enables listening on IPv6 sockets. By default, listening
# on the IPv6 "any" address (::) will accept connections from both IPv6
# and IPv4 clients. It is not necessary to listen on *both* IPv4 and IPv6
# sockets. If you want that (perhaps because you want to listen on specific
# addresses) then you must run two copies of vsftpd with two configuration
# files.
listen_ipv6=YES
#
# Allow anonymous FTP? (Disabled by default).
#This is to set whether anonymous login to the ftp server is allowed. It is not allowed.
anonymous_enable=NO
#
# Uncomment this to allow local users to log in.
#Allow local users to log in
local_enable=YES
#
# Uncomment this to enable any form of FTP write command.
#Allow uploading files to ftp server
write_enable=YES
#
# Default umask for local users is 077. You may wish to change this to 022,
# if your users expect that (022 is used by most other ftpd's)
#local_umask=022
#
# Uncomment this to allow the anonymous FTP user to upload files. This only
# has an effect if the above global write enable is activated. Also, you will
# obviously need to create a directory writable by the FTP user.
#anon_upload_enable=YES
#
# Uncomment this if you want the anonymous FTP user to be able to create
# new directories.
#anon_mkdir_write_enable=YES
#
# Activate directory messages - messages given to remote users when they
# go into a certain directory.
dirmessage_enable=YES
#
# If enabled, vsftpd will display directory listings with the time
# in  your  local  time  zone.  The default is to display GMT. The
# times returned by the MDTM FTP command are also affected by this
# option.
use_localtime=YES
#
# Activate logging of uploads/downloads.
xferlog_enable=YES
#
# Make sure PORT transfer connections originate from port 20 (ftp-data).
connect_from_port_20=YES
#
# If you want, you can arrange for uploaded anonymous files to be owned by
# a different user. Note! Using "root" for uploaded files is not
# recommended!
#chown_uploads=YES
#chown_username=whoever
#
# You may override where the log file goes if you like. The default is shown
# below.
#xferlog_file=/var/log/vsftpd.log
#
# If you want, you can have your log file in standard ftpd xferlog format.
# Note that the default log file location is /var/log/xferlog in this case.
#xferlog_std_format=YES
#
# You may change the default value for timing out an idle session.
#idle_session_timeout=600
#
# You may change the default value for timing out a data connection.
#data_connection_timeout=120
#
# It is recommended that you define on your system a unique user which the
# ftp server can use as a totally isolated and unprivileged user.
#nopriv_user=ftpsecure
#
# Enable this and the server will recognise asynchronous ABOR requests. Not
# recommended for security (the code is non-trivial). Not enabling it,
# however, may confuse older FTP clients.
#async_abor_enable=YES
#
# By default the server will pretend to allow ASCII mode but in fact ignore
# the request. Turn on the below options to have the server actually do ASCII
# mangling on files when in ASCII mode.
# Beware that on some FTP servers, ASCII support allows a denial of service
# attack (DoS) via the command "SIZE /big/file" in ASCII mode. vsftpd
# predicted this attack and has always been safe, reporting the size of the
# raw file.
# ASCII mangling is a horrible feature of the protocol.
#ascii_upload_enable=YES
#ascii_download_enable=YES
#
# You may fully customise the login banner string:
#ftpd_banner=Welcome to blah FTP service.
#
# You may specify a file of disallowed anonymous e-mail addresses. Apparently
# useful for combatting certain DoS attacks.
#deny_email_enable=YES
# (default follows)
#banned_email_file=/etc/vsftpd.banned_emails
#
# You may restrict local users to their home directories.  See the FAQ for
# the possible risks in this before using chroot_local_user or
# chroot_list_enable below.
#chroot_local_user=YES
#
# You may specify an explicit list of local users to chroot() to their home
# directory. If chroot_local_user is YES, then this list becomes a list of
# users to NOT chroot().
# (Warning! chroot'ing can be very dangerous. If using chroot, make sure that
# the user does not have write access to the top level directory within the
# chroot)
chroot_local_user=YES
chroot_list_enable=YES
# (default follows) allow chroot_ The user configured in the list file logs in to this ftp server.
chroot_list_file=/etc/vsftpd.chroot_list

# You may activate the "-R" option to the builtin ls. This is disabled by
# default to avoid remote users being able to cause excessive I/O on large
# sites. However, some broken FTP clients such as "ncftp" and "mirror" assume
# the presence of the "-R" option, so there is a strong case for enabling it.
#ls_recurse_enable=YES
#
# Customization
#
# Some of vsftpd's settings don't fit the filesystem layout by
# default.
#
# This option should be the name of a directory which is empty.  Also, the
# directory should not be writable by the ftp user. This directory is used
# as a secure chroot() jail at times vsftpd does not require filesystem
# access.
secure_chroot_dir=/var/run/vsftpd/empty
#
# This string is the name of the PAM service vsftpd will use.
pam_service_name=vsftpd
#
# This option specifies the location of the RSA certificate to use for SSL
# encrypted connections.
rsa_cert_file=/etc/ssl/certs/ssl-cert-snakeoil.pem
rsa_private_key_file=/etc/ssl/private/ssl-cert-snakeoil.key
ssl_enable=NO

#
# Uncomment this to indicate that vsftpd use a utf8 filesystem.
#utf8_filesystem=YES
#Configure the directory where the ftp server uploads and downloads files.
local_root=/home/ftpfile
#this directory is for ftp server to save  download or upload data
1.3 configuring users
Create a new / etc / vsftpd chroot_ List file to add linux users who log in to the ftp server
sudo vi /etc/vsftpd.chroot_list
vsftpd.chroot_list file content, michael is my linux user name:
michael
1.4 configure the storage directory of ftp upload / download files
This directory should be the same as vsftpd The configuration paths in conf are consistent. For example, local is configured above_ Root = / home/ftpfile, create a new / home/ftpfile Directory:
sudo mkdir /home/ftpfile
1.6 configure full access to the storage directory
#Grant permissions to the directory
sudo chmod -R 777 /home/ftpfile
1.7 restart the ftp server with the configuration just described
You can only start the server with the following command, otherwise the configuration will not take effect
sudo /etc/init.d/vsftpd restart
1.8 test login
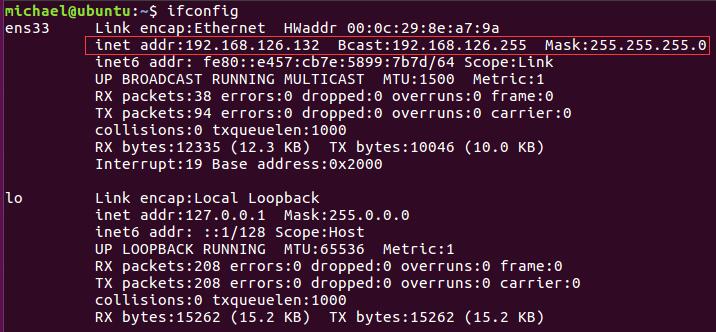
View native IP
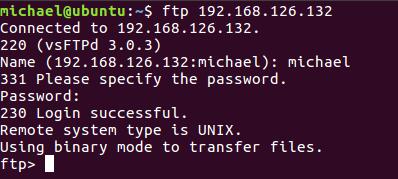
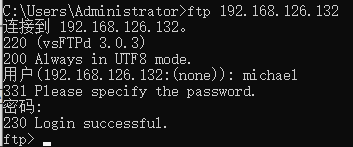
Log in to ftp server
ftp 192.168.126.132
2. Perform ftp interaction with Telnet
2.1 introduction to FTP
File Transfer Protocol (FTP) is a set of standard protocols used for file transmission on the network. It works in the seventh layer of OSI model and the fourth layer of TCP model, that is, the application layer. TCP transmission is used instead of UDP. The customer needs to go through a "three-time handshake" before establishing a connection with the server The process ensures that the connection between the client and the server is reliable and connection oriented, providing a reliable guarantee for data transmission.
FTP allows users to operate as files (such as file addition, deletion, modification, query, transmission, etc.) communicate with another host. However, users do not really log in to the computer they want to access and become full users. FTP programs can be used to access remote resources to realize users' round-trip transmission of files, directory management, access to e-mail, etc., even if the computers of both sides may be equipped with different operating systems And file storage.
2.2 FTP interaction process
1. Before the user host starts an FTP session with the remote host, the FTP client (user) first initiates a TCP connection with the server (remote host) for control on port 21.
2. The FTP client sends the user's ID and password through the control connection, and can also send commands such as changing the remote directory.
3. After the FTP server receives a file transfer command from the connection (whether to the remote host or from the remote host to the client), initiate a data connection to the client. FTP accurately transfers a file on the data connection and closes the connection, but the control link remains connected. If the user needs to transfer another file during the same session, FTP opens another data connection.
Therefore, for FTP transmission, the control connection runs through the whole user session, but for each file transmission in the session, a new data connection needs to be established (that is, the data connection is non persistent).
2.3 common instructions for telnet to execute ftp interaction
③ FTP common commands and codes:
ABOR | Interrupt data connection program |
ACCT <account> | System privilege account |
ALLO <bytes> | Allocate bytes for file storage on the server |
appe <filename> | Add a file to a file with the same name as the server |
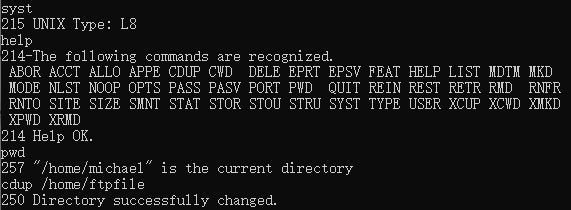
cdup <dir path> | Change parent directory on server |
cwd <dir path> | Change the working directory on the server |
DELE <filename> | Delete the specified file on the server |
HELP <command> | Returns the specified command information |
LIST <name> | If it is a file name, the file information is listed, and if it is a directory, the file list is listed |
MODE <mode> | Transmission mode (S = stream mode, B = block mode, C = compression mode) |
MKD <directory> | Create the specified directory on the server |
NLST <directory> | Lists the contents of the specified directory |
NOOP | No action except acknowledgement from the server |
PASS <password> | System login password |
PASV | Request server to wait for data connection |
PORT <address> | IP address and two byte port ID |
PWD | Displays the current working directory |
QUIT | Log out from FTP server |
REIN | Reinitialize login status connections |
REST <offset> | Restart file transfer by a specific offset |
RETR <filename> | Retrieve (copy) files from the server |
RMD <directory> | Deletes the specified directory on the server |
RNFR <old path> | Rename old path |
RNTO <new path> | Rename new path |
SITE <params> | Site specific parameters provided by the server |
SMNT <pathname> | Mount specified file structure |
STAT <directory> | Returns information on the current program or directory |
STOR <filename> | Save (copy) files to the server |
STOU <filename> | Save file to server name |
STRU <type> | Data structure (F = file, R = record, P = page) |
SYST | Returns the operating system used by the server |
TYPE <data type> | Data type (A=ASCII, E=EBCDIC, I=binary) |
USER <username> | User name for system login |
2.4 telnet FTP experiment
The IP address of ubuntu system is 192.168 one hundred and twenty-six point one three two
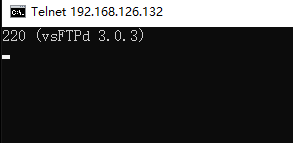
First open the command line window and enter telnet 192.168 126.132 21 to establish a connection with the ftp server:
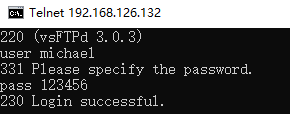
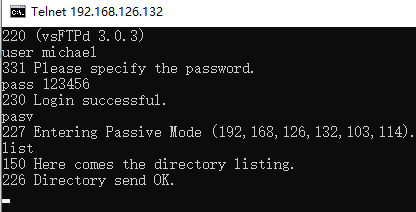
Then log in to FTP using the user, pass command
Test some instructions that do not need to transfer files
Use the passive (PASV) method to establish a data connection with the server. Enter psav and press enter. The server returns the IP of the server and the port number opened by the server

The server IP is 192.168 126.132, port number 58 * 256 + 189 = 15037
Then open a command line window and enter telnet 192.168 ***
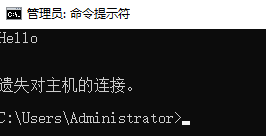
Enter the list command in the command line window of the input command, and the files in the current directory will be displayed in the command line window of data transmission
When a data connection transfers a file, the connection will be closed immediately

Try to transfer the information in the file to the host, and use retr + file name after entering the transfer mode

Received a message on the other side
2.5 file transfer using ftp command
Use ftp 192.168 126.132 connecting to ftp server
Use the put command to transfer files to the server. First, close the windows firewall, otherwise the port mode transmission will not succeed


2.6 using ftp tool for slice Download
Fragment transmission overview:
Fragment transmission is to divide the files to be transmitted into multiple data blocks (we call them parts) according to a certain size for separate transmission. After transmission, the server will summarize all transmitted files and integrate them into the original files.
Use the split command to cut the file
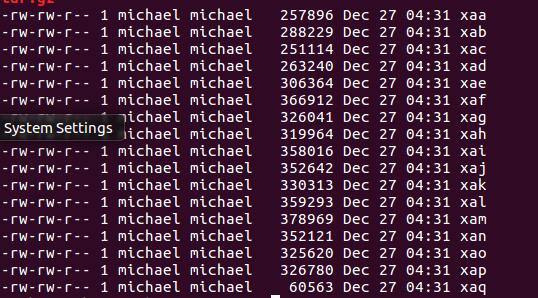
Use the mget command to download multiple files
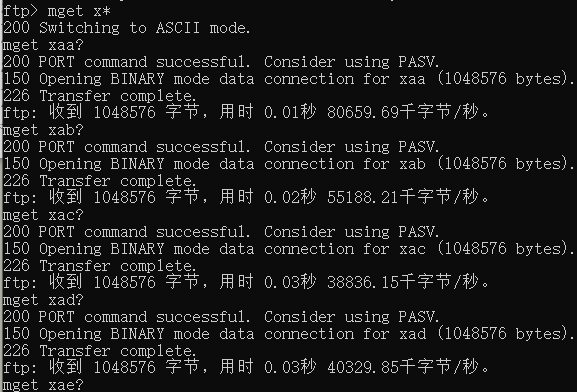
Locally received files

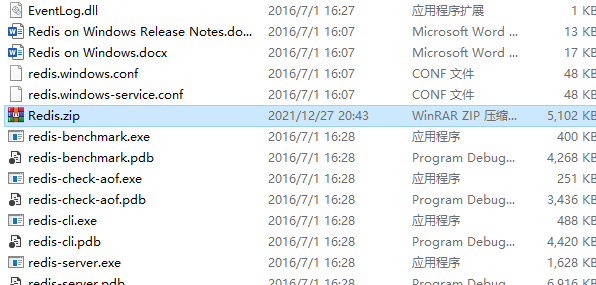
Use the copy command under Windows to merge split files under linux: copy / b XAA + XAB + XAC + XAD + XAE redis zip
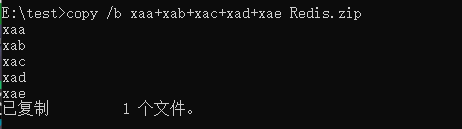
The file was successfully decompressed
3. Reference
[1] Deploying and installing ftp server on ubuntu
[2] Merging Linux split command split files in Windows
[3] ftp upload and download and some common commands under windows system